Close

Nowe oblicze pracy zespołowej dzięki Confluence. Zobacz, dlaczego Confluence jest doskonałym narzędziem dla zespołów współpracujących przy tworzeniu treści. Zacznij korzystać za darmo

Harmonogram projektu mający usprawnić zarządzanie projektami

Zespół będzie mieć bieżące informacje na temat tego, co się dzieje i kiedy

Przeglądaj tematy
Kalendarz do planowania harmonogramu

A project management timeline is like a detailed schedule for your project. It lays out all the tasks and their deadlines so your team knows when each step will happen and when the whole project will be finished.

A project management timeline is like a detailed schedule for your project. It lays out all the tasks and their deadlines so your team knows when each step will happen and when the whole project will be finished.

Let's say you and your team are working on rebranding your website, and everyone wants to know: How long will this take?

It's tough to pinpoint the exact end date for a project. In fact, 48% of projects don't meet their original deadlines. Having a project management timeline can help keep your team organized and prevent your project from dragging on forever.

Czym jest harmonogram zarządzania projektem?

Harmonogram zarządzania projektem to szczegółowe rozplanowanie projektu w czasie, od początkowej idei aż po jego zakończenie. Rozkłada on cały projekt na mniejsze zadania i kamienie milowe z przypisanymi terminami.

This timeline lets teams see when individual pieces are due and when the entire project will be delivered.

Difference between a project schedule and a project timeline

A project schedule is like a detailed to-do list for your project, outlining all the tasks, when they need to be done, and who is responsible for them. It's like breaking down your project into smaller steps and planning exactly when each step will happen.

On the other hand, a project timeline is more like a big-picture overview of your project, showing key milestones and deadlines in a visual format. It's like seeing the whole journey from start to finish on a map without getting into all the little details of each step along the way.

While a project schedule focuses on the specifics of what needs to be done and when, a project timeline gives you a broader view of the overall progress of your project. Both are essential tools for keeping your project on track, but they serve slightly different purposes in helping you manage and communicate your project's progress.

Dlaczego ramy czasowe projektu są tak ważne?

Project timelines give your team an action plan, boost accountability, and help you avoid potential roadblocks. And that's only scratching the surface of your project timeline's advantages. Additional benefits include:

1. Giving everybody a high-level view of the project

It's easy to get lost in the weeds when you're hard at work on a project. A project timeline allows teams to get a broader view so they can zoom out and see what different steps are happening and when. It lets them get context around their pieces to see how it fits together. You can also proactively identify potential roadblocks or requirements before your project starts.

2. Managing your resources more effectively

Your project will need resources like equipment, budget, and time from team members. Projects would be a dream if everything were available for you right when you needed it, but you aren't carrying out this plan in a vacuum.

Knowing when specific tasks happen helps you allocate and manage your project resources more effectively. So, if you know that your company's graphic designer won't be able to pitch in with your website redesign until the end of the month, you can plan accordingly.

3. Making overwhelming projects more manageable

Project timelines are essential for managing large-scale projects effectively. To create a successful project timeline, it's necessary to divide the project into manageable steps. This approach provides you and your team with a clear roadmap, allowing you to progress steadily without feeling overwhelmed by the project's scope.

Need help? With our project schedule template, you can easily and effortlessly manage any project from beginning to end.

4. Keeping projects on track

Creating a project timeline enables teams to maintain focus and stay on track. Breaking down projects into smaller components makes identifying inconsistencies and tracking progress easier. If one task misses its deadline, you'll know the whole project could fall behind. Project timelines enhance accountability within your team by providing transparency regarding each member's responsibilities and deadlines.

Benefits of a project management timeline

A project management timeline offers a multitude of benefits that significantly enhance the efficiency and success of projects. Here are some key advantages:

  1. Improved planning and organization: A project timeline provides a structured roadmap for the entire project, ensuring all tasks are identified, prioritized, and scheduled appropriately. This organized approach helps in better planning and allocation of resources.
  2. Enhanced communication and collaboration: With a clear timeline, team members have a shared understanding of project milestones, deadlines, and dependencies. This fosters better communication and collaboration among team members, reducing misunderstandings and conflicts.
  3. Effective resource management: By mapping out tasks and their deadlines, project timelines enable better resource allocation. Teams can identify constraints and allocate resources optimally to avoid bottlenecks and ensure smooth project execution.
  4. Increased accountability: Assigning deadlines to individual tasks creates accountability among team members. Everyone knows their responsibilities and the expected timelines for task completion, which reduces procrastination and improves overall productivity.
  5. Risk mitigation: Project timelines allow project managers to identify potential risks and bottlenecks early in the project lifecycle. Project managers can proactively address issues and mitigate risks before they escalate by having a clear overview of task dependencies and critical path activities.
  6. Client satisfaction: Transparent project timelines give clients visibility into project progress and expected deliverables. This transparency builds trust and confidence in the project's management, ultimately increasing client satisfaction.
  7. Informed decision-making: Project timelines serve as valuable tools for decision-making by providing stakeholders with timely and accurate information on project progress. Managers can make informed decisions based on real-time data, ensuring that projects stay on track and within budget.

Project management timelines streamline project planning, improve stakeholder communication, optimize resource utilization, enhance accountability, mitigate risks, boost client satisfaction, and facilitate effective decision-making throughout the project lifecycle.

Features to look for in project timeline software

Choosing the right project timeline software is crucial for effectively managing projects and ensuring successful outcomes. Here are some essential features to consider when evaluating project timeline software:

Intuitive interface for ease of use

Look for software with a user-friendly interface that allows for easy navigation and customization of timelines. Jira stands out with its intuitive interface and drag-and-drop functionality, making project timeline creation and management effortless.

Collaboration capabilities

Atlassian’s collaboration tools facilitate smooth communication and teamwork, allowing team members to access and update project timelines in real-time. Features such as commenting, task assignment, and file sharing promote collaboration and ensure everyone is on the same page throughout the project. Coupled with Jira’s timeline features, which ensure stakeholders stay informed and teams are aligned with overarching goals. Together, our tools foster transparency and collaboration, ensuring everyone understands project progress and tracks its trajectory toward success.

Opcje dostosowywania

Choose software that offers customization options to tailor project timelines to your requirements. Jira shines in this aspect, providing users with extensive customization options to adapt timelines to specific needs.

Beyond its robust project management capabilities, Jira caters to the diverse needs of every team, offering a comprehensive suite of tools and functionalities. Whether it's software development, marketing, HR, or beyond, Jira provides structure, visibility, and advanced planning capabilities without compromising flexibility.

Możliwości integracji

Select software that seamlessly integrates with your organization's project management tools and software applications. Jira excels in integration, enhancing workflow efficiency and data synchronization.

Timeline visualization and task management

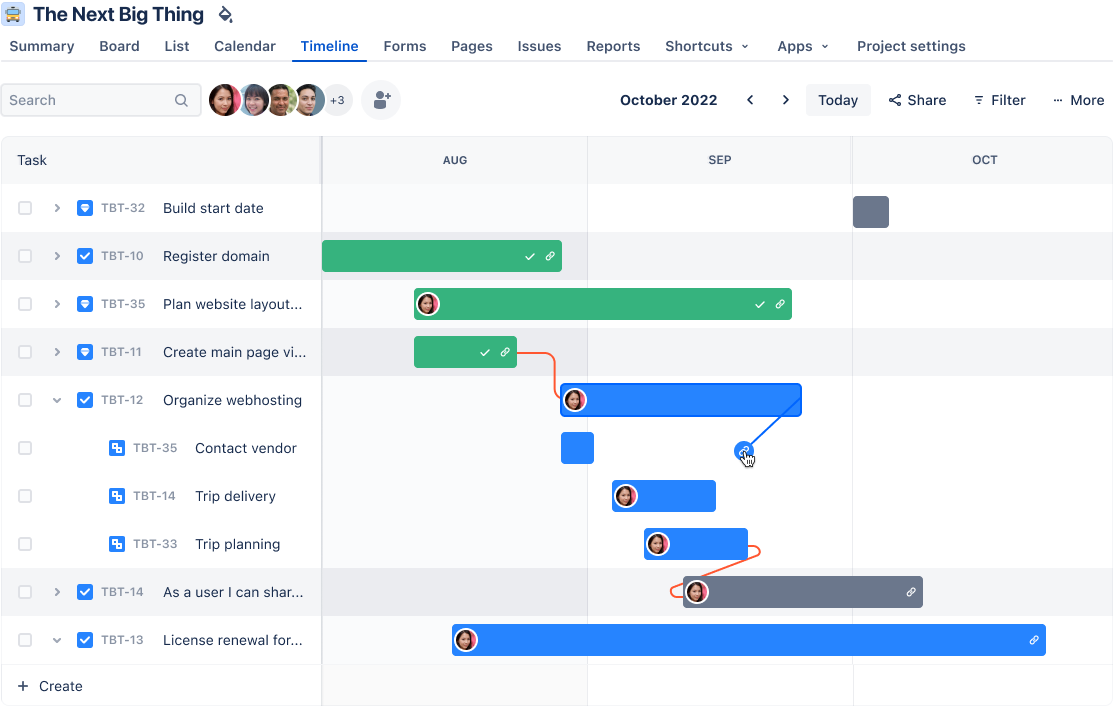
Look for software that provides visually appealing timeline visualization options, such as Gantt charts or Kanban boards. Jira offers a wide range of visualization options, allowing users to understand project progress, dependencies, and critical path activities at a glance. Its robust task management features—including boards, issues, and reports—enable users to stay on top of task deadlines, manage dependencies, and generate insightful reports to keep projects on track.

Reporting and analytics, real-time updates, and mobile accessibility

Choose software with robust reporting and analytics capabilities to track key project metrics and make data-driven decisions. Jira's powerful reporting and analytics capabilities give users valuable insights into project performance.

With real-time notifications, teams stay informed every step of the way, receiving instant updates on critical task updates, new comments, or changes in project status. Jira's mobile accessibility ensures team members can view and update project timelines on the go, enabling remote collaboration and ensuring project timelines are accessible anytime, anywhere.

Incorporating Jira and Confluence into your project management toolkit not only enhances efficiency and productivity but also fosters a collaborative and cohesive work environment. By combining project timelines with Jira's robust features, you can streamline workflows, improve communication, and drive project success like never before.

Best practices for making a project management timeline

Creating a successful project management timeline requires careful planning and execution to ensure its effectiveness in guiding project execution. Here are some best practices to follow when making a project management timeline:

  1. Define clear objectives: Define the project objectives, deliverables, and success criteria. Understanding the project scope and goals is essential for creating a realistic and achievable timeline.
  2. Involve stakeholders: Engage key stakeholders, including project sponsors, clients, and team members, in the timeline planning process. Solicit their input and feedback to ensure the timeline reflects their expectations and requirements.
  3. Break down tasks: Decompose the project into smaller, manageable tasks and subtasks. Use a Work Breakdown Structure (WBS) to identify all the activities required to complete the project and organize them hierarchically.
  4. Estimate time and resources: Estimate the time and resources required for each task based on historical data, expert judgment, and input from team members. Consider task complexity, dependencies, and resource availability when estimating durations.
  5. Identify dependencies: Identify task dependencies and constraints to determine the sequence of activities and their interrelationships. Use techniques such as precedence diagrams or dependency matrices to visualize task dependencies accurately.
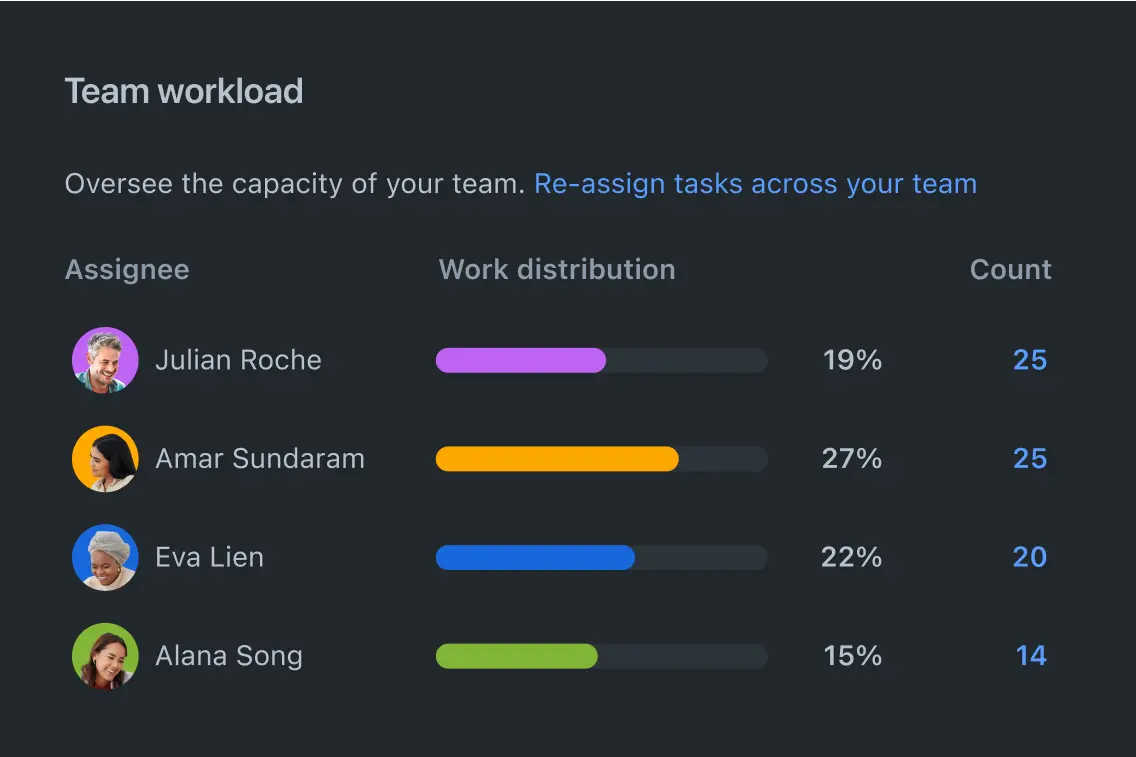
  6. Allocate resources: Assign resources, including human resources, equipment, and materials, to tasks based on their availability and skill sets. Avoid overloading resources or scheduling conflicts by balancing workloads effectively.
  7. Set realistic deadlines: Establish realistic deadlines for each task and milestone, considering potential risks and uncertainties. Build in buffers or contingency time to accommodate unforeseen delays or changes in project scope.
  8. Monitor and update: Continuously monitor the project's progress against the timeline and update it as needed. Track actual versus planned progress, identify deviations or delays and take corrective actions to keep the project on track.
  9. Communicate effectively: Communicate the project timeline to all stakeholders, ensuring everyone understands their roles, responsibilities, and deadlines. Use visual aids such as Gantt charts or project dashboards to convey information clearly and concisely.
  10. Review and improve: Conduct regular reviews of the project timeline to assess its effectiveness and identify areas for improvement. Solicit feedback from team members and stakeholders to refine the timeline and enhance its accuracy and reliability.

By following these best practices, you can create a comprehensive and realistic project management timeline that is valuable for effectively planning, executing, and monitoring projects.

How to create a project timeline

From fostering a collaborative "we're in this together" mindset to keeping your team organized, a project timeline is essential for completing projects without feeling overwhelmed. Follow the steps below to draft a project timeline that empowers your team to deliver their best work.

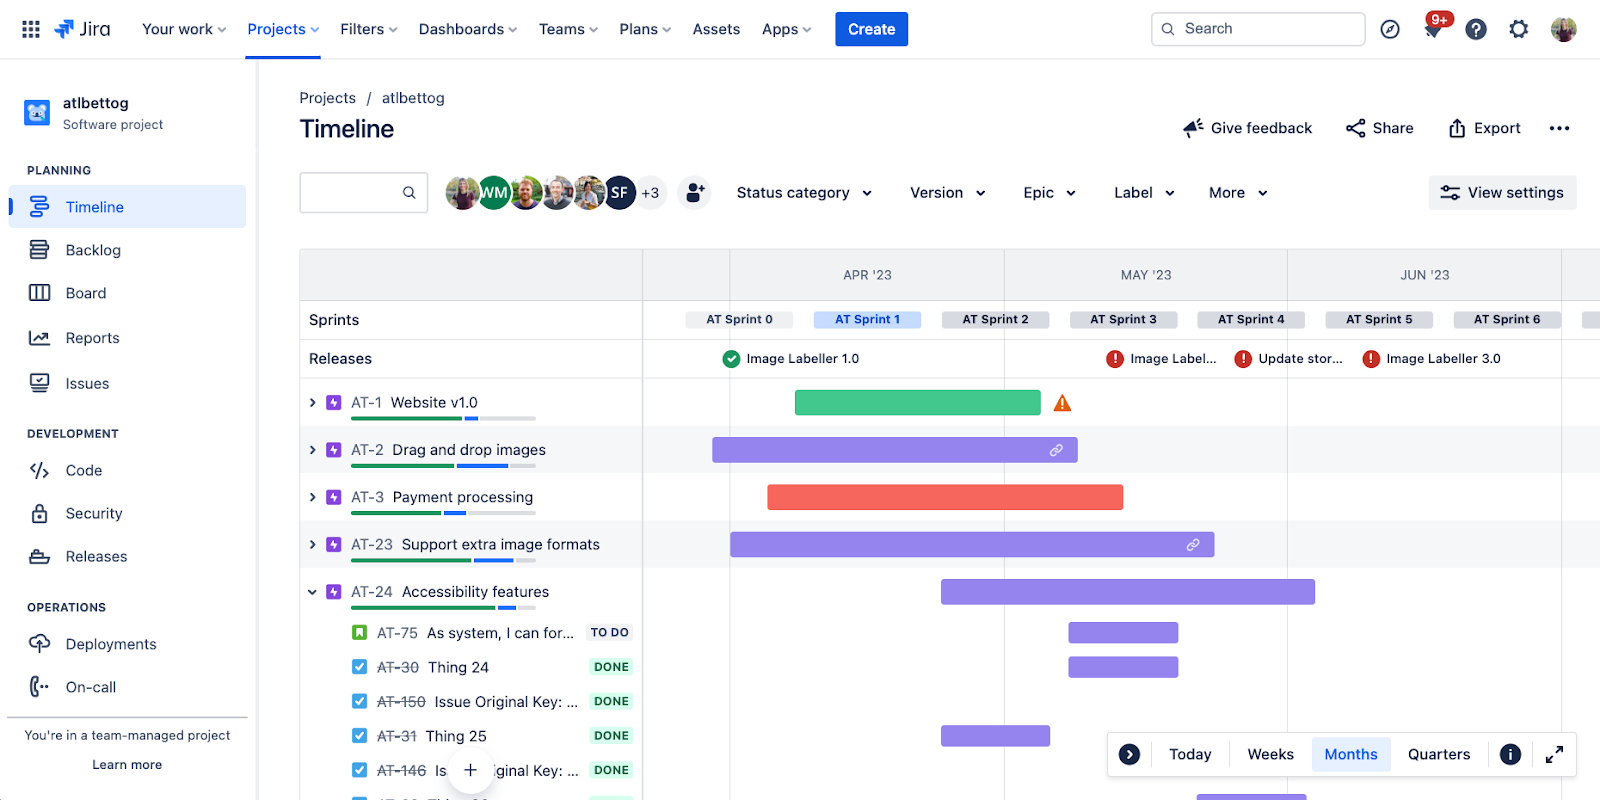
Oś czasu Jira.

1. Zapoznaj się z zakresem projektu

Imagine you’re asked to make a peanut butter and jelly sandwich. Initially, it might seem like a quick task. However, if you then specified that you wanted it on homemade bread from a specific recipe, with a unique jelly only available from a particular farmer's market open on Sunday mornings, and requested that the crust be removed and the sandwich cut into a star shape, suddenly, the process becomes more complex and time-consuming.

This analogy highlights the importance of understanding the scope of a project. The project scope encompasses everything needed to complete the project, including tasks, time, and resources. By identifying all requirements from the outset, you can create a more realistic timeline and proactively address scope creep—when project requirements expand beyond the initial agreement. Scope creep is a common issue, affecting 52% of projects.

To define your scope, you'll figure out your project's:

  • Goals: What will your project accomplish?
  • OKRs: How will you measure the success of your project?
  • Końcowe rezultaty: co ma być wynikiem projektu?
  • Tasks and activities: What steps must you take to produce those deliverables?
  • Exclusions: What won't you complete as part of this project?
  • Ograniczenia: z jakimi ograniczeniami musisz sobie poradzić?

Once you have this information, you can consolidate it into a project scope statement. This statement serves as a reference for you and your team throughout the project, enabling you to focus on the essential aspects while setting aside anything that falls outside the scope.

2. Zidentyfikuj zadania w ramach projektu

Your project timeline shouldn't revolve around a single end date for the entire project. Instead, you must establish milestone dates for various tasks throughout the project.

To get technical, this process is called creating a Work Breakdown Structure (WBS), which involves breaking down your large project into different deliverables. This approach simplifies the identification of tasks associated with each deliverable.

In our PB&J example, the ultimate deliverable is a finished, gooey, crustless, star-shaped PB&J sandwich. However, several other deliverables must be completed to achieve this final product. These might include:

  • Domowy bochenek chleba tostowego
  • Specific jelly from the farmer's market
  • Masło orzechowe

Now that we have identified each of our separate deliverables, it's simpler to discern the tasks associated with each one:

Rezultat 1: Chleb tostowy

  • Wybrać przepis na chleb.
  • Kupić składniki na chleb.
  • Upiec chleb.
  • Zostawić chleb na godzinę do ostygnięcia.
  • Pokroić chleb na kromki.

Rezultat 2: Dżem

  • Sprawdzić, o której godzinie i gdzie jest organizowany targ z przetworami.
  • Pojechać na targ.
  • Kupić dżem.
  • Wrócić do domu.

Rezultat 3: Masło orzechowe

  • Pójść do sklepu spożywczego.
  • Kupić masło orzechowe.
  • Wrócić do domu.

Rezultat 4: Gotowa kanapka

  • Przygotować nóż i pozostałe materiały.
  • Rozsmarować masło orzechowe na jednej kromce chleba.
  • Rozsmarować dżem na drugiej kromce chleba.
  • Złożyć obie kromki razem.
  • Odciąć skórkę.
  • Przyciąć kanapkę w kształt gwiazdy.
  • Umieścić kanapkę na talerzu i podać.

Gdy spojrzymy na wszystkie te kroki, nie ulega wątpliwości, że proces nie jest tak prosty, jak mogłoby się wydawać. Chociaż w pierwszym odruchu możesz mieć pokusę zapisania wszystkiego na papierze, aby niczego nie przeoczyć, ważne jest, aby te informacje były dostępne dla całego zespołu.

Do robienia notatek, rozdzielania obowiązków i zapisywania szczegółów projektu można użyć platformy, takiej jak Confluence, która ułatwia dzielenie się wiedzą z pozostałymi uczestnikami. Dzięki temu każdy może tworzyć spójną dokumentację, do której mają dostęp wszyscy członkowie zespołu.

3. Przypisz każdemu zadaniu szacowany czas realizacji

Opisaliśmy elementy dostarczane i powiązane zadania, ale nie mówiliśmy jeszcze o czasie, zatem nie jesteśmy na etapie tworzenia osi czasu. W tym kroku oszacujesz czas potrzebny na wykonanie każdego zadania. Przejrzyj zadania składające się na dany element dostarczany i oszacuj czas, którego wymaga każde z nich.

Koniecznie zaangażuj w ten proces swój zespół, ponieważ jego członkowie będą w stanie lepiej oszacować, jak długo zajmuje im zazwyczaj wykonanie przypisanego zadania. Ta współpraca pomaga uniknąć błędu planowania związanego z faktem, że ludzie zwykle zaniżają szacunek czasu potrzebnego na zadanie. Twój zespół może dostarczyć cennych analiz i działać jako weryfikator, aby upewnić się, że szacunki czasu są dokładne.

4. Uporządkuj kolejność zadań

Teraz, gdy masz już gotowe zadania projektowe i oszacowania czasu, należy uporządkować je chronologicznie, aby określić logiczną sekwencję, zgodnie z którą Ty i Twój zespół będziecie mogli postępować. Tworząc tę sekwencję, pamiętaj o kilku ważnych kwestiach:

  • Zależność zadań i zasobów: Chodzi o zasoby, z których nie można korzystać w tym samym czasie, lub o zadania, których nie można wykonać, dopóki nie zostanie wykonane poprzednie. Przykładowo nie możesz rozsmarować masła orzechowego, dopóki nie upieczesz i nie pokroisz chleba.
  • Równoczesne zadania: Kroki, które można wykonywać jednocześnie, aby zaoszczędzić czas. Przykładowo może uda Ci się wyskoczyć na targ, gdy chleb stygnie.

Uwzględniając te czynniki, możesz opracować realistyczną i skuteczną oś czasu dla swojego projektu.

5. Stwórz listę terminów

Pamiętaj, że same szacunki czasu nie stanowią harmonogramu. Musisz przypisać zadaniom dokładne terminy. Jest bowiem ogromna różnica pomiędzy stwierdzeniem, że coś „powinno zająć trzy godziny” a „to zadanie zostanie ukończone do wtorku”.

Na szczęście wstępne oszacowanie czasu realizacji pozwala na ustalenie bardziej realistycznych terminów. Aby zachować ostrożność, uwzględnij pewien bufor, aby terminy nie były zbyt napięte. Zawsze mogą wystąpić niespodzianki, dlatego warto, aby oś czasu zapewniała pewną elastyczność.

Znaczenie ustalenia końcowego terminu realizacji projektu

W trakcie realizacji projektów często występują nieoczekiwane trudności i nie sposób uwzględnić w planowaniu każdego możliwego rozwoju wydarzeń. Nie oznacza to, że nie warto poświęcić wysiłku na utworzenie osi czasu projektu.

Rezygnacja z osi czasu projektu może spowodować problemy, na przykład z zarządzaniem obłożeniem pracą poszczególnych członków zespołu i kolejnością wykonywania zadań, przez co projekt popada w chaos.

Oś czasu nie musi być sztywna. Ważne jest, aby zachować elastyczność i zdolność do adaptacji. Nawet gdy trzeba będzie zmodyfikować plan w trakcie jego realizacji, przygotowanie solidnych podstaw pomaga ograniczyć nieporozumienia, ustalić odpowiedzialność poszczególnych osób i pozwala na płynne kontynuowanie projektów.

Chcesz, aby zespół kontynuował pracę według osi czasu projektu? System Jira i Confluence oferują kompletne rozwiązanie pomagające w realizacji zadań. Możesz zarządzać projektami w systemie Jira i mieć wgląd w kontekst zadań w Confluence. Dzięki integracji Confluence z systemem Jira zespoły pracują na jedynej platformie opracowanej zarówno z myślą o sprawnym zarządzaniu projektami, jak i współpracy nad dokumentami, z widokami na żywo dostępnymi w każdym z produktów.

Sprawdź także

Plakat projektu — szablon

Opracowana wspólnie jedna strona informacji, która pomaga zachować zgodność prac zespołu projektowego z oczekiwaniami interesariuszy.

Plan projektu — szablon

Definiuj, określaj zakres i planuj kamienie milowe kolejnego projektu.

Usprawnij współpracę przy tworzeniu treści w zespołach za pomocą narzędzia Confluence

Następny
Planowanie strategiczne