Incident management for high-velocity teams
Tutorial: How to set up an on-call schedule
In this tutorial, you’ll learn how to set up an on-call schedule, apply override rules, configure on-call notifications, and more. All within Opsgenie.
Step 1: Invite some users
Start by adding a few teammates to share on-call duties with.
Access the side menu and click Settings then Users, then Add User.
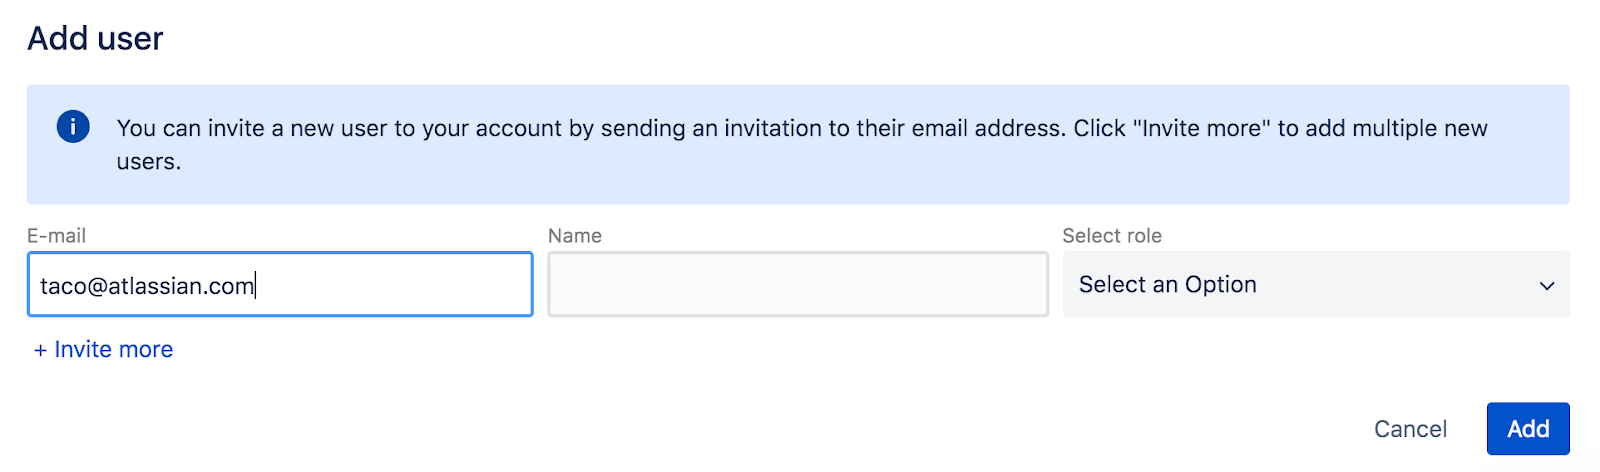
Add a few people from your team who will cover an on-call shift. You can always add or modify team members later on as well. Only users in Responder roles (Admin, Owner, User) can be added to on-call schedules.
Opsgenie provides 4 user roles types (Owner, Admin, User, and Stakeholder) that fall under two categories (Responders and Observers).
- Responders: Owner, Admin, User
- Observers: Stakeholder
You can read up more on role details here. Go ahead and add these new team members as Default Users for now.
Note: Team members you invite will get emails to activate their accounts. Don’t worry, we can continue with the tutorial while we wait for them to activate.
Step 2: Create a team
Now that you have some users uploaded, let’s use them to create a team.
In Opsgenie, a user can be a member of multiple teams. Note that before adding a user to a team, the user has to first be added to the account (which we did in Step 1).
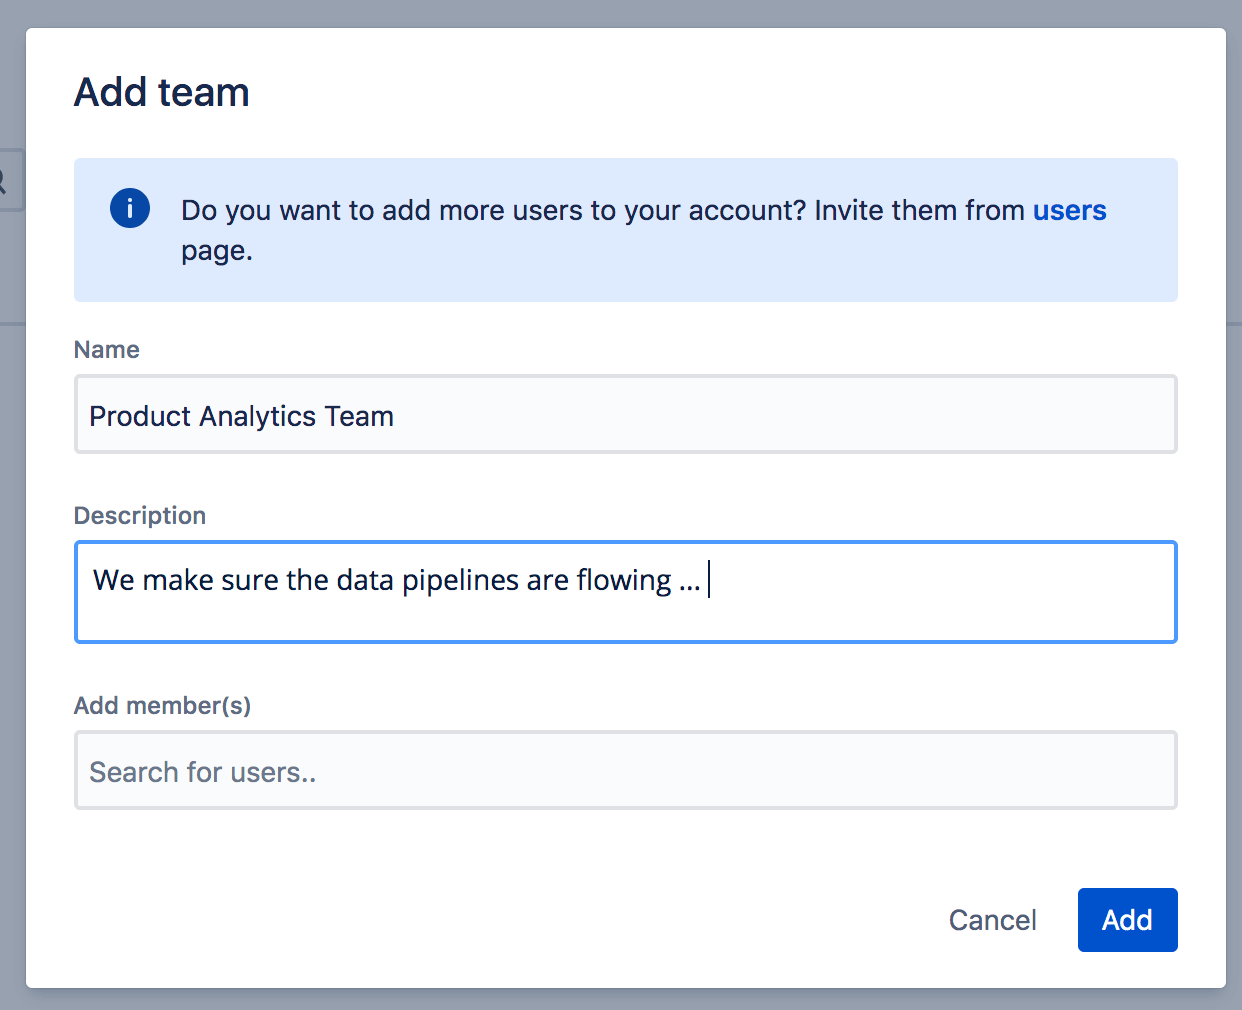
From the side bar, click Teams. Click Add Team.
Give your team an easily-recognizable name and description.
Add members by typing their names in the Search for Users field. You’ll see options surface as you begin typing.
Step 3: Create a new on-call schedule
With Opsgenie, a default on-call schedule is automatically created when the team is created. We’re going to learn how to edit schedules, add schedules, and pause or delete schedules.
If you aren’t seeing these schedules already, click Teams then on-call to see your new team’s on-call schedule.
We’re going to leave our default schedule alone for now and create a new one.
The default Opsgenie schedule gives you 24/7 coverage split evenly among everyone on the team. But sometimes it makes sense to create multiple schedules or experiment with alternative schedules.
Here are three alternative schedule types we see:
- Follow the sun: For teams distributed across different time zones, Having someone on-call across different working hours means nobody has to wake up in the middle of the night.
- Off-hours: Some teams only schedule on-call for hours outside of regular working hours. This assumes someone will already be available to respond to anything that happens during working hours.
- On hours: Sometimes a dedicated schedule for people on-call during working hours can help keep clear division of responsibilities and help with planning and estimating other work.
Next to your on-call schedule, click Add Schedule and fill out the form to build the new desired on-call schedule.
Once you create a new schedule, you’ll now see the new schedule below your default schedule and any others you create. Click the far right arrow to expand or collapse the details of any schedule.
Step 5: Set up an override schedule
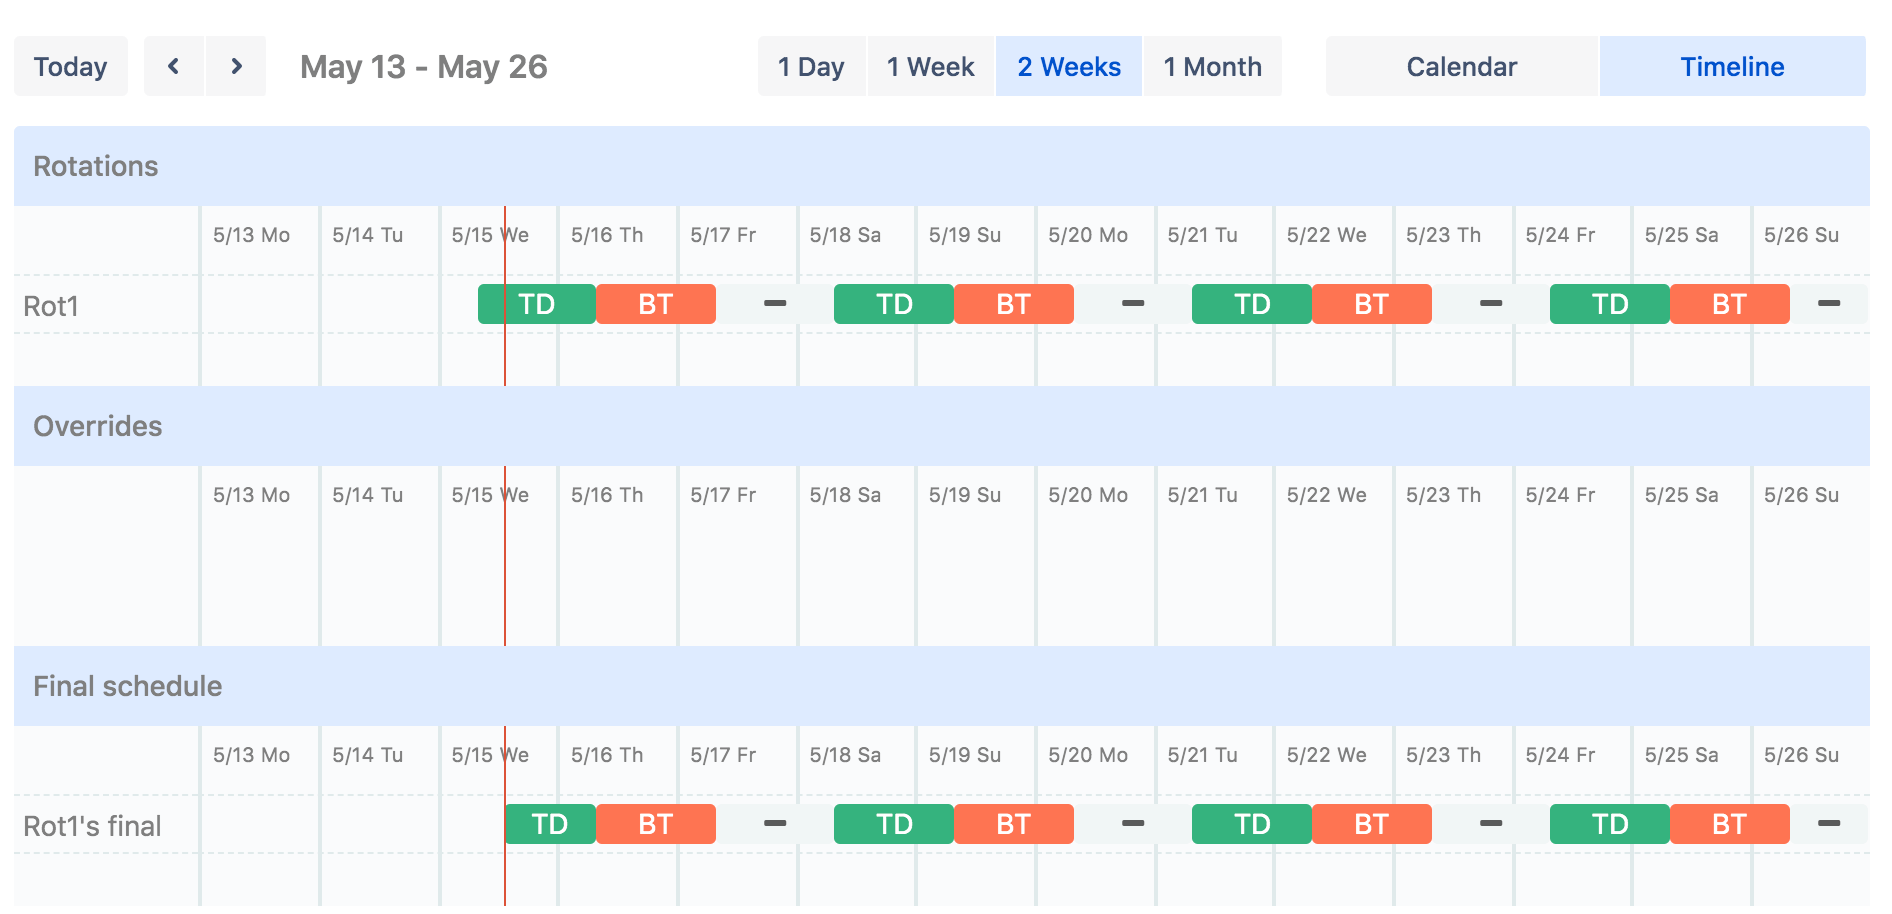
You can schedule specific modifications to your on-call schedule without modifying your overall rotation. You’ll see the Overrides section between Rotations and Final Schedule. By default it will be empty.
Overrides are helpful for one-off situations when a team member is on vacation or otherwise needs to swap their coverage with someone.
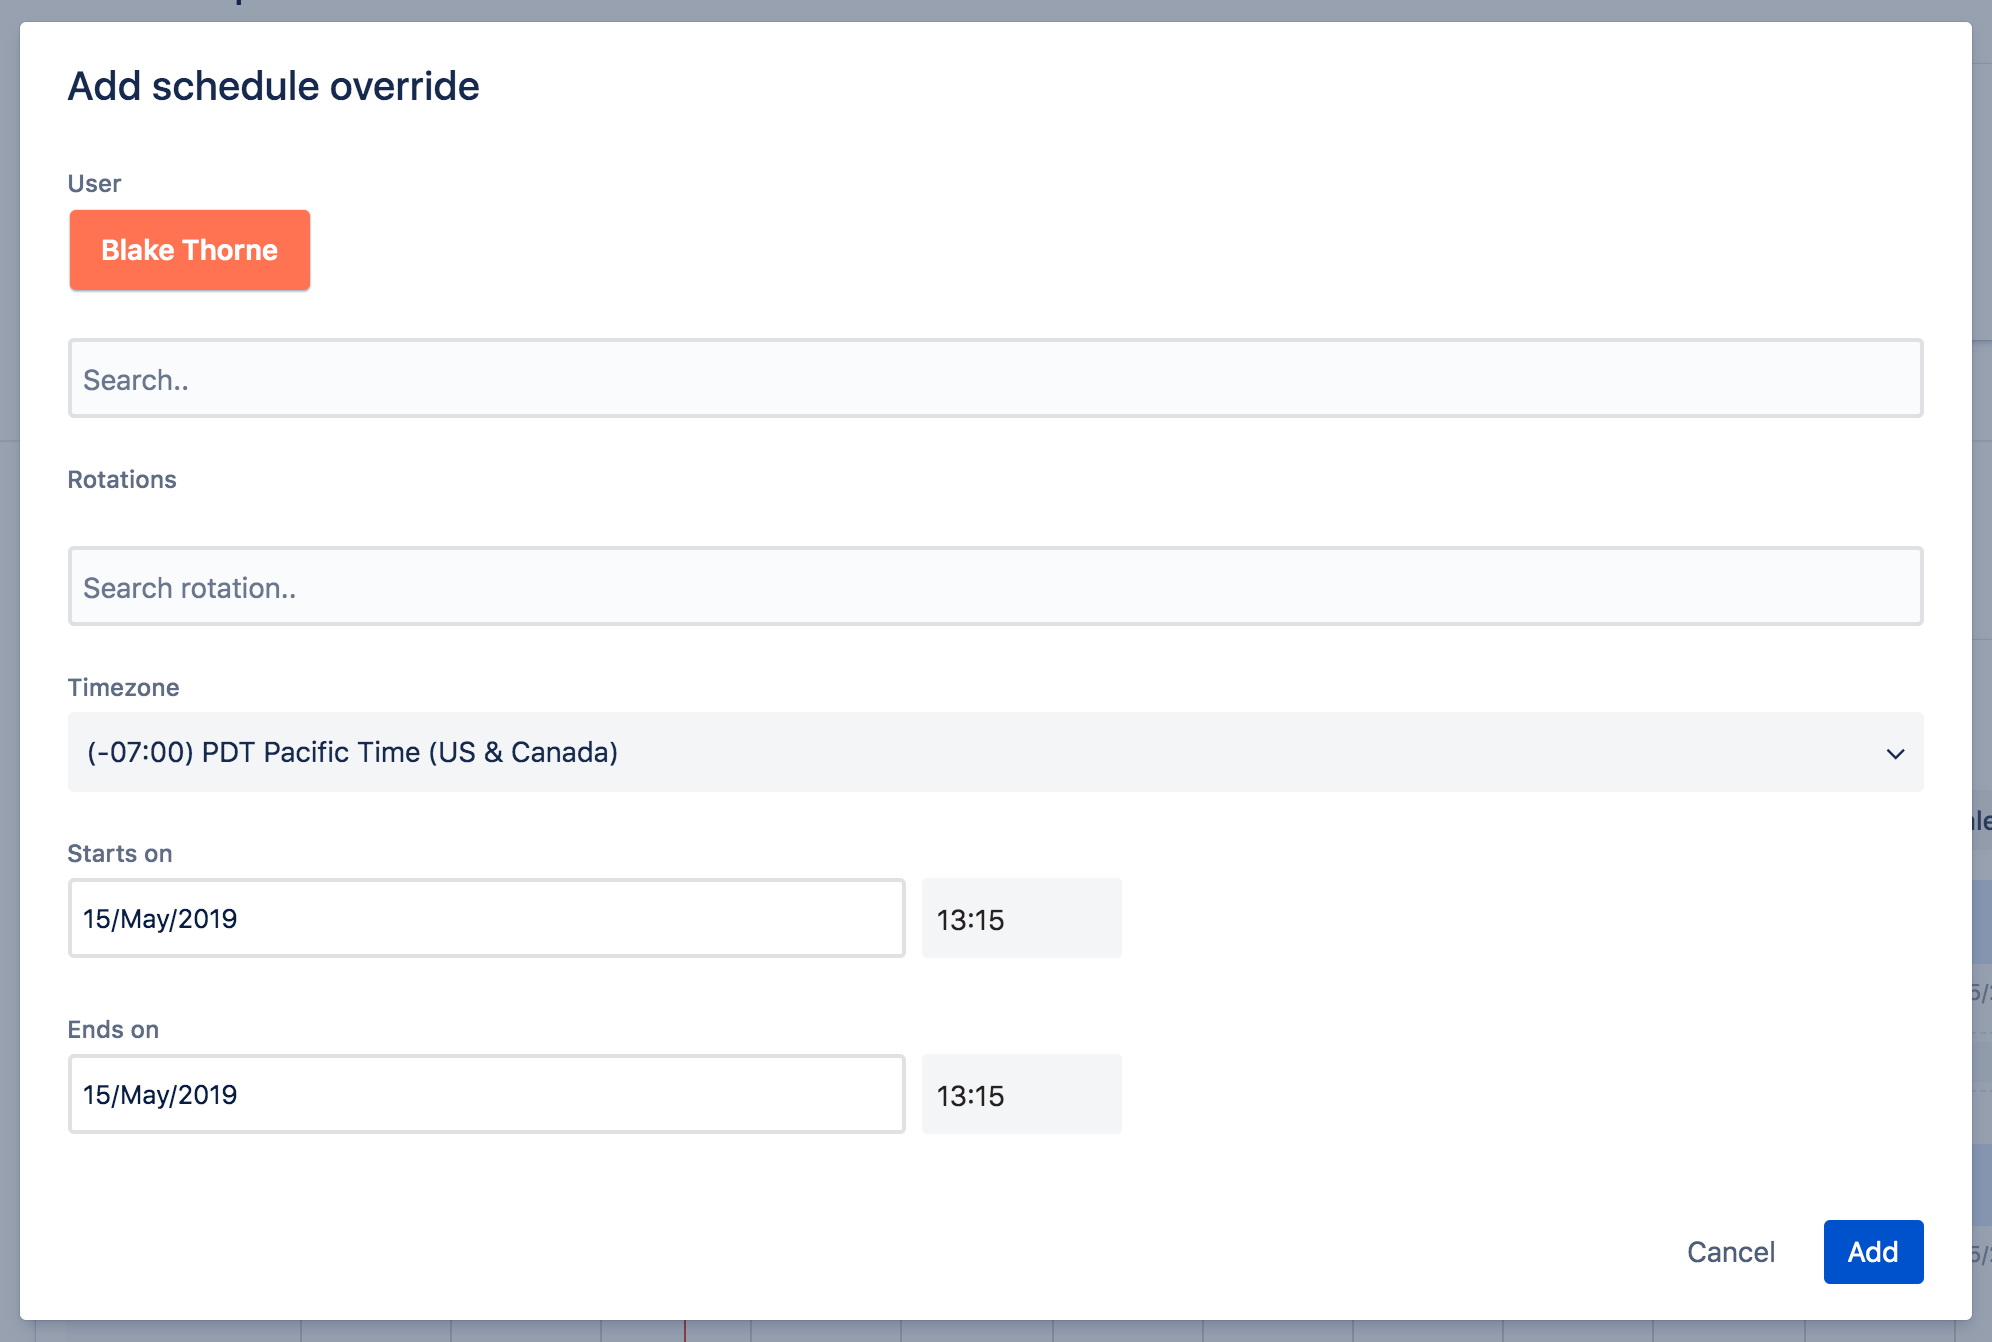
To set up an override, click Add Override.
The user field designates who will take over during the override period. By default your own account is prefilled, but you can change to another user. Be sure to add a start and end time. If you have multiple rotations set up, you can choose which one the override applies to.
Note: You’ll also see the “Take on-call for an hour” button. This is a handy way for anyone on your team to come into Opsgenie and temporarily take over for whoever is on the schedule.
Products Discussed

Centralize alerts, and notify the right people at the right time.
Learn incident communication with Statuspage
In this tutorial, we’ll show you how to use incident templates to communicate effectively during outages. Adaptable to many types of service interruption.
Read this tutorialThe Atlassian Incident Management Handbook
This handbook features the real incident management processes we've created as a global company with thousands of employees and over 200,000 customers.
Read this article