Incident management for high-velocity teams
Tutorial: how to create incident communication templates
During the heat of a service outage, quickly writing an update for customers can be stressful.
In this tutorial, we’ll show you how to use incident templates to communicate effectively with end users during outages. We’ll create and save a few templated announcements you can use during real outages.
The templates we create will be generic and flexible enough to work for many types of service interruptions. They’ll have clearly-marked places to fill in more details during a real incident. And you can always add or remove details as they become available.
Every incident is unique, and you’ll likely never find a perfect message that works for every outage. But having a template gives you a great starting point in the heat of an incident and helps avoid writer’s block during critical situations.
Audience:
DevOps, IT teams, support, and social media teams. Anyone who needs to communicate updates to users during a service outage.
Time:
15 minutes
Prerequisite:
You have access to a Statuspage account.
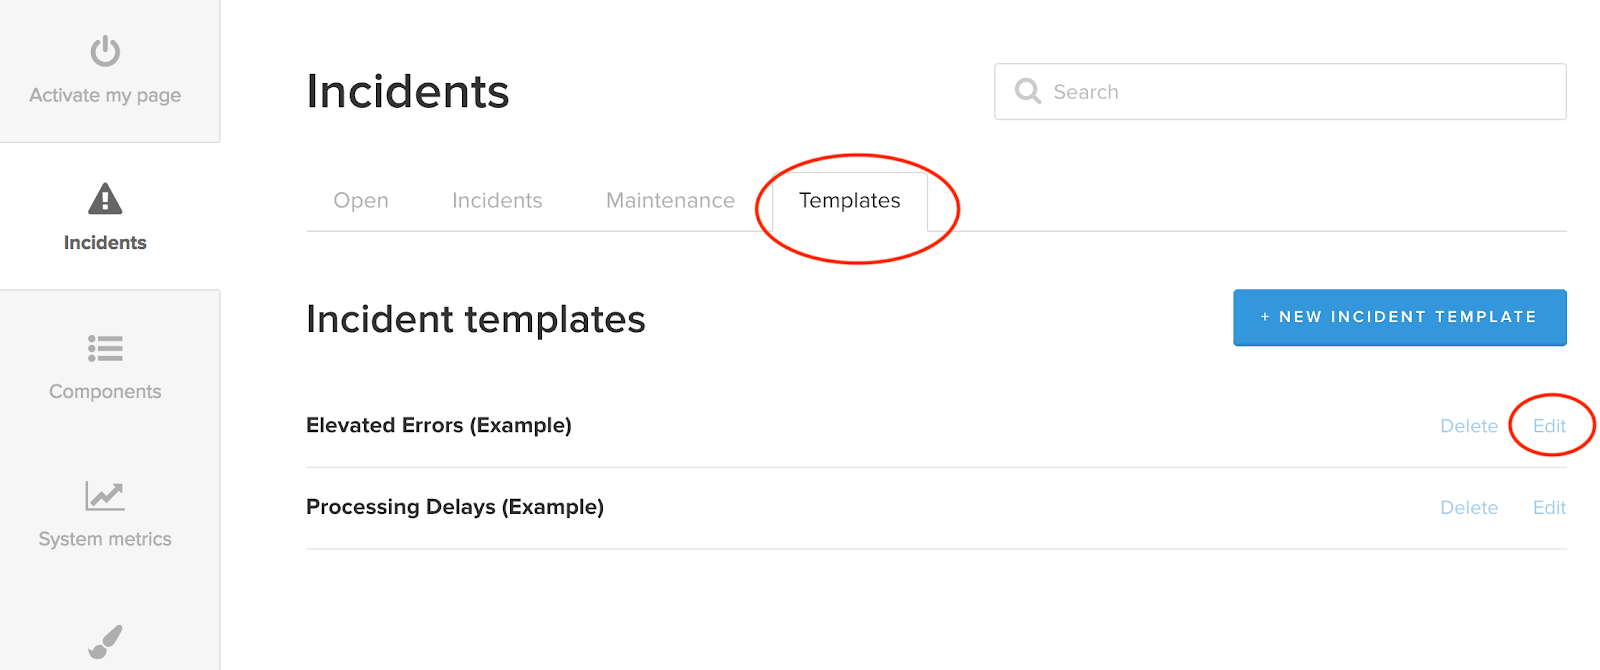
Step 1: Locate your incident templates
Once inside of Statuspage click Incidents on the left nav, then click the Templates tab. Here is where you create, store, and edit as many incident templates as you need.
Two example templates are preloaded: “Elevated Errors (Example)” and “Processing Delays (Example)”
- Let’s take a quick look. Click Edit on Elevated Errors. Don’t worry about editing or filling anything out just yet, we’re just going to use this page to get familiar with the template format.
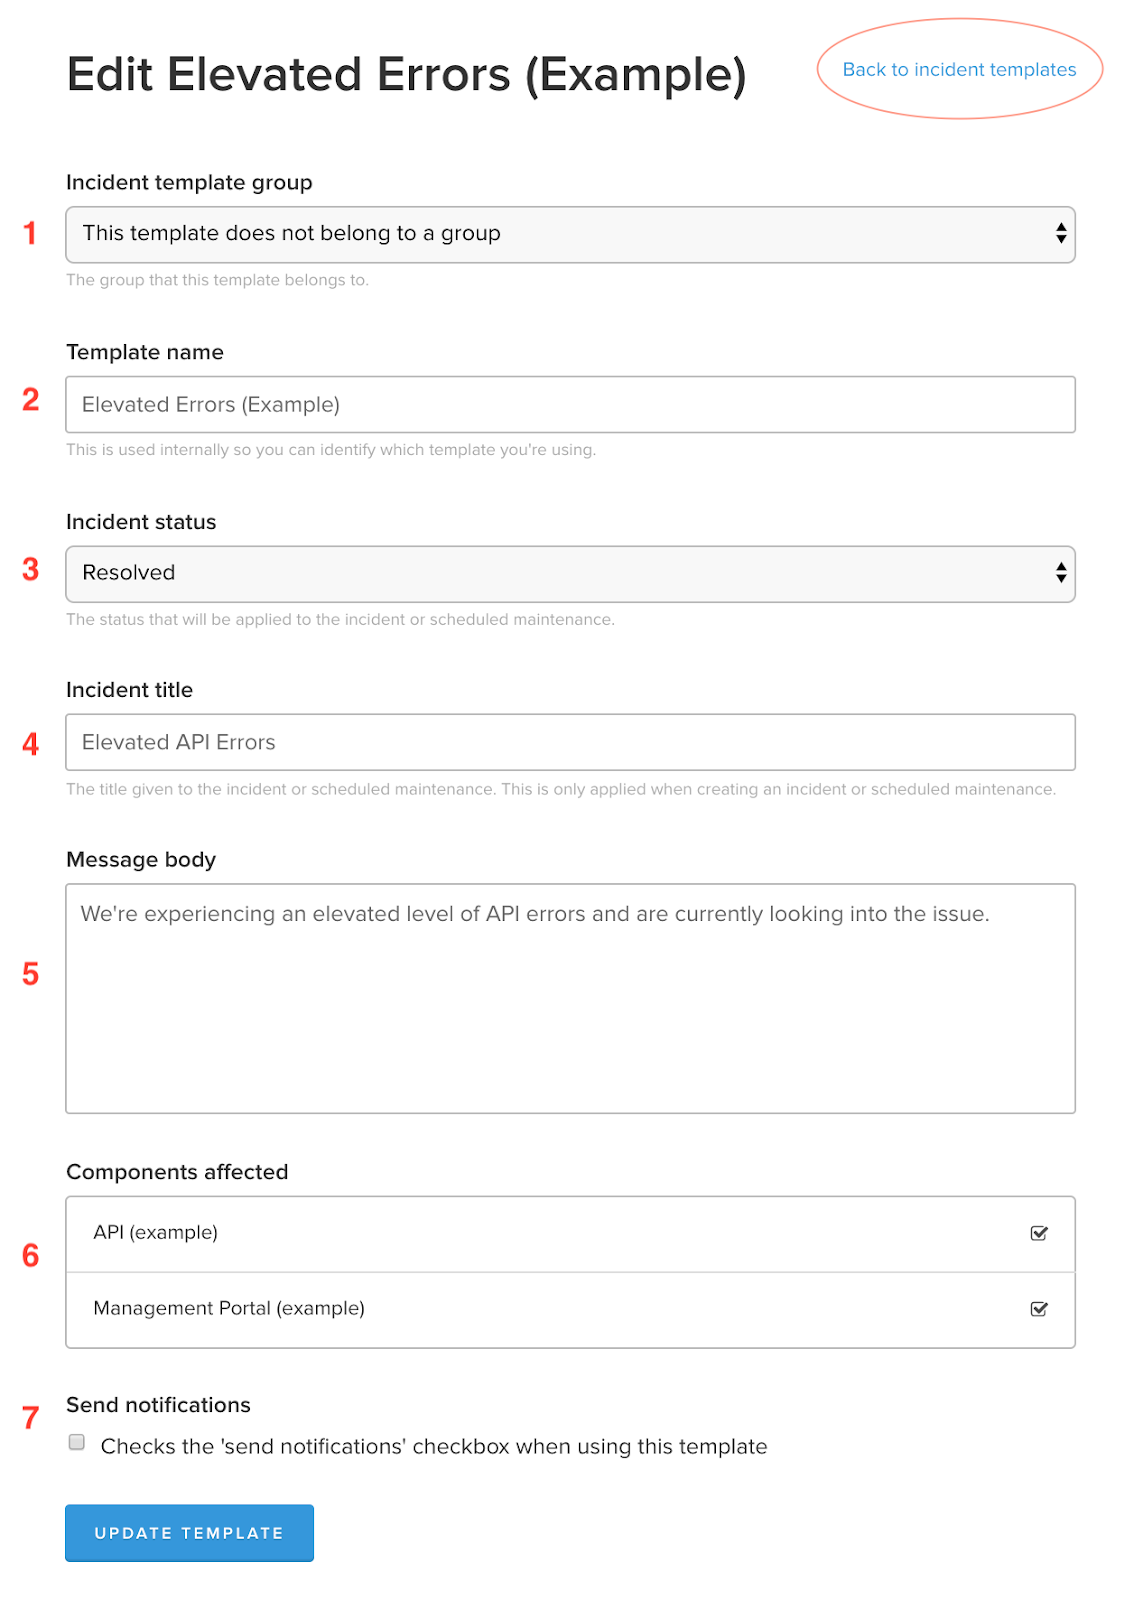
1. Incident template group: We can ignore this dropdown for now, but later we’ll learn how to keep templates organized by adding them to a group.
2. Template name: Use this field to name and identify templates for internal reference. This name never surfaces publicly on your status page or in emails, but it’s good practice to use descriptive names so that everyone on your team know what’s inside each template.
3. Incident status: Statuspage comes with four built-in statuses to mark the most common phases of an incident.
- Investigating: We’ve been alerted, and we’re looking into a potential problem
- Identified: We’re announcing that we’ve identified a problem
- Monitoring: We think we’ve found a solution and we’re monitoring it
- Resolved: We’ve resolved the incident
4. Incident title: This is the public-facing title that your customers will see on your status page and in email updates. Choose a title that plainly explains the nature of the incident.
5. Message body: This is the bulk of the message about the incident, where you will put most of the pertinent details about the message.
6. Components affected: If your page is communicating statuses of multiple services, components help you organize those services and report on each one individually. You can assign templates to update specific components. Learn more about components.
7. Send notifications. By default, posting an incident goes on the your status page, where your customers can see it. Those customers can subscribe to updates over email, SMS, or webhook. This box lets you decide if you want the update to only go to the status page, or if you also want subscribers to be notified. Note: You can always change this before the message goes out.
- Click “Back to incident templates” at the top of the template before you start the next step.
Step 2: Create a template for investigating an outage
Let’s create our first template. We’ll use this one when you know there is a disruption of service and you want to let people know you’re working on it.
- Go to Incidents → templates → and click “new incident template.”
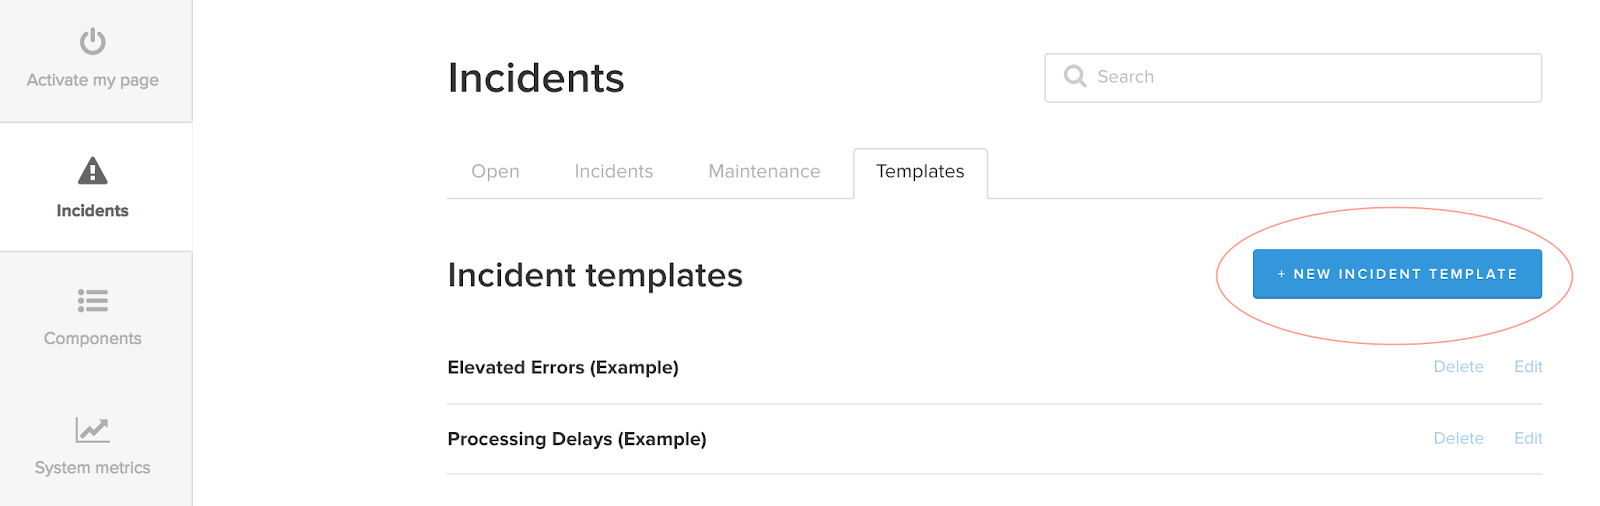
Now fill in the following fields:
- Template name: Name it “Investigating.”
- Incident status: Choose → Investigating
- Incident title: Call it “Investigating service disruption.”
-
Message body: This is the message people will get with your explanation of what you know so far. This won’t be complete, obviously, but you can get started with some boilerplate text and leave spots where you’ll add the real detail when the time comes.
Boilerplate text:
We’re currently experiencing a service disruption.
Our **team name** team is working to identify the root cause and implement a solution.
Users may be experiencing **General impact**.
Next update in **time until next update**.
*Remember: You don’t have to promise to have the fix working by the time of your next update, you just need to let people know when you’ll have an update for them. It may end up being the same message—still working on it!—you just want to keep people informed so they know you’re on the job, and so they don’t overwhelm your support team with additional questions wondering when the next update will be.
-
Hit Save Template.
Click “Back to incident templates” at the top of the template before you start the next step.
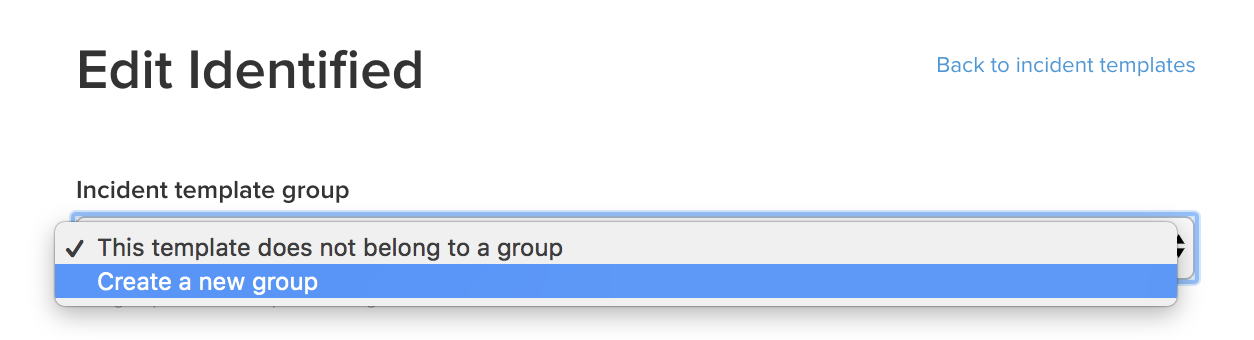
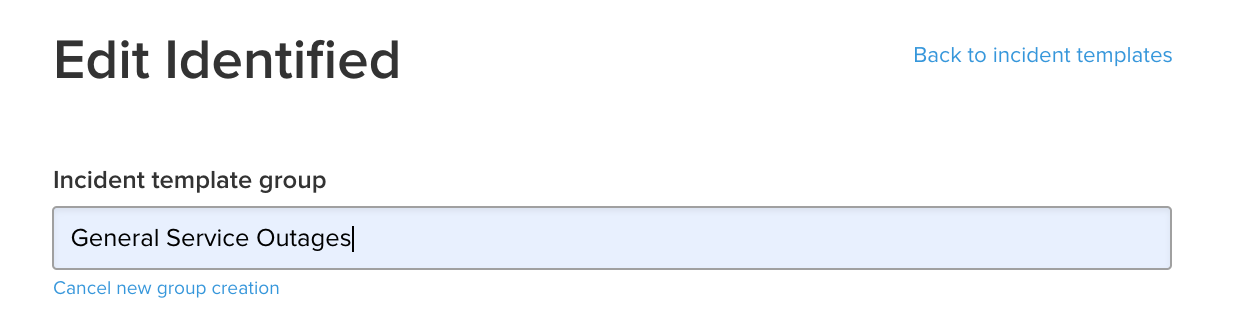
Step 6: Create an incident template group
Eventually, you may have multiple types of outages that each require their own communications. In order to keep these organized and help you locate the right one under pressure, you can organize your templates into groups.
- From the templates overview page, click Edit next to a template you just created
- From Incident template group dropdown → Create a new group
1. Click Update template and title it “General Service Outages.”
2. Go back to your other incident templates and add them to this new General Service Outages group, if you wish.
Some other groups and templates you may want to create communications for:
- Scheduled Maintenance Update
- Degraded performance
- Upstream service provider issues
- Component-specific incidents
Step 7: (Optional) How to use the templates in a real outage
Congrats! Now you have a set of templates you can use during a real outage.
- If you don’t have an active Statuspage account, you can activate your status page right away.
- If you started with a trial, you’ll have to activate your page plan in order to send any live updates or do the following steps. Click “Activate my page” to see pricing plans and select a plan.
Let’s look at how we’d use one in a real scenario (don’t worry we won’t actually post this update).
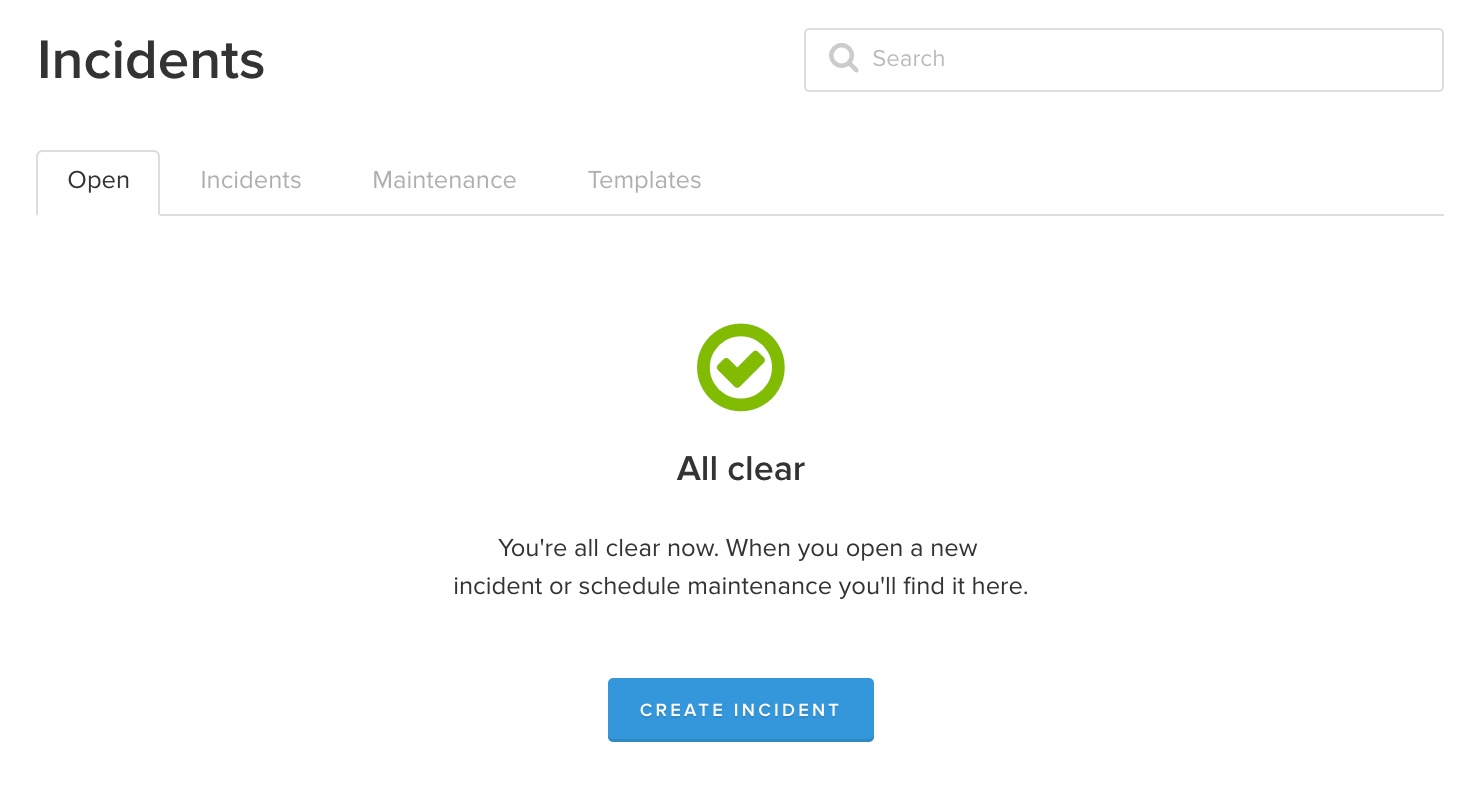
1. Click Incidents on the left nav, then click the Open tab.
2. Click Create Incident.
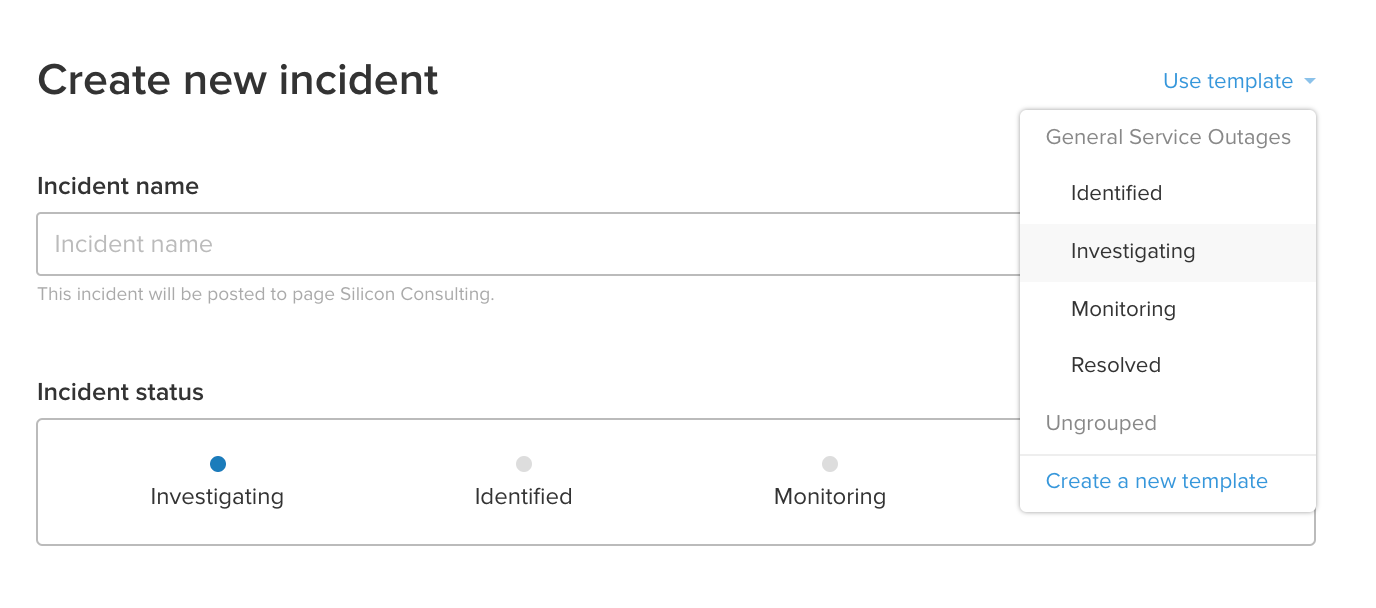
3. In the top right click Use Template and then select the Investigating template we created back in Step 2.
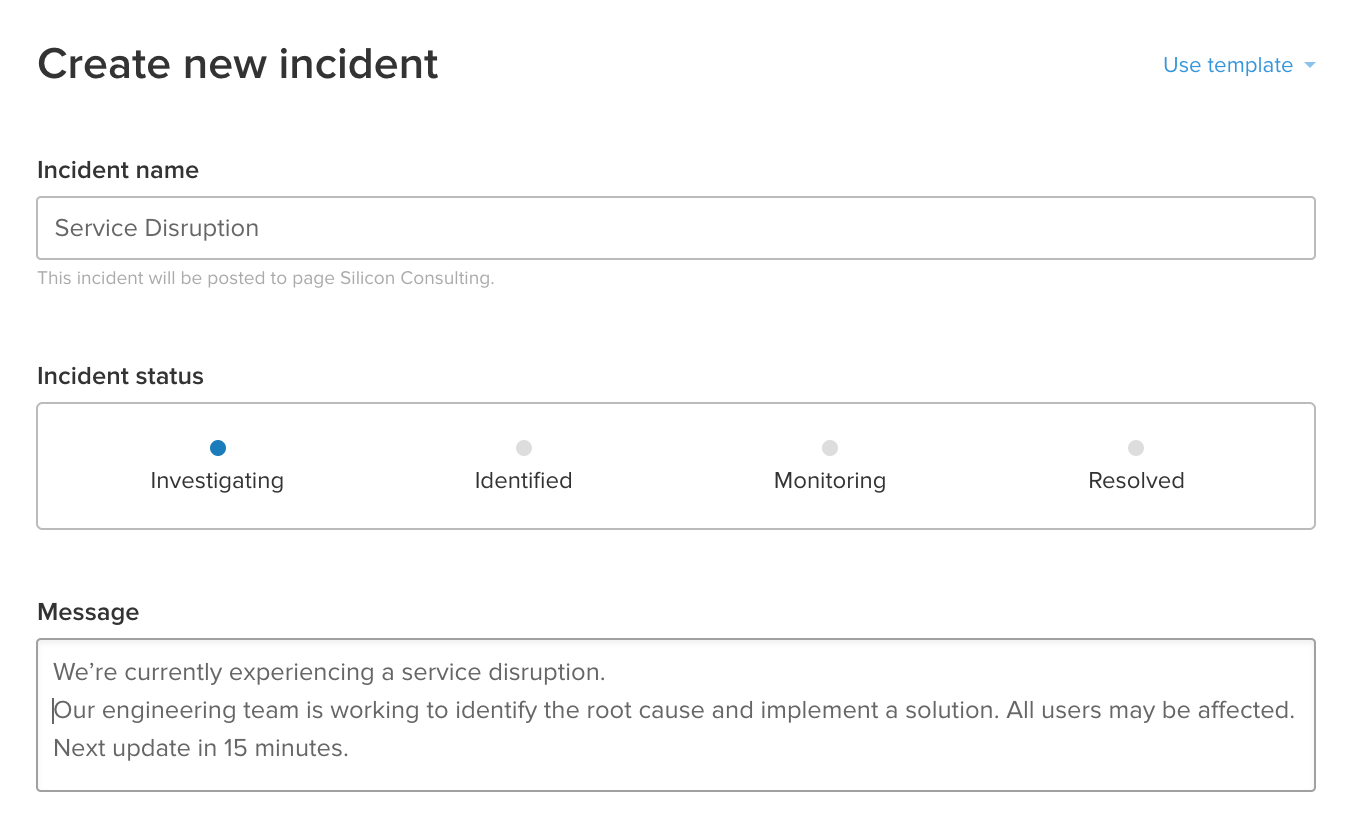
You’ll see that the fields in the template are now pre-populated. We now want to go through and update any boilerplate text. Go through each field and enter the details like you would if you were having a real incident. Note: Remember DO NOT click the Create incident button! This is just a test!
Here’s one we created:
Push the back button on your browser to exit out without posting the incident.
Products Discussed

Easily communicate real-time status to your users.
Setting up an on-call schedule with Opsgenie
In this tutorial, you’ll learn how to set up an on-call schedule, apply override rules, configure on-call notifications, and more, all within Opsgenie.
Read this tutorialIncident response best practices and tips
This collection of incident response best practices and tips will help your team avoid mismanaged incidents, unnecessary delays and associated costs.
Read this article