Articles
Tutorials
Interactive Guides
How to integrate Jira and Harness Drone

Harness.io
Software Delivery Platform
This tutorial provides step-by-step instructions on how to integrate Harness Drone with your Jira project. This allows teams to see runtime information regarding deployed tickets.
Time
10-minute read.
Audience
You work on projects within Jira and would like to see runtime information regarding deployed tickets.
Prerequisites
You have a Jira account and basic proficiency in Jira. Get started with Jira here.
You have basic proficiency with Harness. Get started with Harness here.
Step 1. Create OAuth credentials in Jira
To integrate Harness Drone with your Jira project, you will need to create OAuth credentials. Follow the steps below to create these credentials:
1. From Jira, click on Apps, then Manage your apps
2. Select Create OAuth credentials
3. Click the Create new credentials button
4. Fill out the following fields:
a. App name: Drone
b. Server base URL: https://www.drone.io
c. Under Permissions check Deployments
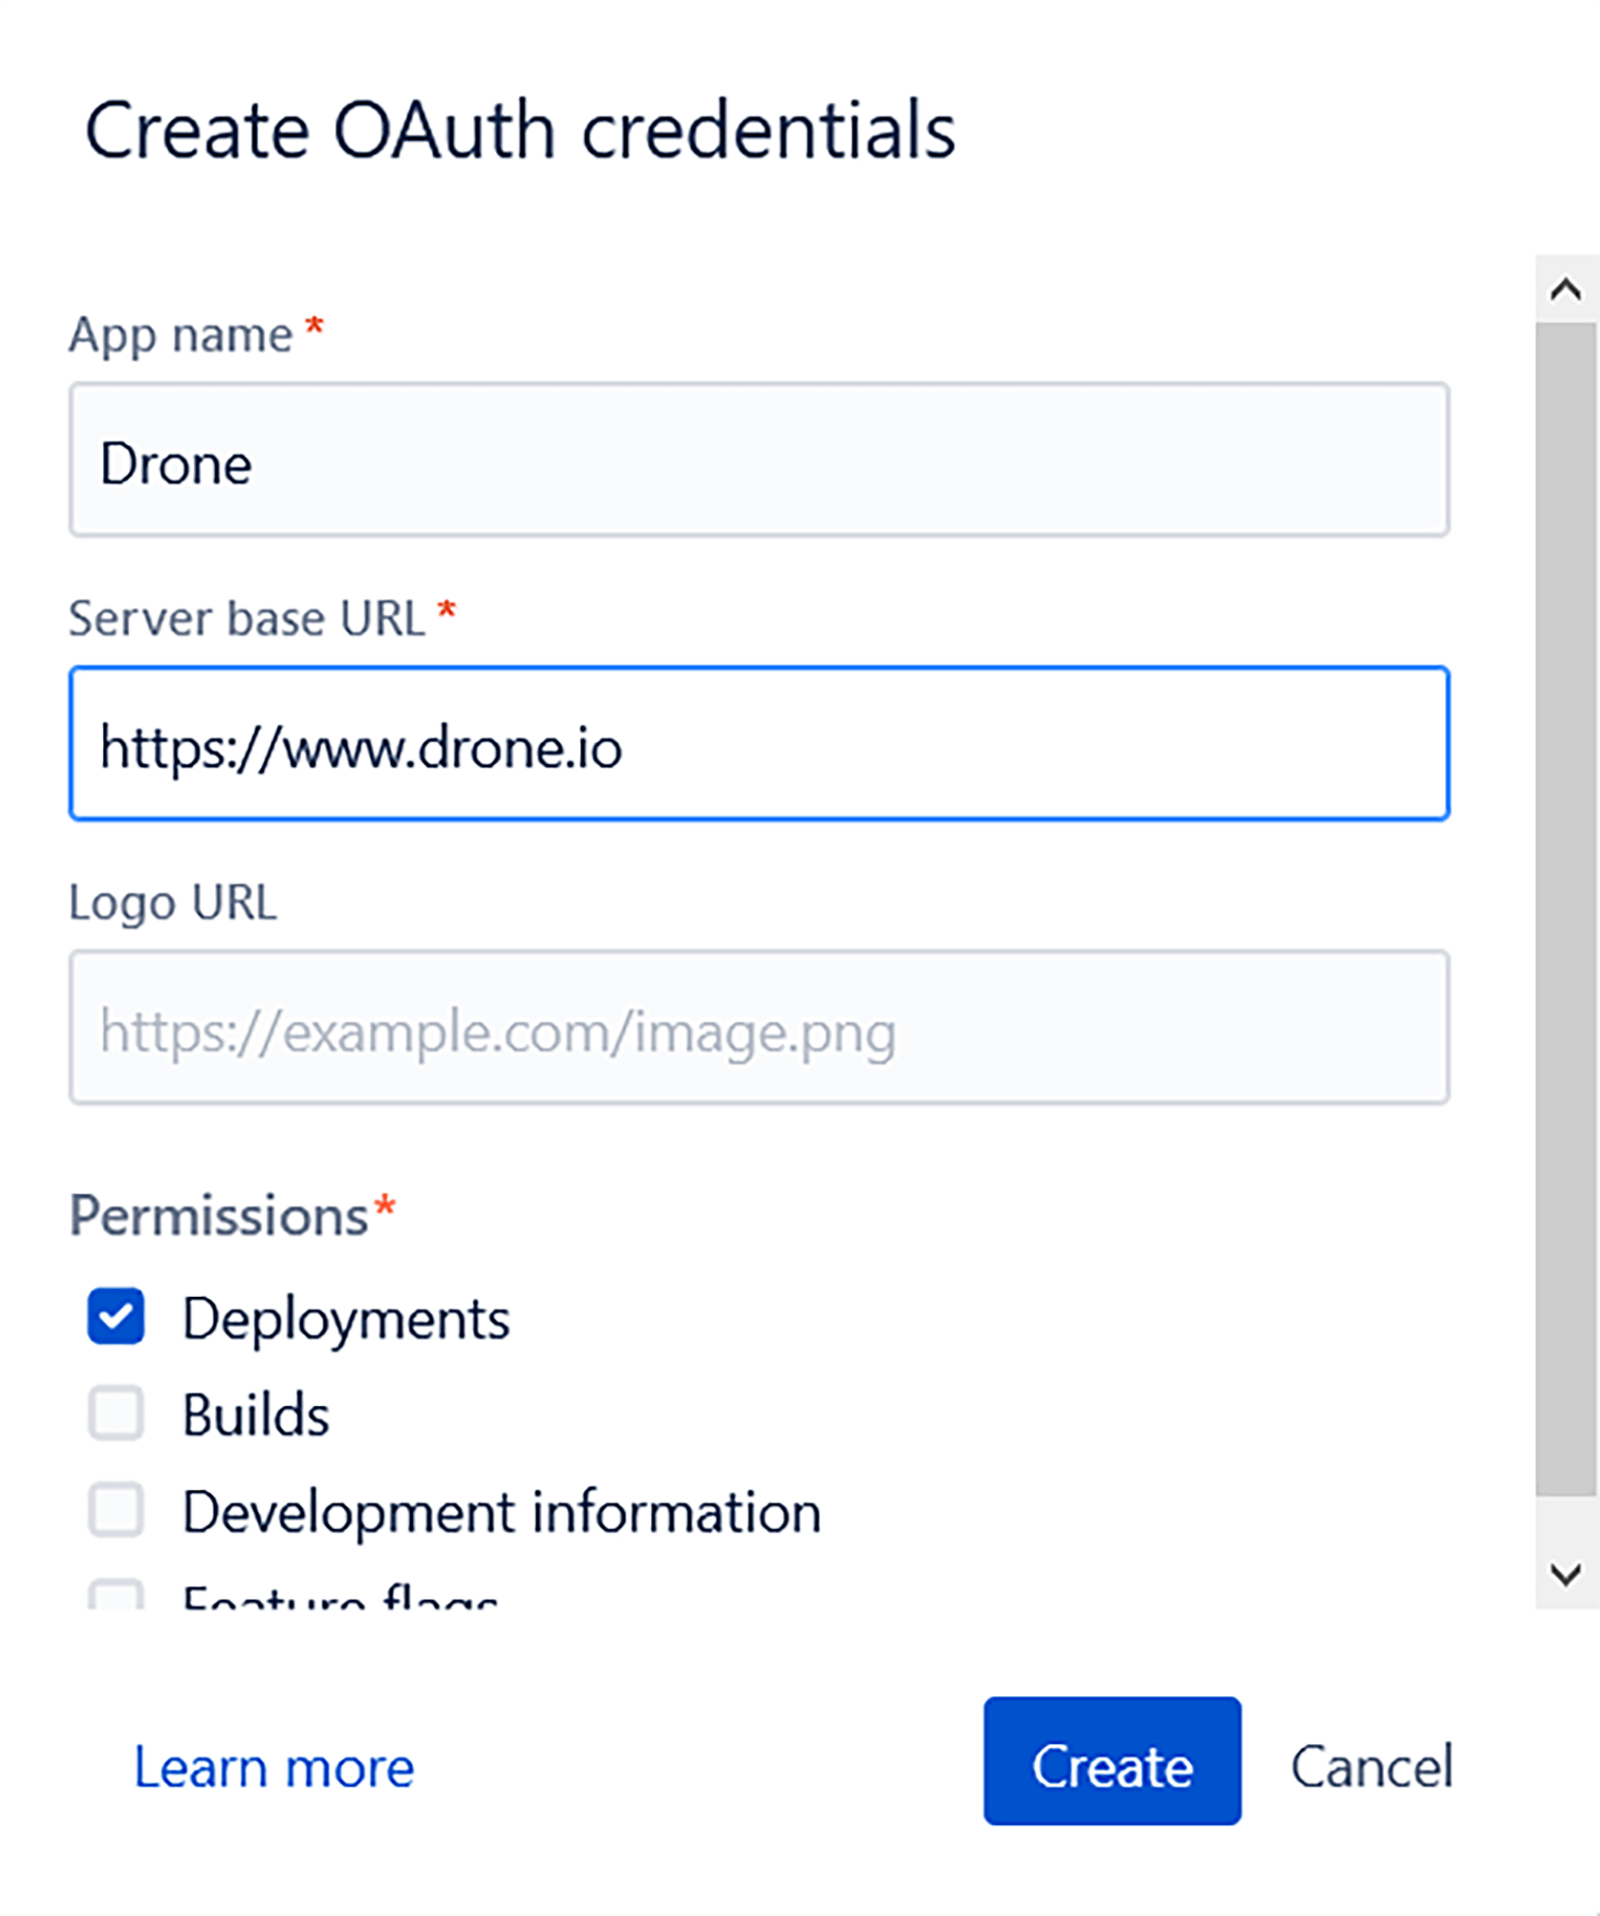
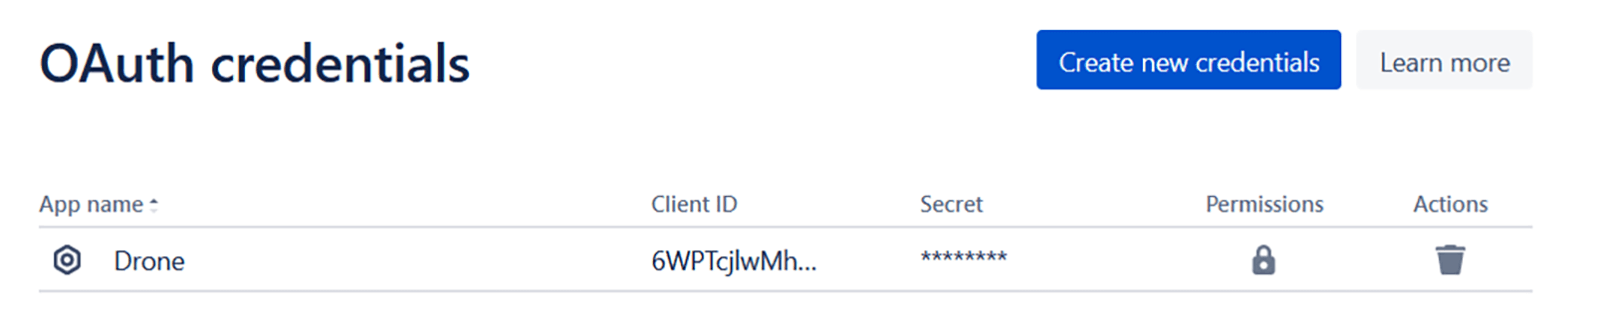
5. Click the Create new credentials button. You will have a new credentials entry.
Step 2. Set up secrets in Harness Drone
Next, you will need to configure your Jira credentials in Harness Drone in order to perform the integration and update the tickets.
1. Log in to your Harness Drone account and select the repository for the integration
2. Select Settings then Secrets
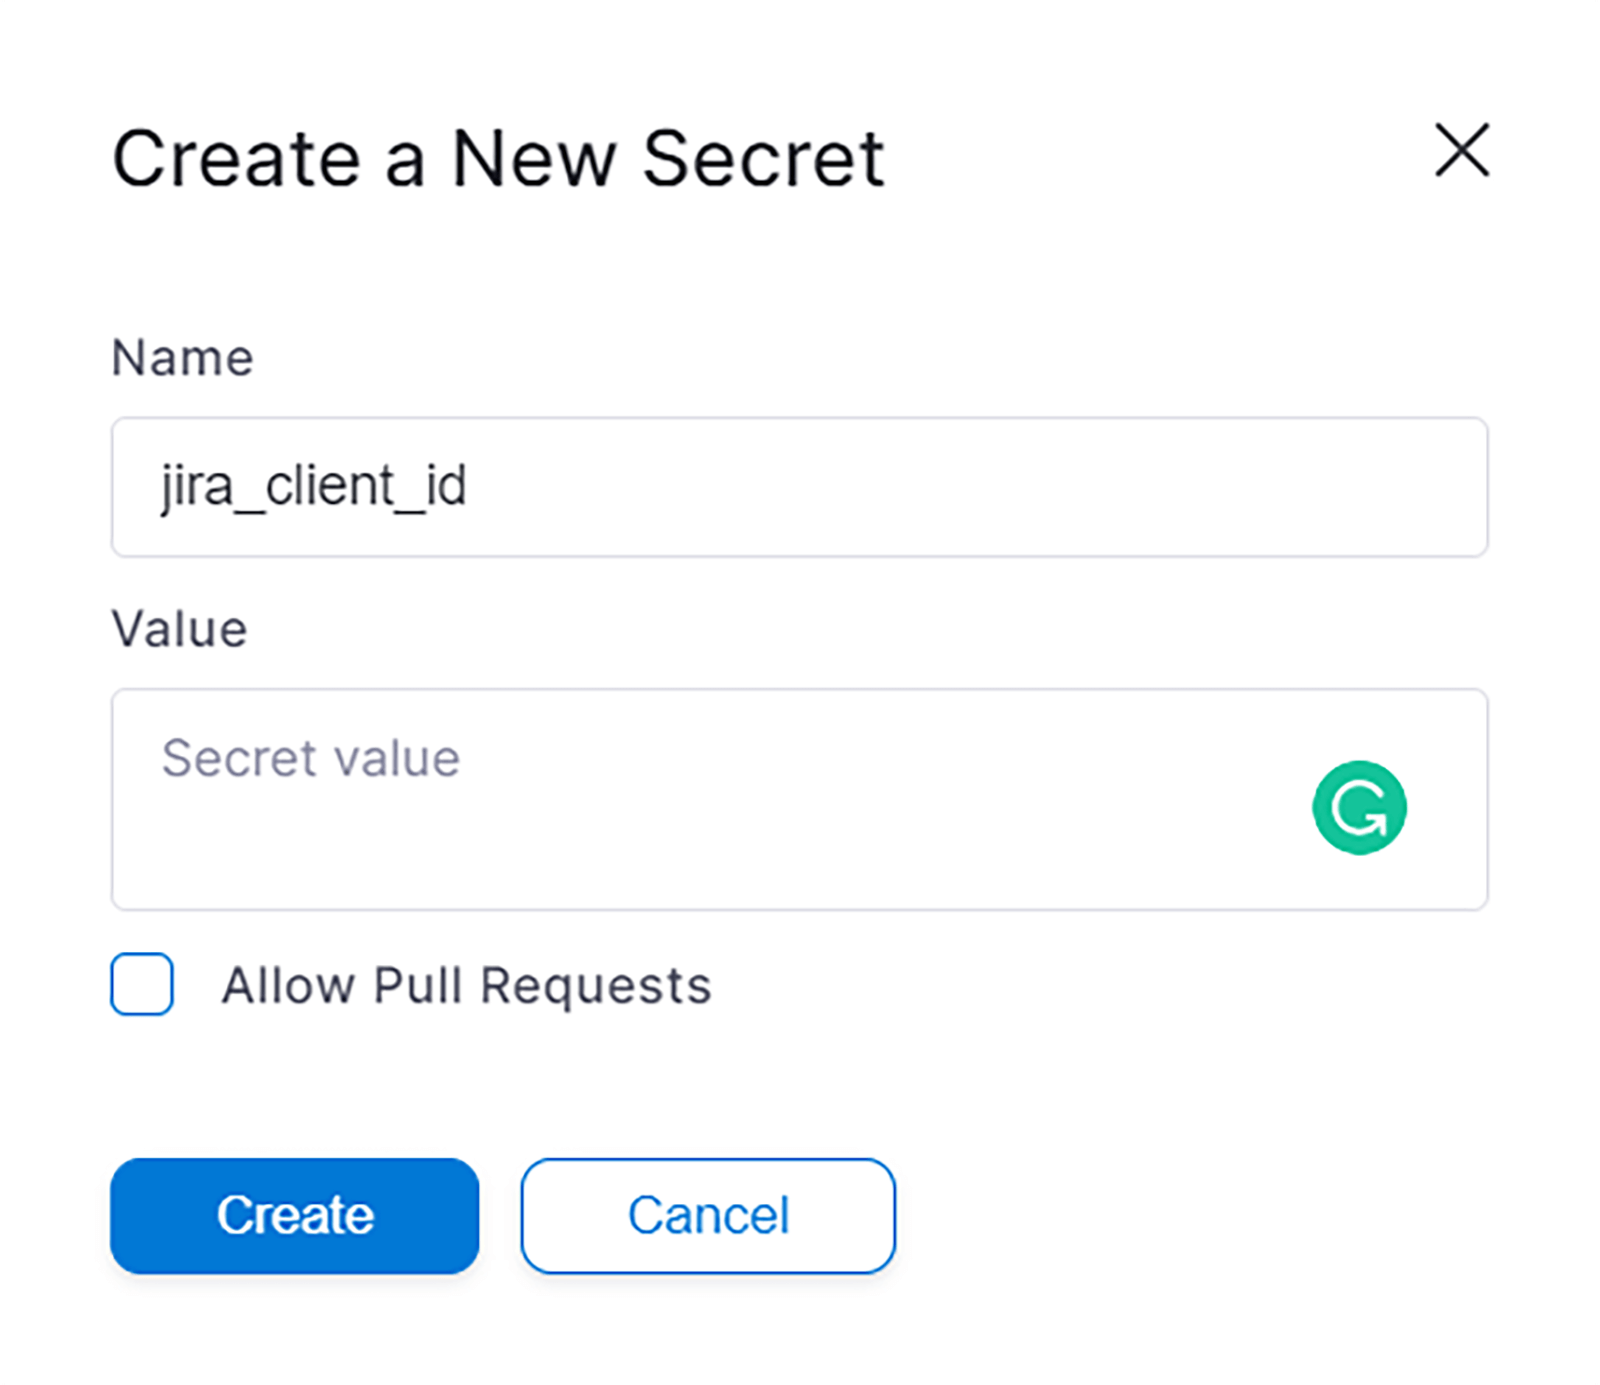
3. Click the New Secret button
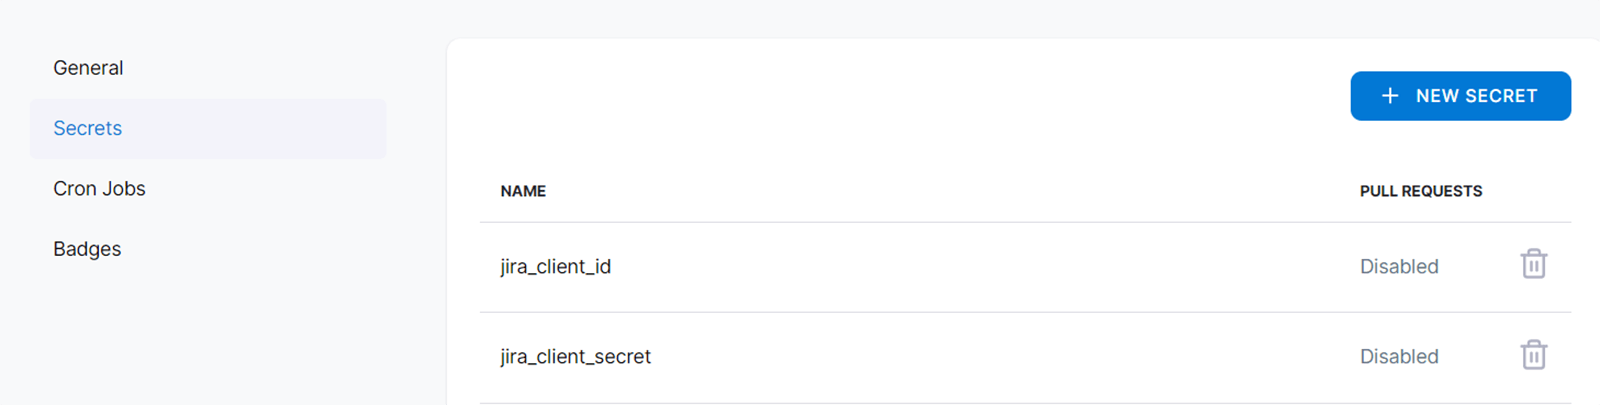
a. The first secret should have the Client ID value from your Jira OAUth Credentials. You can name it “jira_client_id”
b. The second secret needs to have the value of the secret from your Jira OAUth Credentials. You can name it “jira_client_secret”.
You should now have both secrets defined in Harness Drone.
Step 3. Add the Jira plugin to your Harness Drone pipeline
Upon execution, the pipeline will update the Jira ticket mentioned in the commit message on the status, progress and to which environment it has been deployed to. In order to do so, under steps, edit your pipeline and add the Jia Software plugin.
The following attributes will be needed:
1. Name
2. Image — plugins/jira
3. client_id — should be the secret created in step 2 (“jira_client_id” in the example below)
4. Project —should be the same name as your Jira project (“DRONE” in the example below). Please note that the project name is case sensitive
5. Instance — subdomain of your atlassian account that can be fetched from the URL- https://xxxxxx.atlassian.net (“droneio” in this example)
6. Environment — should be any of the following values: unmapped, development, testing, staging, or production
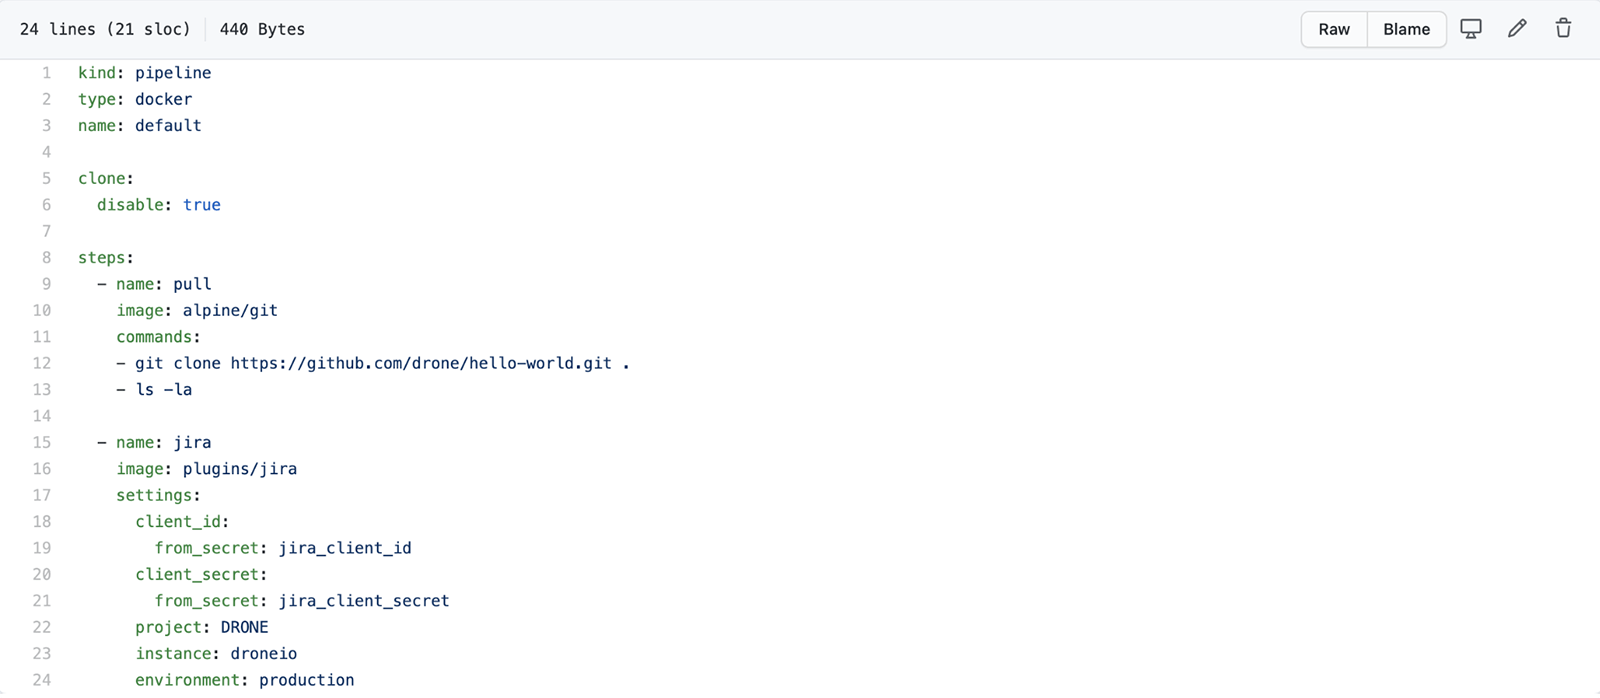
After you add the plugin to your pipeline you can trigger execution and update a Jira ticket automatically.
Step 4. Trigger Harness Drone pipeline execution
The common way to automatically run a Harness Drone pipeline is to commit a change, which will trigger an execution. To update a ticket’s status, you need to provide the ticket ID in the commit message.
Follow the steps below to do so:
1. Create a Jira ticket that you want to update during the pipeline execution
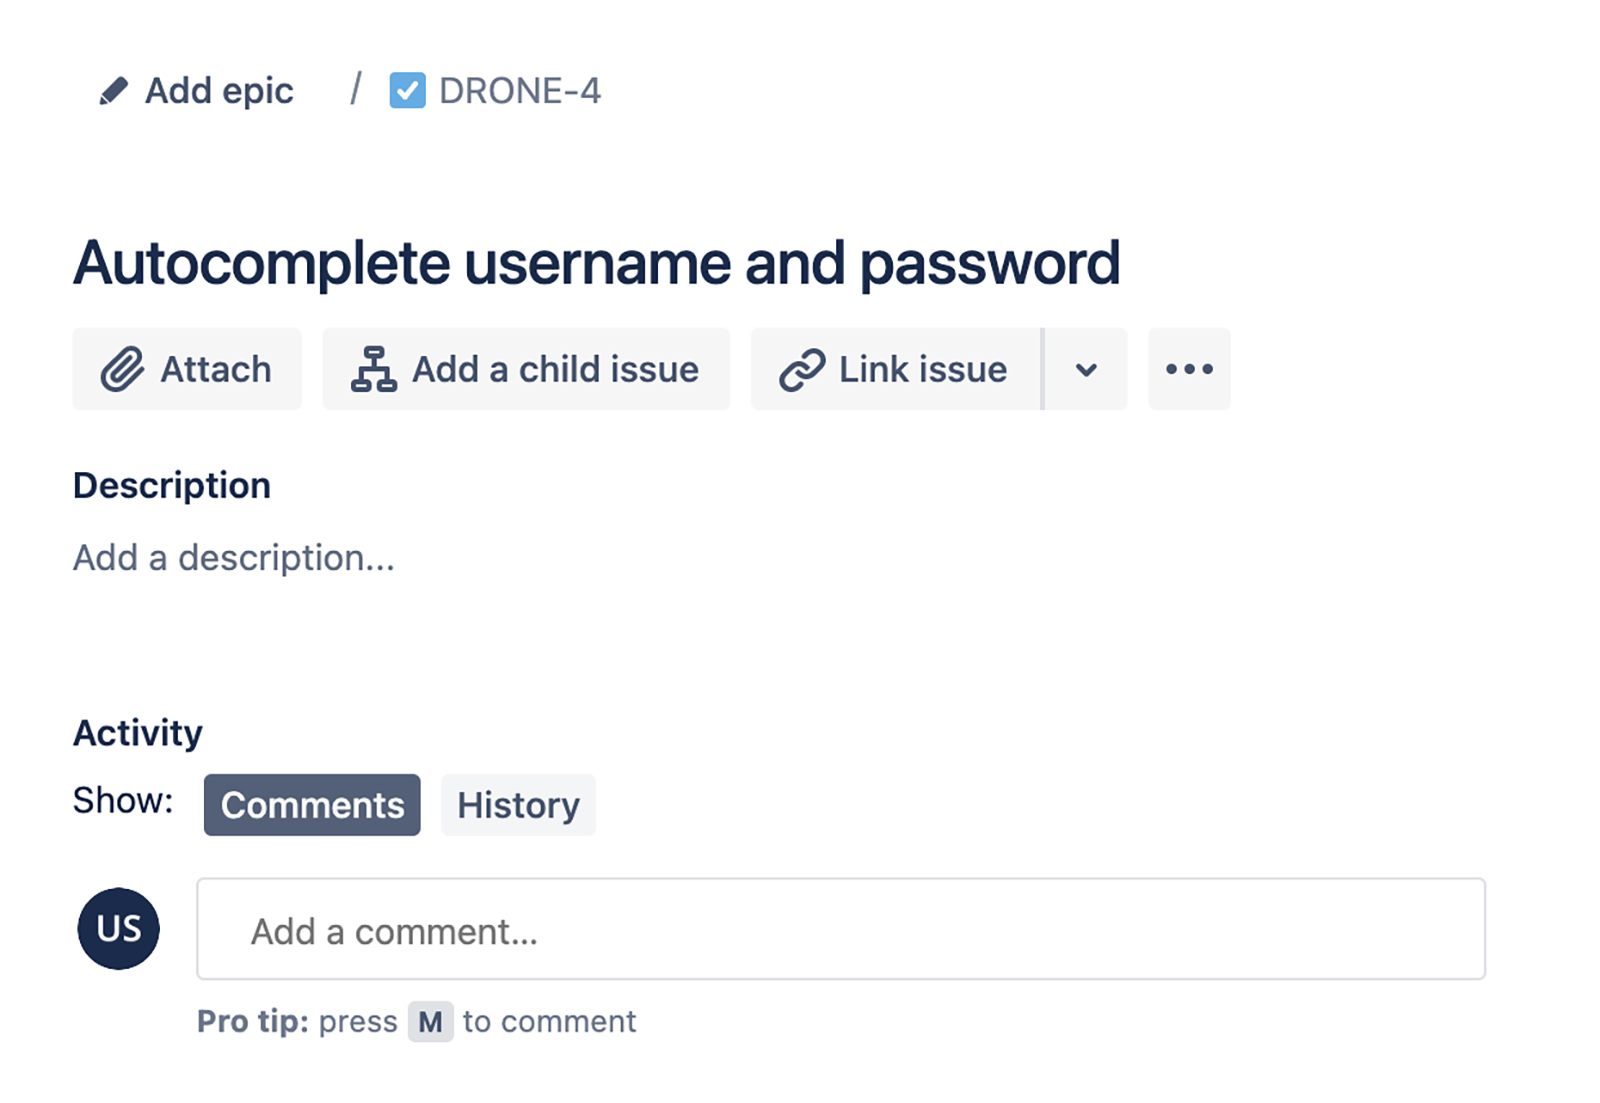
2. After making changes in the ticket code, add the ticket ID in the commit message. In the example below, the ticket is called “Autocomplete username and password” and the ID is DRONE-4.
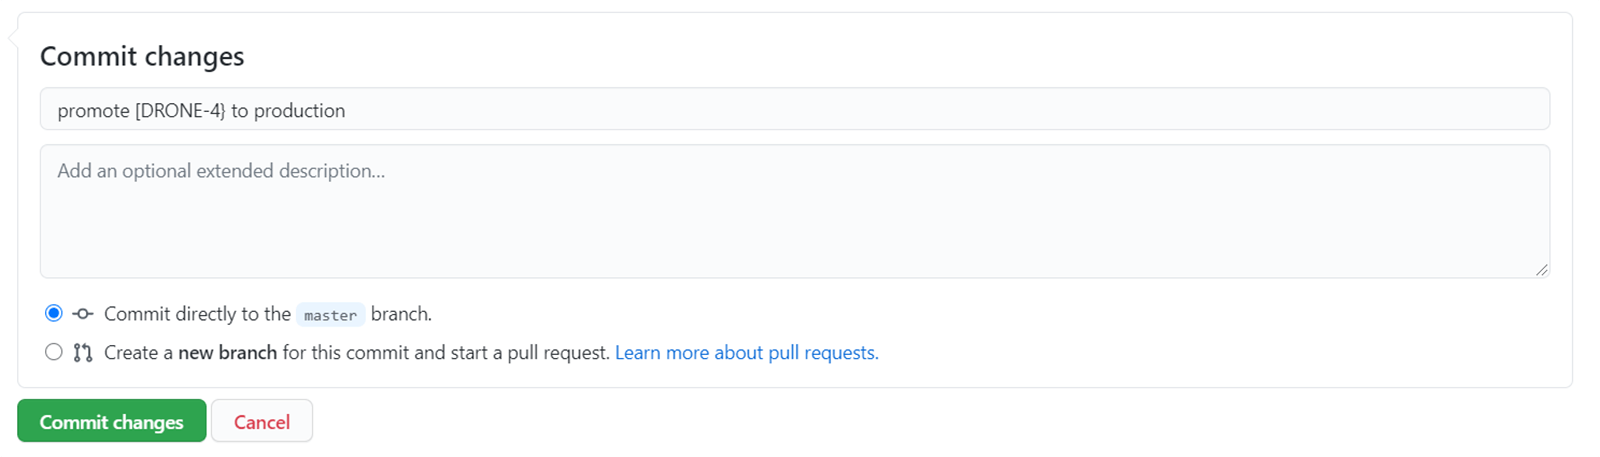
3. The pipeline should start the execution. The example below involves updating the production environment.
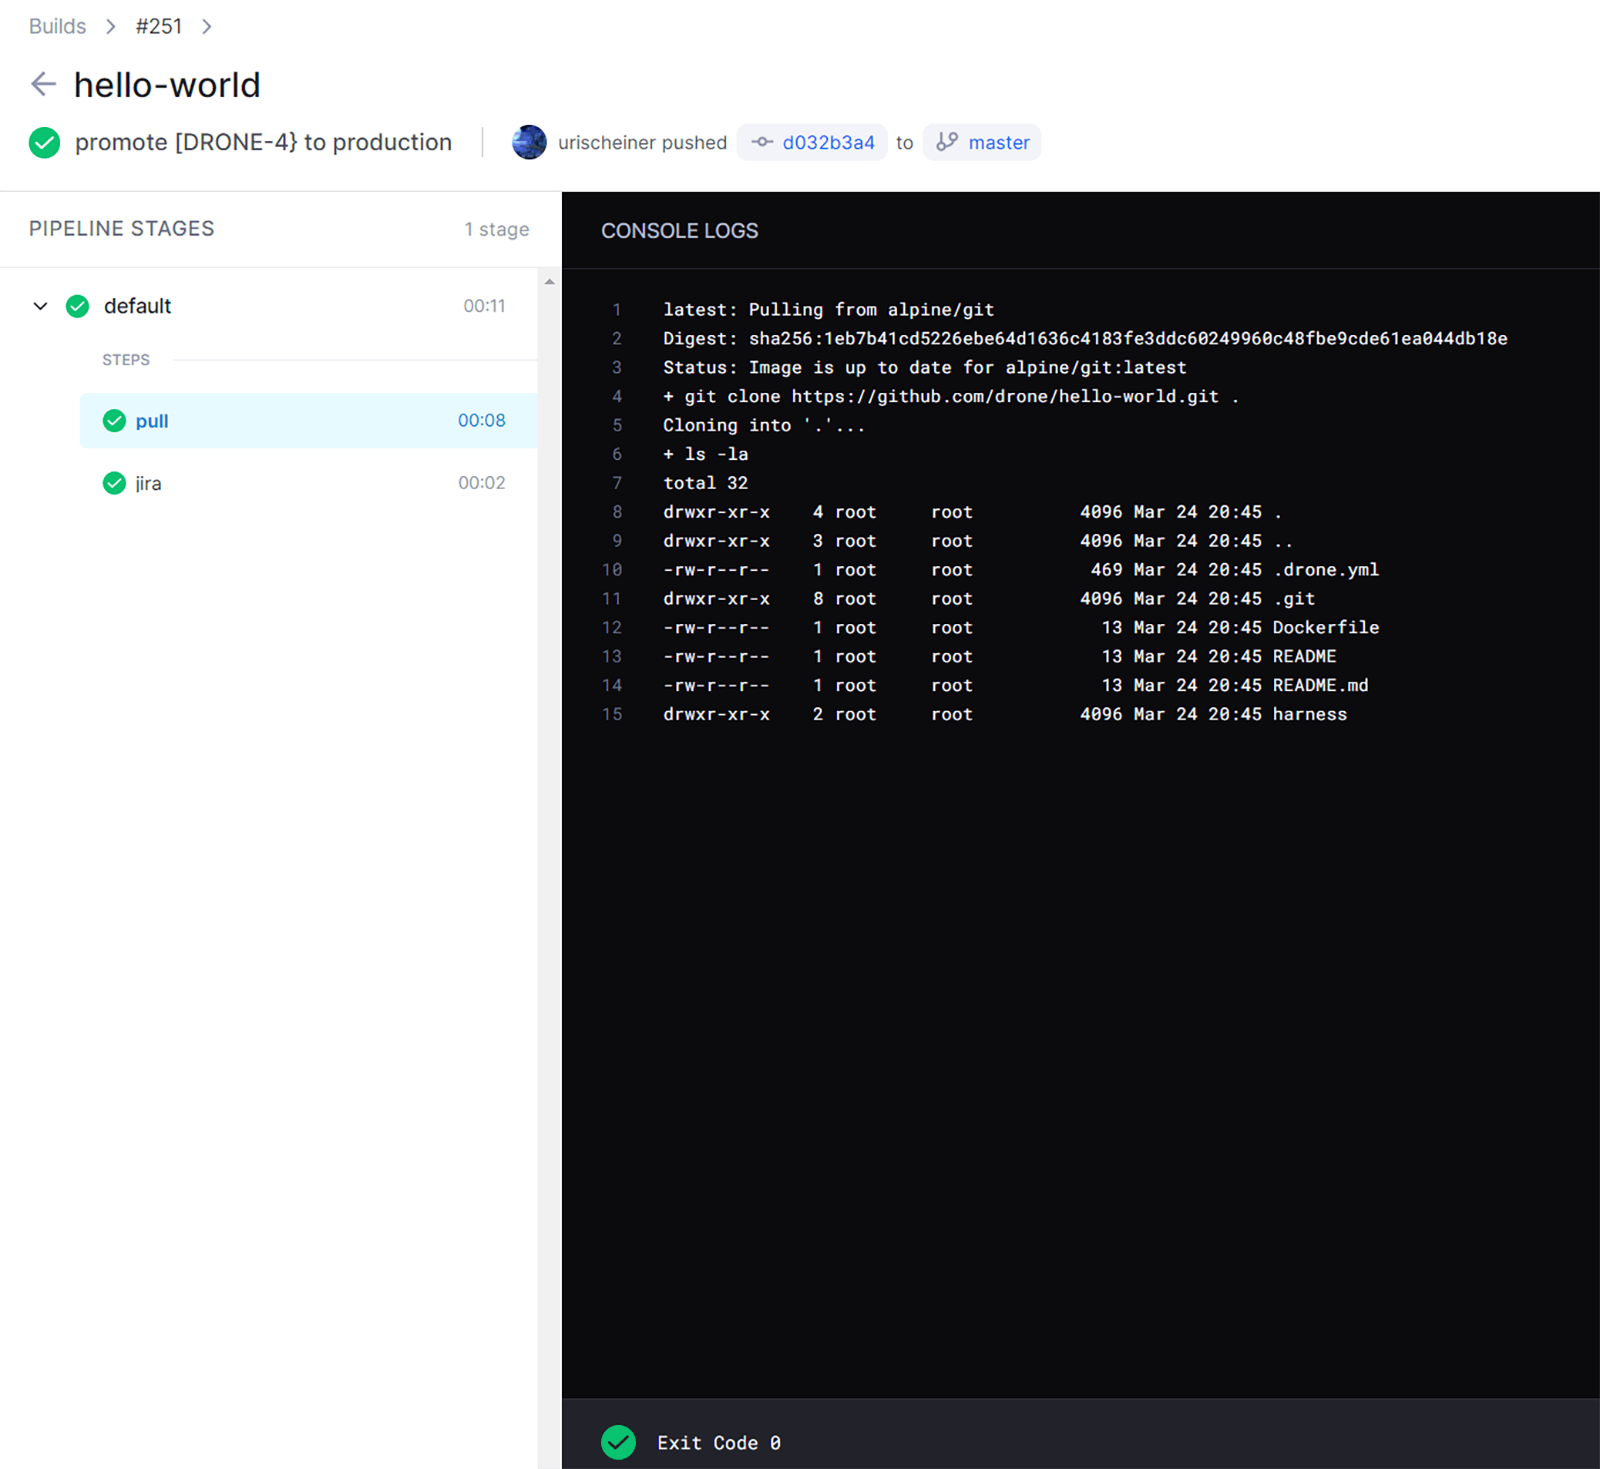
When the pipeline is finished, you should see the status in Jira.
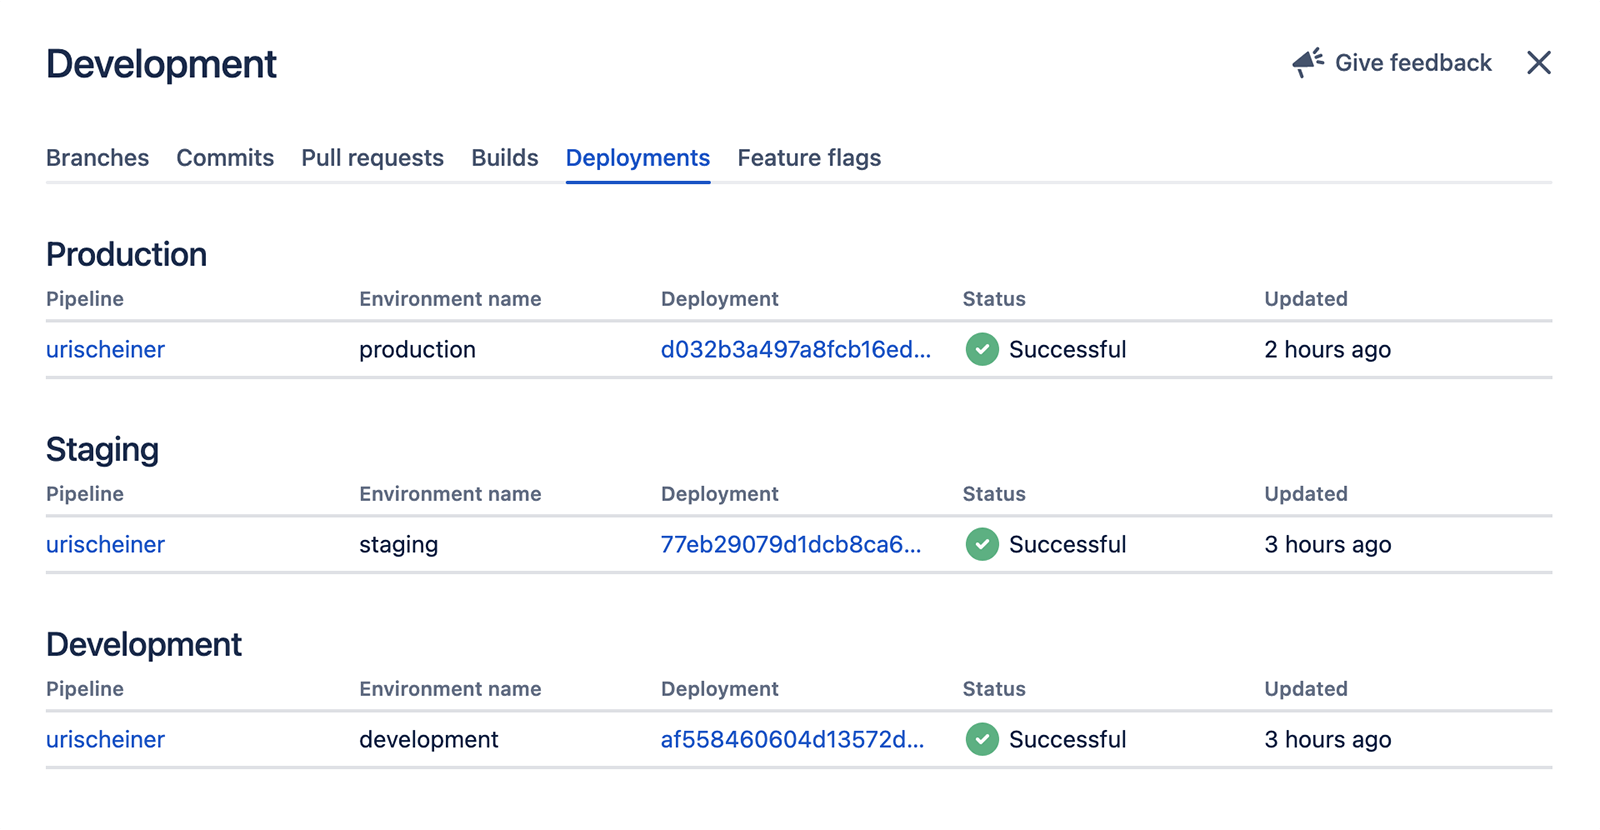
Step 5. View ticket status on the Jira Deployment page
On the Jira Deployment page you should see the status of the ticket based on the progress updated by the Drone pipeline.

If you click on Show more information, you can see the full history and status of the ticket deployment.
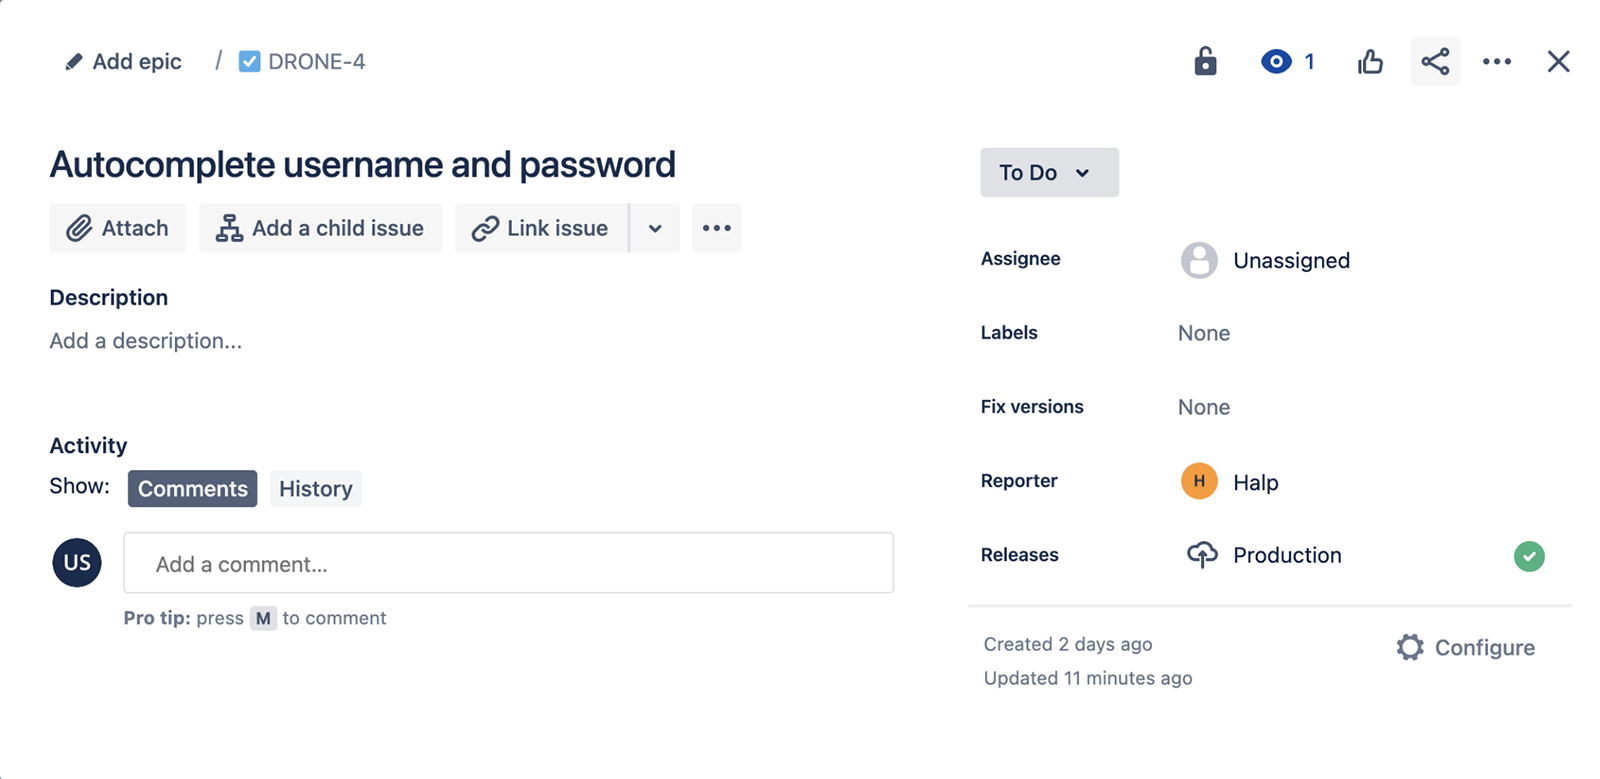
Step 6: View ticket status in the Jira Board
From the Jira board, if you open the ticket you will see the latest deployment status under the “Releases” field. In the following example, the latest deployment took place in the production environment.
Atlassian’s Open DevOps allows you to build the DevOps toolchain you want, thanks to integrations with leading vendors and marketplace apps. To learn more, check out our DevOps integrations.

Share this article
Next Topic
Recommended reading
Bookmark these resources to learn about types of DevOps teams, or for ongoing updates about DevOps at Atlassian.

DevOps community

DevOps learning path