Articles
Tutorials
Interactive Guides
Deploy AWS CloudWatch alarms with Bitbucket
.png?cdnVersion=3303)
Warren Marusiak
Senior Technical Evangelist
To demonstrate how to develop, deploy, and manage applications using Jira Software and various connected tools, our team created ImageLabeller, a simple demo application built on AWS that uses machine learning to apply labels to images.
This page covers how to monitor ImageLabeller with Opsgenie. Before you begin, we recommend reading the ImageLabeller architecture page for context.
Add an alarms repository for Opsgenie integration
Go to Jira and create a new Jira issue for adding AWS CloudWatch alarms repository to Bitbucket. In this example the Jira issue ID is IM-9.

Go to Bitbucket, and click Create, then Repository.

Select the appropriate Workspace, and Project. Set the Default branch name to mainline. Click Create repository to proceed.

Go to your CloudWatchAlarms repository in your terminal, and run the following to push your AWS CloudFormation template code to Bitbucket.
git add --all
git commit -m "IM-9 add CloudWatchAlarms to Bitbucket"
git remote add origin git@bitbucket.org:pmmquickstartguides01/cloudwatchalarms.git
git branch -m mainline
git push -u origin mainline
Alarms template.yml
Description: 'A description'

Resources:
  OpsGenieSNS:
    Type: AWS::SNS::Topic
    Properties:
      DisplayName: 'Opsgenie'
      Subscription:
        - Endpoint: 'https://api.opsgenie.com/v1/json/cloudwatch?apiKey=a4449509-6998-4d55-841d-2e6b363520c7'
          Protocol: 'HTTPS'
      TopicName: 'Opsgenie'

  SubmitImageLambdaAlarm:
    Type: AWS::CloudWatch::Alarm
    Properties:
      AlarmActions:
        - !Ref 'OpsGenieSNS'
      AlarmDescription: 'SubmitImage Too Many Invocations'
      ComparisonOperator: 'GreaterThanThreshold'
      Dimensions:
        - Name: FunctionName
          Value: !ImportValue 'SubmitImageFunctionName'
      EvaluationPeriods: 1
      MetricName: 'Invocations'
      Namespace: 'AWS/Lambda'
      Period: 60
      Statistic: 'Sum'
      Threshold: 10
Set the SNS topic subscription endpoint to the endpoint URL you copied from Opsgenie. The SubmitImageLambdaAlarm monitors a single metric emitted by the submitImage AWS Lambda. If there are more than 10 invocations, a minute the alarm is raised.
bitbucket-pipelines.yml for deploying to AWS
Go to your CloudWatchAlarms repository in your terminal, create a branch named after your Jira issue ID.
definitions:
  steps:
    - step: &deploy-test-usw1
        name: Deploy Test us-west-1
        script:
        - pipe: atlassian/aws-cloudformation-deploy:0.10.0
          variables:
            AWS_ACCESS_KEY_ID: ${AWS_ACCESS_KEY_ID}
            AWS_SECRET_ACCESS_KEY: ${AWS_SECRET_ACCESS_KEY}
            AWS_DEFAULT_REGION: 'us-west-1'
            STACK_NAME: 'OpenDevOpsAlarms'
            CAPABILITIES: ['CAPABILITY_IAM', 'CAPABILITY_AUTO_EXPAND']
            WAIT: 'true'
            TEMPLATE: 'template.yml'
    - step: &deploy-staging-use2
        name: Deploy Staging us-east-2
        script:
        - pipe: atlassian/aws-cloudformation-deploy:0.10.0
          variables:
            AWS_ACCESS_KEY_ID: ${AWS_ACCESS_KEY_ID}
            AWS_SECRET_ACCESS_KEY: ${AWS_SECRET_ACCESS_KEY}
            AWS_DEFAULT_REGION: 'us-east-2'
            STACK_NAME: 'OpenDevOpsAlarms'
            CAPABILITIES: ['CAPABILITY_IAM', 'CAPABILITY_AUTO_EXPAND']
            WAIT: 'true'
            TEMPLATE: 'template.yml'
    - step: &deploy-production-usw2
        name: Deploy Production us-west-2
        script:
        - pipe: atlassian/aws-cloudformation-deploy:0.10.0
          variables:
            AWS_ACCESS_KEY_ID: ${AWS_ACCESS_KEY_ID}
            AWS_SECRET_ACCESS_KEY: ${AWS_SECRET_ACCESS_KEY}
            AWS_DEFAULT_REGION: 'us-west-2'
            STACK_NAME: 'OpenDevOpsAlarms'
            CAPABILITIES: ['CAPABILITY_IAM', 'CAPABILITY_AUTO_EXPAND']
            WAIT: 'true'
            TEMPLATE: 'template.yml'
    - step: &deploy-production-use1
        name: Deploy Proudction us-east-1
        script:
        - pipe: atlassian/aws-cloudformation-deploy:0.10.0
          variables:
            AWS_ACCESS_KEY_ID: ${AWS_ACCESS_KEY_ID}
            AWS_SECRET_ACCESS_KEY: ${AWS_SECRET_ACCESS_KEY}
            AWS_DEFAULT_REGION: 'us-east-1'
            STACK_NAME: 'OpenDevOpsAlarms'
            CAPABILITIES: ['CAPABILITY_IAM', 'CAPABILITY_AUTO_EXPAND']
            WAIT: 'true'
            TEMPLATE: 'template.yml'
    - step: &deploy-production-cac1
        name: Deploy Production ca-central-1
        script:
        - pipe: atlassian/aws-cloudformation-deploy:0.10.0
          variables:
            AWS_ACCESS_KEY_ID: ${AWS_ACCESS_KEY_ID}
            AWS_SECRET_ACCESS_KEY: ${AWS_SECRET_ACCESS_KEY}
            AWS_DEFAULT_REGION: 'ca-central-1'
            STACK_NAME: 'OpenDevOpsAlarms'
            CAPABILITIES: ['CAPABILITY_IAM', 'CAPABILITY_AUTO_EXPAND']
            WAIT: 'true'
            TEMPLATE: 'template.yml'
pipelines:
  default:
    - step:
        <<: *deploy-test-usw1
        deployment: Test us-west-1
    - step:
        <<: *deploy-staging-use2
        deployment: Staging us-east-2
  branches:
    mainline:
      - step:
          <<: *deploy-production-usw2
          deployment: Production us-west-2
      - step:
          <<: *deploy-production-use1
          deployment: Production us-east-1
      - step:
          <<: *deploy-production-cac1
          deployment: Production ca-central-1
Remember that you need to enable pipelines, setup deployment environments, and add AWS access keys to the repository before pipelines will run.
Pushing to a feature branch
Run the following from the command line to push your changes to the IM-9 branch of your CloudWatchAlamrs repository. Include the Jira issue ID in commit messages, and branch names to enable the Jira Bitbucket integration to keep track of what is happening in your project.
git add --all
git commit -m "IM-9 add bitbucket-pipelines.yml to CloudWatchAlarms"
git push -u origin IM-9
Click Pipelines, then IM-9 to see the running pipeline.
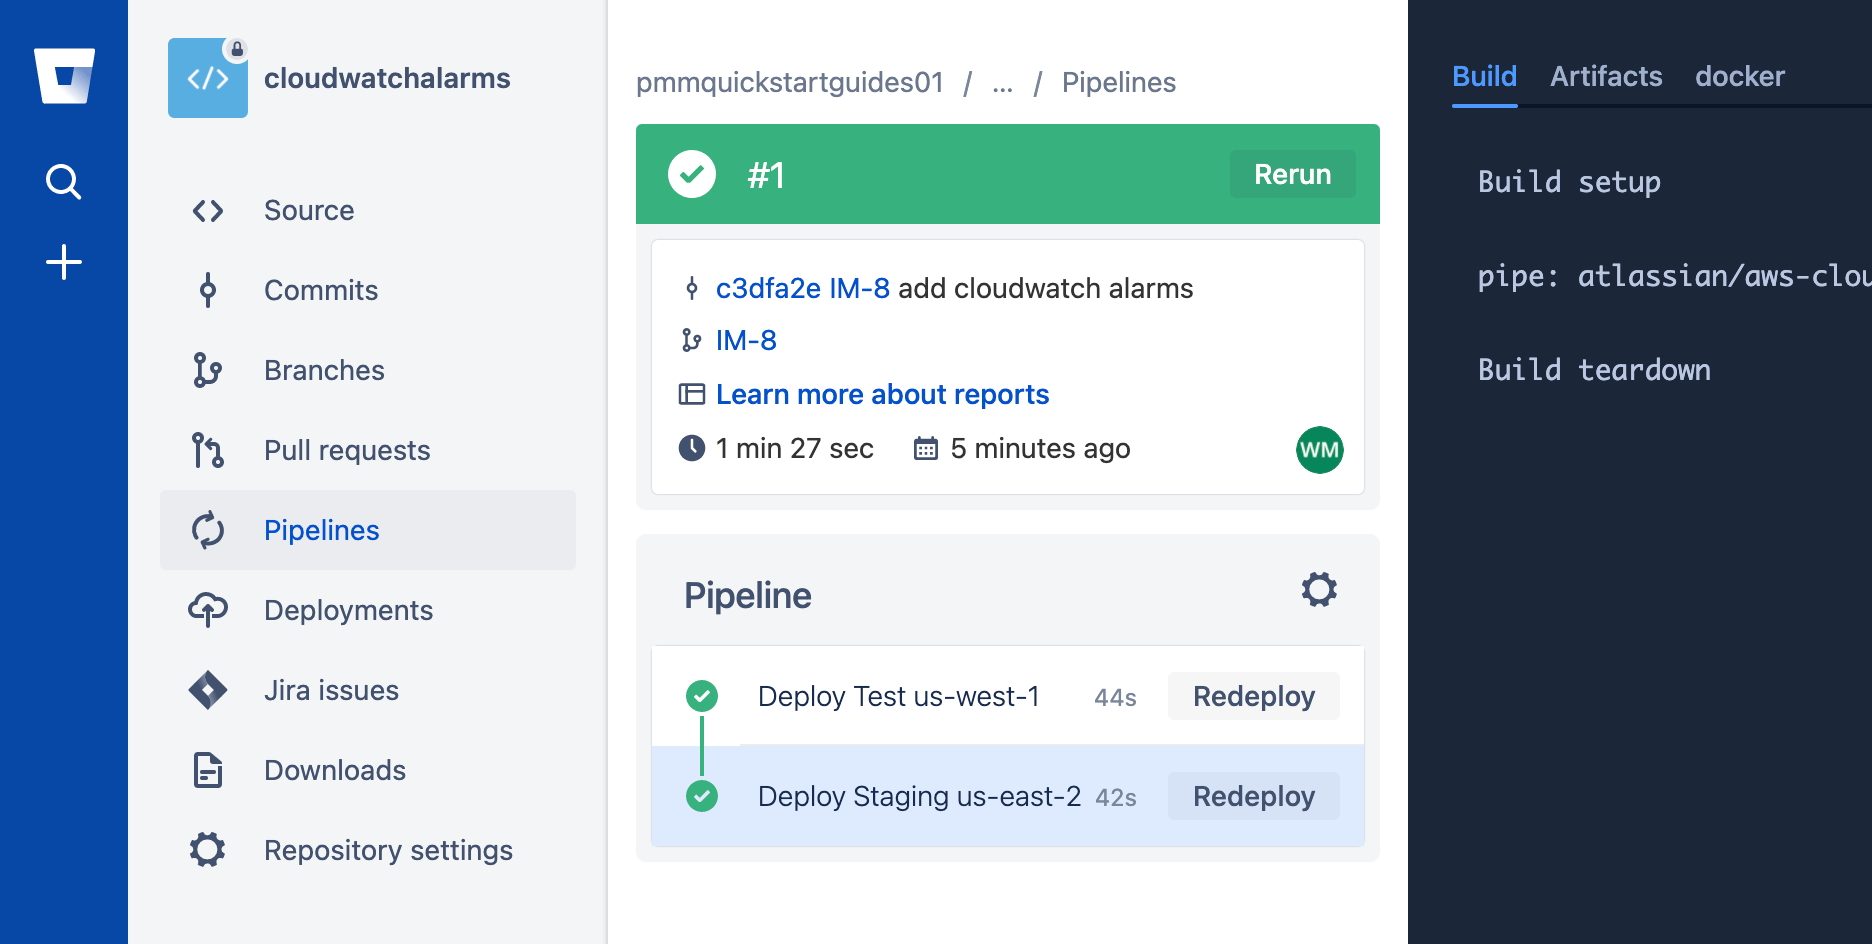
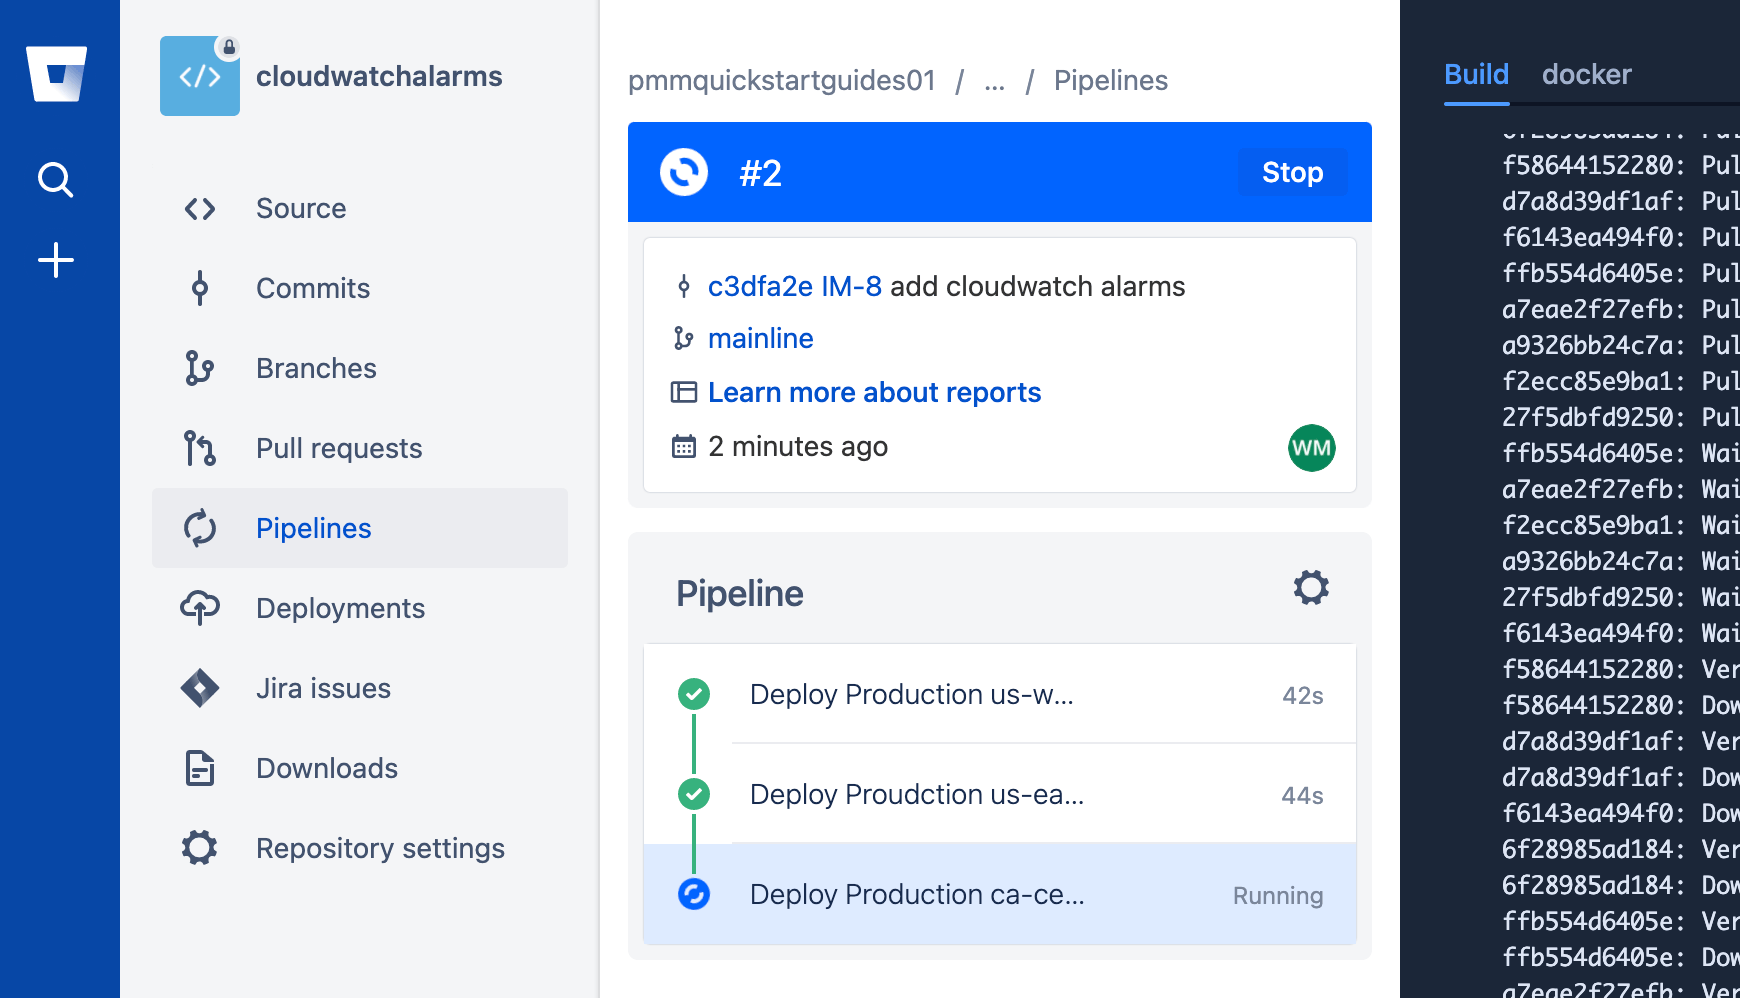
Create a pull request
To create a pull request click Pull requests, then Create pull request. Finish the pull request, and click Pipelines to see the Production deployment.
Testing the alarm
Generate an alert by triggering the AWS CloudWatch alarm you just set up, or by clicking Create alert.
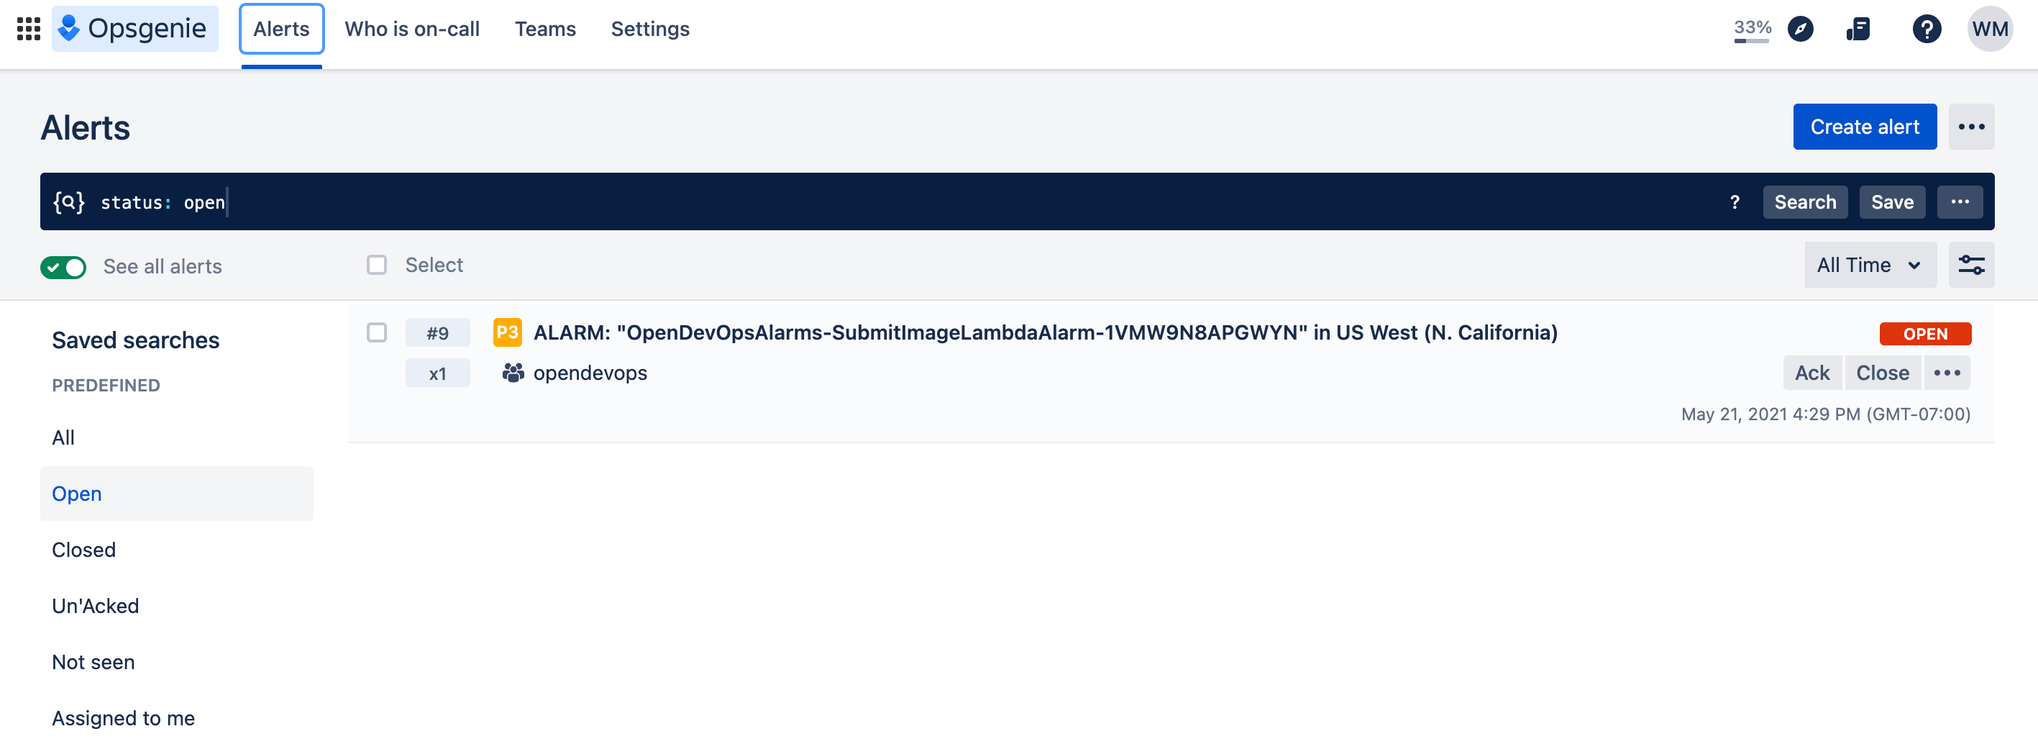
Bravo! You did it. ImageLabeller is now up and running.

Share this article
Next topic
Recommended reading
Bookmark these resources to learn about types of DevOps teams, or for ongoing updates about DevOps at Atlassian.

DevOps community

DevOps learning path