Learn about code review in Bitbucket Cloud
Objective
Create a repository and add someone as a reviewer to your pull request to start collaborating on your code.
Disclaimer: The following section of this tutorial outlines the steps of adding a reviewer (or team member) to your pull request, so you can collaborate on your code in Bitbucket Cloud. If you are not working with a teammate or do not need to add reviewers at this time, feel free to move onto the next tutorial: Learn branching in Bitbucket Cloud.
Mission Brief
So far, you’ve been the only person working in your repositories and on your code. What if you wanted to have someone review your code and provide feedback? By adding a reviewer to your pull request, you can do just that, whether you’re in the same room or across the universe.
Time
15 minutes
Audience
- You have some experience using Bitbucket Cloud. If not, try out one of our beginner tutorials.
- For those who prefer using a Git GUI with Bitbucket Cloud
About branches and pull requests
When you work on a team with multiple Bitbucket users, you'll want to work on your own set of code separately from the main codebase. Branches allow you to do just that. A branch represents an independent line of development for your repository. Think of it as a brand-new working directory, staging area, and project history. After you create a branch, you work on and commit code to that branch, pull updates from Bitbucket to keep your branch up-to-date, and then push all your work to Bitbucket.
Once you've got code changes on a branch in Bitbucket, you can create a pull request, which is where code review takes place. Your teammates will comment on your code with feedback and questions and eventually (hopefully) approve the pull request. When you have enough approvals, merge the pull request to merge your branch into the main code.
Create a Git repository
You just arrived at the Bitbucket space station and it's time to go through the orientation process, part of which involves making updates to your welcome package and getting them approved.
1. Click + in the global sidebar and select Repository under Create.
2. Make sure the team you created is the repository Owner.
3. Enter anything you want for the Project name and Repository name. If you can't think of anything, how about Welcome package and First impressions, respectively.
4. From Include a README?, select either of the Yes options.
5. From Version control system, pick an option for the type of repository you want to create. If you're not sure, keep as is.
6. Click Create repository and you'll land on the Source view of your brand, new repository.
7. From Source, select > Add file.
8. Name the file survey.html, then copy this code and paste it into the main text area.
SEE SOLUTION
Learn Git with Bitbucket Cloud

related material
Learn branching with Bitbucket Cloud
\<\!DOCTYPE html>
<html>
<head>
 <meta http-equiv="Content-Type" content="text/html; charset=utf-8">
 <style media="screen" type="text/css">
 body {
 margin: auto;
 width: 700px;
 color: #FFFFFF;
 font-family: Arial, sans-serif;
 background-color: #172B4D;
 }
 body>h1 {
 margin: 50px;
 font-size: 50px;
 text-align: center;
 color: #0052CC;
 }
 </style>
</head>
<body>
 <h1>Team up in space</h1>
 <p>
 Welcome to the team! You've made it this far so we know that you've got the potential to do great things. Because you're going to be collaborating with other awesome people, anything you add needs to be code reviewed and approved. That's just how a team works! You should have already created a branch and checked it out locally. If you haven't, go back to the tutorial and do that now. We'll be here.
 </p>
 <p>
 Because you're on your own branch, you can go crazy. Spice up this file any way you like. Add more files to this repository if you see fit. If want to take it slow and are just here to learn about pull requests, you can use this opportunity to fill out our short questionaire.
 </p>
 <br>
 <p>
 <b>Question 1</b>: Have you used pull requests before?
 </p>
 <p>
 <b>Answer 1</b>: **** Your answer here **** </p>
 <p>
 <b>Question 2</b>: Why do you want to learn about code review?
 </p>
 <p>
 <b>Answer 2</b>: **** Your answer here **** </p>
 <p>
 <b>Question 3</b>: Who do you plan to work with on Bitbucket? </p>
 <p>
 <b>Answer 3</b>: **** Your answer here **** </p>
</body>
</html>
9. Click Commit and then Commit again from the dialog.
Your repository is looking pretty good now. Take a look around if you feel like it.
Clone and make a change on a new branch
When you know that you will be adding reviewers to review and approve your code prior to merging, you’d most likely already have the repository cloned before creating a branch. So that’s what we’re going to do first before you set up your own branch.
If you're using command line
Step 1. Clone your repository to your local system
1. From the repository, click the Clone button in the top right. Bitbucket displays the Clone this repository dialog. By default, the clone dialog sets the protocol to HTTPS or SSH, depending on your settings. As a result, you don't need to change your default protocol.
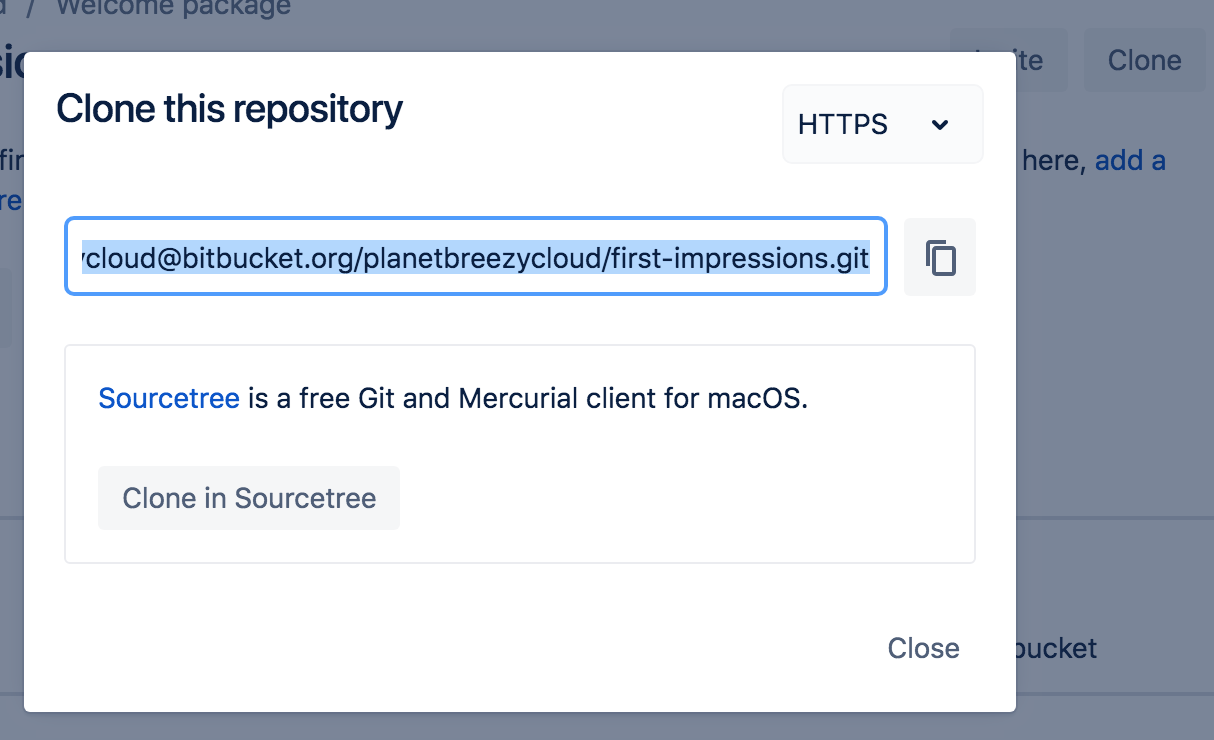
2. Copy the clone command.
3. From a terminal window, change into the local directory where you want to clone your repository.
$ cd ~/<path_to_directory>4. Paste the command you copied from Bitbucket, for example:
$ git clone https://breezy@bitbucket.org/powerstars/first-impressions.git

Cloning into 'first-impressions'...
Password for 'https://breezycloud@bitbucket.org':
remote: Counting objects: 6, done.
remote: Compressing objects: 100% (5/5), done.
remote: Total 6 (delta 1), reused 0 (delta 0)
Unpacking objects: 100% (6/6), done.
For more details, check out our cloning video to see how it's done:

Step 2. Create a branch and pull in locally
Now that your repository is all set up, next comes the fun part. You can create branches locally or through Bitbucket. Let's create one from Bitbucket for the purposes of this tutorial.
1. Click Branches from the left navigation. You'll see that you already have one branch — your primary branch, main.
2. Click Create a branch in the top right corner.
3. After you create a branch, you need to check it out on your local system. Bitbucket provides you with a fetch and checkout command that you can copy and paste into your command line, similar to the following:
$ git fetch && git checkout my-updates

Password for 'https://breezycloud@bitbucket.org':
From https://bitbucket.org/planetbreezycloud/first-impressions
 * [new branch]      my-updates -> origin/my-updates
Branch 'my-updates' set up to track remote branch 'my-updates' from 'origin'.
Switched to a new branch 'my-updates'
As you can see, you've switched to your new branch locally, allowing you to work on and push that separate line of code.
Step 3. Make a change to the branch
Now, it's your turn to makes some changes to your repository. Like the file mentions, you can go as crazy or as simple as you like. Change up the CSS. Add more files. Compose a space opera. Or simply answer the questions.
1. Open the survey.html file (or whatever you named it) with a text editor.
2. Make your changes, big or small, and then save and close the file.
3. From your terminal window, you should still be in the repository directory unless you've changed something. Display the status of the repository with git status. You should see the survey.html file you modified. If you added or modified other files, you'll see those as well.
$ git status
On branch my-updates
Your branch is up-to-date with 'origin/my-updates'.
Changes not staged for commit:
  (use "git add <file>..." to update what will be committed)
  (use "git checkout -- <file>..." to discard changes in working directory)
        modified:   survey.html
no changes added to commit (use "git add" and/or "git commit -a")
4. Add your changes locally with git add:
$ git add survey.html5. Commit your changes locally with git commit -m "your commit message":
$ git commit -m "Answered questions"
[my-updates 7506040] Answered questions
 1 file changed, 3 insertions(+), 3 deletions(-)
6. Enter git push origin to push the changes to your branch on Bitbucket, and enter your password to finish pushing changes.
$ git push origin my-updates

Password for 'https://breezycloud@bitbucket.org':

Counting objects: 3, done.

Delta compression using up to 8 threads.

Compressing objects: 100% (3/3), done.

Writing objects: 100% (3/3), 350 bytes | 350.00 KiB/s, done.

Total 3 (delta 1), reused 0 (delta 0)

To https://bitbucket.org/planetbreezycloud/first-impressions.git

   454ccaf..7506040  my-updates -> my-updates

Branch main set up to track remote branch main from origin.
7. From Bitbucket, click the Source page of your repository. You should see both branches in the dropdown. Any other commits you make to my-updates will also appear on that branch.
If you're using Sourcetree
Step 1. Clone your repository to your local system
Let's get it onto your local system so that you can really start working on it.
1. From the repository, click + in the global sidebar and select Clone this repository under Get to work.
2. Click the Clone in Sourcetree button.
3. From the Clone New window, update the Destination Path to .

4. Click the Clone button.
To see how it's done, check out the Clone a repository part of our video here:
Step 2. Create a branch and pull in locally
Now that your repository is all set up, next comes the fun part. Because branches aren't only a Bitbucket concept, you can create one locally. However, we're going to create one from Bitbucket for the purposes of this tutorial.
1. Click Branches from the left navigation. You'll see that you already have one branch — your main branch.
2. Click Create a branch in the top right corner.
3. Enter a Branch name and click Create. If you aren't sure what to name your branch, go with something like my-updates.
4. After you create a branch, you need to check it out from your local system. To do so, click the Check out in Sourcetree button.
5. From the Checkout Existing dialog in Sourcetree, click Checkout.
Now you've got a branch in Bitbucket and it's checked out to your local system, allowing you to work on and push that separate line of code.
Step 3. Make a change to the branch
Now, it's your turn to make some changes to your repository. Like the file mentions, you can go as crazy or as simple as you like. Change up the CSS. Add more files. Compose a space opera. Or simply answer the questions.
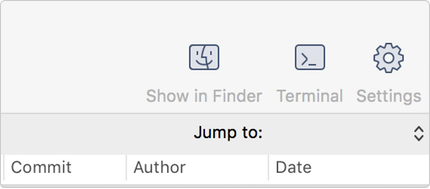
1. From the repository in Sourcetree, click the Show in Finder button.
2. Open the survey.html file (or whatever you named it) with a text editor.
3. Make your changes, big or small, and then save and close the file.
4. Open Sourcetree and notice that your repository has Uncommitted changes.
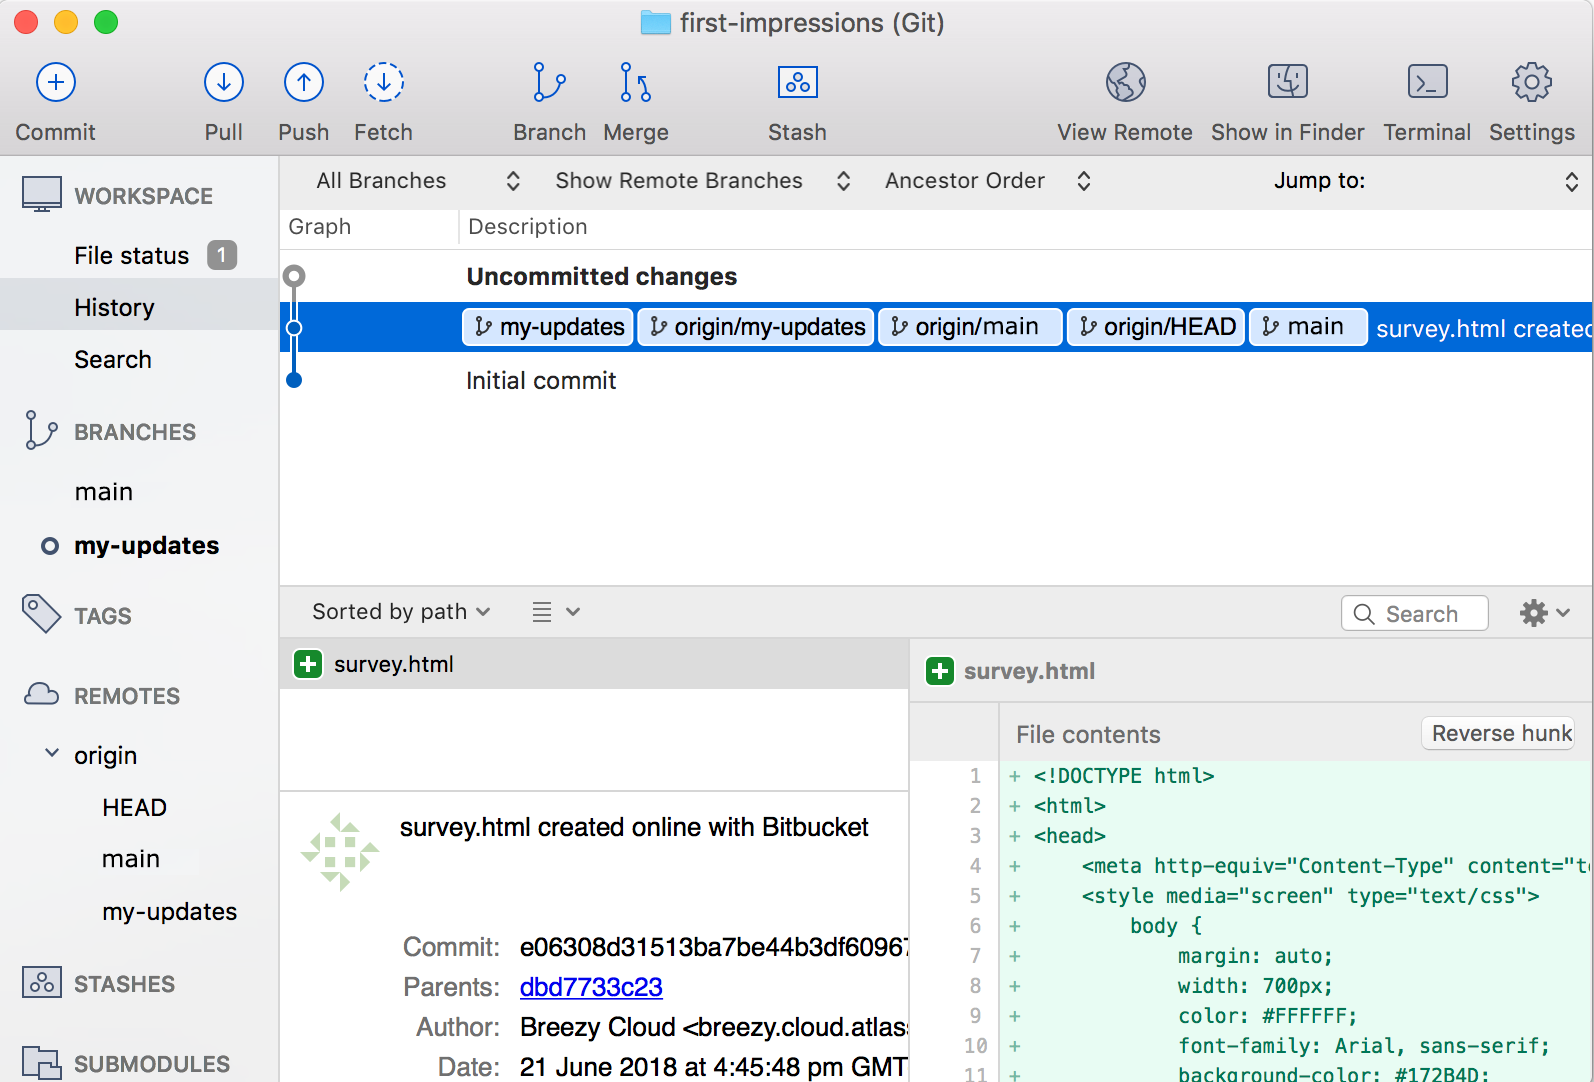
5. (Git only) Add the file to the staging area:
1. Select the Uncommitted changes line.
2. From the Unstaged files list, place a checkmark next to the survey.html file (and any other files with uncommitted changes).
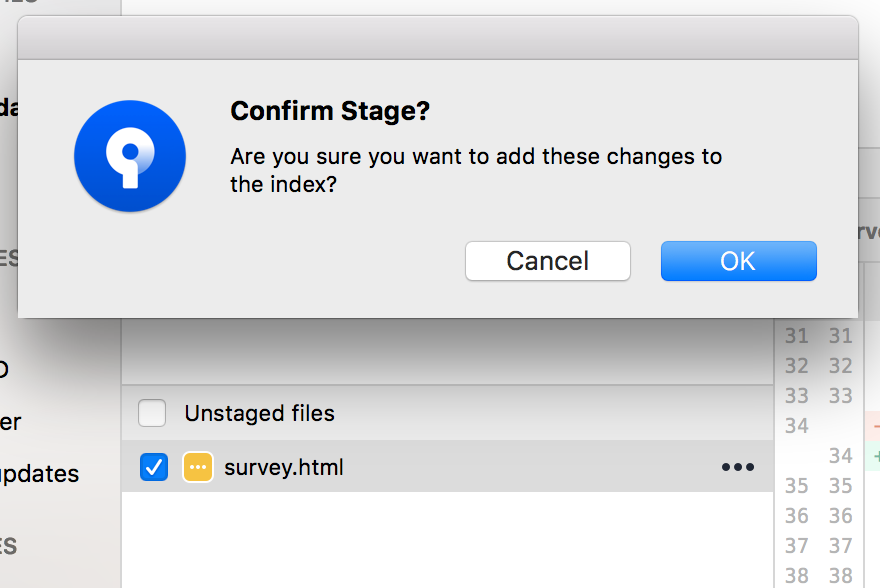
3. From the Confirm Stage? dialog, click OK.
6. Click the Commit button at the top to commit the file.
7. Enter a commit message in the space provided, something like Answered questions.
8. Click the Commit button under the message box. When you switch back to the view, you see that the file has been committed but not pushed to the Bitbucket repository.
9. From Sourcetree, click the Push button to push your committed changes.
10. From the dialog that appears, click OK to push your branch with the commit to Bitbucket.
11. From Bitbucket, click the Source page of your repository. You should see both branches in the dropdown. Any other commits you make to my-updates will also appear on that branch.
Create a pull request to merge your change
To add reviewers to check and approve your code prior to merging, your next step is to create a pull request. In addition to a place for code review, a pull request shows a comparison of your changes against the original repository (also known as a diff) and provides an easy way to merge code when ready.
Step 1. Create the pull request
You need a branch to create a pull request. Good thing you already have one.
1. From your repository, click + in the global sidebar. Then, click Create a pull request under Get to work.
Bitbucket displays the request form.
2. Complete the form:
1. You've already got an automatic Title, your last commit message.
2. Add a Description if you'd like.
(Optional - adding a reviewer) If you need someone to review and/or approve your code prior to merging, add them in the Reviewers field. You can see that Breezy Cloud was added as the reviewer to the example pull request below.
In order to add a reviewer to a pull request, you must first grant the user access to your repository by adding them to a group. For more information and detailed steps, refer to the following: Grant repository access to users and groups. Note: You can always create the pull request and then add reviewers later.
When you're done, the form will look something like this:
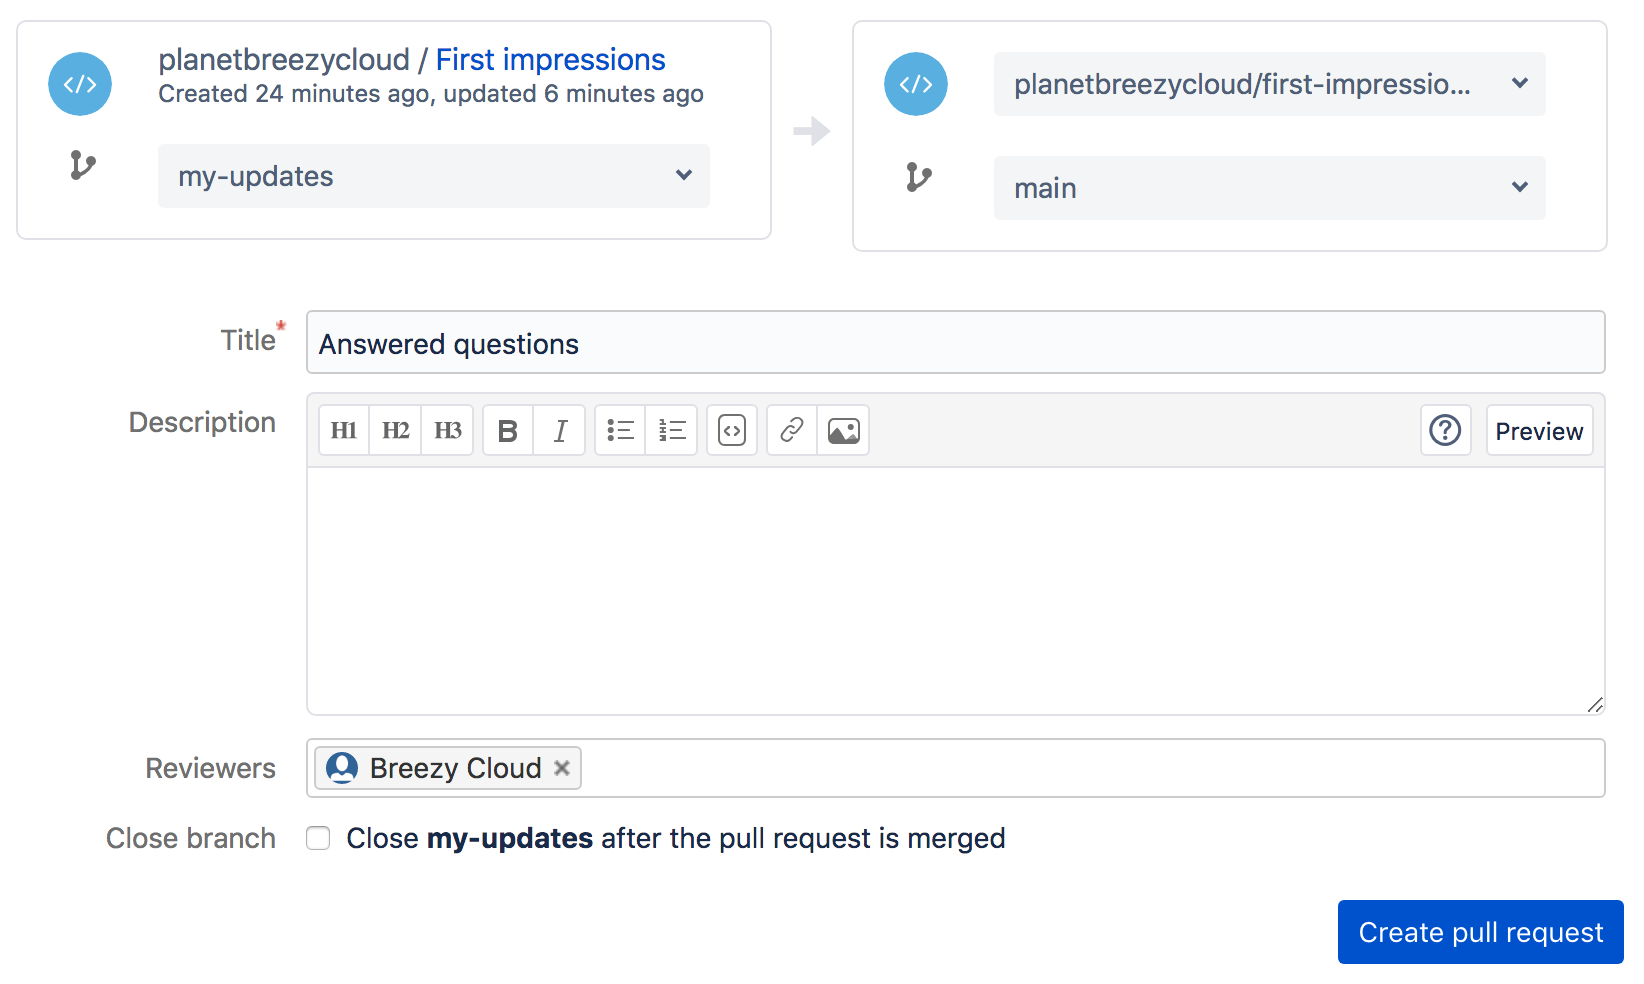
3. Click Create pull request.
Step 2. Merge your pull request
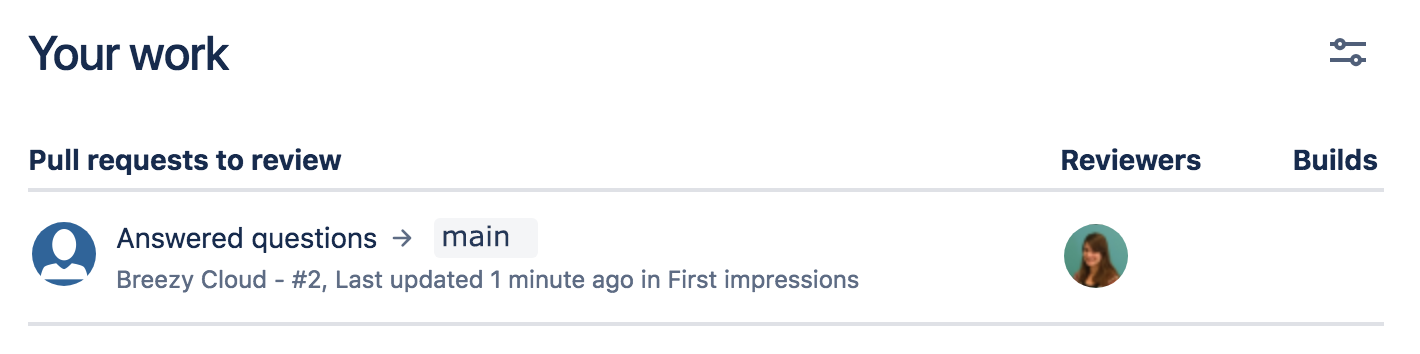
Not so fast! You may have noticed the Merge button at the top. Before you click it, you need to wait for an approval of your changes. In addition to the email notification your teammates receive, they'll also see the pull request appear under Pull requests to review on the Your work dashboard.
From the pull request, the reviewer can view the diff and add comments to start a discussion before clicking the Approve button.
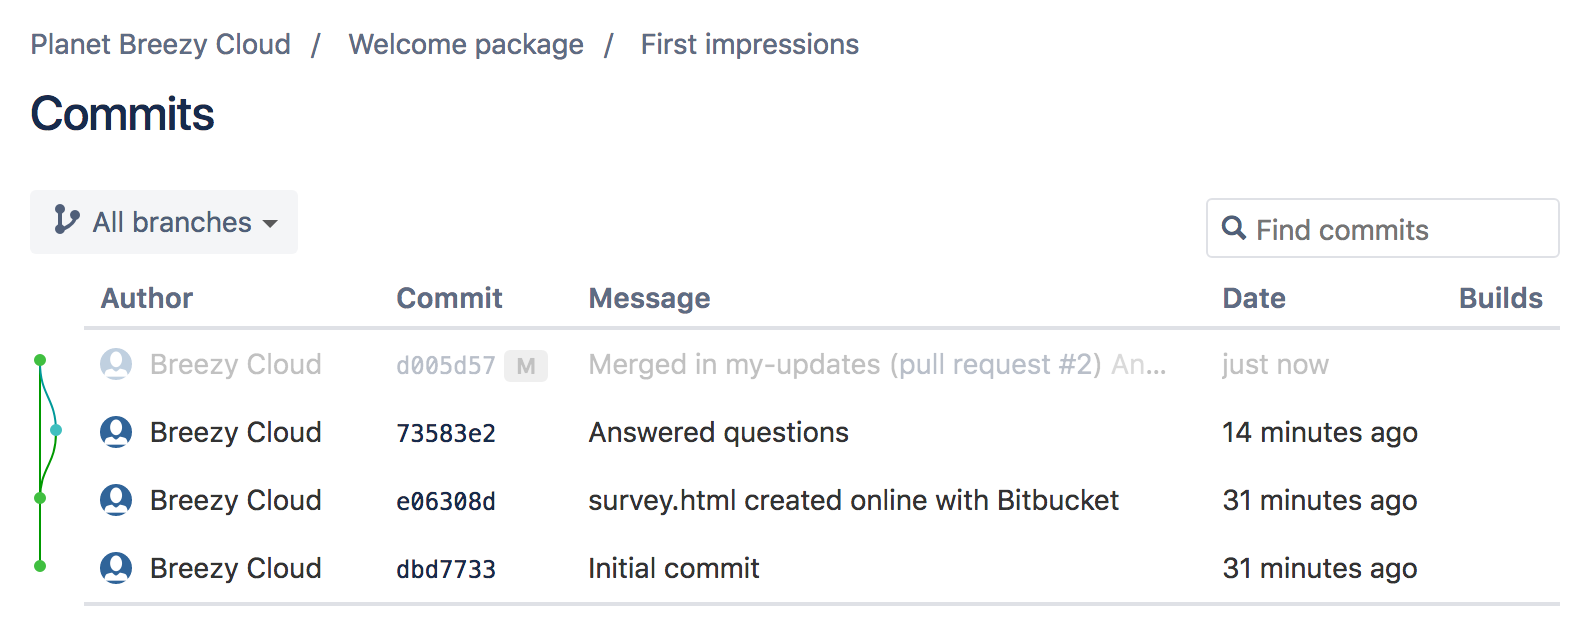
When someone approves your pull request, you'll get an email notification. Once you've got the approvals you need (in this case just one!), you can merge. From the pull request, click Merge. And that's it! If you want to see what it looks like when your branch merges with the main branch, click Commits to see the commit tree.
Share this article
Next Topic
Recommended reading
Bookmark these resources to learn about types of DevOps teams, or for ongoing updates about DevOps at Atlassian.

Bitbucket blog
DevOps learning path