Set up your site and spaces
Before you begin this tutorial, sign up for your free trial of Confluence Cloud. This guide will help you set up your first project, so keep this tab open while you sign up. Go on, we'll wait here.
This guide is for Confluence Cloud. If you’re interested in one of our self-managed options, go here >>

If you’re a Confluence Data Center user, check out this tutorial on how to create and edit pages in Confluence.
Customize your space overview
Each space comes with an Overview that you can use to tell team members and other stakeholders all about the purpose of your space and what they will find in it. If you created your space from a space template, your overview will come with built-in features to help you make the most of your space. Even so, you may find adding your own touch lets you turn your overview into the perfect hub for everything your team needs.
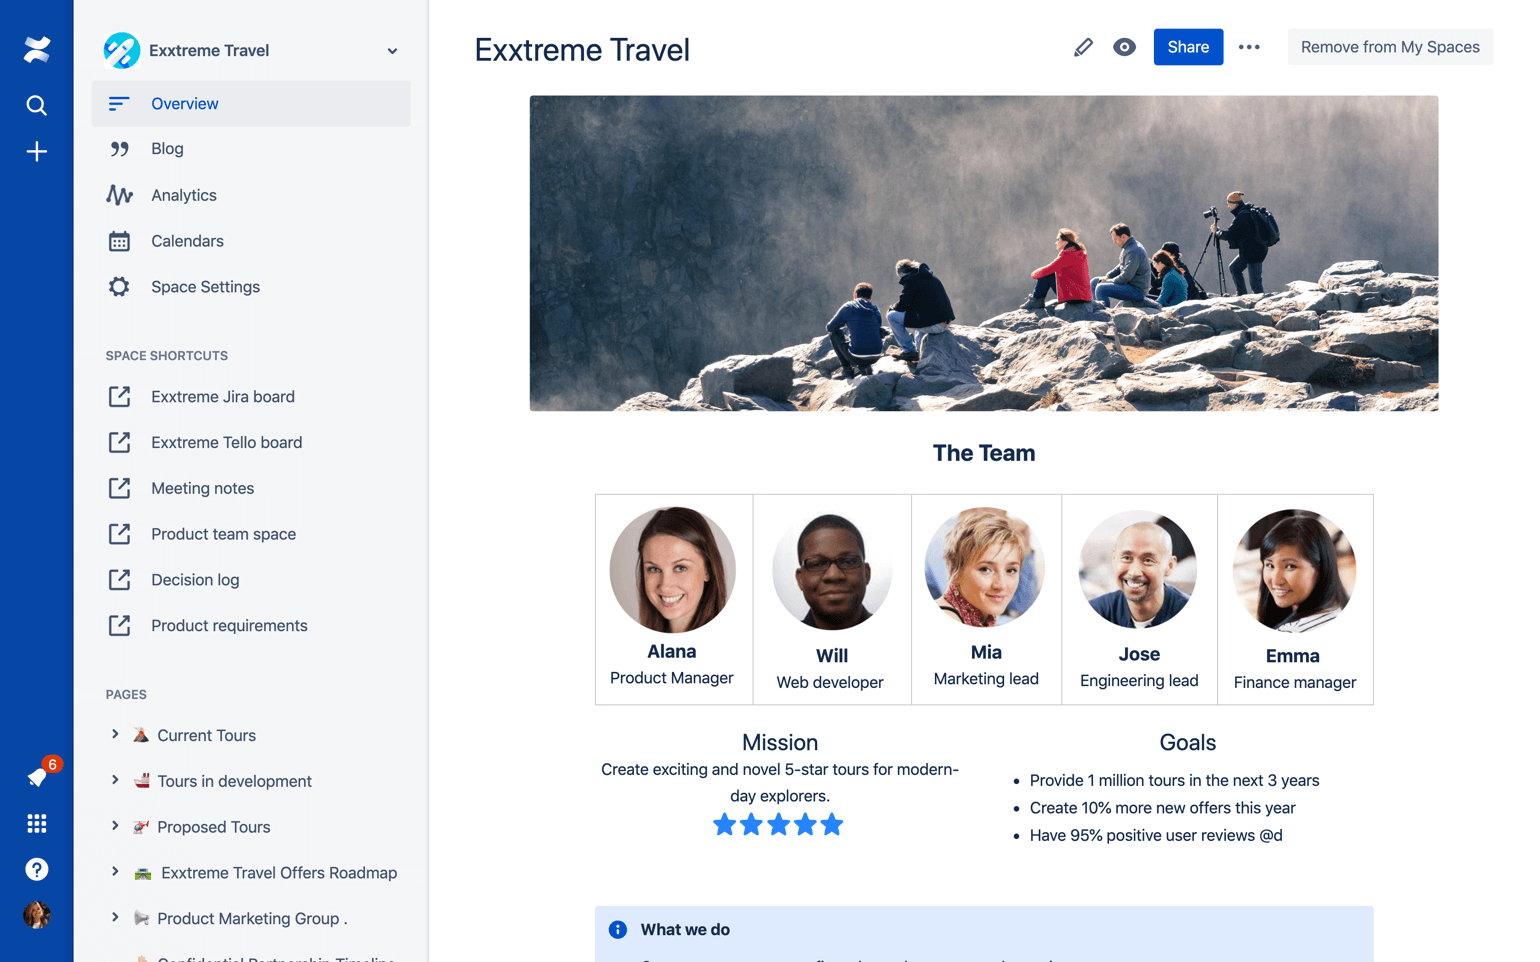
To customize your overview, select the pencil icon (  ) and edit the overview just like you would any other page.
Try these tricks to make your overview pop:
- Upload a banner or logo to help people identify your space at a glance
- Describe your team’s mission and goals and add links to key pages
- Add a table of contents, team calendar, or roadmap
For more information on how to craft a great overview page, check out the Confluence Cloud documentation or this blog post.

Need a quick win? Get started fast with the team homepage template from Hubspot.
Organize your content
Now that you’ve created your first space, it’s time to get organized. The goal is to make your space easy to navigate so team members and other stakeholders can find the content they’re looking for quickly.
To learn more about navigation, see Guide 4: Navigate Confluence.
Use parent pages to group similar content
In Confluence, you can nest pages underneath other pages, creating a hierarchy of content in each space. This hierarchy is reflected in the page tree, which appears in the space sidebar to the left of the active page.
To use the page tree to your advantage, create a page for each task or project your team is involved with and nest related child pages underneath it. For example, if your team conducts retrospectives every 2 weeks, you might have a top-level page called “Retrospectives” with a page for each retrospective you’ve conducted nested beneath it.
The example below shows how one Atlassian team utilizes this strategy to organize their space:

Create shortcuts for important pages
Confluence lets you create unique space shortcuts – links that are pinned to the space sidebar, above the page tree – for every space in your site. Use these to highlight important content so it’s easy to find.
To create your first space shortcut, navigate to your space and select + Add shortcut in the sidebar. For more information on space shortcuts, including how to edit or remove existing space shortcuts, see Customize your space.
Label pages and attachments
Labels make it a breeze to identify related pages and attachments, so team members and other stakeholders can find what they’re looking for.
- Open the page in Confluence.
- Select the label icon () in the bottom right.*
- Enter the name of the label you’d like to apply. If a label with that name already exists, it will appear in the autosuggest menu.
- Select Add to apply the label.
- Select Close to exit the dialog.
*If you’re editing the page instead of viewing it, select the more actions menu (•••) in the top right, then select Add labels.
Give labels transparent and meaningful names. For example, the label you use for meeting notes might be called meeting-notes or meetings. If you add that label to every page you use to capture meeting notes, then you can browse all your meeting notes – within a single space or across your entire Confluence site – just by selecting the label. You can also display all pages with the same label on a page or search content by label to find relevant pages and attachments more easily. For more information about labels, see Use labels to organize your content.
If you apply a label to a page template, that label will automatically be applied to any page you create with that template.
Keep content organized
Set aside time to review the content in your space, delete or archive obsolete content, and move pages around to maintain the structure you want. If you’re a site admin, set up rituals around maintaining your space with people on your team and encourage space admins to carve out time to review and update their spaces with the people who use them.
- Recruit champions to help you keep tabs on your spaces.
- Audit the content in the space and review analytics.
- Identify obsolete or out-of-date pages and create an action plan.
- Review and adjust your information architecture to meet current needs.
For more information, see this blog post.
Manage users and permissions
As a Confluence admin or site admin with a paid subscription to Confluence, you can manage users, groups, and permissions manually, or you can turn on public signup and let users create their own accounts. For information about permissions in the free plan, see our documentation.
Manage global permissions
To manage global permissions, you must have the Confluence administrator permission.
Global permissions apply to your entire site and let you control:
- Who can create a space or personal space
- Who can access user profiles
- Whether unlicensed users can access your site
- Whether apps can access your site
Licensed users
To edit global permissions for licensed users:
- Click the gear icon in the top nav bar to go to your site’s settings.
- In the settings sidenav, go to Global Permissions (under Security).
- Make sure you’re in the User groups tab (or the Guest access tab, if you want to manage access for guests), then click Edit.
- Check the box to grant permission, or uncheck the box to revoke it.
- Click Save when you’re done.
Changes to global permissions aren’t active until you click Save.
You can search and filter user groups while in edit mode.
Unlicensed users
There are two ways to manage users on Confluence who don’t have Confluence licenses:
Jira Service Management unlicensed access
- Under the tab JSM access, you can choose to allow licensed Jira Service Management (JSM) agents to view content on your Confluence site, even if the agents don’t have a Confluence license. Learn more
Anonymous access
- Under the Anonymous access tab, you can choose to allow space admins to make their spaces accessible by all unlicensed users (aka, “anonymous users” or “anyone on the internet”). Learn more
Manage space permissions
To edit space permissions, you must be a space administrator. If you are a Confluence administrator, you can recover space administrator permissions for any space on your site. For more information, see What are space permissions?
Space permissions let you control:
- Who can see the content in a space
- Who can comment on that content
- Who can create, edit, or upload content
Confluence is open by default. That means that unless you make space permissions more restrictive, everyone with access to your Confluence site can access content in any given space. Space administrators can set permissions when they create a new space and adjust them later. Anyone who can edit a page can edit its restrictions.
To get to space permissions:
- Go to the space.
- Select Space settings in the Confluence sidebar.
- Select the Permissions tab in space settings.
*The Permissions tab will only appear if you're a space admin in that space.
You can manage space permissions for individuals or for entire groups. If your site is public, you can also grant anonymous access to an individual space. For more information, see Set up public access.
To learn more about all you can do with space permissions, see Assign space permissions.
How should I set up space permissions?
While some Confluence customers use the same permissions scheme for every space on their site, others set space permissions differently for spaces with different purposes or use cases.
| | Target audience | Permissions |
|---|---|---|
| Share help and support information with customers | Target audience
| Permissions
|
| Share policies, tutorials, and troubleshooting tips with your organization | Target audience
| Permissions
|
| Collaborate on a project or initiative with others | Target audience
| Permissions
|
| Share sensitive information (e.g., about personnel, payroll, or legal matters) | Target audience
| Permissions
|
Invite team members to your site
Once you’ve set up your site and configured overall permissions, it’s time to invite team members to start using Confluence Cloud (along with any other Atlassian products on your site).
- Select the settings wheel on the top right (next to your avatar).
- Select User management on the sidebar.
- Select Invite users from the top right.
- Enter the email address of each team member you’d like to invite. You can invite up to 10 email addresses at a time.
- Select a role for invited team members. This determines the level of access they have to your site as a whole.
- Select the products you’d like your team members to access.*
- Select the groups you’d like them to belong to.
- Personalize your invitation, then select Invite user.
*This only applies to team members with the Basic role.
As a site admin, you can update roles, access, and groups for users at any time. You can also remove a user by revoking site access, deactivating their account, or even deleting it (for example, when an employee leaves your company). For more information, see Invite and remove users.
Confluence Overview
Learn what Confluence is and whether it’s a good fit for your team or organization.
Confluence best practices
Learn how to integrate Confluence with your favorite business tools.