Agent onboarding guide
Introduction
This guide is intended to help new agents get started with Jira Service Management.
What do agents do in Jira Service Management?
Agents in Jira Service Management respond directly to help desk questions and add customers to service projects. Agents are added to the Service Desk Team role in your service project. Agents can:
- View the portal, queues, reports, and SLA metrics within a service project
- View, add, edit, and delete customer-facing and internal comments on an issue
- Add customers to a service project
- View, create, and manage content in the knowledge base
- Manage customers and organizations
Accept your invitation to be a service project agent
To join the service project team as an agent, you’ll first need to accept the email invite your admin sent you.
To accept your invitation:
- Go to your email client and log in with the email your admin invited you with.
- Find your invitation email, which includes the name of the admin who invited you.
- Click Join them now and set up your Atlassian account.
- Follow the steps to create an Atlassian account, if you don’t already have one.
Go to your service project
If you only have one service project, we’ll take you directly into it. However, if you’ve been added to multiple projects or have access to other Atlassian cloud apps, you may need to navigate to your service project.
To go to your service project:
- Go to (
 or
or  ) > Projects.
 - Select your service project.
Navigating Jira Service Management
Once you’re in your service project, you can use the sidebar to navigate. Here’s an overview of some of the most commonly used entries in the sidebar.
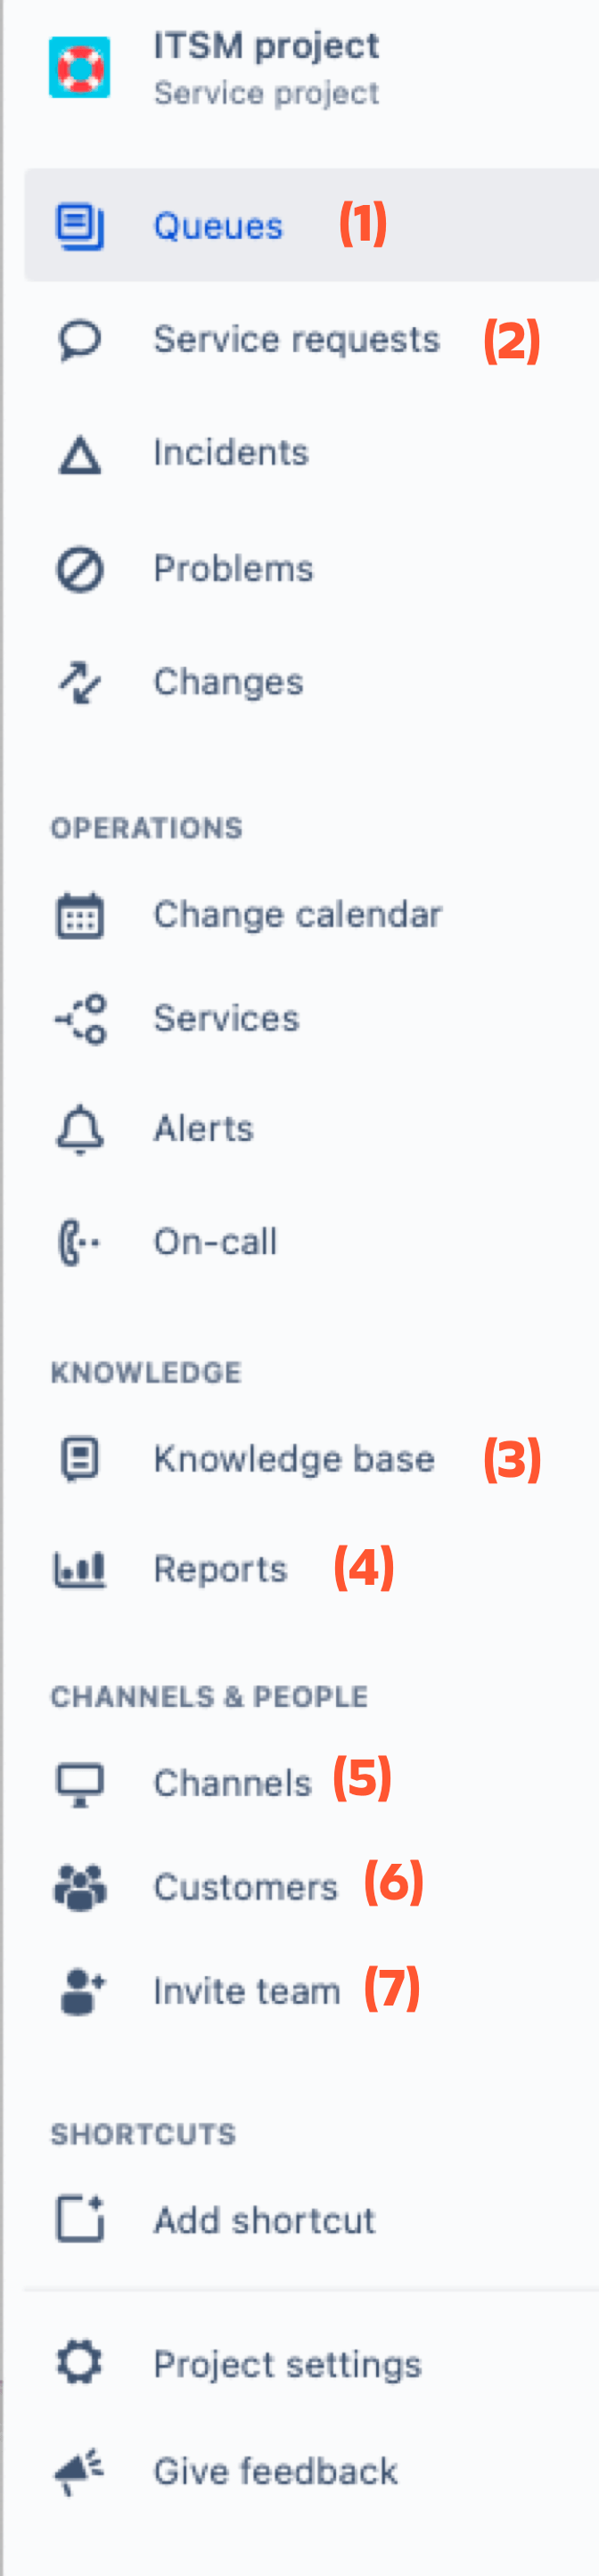
- Queues
View issues that customers have submitted to your service desk. Queues are where you work on customer requests. Your project admin sets up and configures queues to triage requests. You can then view and work on these requests from your queues. - Service requests
Track service request tickets customers have logged, monitor SLAs, and communicate with customers. To raise a service request on behalf of a customer, either click here to My service requests → Create a service request ticket or select Create on the top nav. - Knowledge base
Search your team's knowledge base or create an article. A knowledge base stores helpful articles, such as how-tos and frequently asked questions (FAQs) that your team and customers can reference. - Reports
View reports about your team's SLA goals, knowledge base, and workload. You can also use reports to visualize trends in your service project. - Channels
View your service project's customer portal and email address. Channels are where you find the ways customers send you requests. Here, you can see the details of your email, help center, and widget channels. - Customers
View your customers and requests, and invite new customers to the service project. See all the customers and organizations who can send requests to your service project. You can view, add, or manage customers here. - Invite team
Invite another agent to work on your project. You can add existing agents from other service projects to work on your project.
How to’s: working on customer requests
Raise a request for a customer
While your customers can raise a request themselves through the portal and by email, sometimes you might need to raise a request for them. For example, if a customer requests help over the phone, you might want to raise a request for them in your service project.
To raise a request for a customer:
- From your service project, select Create.
- Select the request type most suited to your customer.
- Under Raise this request on behalf of, find your customer using the dropdown or enter their email address.
- Fill out the rest of the request details.
- Select Create.
Your customer will be emailed a link to their request. New customers will also receive an invitation to finish creating a service project account.
Once the request is raised, it’ll appear in your queues as an issue.
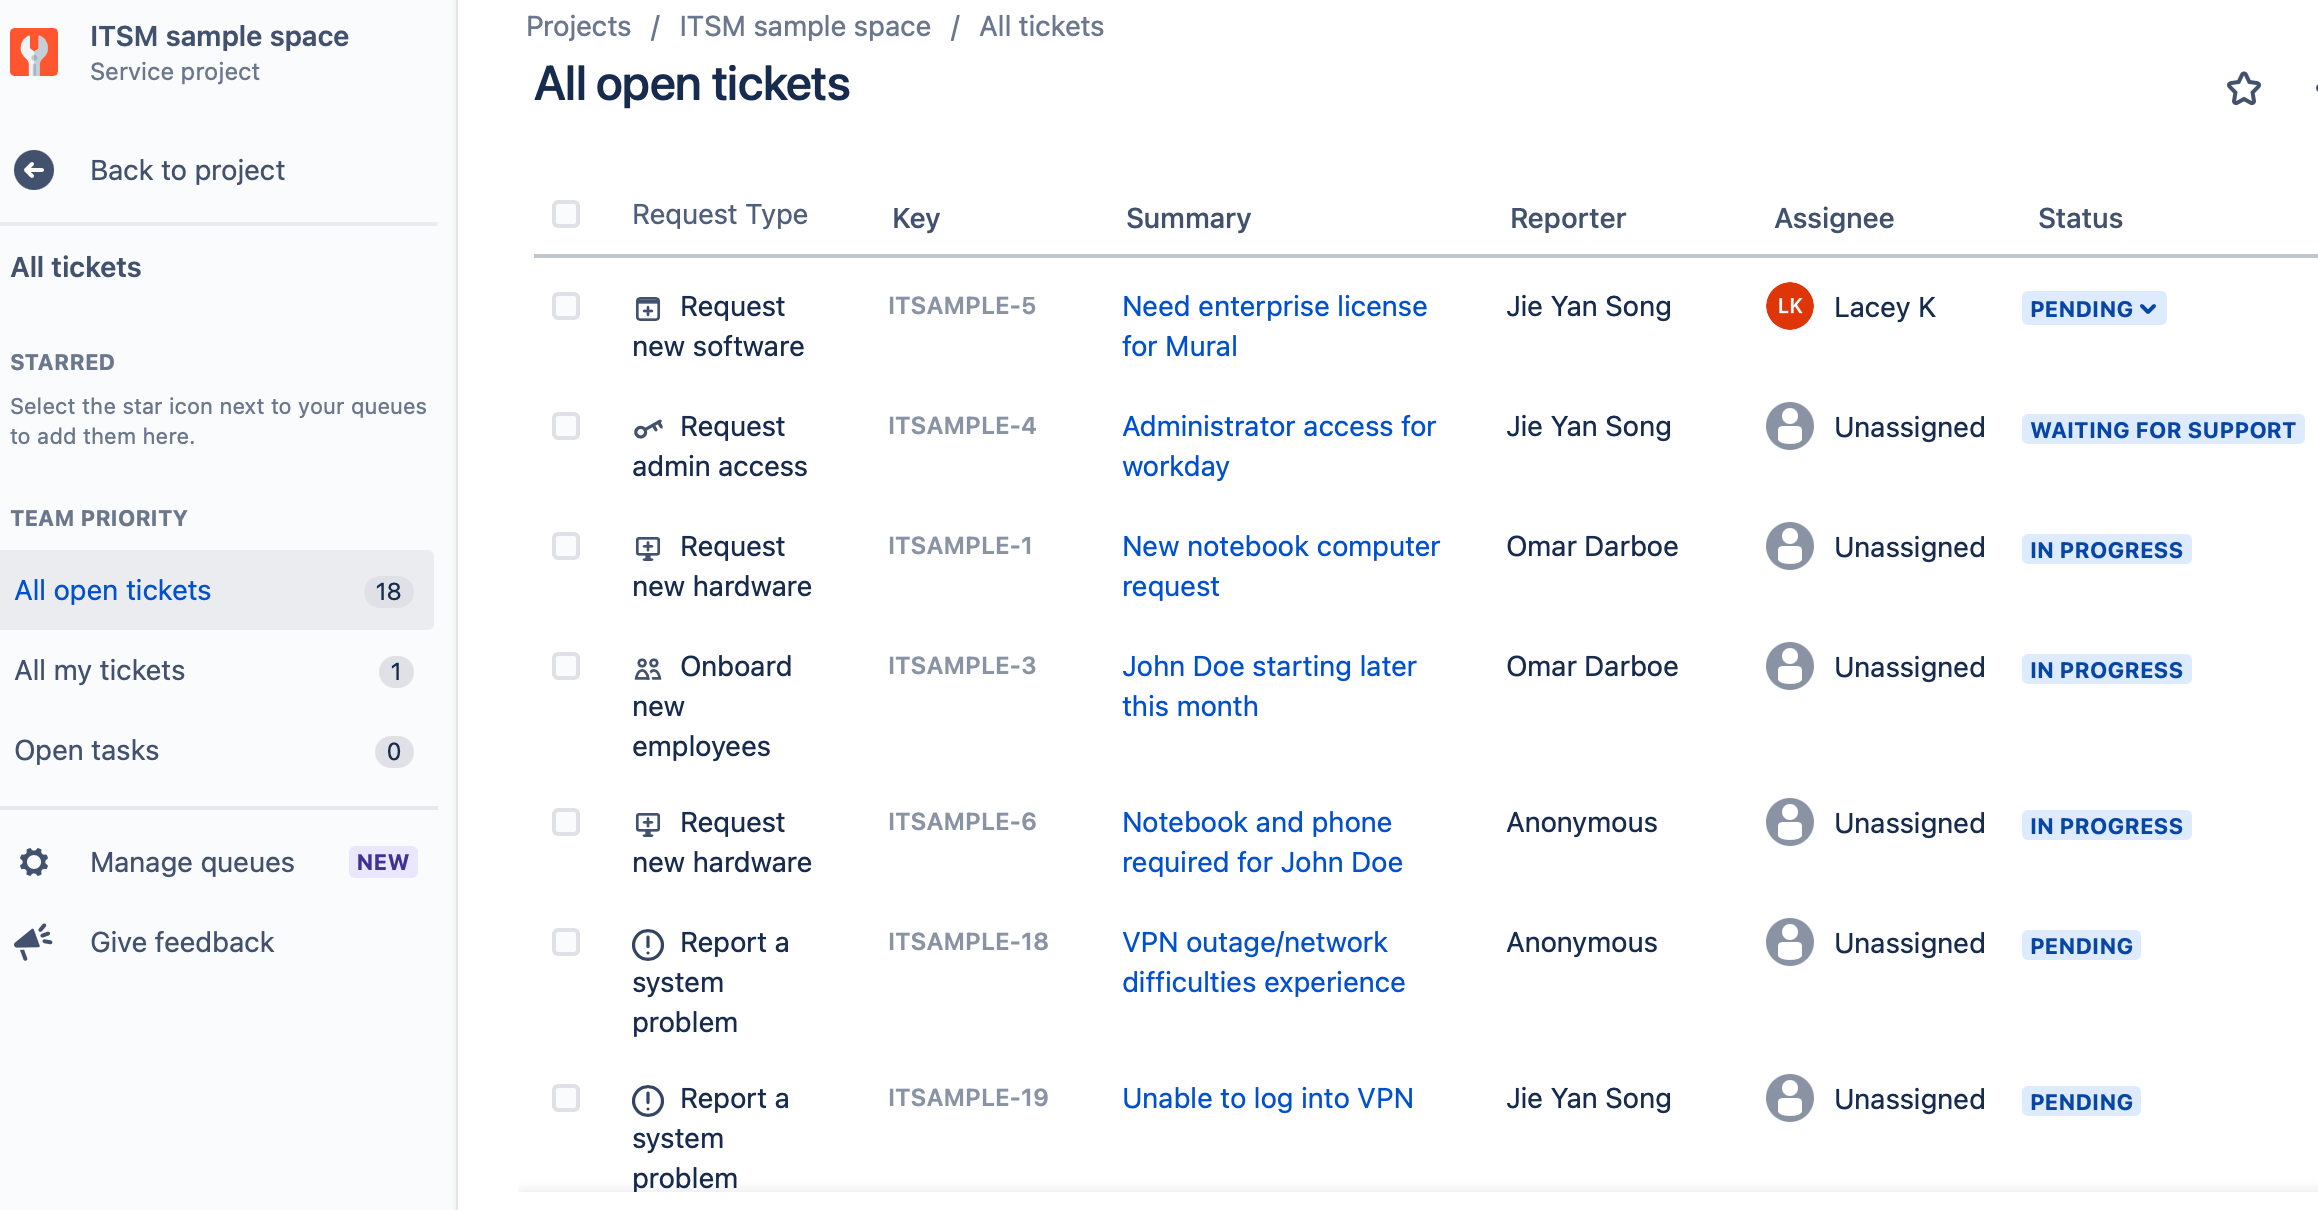
Check out your queues
Customer requests are organized into queues. Queues let you quickly view, triage, and assign requests as they come in. They also provide high-level information on an issue; usually a summary, status, and customer name. The IT service management template adds extra functionality to queues with ITSM-specific categories.
Queues are normally sorted by a Service Level Agreement (SLA) or goal for your team's service interactions. A clock on the issue indicates the time until your team's next target is due.
To find your queues:
- From your service project, go to Queues.
- Use the sidebar to switch between queues.
Dive into the issue view of a customer request
Now that you’ve learned where to work in your service project, let’s dive deeper into how you can help your customers.
Go to the issue view of a customer request
When a customer sends a request to your service project, it becomes an issue for your team to work on. This is the place where you’ll spend most of your time, so it’s important to understand well.
To see the issue view for a request:
- From your service project, go to Queues.
- Select the request you want to see the issue view for.
See everyone involved in a request
You can find everyone involved in a customer request in the issue view. This panel in the sidebar shows the service project agent working on the issue, the customer, and other people involved.
Here are the people you might see:
- Assignee: The person tasked with resolving the issue.
- Reporter: The customer who sent the request.
- Request participants and Organizations: Customers and groups of customers who can view and comment on the issue. They might be included if they’re interested in the outcome of the issue.
- Votes: People who vote for an issue are people who want the issue resolved.
- Watchers: Team members on your Jira site who receive notifications about the issue.
- Approvers: If the issue has approvers, this field displays people who are tasked with approving or declining the request.
Communicate with customer or service project team members
You can communicate with the customer who made the request from the issue view. Your conversation with the customer is recorded in the Activity section of the issue view.

To communicate from the issue view:
- Go to the Activity section of the issue view.
- Select Add internal note to post a comment that only your team can see, or Reply to customer to communicate with the customer.
- Type your comment.
- Select Save.
Transition an issue through its workflow
When you work on an issue, you can move it through its workflow. This depends on the request type your project administrator set up.
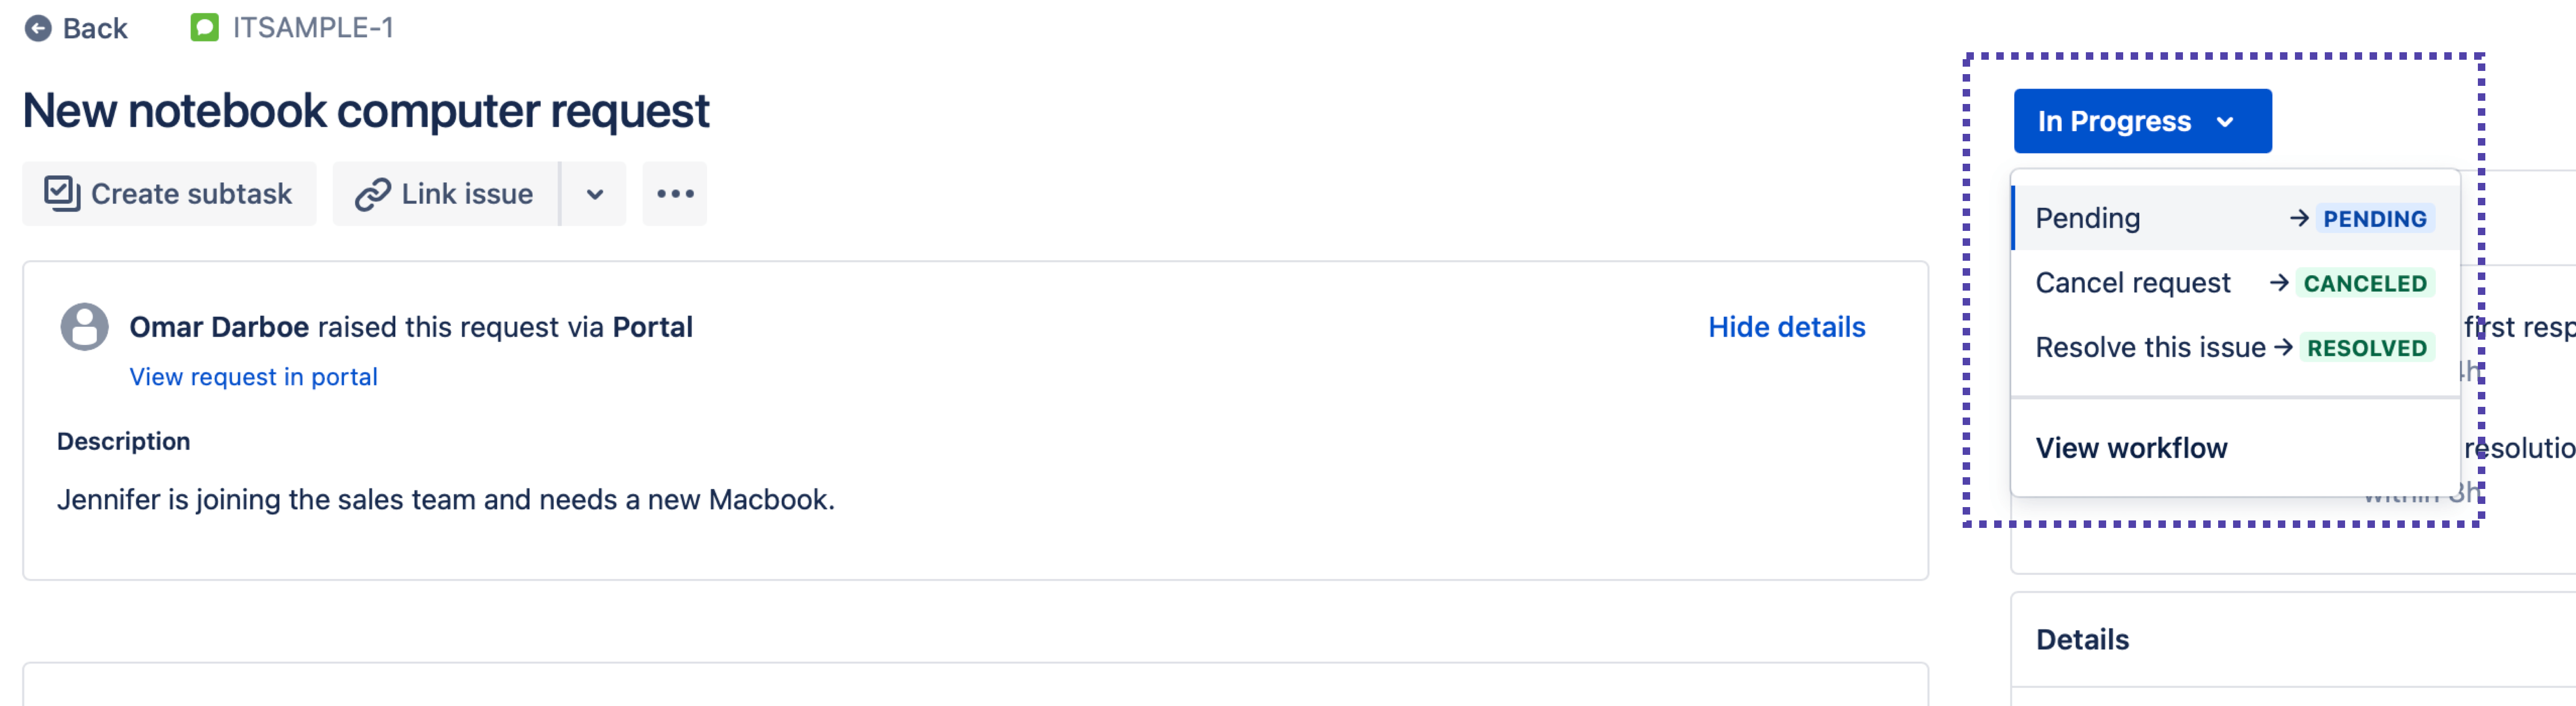
To transition an issue:
- Go to the issue view of the customer request you want to transition.
- Select the workflow status which opens the dropdown.
- Choose the status you want.
Usually, issues are completed when you transition them to a Resolved status. Not sure which status to select? While the workflow dropdown is open, select View workflow to see the issue’s workflow. Hover over the line connecting to your current workflow status. Note the transition name and select Close. Then, use the workflow dropdown to choose the transition you want.
See how customers send requests to your service project
Check out the online help center
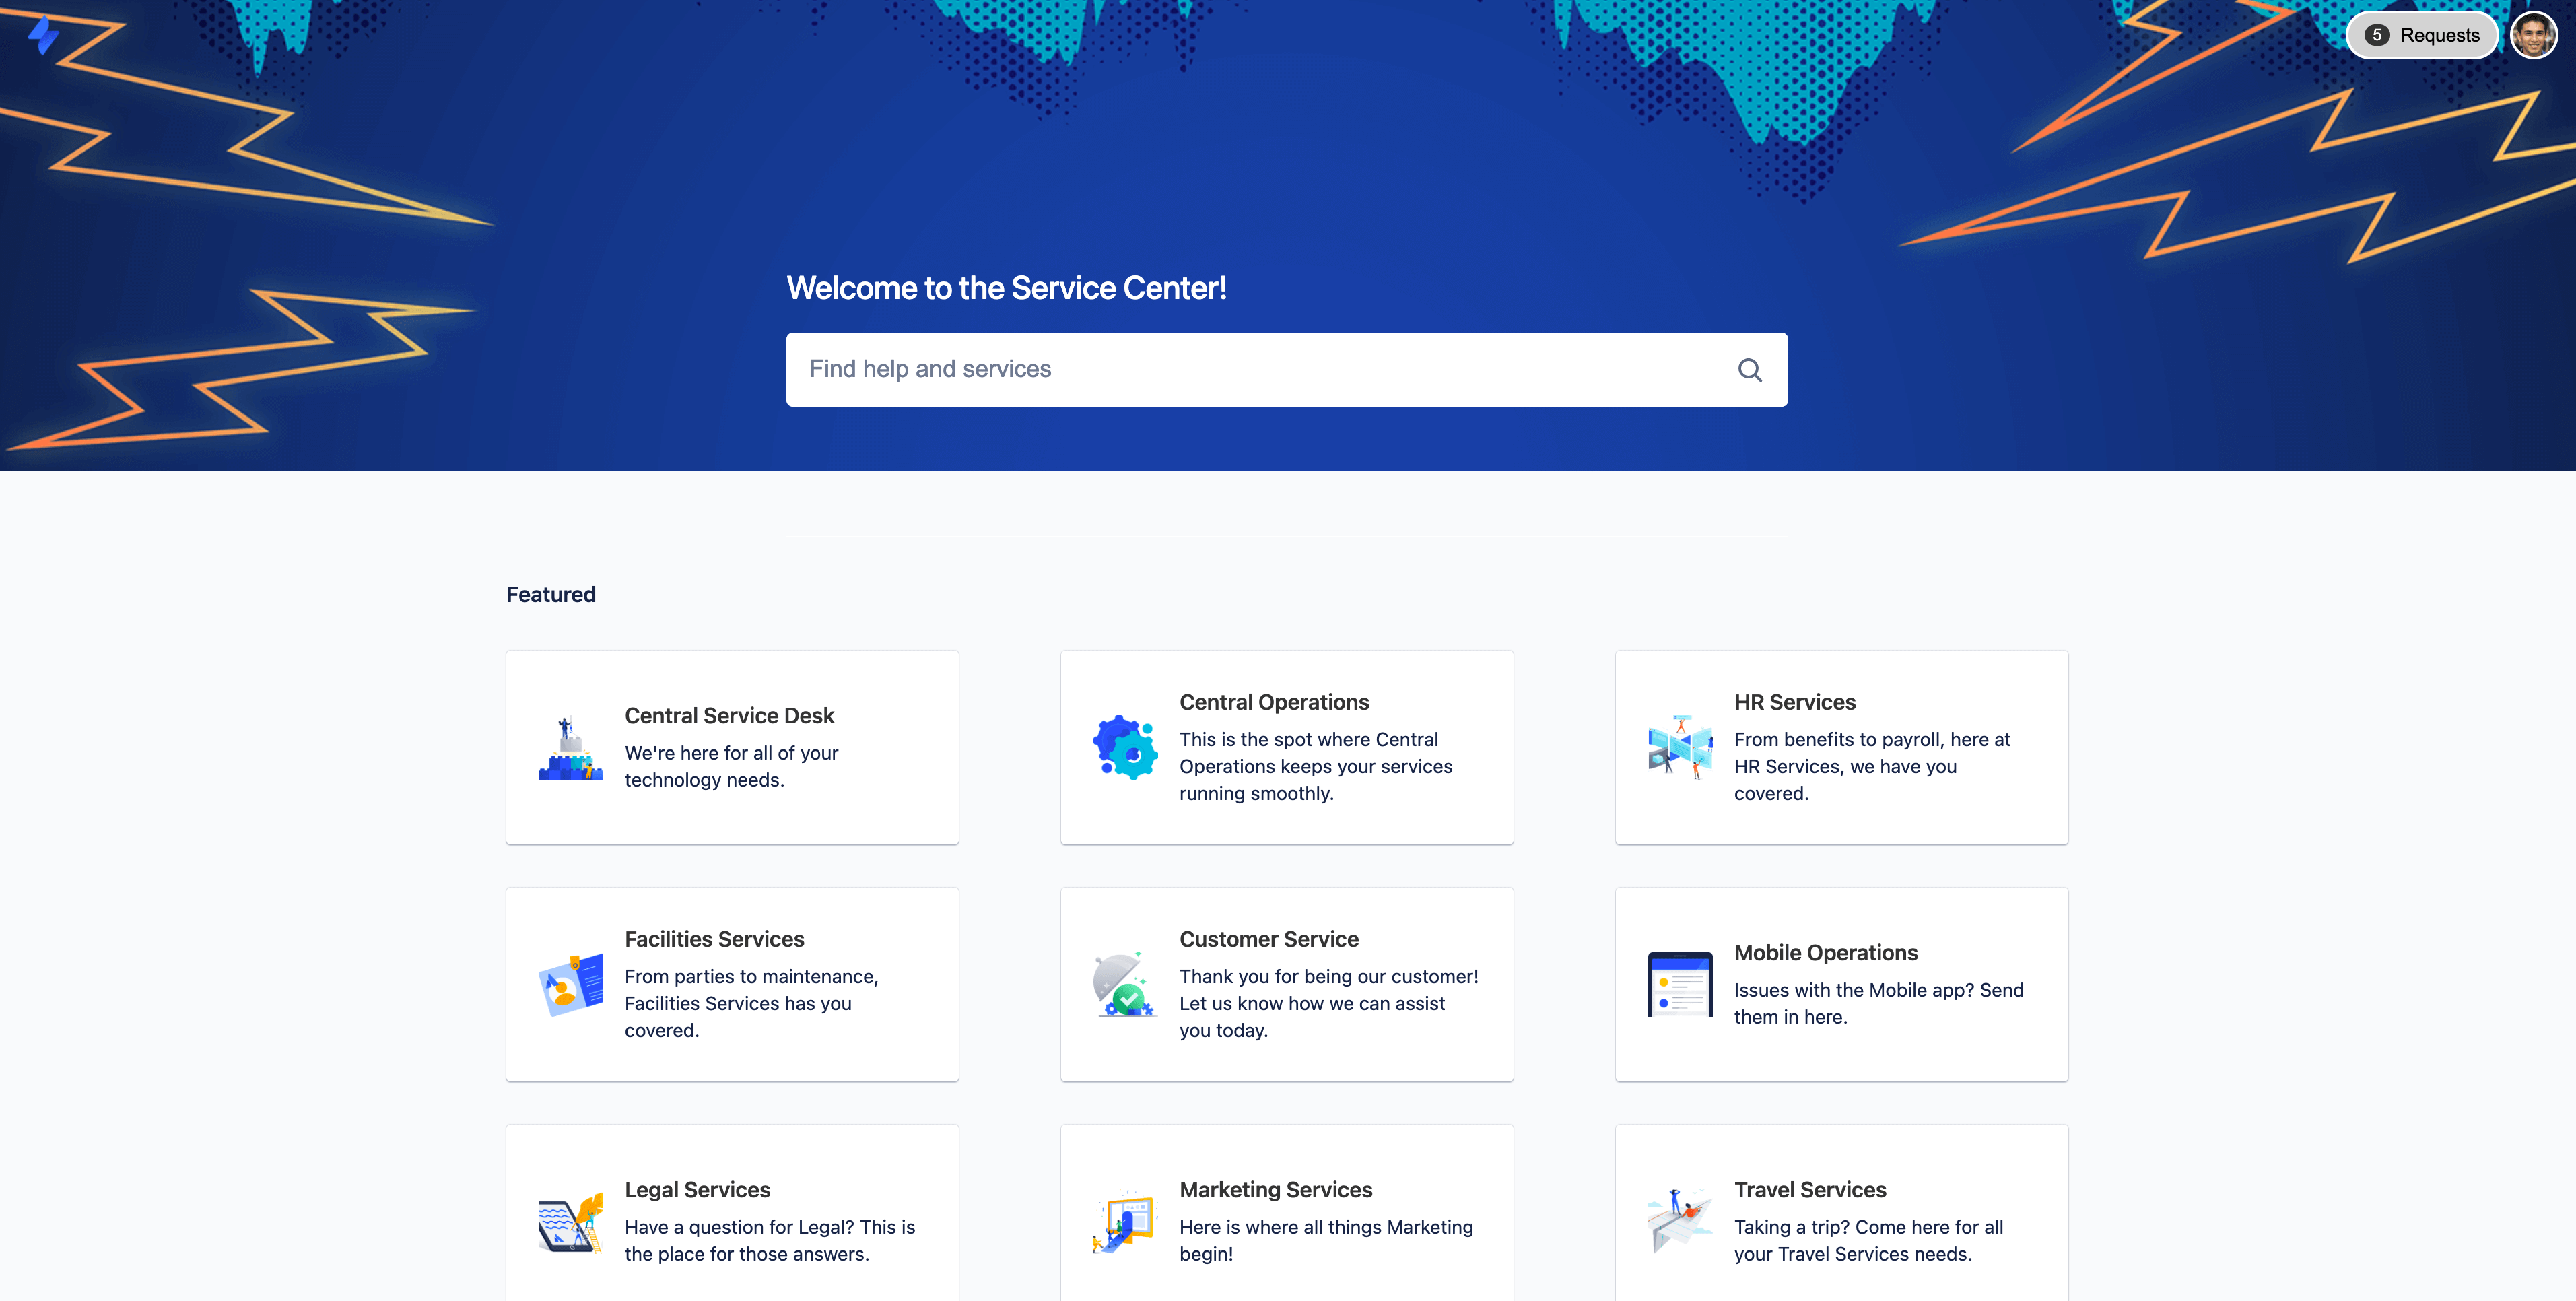
You can see how customers send requests by going to the help center. There, you can go through the same process that customers do to raise a request.
To check out the help center:
- From your service project sidebar, select Channels.
- Select Open when hovering over Help center.
Your project administrator can change the request forms on the portal by customizing request types.
Give customers an email address to send requests to
If your customers want to send requests to your service project via email, copy your service project’s email address and send it to them.
To view and copy your service project’s email address:
- From your service project sidebar, select Channels.
- Hover over Email.
- Select Configure.
- Under Default email account, select the Copy icon (
 ) next to your email address.
 - The email address will be copied to your clipboard.
Depending on the permissions set by your admin, email addresses CC’d in email requests may be added as new customers or request participants.
If the lower-left of your service project sidebar says you're in a team-managed project, check out these team-managed project articles instead.
Learn more about the difference between company-managed and team-managed projects.
Use your knowledge base to help customers self-service
Write knowledge base articles for your customers
Knowledge base articles let you share information and know-how with your customers. For example, if you get a lot of requests on how to access office wifi, you can write a how-to article explaining the steps.
You must add Confluence to your Jira Service Management site in order to use the knowledge base. Please follow the steps in this guide to add Confluence to your Jira Service Management site.
To write a knowledge base article:
- From your project sidebar navigation, select Knowledge base.
- Select Create article.
- Select Blank page or choose a template.
Templates come pre-populated with useful content and can help you structure your article better.
If you choose to use a template, select Next to name your article and add the required labels. Labels help users find articles faster. For example, for an article on setting up your printer, you can use the labels Printer and Set up. - Select Create.
- Write your article content. While writing, a draft is automatically saved.
- Select Publish when done.
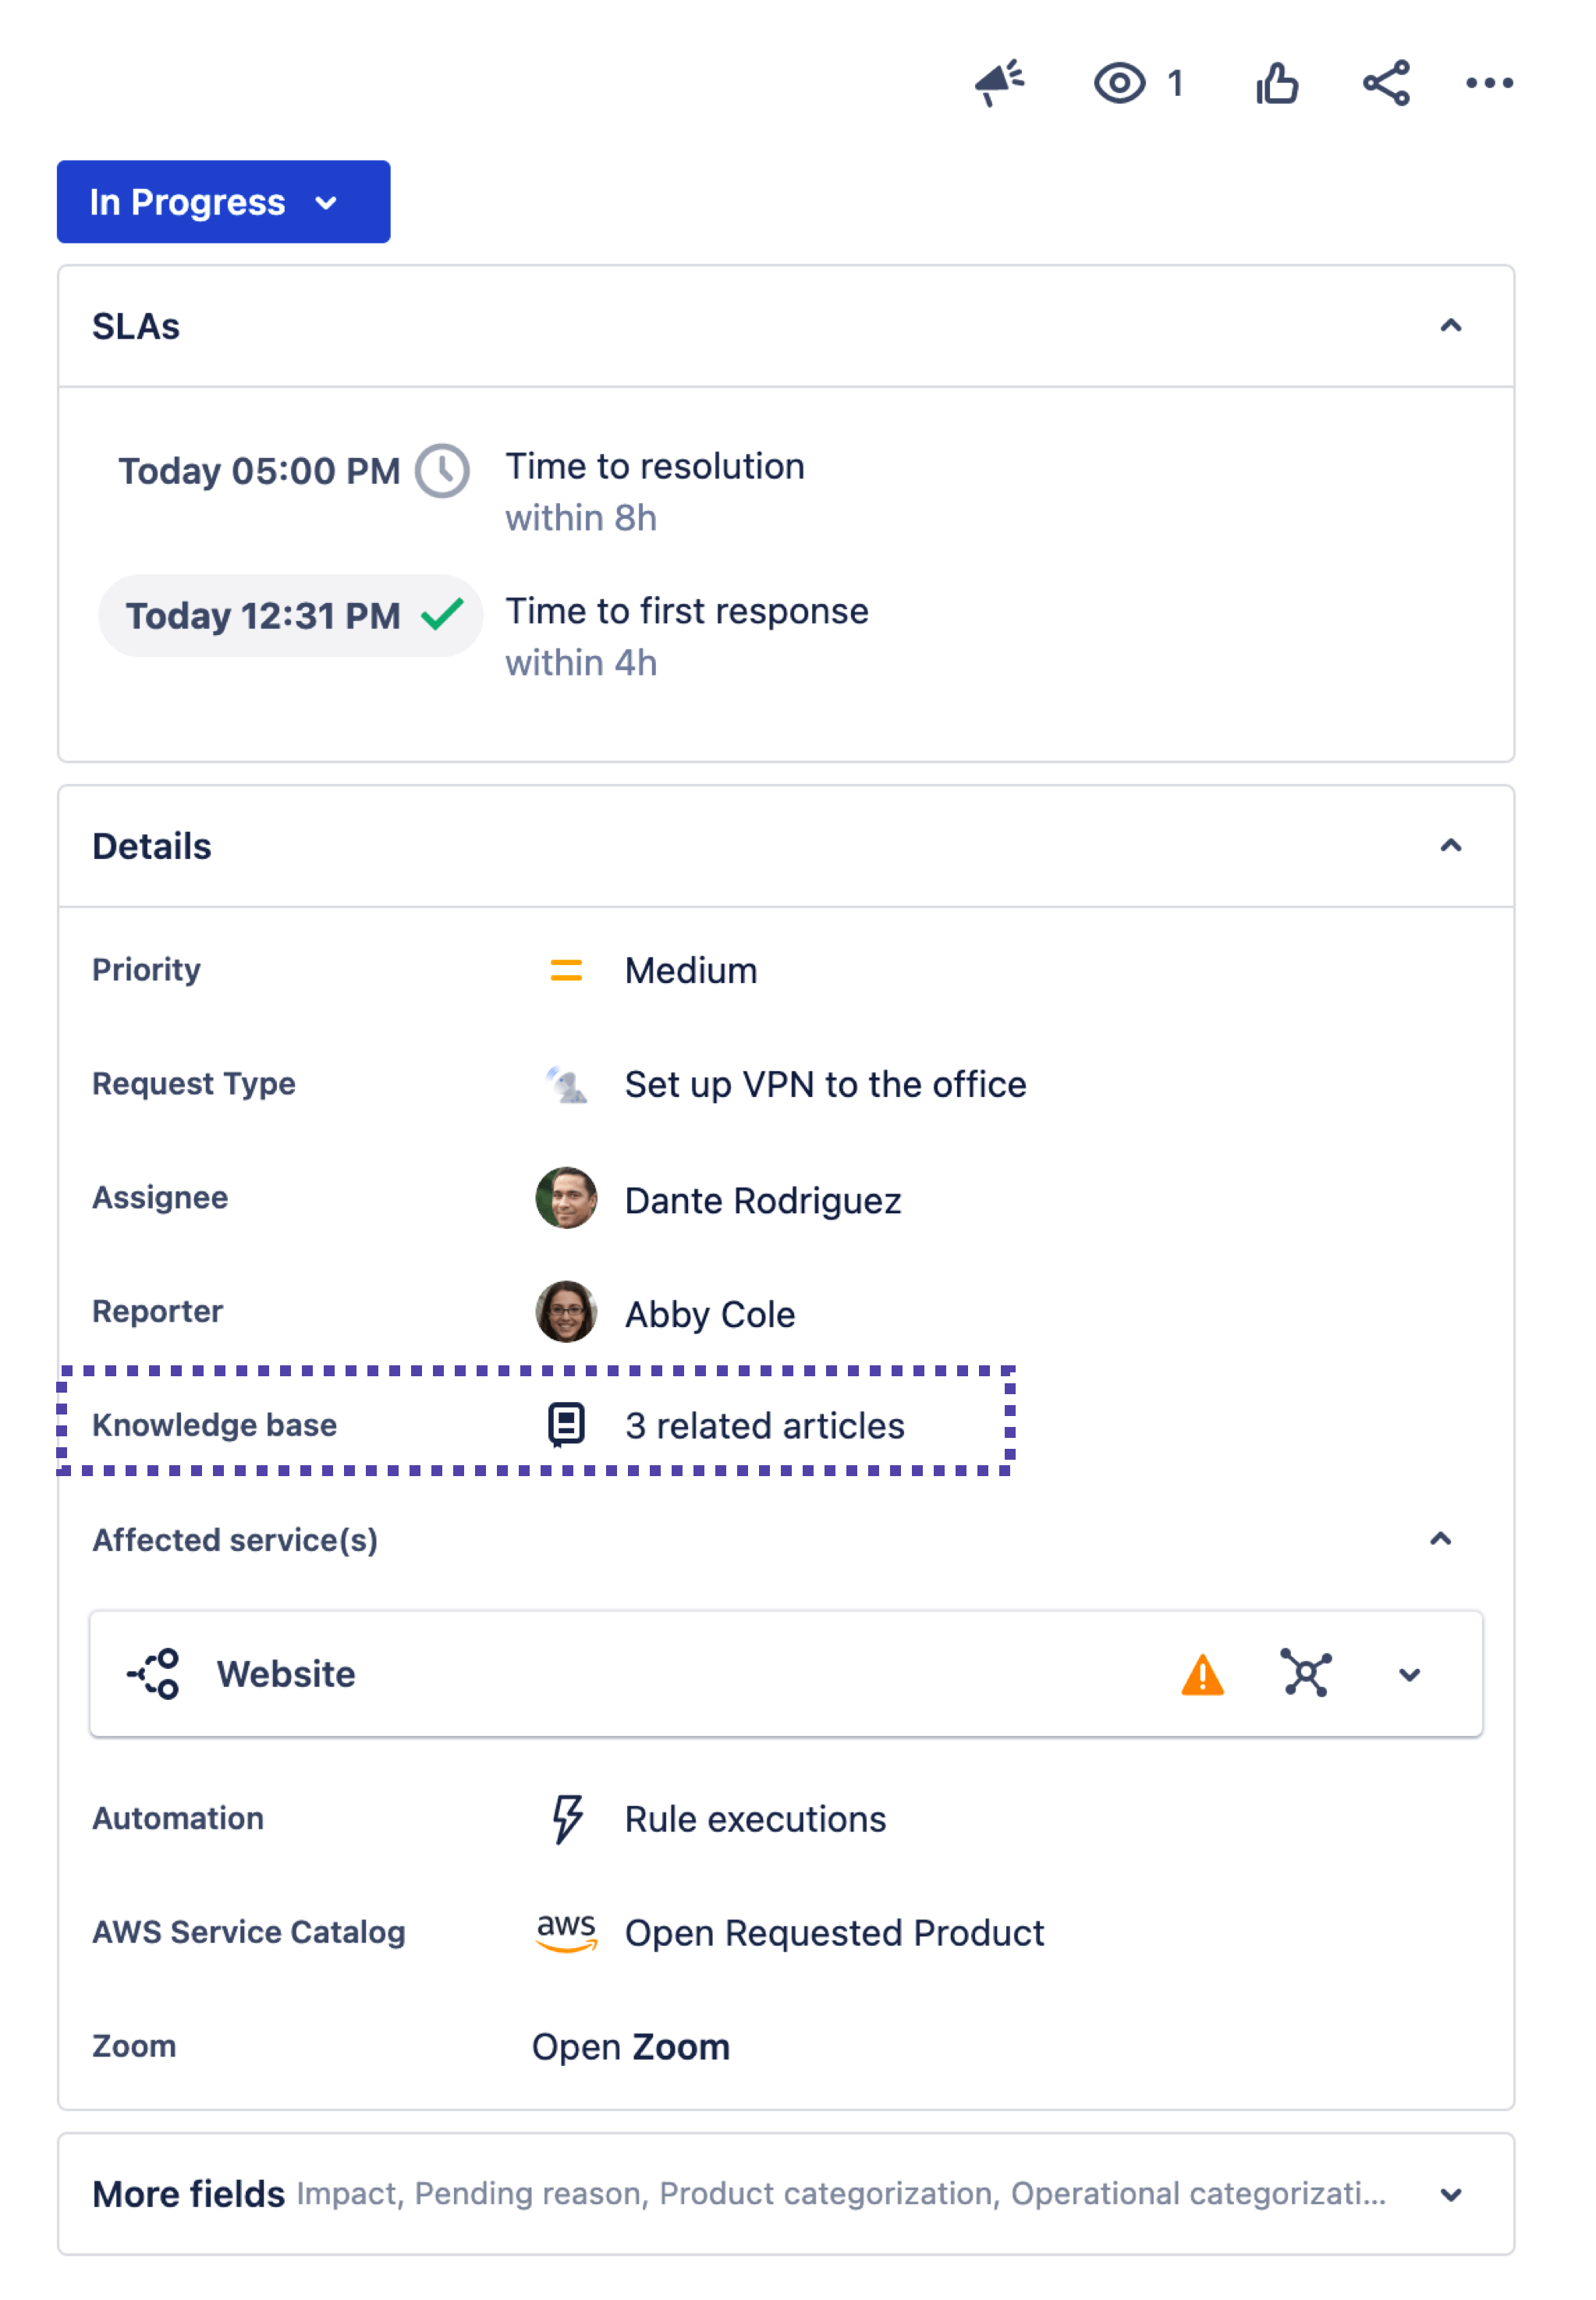
Share articles with customers from the issue view
To share articles with customers from the internal issue view of a request:
- From your service project, go to Queues.
- Select the required issue.
- Hover over the related article(s) link in the knowledge base field when viewing an issue. Select Share as comment.
- Enter any additional text in the dialogue box if required.
- Select Save.
Tips and tricks
Insight cloud onboarding