Project charter vs. project poster: What’s the difference?
Browse topics
This article explores the distinctions between two essential tools in project management: the project charter and the project poster. While both serve as instruments for initiating and planning projects, they differ significantly in their applications. The project charter, a formal and static document, acts as a foundational blueprint by outlining a project's purpose, goals, and key details.
In contrast, the project poster is a dynamic tool, providing a visual overview that evolves as the project progresses. In the following sections, we’ll delve into the unique features of each—emphasizing how project charters set the formal groundwork for a project, while project posters serve as dynamic guides for ongoing planning and visualization, catering to different needs and stages in the project lifecycle.
What is a project charter?
A project charter or brief is a high-level document outlining a project's purpose, goals, and scope statement. It’s a formal authorization for the project to begin and sets the foundation for project planning and execution. The project charter usually includes vital information such as:
- Project title: A brief, descriptive name for the project.
- Project purpose or justification: The purpose of the project and its expected benefits.
- Project objective: Specific, measurable goals the project aims to achieve.
- Project scope: A description of the project requirements, including specific goals, tasks, costs, and deadlines..
- Project deliverable: The tangible products or services the project will produce.
- Project stakeholder: A list of the individuals or groups with a vested interest in the project, such as customers, sponsors, and team members.
- Project timeline: A high-level overview of the project schedule, including significant milestones and deadlines.
- Project budget: An estimate of the resources needed to complete the project, including costs, staff, and other resources.
Overall, project charters provide a shared understanding and agreement among all main project stakeholders and project sponsors about the project's purpose, scope, and expected outcomes. It also serves as a reference point throughout the project management process to help ensure the project remains on track and meets your objectives.
Why is a project poster important?
Project charters play a pivotal role in the project management process by providing a structured foundation and offering several specific benefits. First, they serve as a compass, providing clear directions for the project team by outlining the project's purpose, objectives, and scope. This clarity helps align efforts toward common goals and minimizes the risk of diverging priorities. In addition, project charters contribute to effective risk mitigation by identifying potential challenges and uncertainties upfront, enabling proactive planning and risk management strategies.
What’s more, project charters are instrumental in optimizing resource allocation. By detailing project requirements, including tasks, costs, and deadlines, they ensure that resources, both human and financial, are allocated judiciously and in accordance with the project's needs. This, in turn, enhances efficiency and prevents resource bottlenecks. Another significant advantage is that project charters facilitate informed decision-making. Stakeholders, armed with a comprehensive understanding of the project's purpose, expected benefits, and potential risks, can make well-informed decisions throughout the project lifecycle.
Finally, project charters act as a documented agreement among stakeholders, providing proof of work and a basis for accountability. This fosters transparency and helps resolve disputes or misunderstandings that may arise during project execution. In summary, project charters contribute to project success by offering clear guidance, risk mitigation strategies, optimal resource allocation, and an informed decision-making framework.
What is a project poster?
A project poster is a project planning tool that allows your project managers and team to think through the problem you're trying to solve, the possible solutions, and the ideal result of your project. A project poster is not a sporadic activity but rather a document that serves as a project overview. Unlike a static project charter, a project poster is designed to evolve and be updated as the project team progresses in research and project activities.
The project poster is a dynamic tool that allows teams to think through problems, explore potential solutions, and refine the project's vision. This continuous updating ensures that the poster remains a relevant and valuable resource throughout the project lifecycle, adapting to the evolving nature of the project.
Why is a project poster important?
A project poster is where your team's project planning begins. Ultimately, it helps you reach conclusions around project risks, which solution to pursue and create an idealized project vision of what you'll deliver and what it will take to deliver it.
A project poster helps teams answer critical questions, including:
- What problem are you solving?
- Why does it matter that you solve this problem?
- What are the goals and objectives of the project?
- What do you know, and what information are you missing?
- What are potential solutions?
What is the difference between a project poster and a project charter?
There are several differences between a project poster and a project charter. Unlike project charters, your project poster is a living document. You can update it as you explore your problem space, challenge assumptions, validate solutions, gather feedback, and course-correct before you move forward.
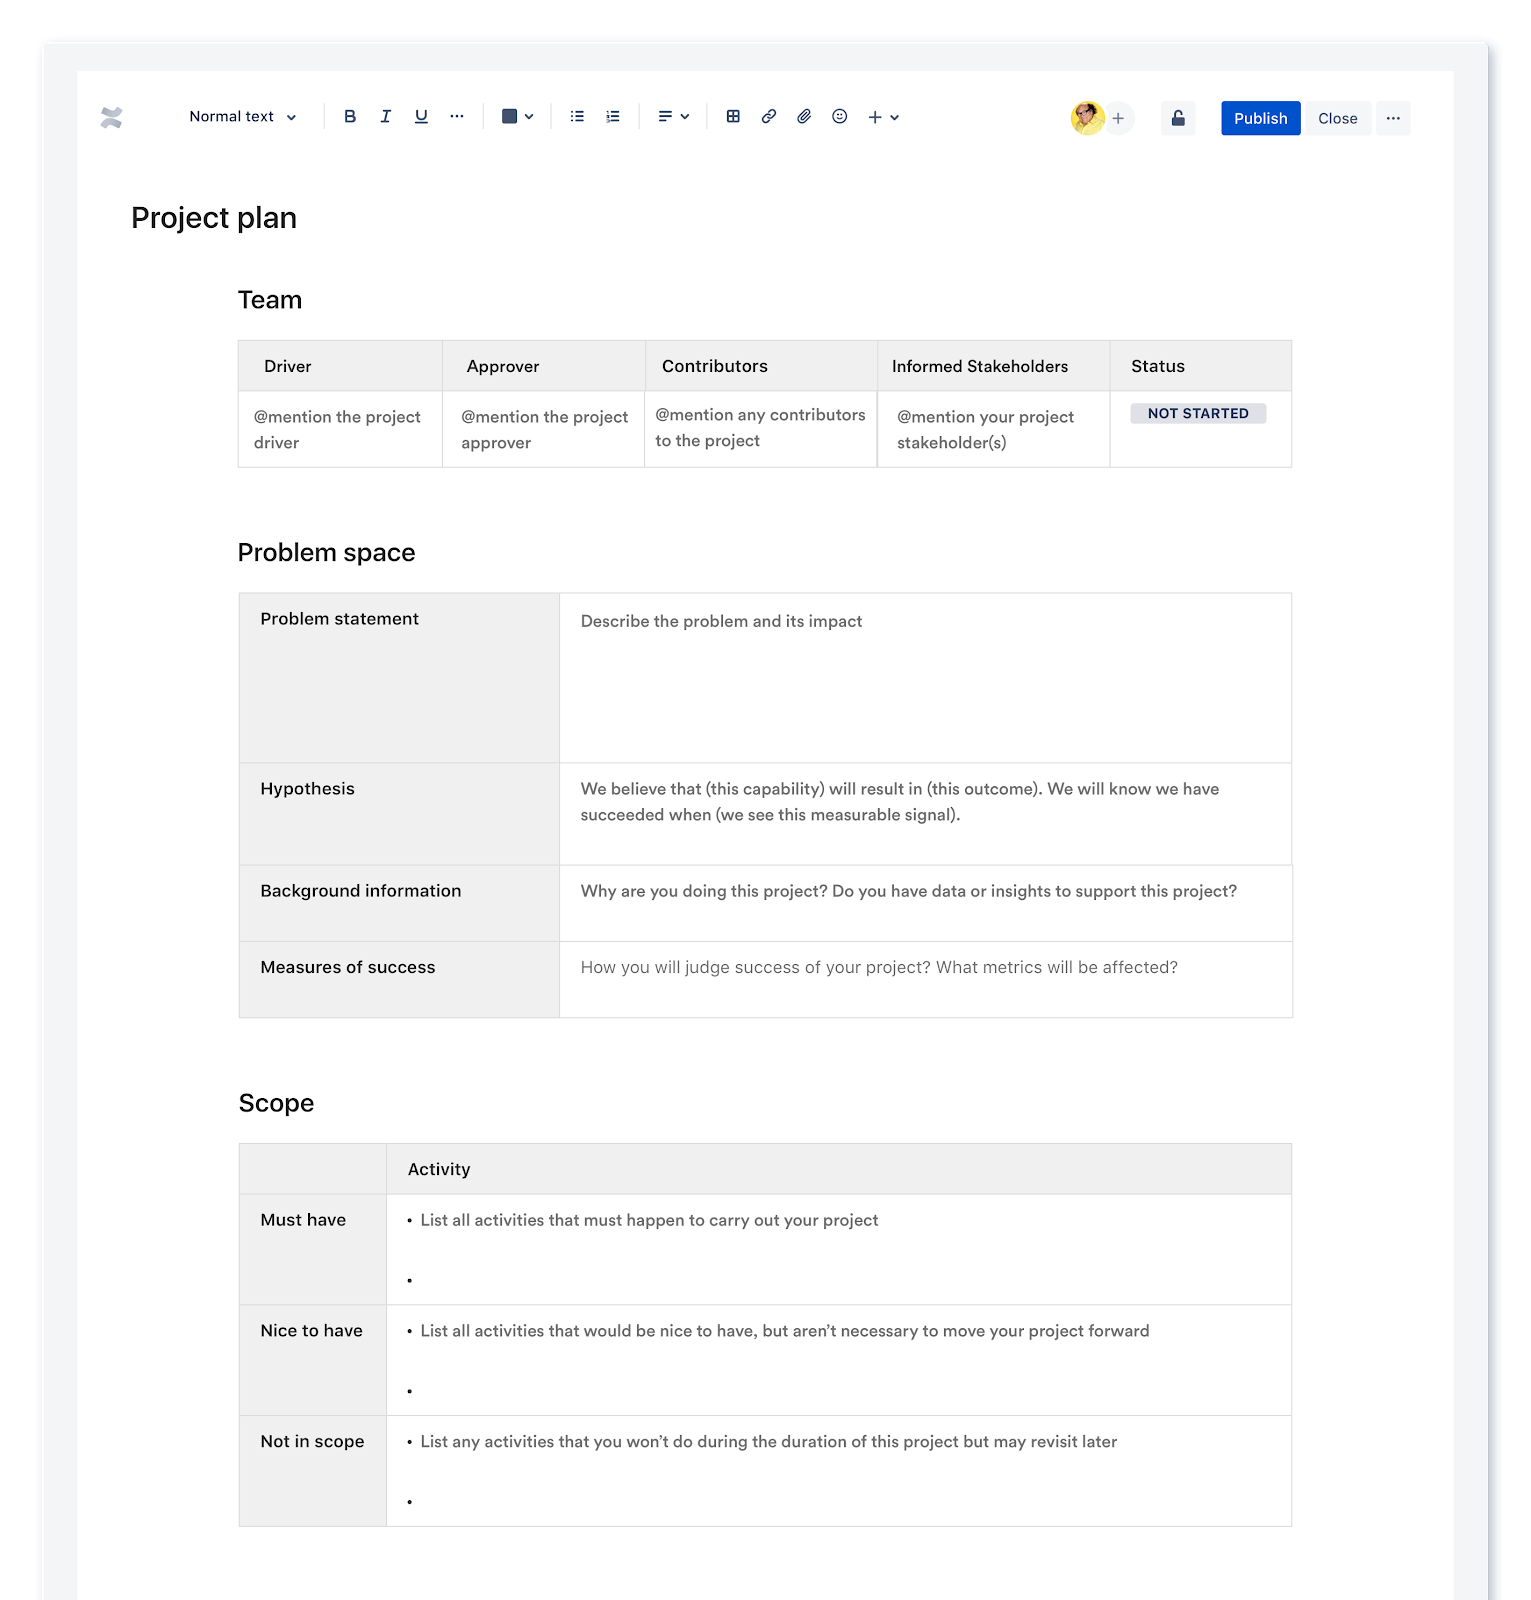
A project poster has three categories to organize your information in, which include:
Problem space: This is your project statement. Explain why solving this problem matters to customers and the business. Get specific on your project objectives and possible solutions.
Validation: Identify knowledge gaps and risks. What do you know, and what do you need to find out?
Ready to make it: Visualize the solution and implement a project plan.
Here’s an example of a project poster:
Tips for writing your project poster with Confluence
To set your team up for project success, use the project poster template to run the Project Poster Play. The Project Poster Play helps you validate assumptions and understand the problem you're solving. Once completed, this simple, collaborative document will house all the essential project details. This will help everyone grasp your project's context and business case.
In the kick-off session, define the problem and set your project goals. Then, share it with your project sponsor as early as possible to get their feedback, which you'll incorporate in future sessions as your project develops.
How to use the project poster template
Check out the Confluence project poster template
Step 1. Start with the basics
Let's kick things off with the easy stuff. The top section of the template is a space to fill in information like the project name, owner, team members, current status, and a brief description of how this project fits into your larger strategy. Typically, a project manager will complete this portion as the project initiator.
Step 2. Define your problem space
Carefully think through the problem you're trying to solve before you get into the details of your project. This process helps capture the project's purpose.
What's the problem? How does it affect your customers or your project team members? How will you know you've solved it? What are some possible solutions that immediately come to mind?
Those are the types of questions you'll think through and record here. Take your time with this. You'll likely revisit this section several times before moving forward with your new project, and you may need to make some adjustments as you collect more feedback and insights. That's normal and all part of the learning process.
Step 3. Validate your assumptions and get the creative juices flowing
You likely made a lot of assumptions as you defined your problem. The next section of the template gives you room to test them against facts and numbers.
There are two sections involved here: one where you'll list what you already know and one where you'll jot down the questions you still need to answer.
For example, imagine that you're planning to redesign your company's blog to be more user-friendly. You already know that 56% of visitors leave your blog after reading a single post. That would go in the first slot of the validation section. But you also want to discover what would keep them on your site longer. That goes in the second slot of this section.
Remember that your goal here is to confirm or disprove the critical elements of the solution you brainstormed before going further. If you can't confidently do that, you should head back to your problem space or think through other possible solutions.
Step 4. Get to work
This final section is where you'll kick things into high gear. You've already worked to define your problem and pick a validated solution. Use this last section to explain the solution and summarize why a customer will want this. Add notes and type /image to add screenshots and sketches. There's also space to define your scale and project scope, such as the team size you'll need.
Hashing all the details out now will help you stay focused on what matters to key project stakeholders and ensure that the project is within your capabilities and capacity.
Step 5. Include reference materials
You want your project plan to be the one-stop shop for all the essential information related to that project. Use the command “/link” to include any reference material people might need. This feature enables the addition of relevant materials, such as a creative brief or examples, to ensure that the project plan serves as a comprehensive and easily accessible resource for all involved stakeholders.
Whether it's a creative brief or an example you want people to refer back to, add everything to this page so that it's organized and easily accessible.

