
Reimagine customer service together
An AI-powered customer service solution that gives your team the context to deliver smarter service and improve with every interaction.
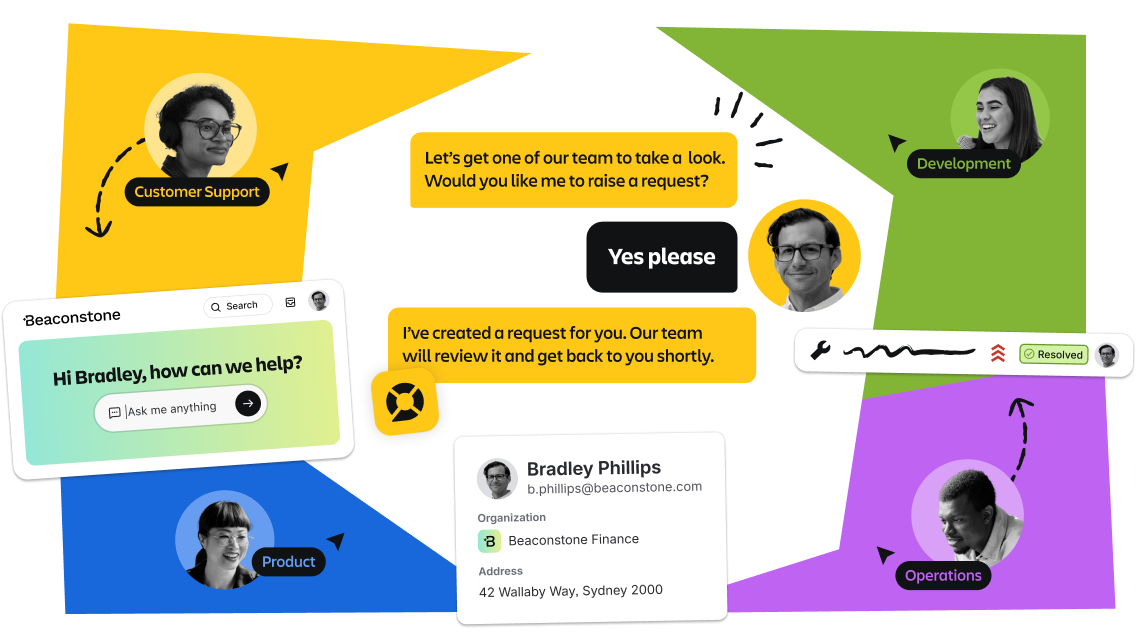
Team up with AI
Our AI doesn’t just provide answers. It collaborates with your team, knows when to escalate, and learns as it goes. The result is faster fixes, less frustration, and more time for your team to focus on the most impactful work for customers.
Always see the full picture
With the power of the Teamwork Graph, data from across your business comes together so both AI and support agents have the context they need to resolve requests faster and deliver service that feels personal.
Unite teams around the customer
Get rid of silos from disparate tools and bring support, dev, product, and ops together on one platform. Share customer requests across teams, get access to feedback and ideas, and deliver customer fixes faster.
Get started fast
With access to your organization’s knowledge, teams, and customer data, AI gets started instantly. No long setup or consultants needed – just faster resolutions and happier customers from day one.
Customer Service Management features

Rovo Customer Service
Deliver 24/7 support powered by your own help resources. Continuously level up your agent using analytics, reviews and coaching.

Omnichannel support
Provide support across email and your website with an embeddable AI widget, and bring voice into the mix with powerful vendor integrations.

Customizable support site
Easily create, customize, and launch a support website that’s on-brand - no coding required.

Team workspace
Manage requests with queues, flexible workflows, customizable SLAs, and advanced routing, all backed by Jira.

Customer context
Know who you’re helping - see your customer’s products, organization and past conversations so you can deliver faster, more personalized support.
Rovo for support teams
Bring knowledge, actionable suggestions, and customer context right to your support team’s fingertips.

Knowledge base
Build your knowledge base natively with the power of Confluence. Enable self-service by connecting your knowledge to Rovo.

Reporting
Track & improve CSAT and performance with out-of-the-box, customizable dashboards.

Developer escalations
Forward requests to development teams with all the necessary context to collaborate on resolutions.
Real stories of AI-driven support in action


Resources

Customer Service Management app overview
Get to know Atlassian’s new Customer Service Management app.

How Atlassian uses the Customer Service Management app
Learn how Atlassian reimagined our customer support with the new app.

Atlassian Community Group
Ask questions, give feedback, and connect with our team and other users to learn best practices.

Let's chat about the Customer Service Management app
Have questions about customer service management for your enterprise? Fill out the form and we’ll get back to you shortly.
FAQs

Ready to reimagine your customer service experiences?
Get started today with the Customer Service Management app as part of Atlassian Service Collection.
