クラウド導入キット
このガイドでは、クラウドへの移行によってユーザーが経験する主な UX の違いについて概説します。管理者は、このガイドを活用して、チームが今後の変化に備えられるようにしてください

Jira Cloud の主な相違点
一般的なユーザー・インターフェイスとナビゲーション
クラウド プラットフォームは、開発者だけでなく、すべてのユーザーにとってより直感的になるように設計されています。基本的な機能に対して行ったこのような変更のいくつかは、ユーザーが自律的にナビゲートしやすいことが判明しています。
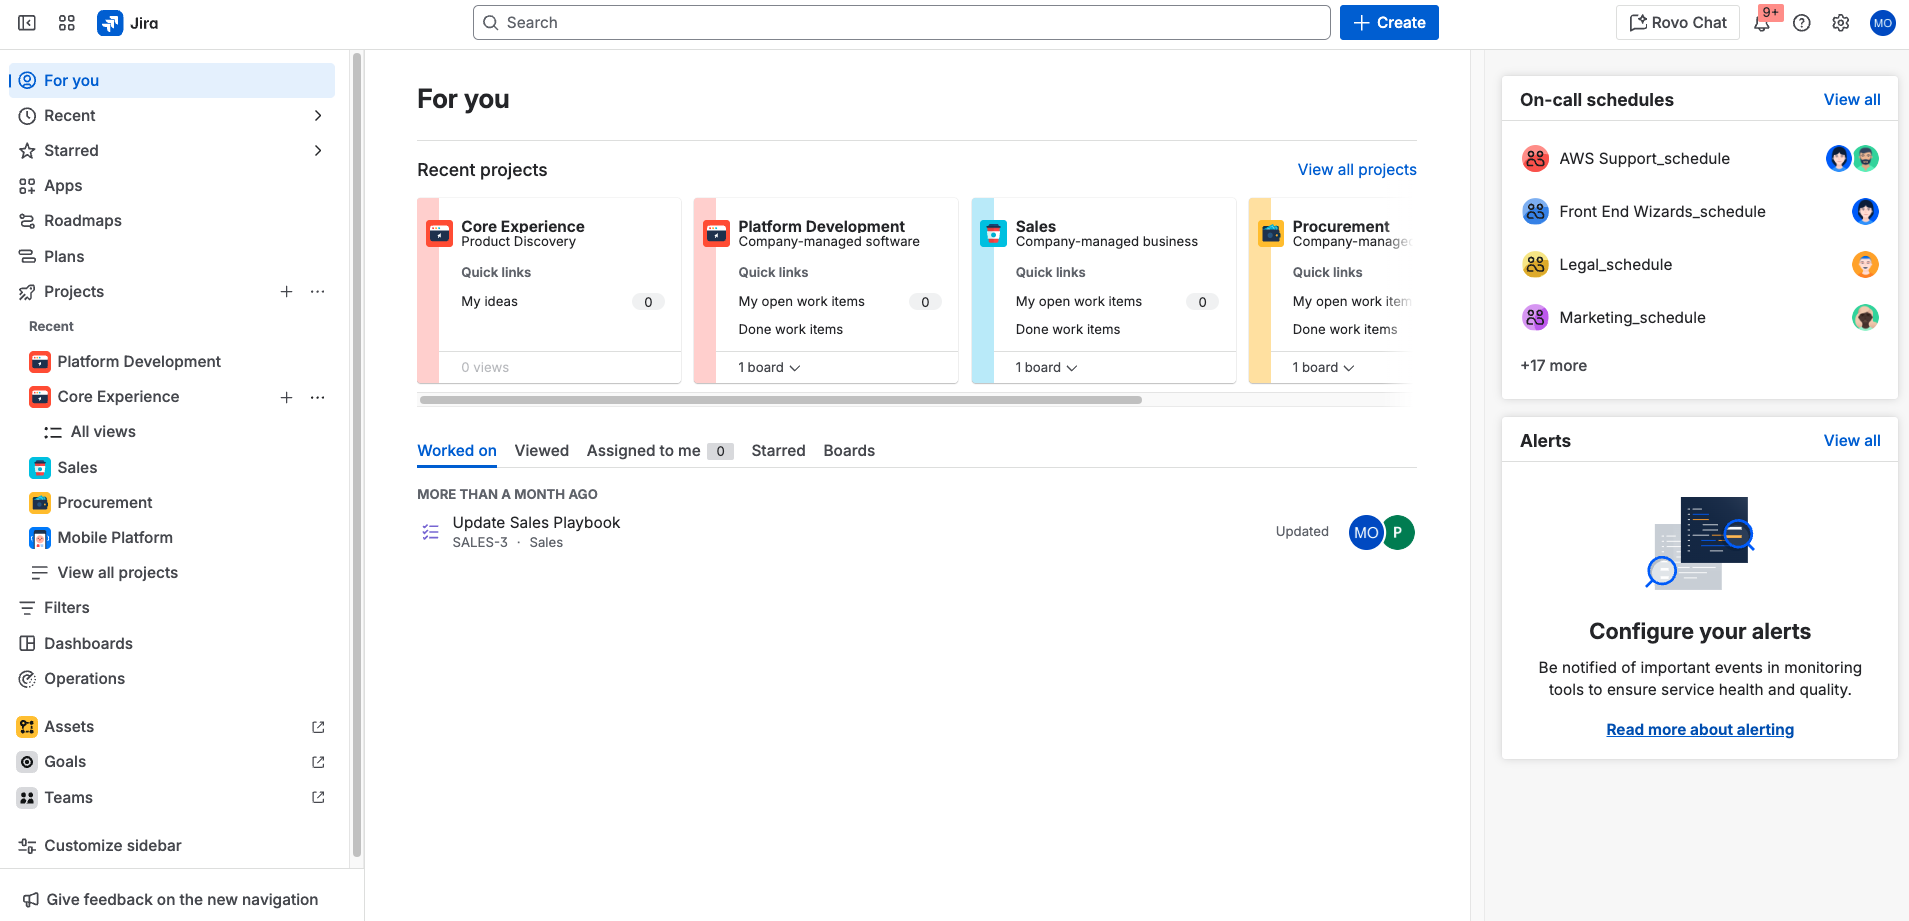
クラウドには、Data Center とは異なるサイドバーと水平ナビゲーションがあります。すべての Jira Cloud アプリで同じメイン ナビゲーション バーが表示されます。これにより、よく使用するスペース (旧称「プロジェクト」)、フィルター、およびダッシュボードにすばやくアクセスできます。また、作業項目 (旧称「課題」) を作成したり、Rovo を使用して検索やチャットしたり、ヘルプ通知やグローバル Jira 設定にアクセスしたりすることもできます。
下の図を参考に、すべての Jira Cloud アプリのナビゲーション バーをよく理解しましょう。
注: Jira アプリとアプリ バージョンによっては、ナビゲーション バーのオプションが若干異なる場合があります。

- アプリ スイッチャー: Atlassian アプリやサードパーティ アプリ (Confluence、Talent、Miro など) を切り替えたり、他のサイトに移動したりできます。
- Jira のロゴ: アプリを切り替えるときに、現在どの Atlassian アプリを使用しているかを把握できます。このロゴを使用すると、どのページからもホームページに戻ることができます。
- あなた専用の場所: Jira で取り組み中の作業の概要が表示されます。これまでにアクセスした作業項目、スペース、ボード、キュー、自分に割り当てられた作業、スター付きの項目を確認できます。
- スペース、フィルター、ダッシュボード、その他: 最も頻繁に使用するツールですばやく作業を再開できます。スター付きのアイテムが各メニューの上部に表示され、その後に最近アクセスしたアイテムが続きます。
- チーム: 一緒に作業するユーザーやチームの表示や、新しいチームの作成を実行できます。
- アプリ: ご利用の Jira サイトにインストールされている Marketplace アプリを表示および管理します。
- 検索: 作業項目、スペース、ボード、キュー、フィルター、およびユーザーを検索します。有効にすると、有料版では、Rovo 経由で AI を活用したアプリ横断検索が可能になります。
- 作成:Jira 内のあらゆる場所から簡単に作業項目を作成します。
- Rovo チャット: AI を活用したチャット インターフェイスで質問をしたり、会社全体のナレッジを調べたりできます。Rovo チャットは有料版で利用でき、管理者が有効にする必要があります。
- 通知、ヘルプ、設定、自分のプロファイル: Jira の状況の確認、ヘルプの参照、Jira 設定 (Jira 管理者のみ) と個人設定のカスタマイズを実行します。
詳細については、Jira Cloud のナビゲーション・ページを参照してください。
作業項目のドロップダウンはどこに移動しましたか?
クラウドには作業項目のドロップダウンがないことにお気づきでしょう。代わりに、サイドバーの [あなた専用の場所] セクションに最近のアクティビティが表示されます。フィルターは独立したメニュー項目になり、検索バーから作業項目にアクセスできるようになりました。
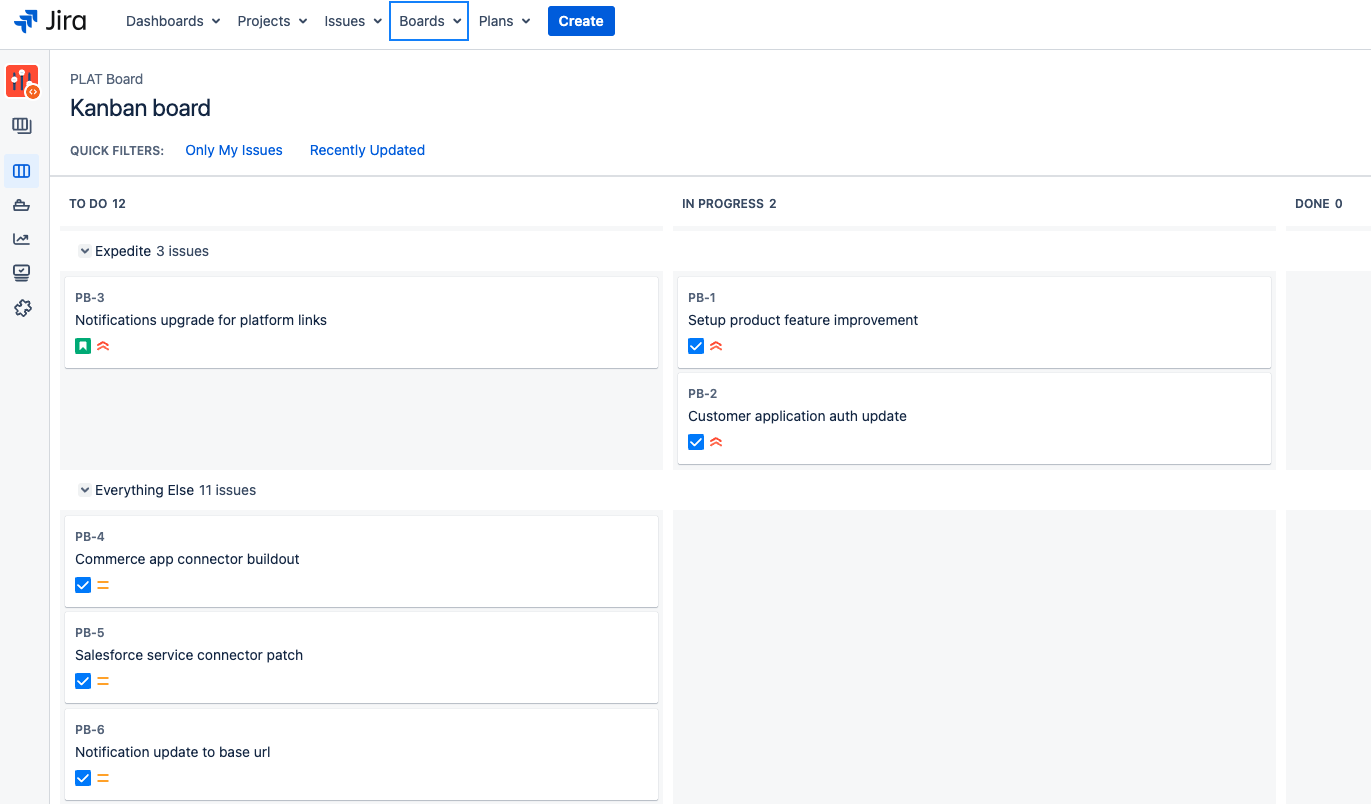
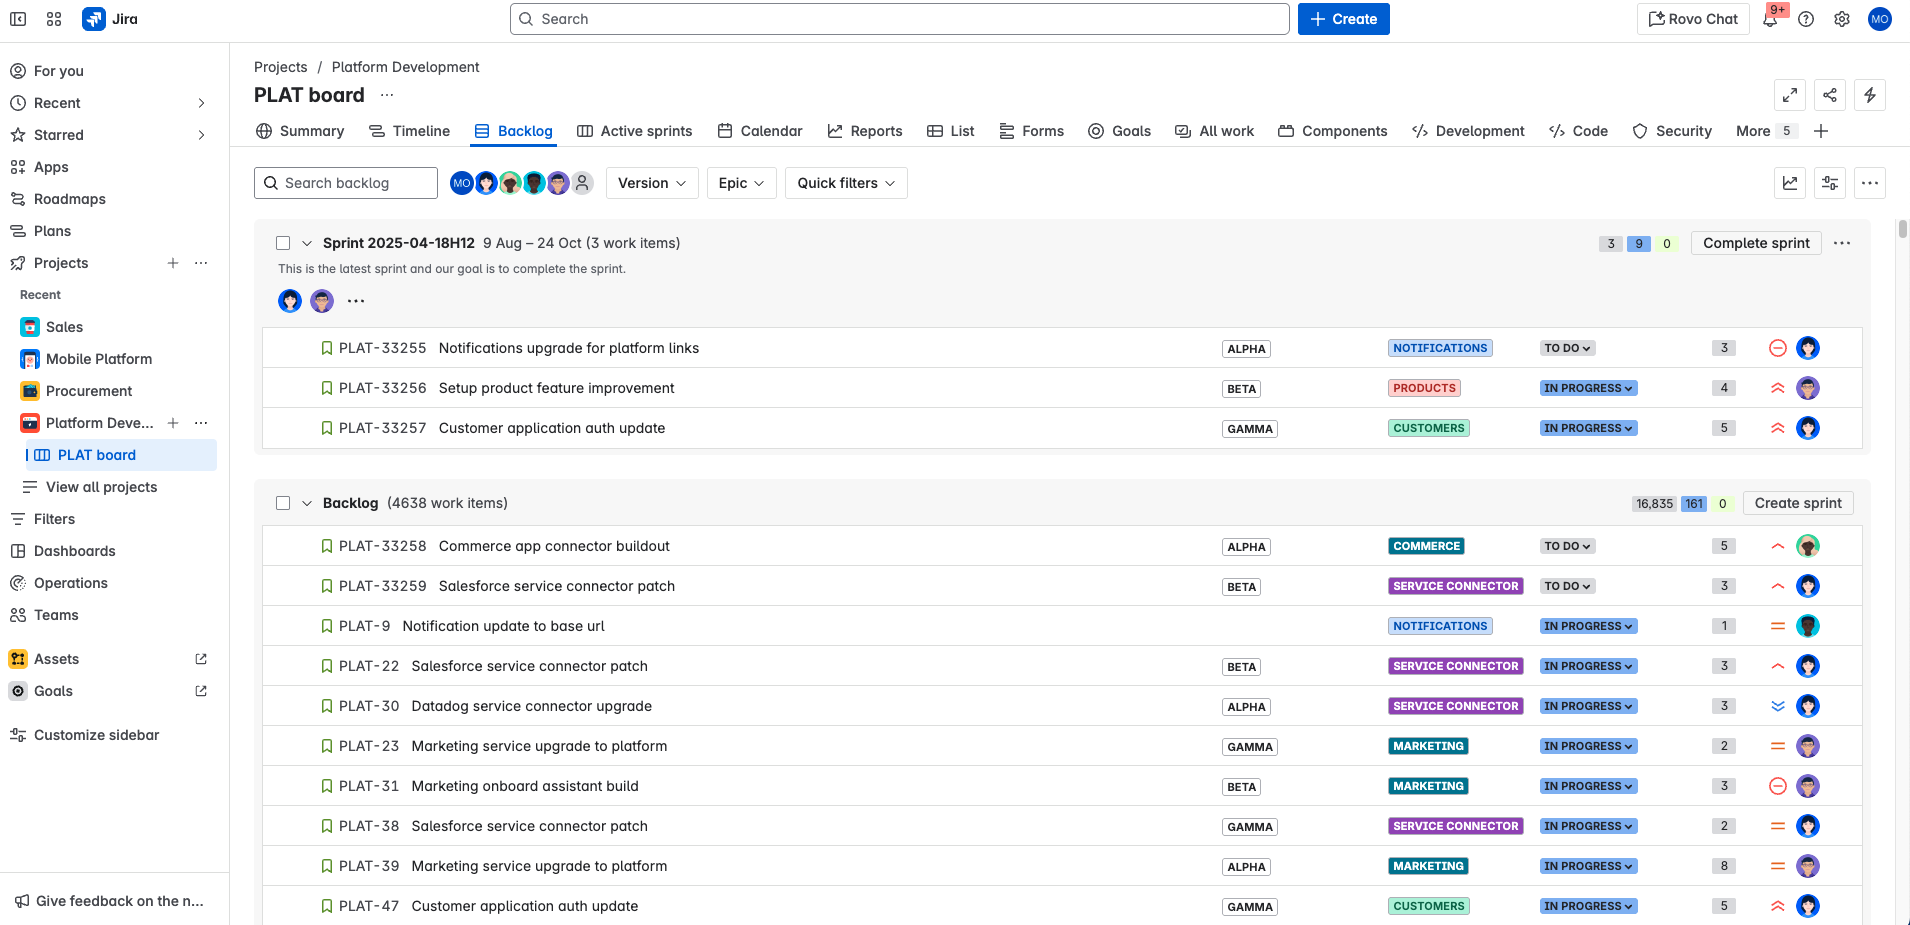
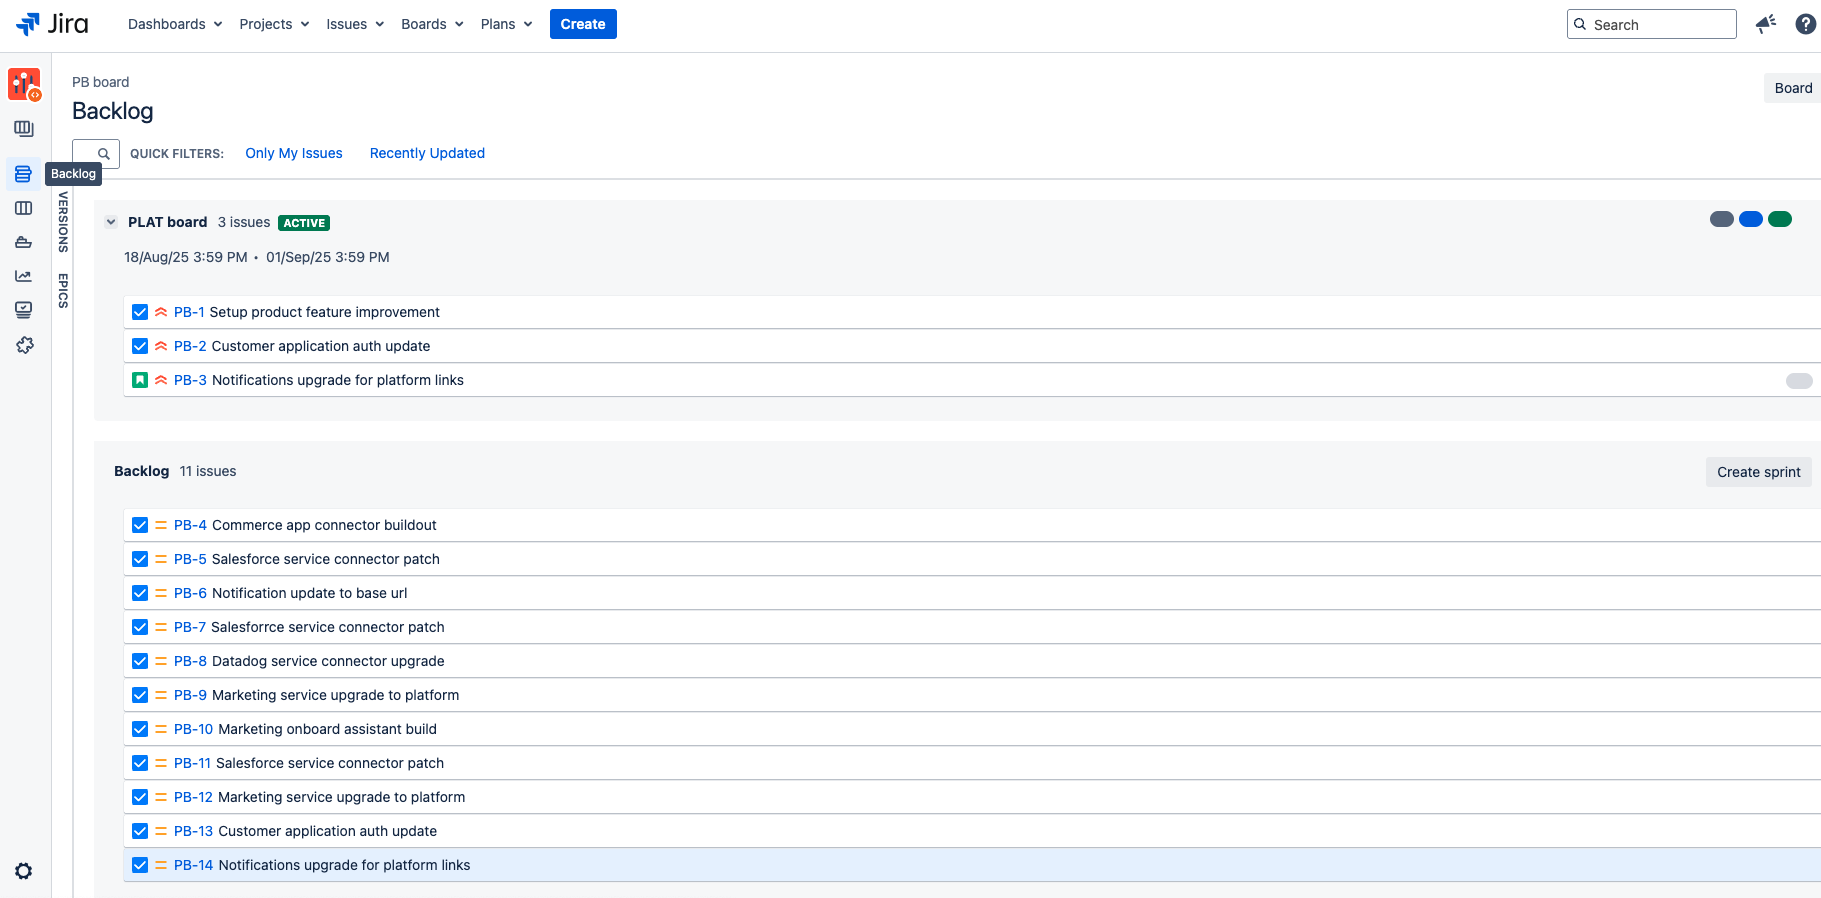
ボード・ビューの主な変更点
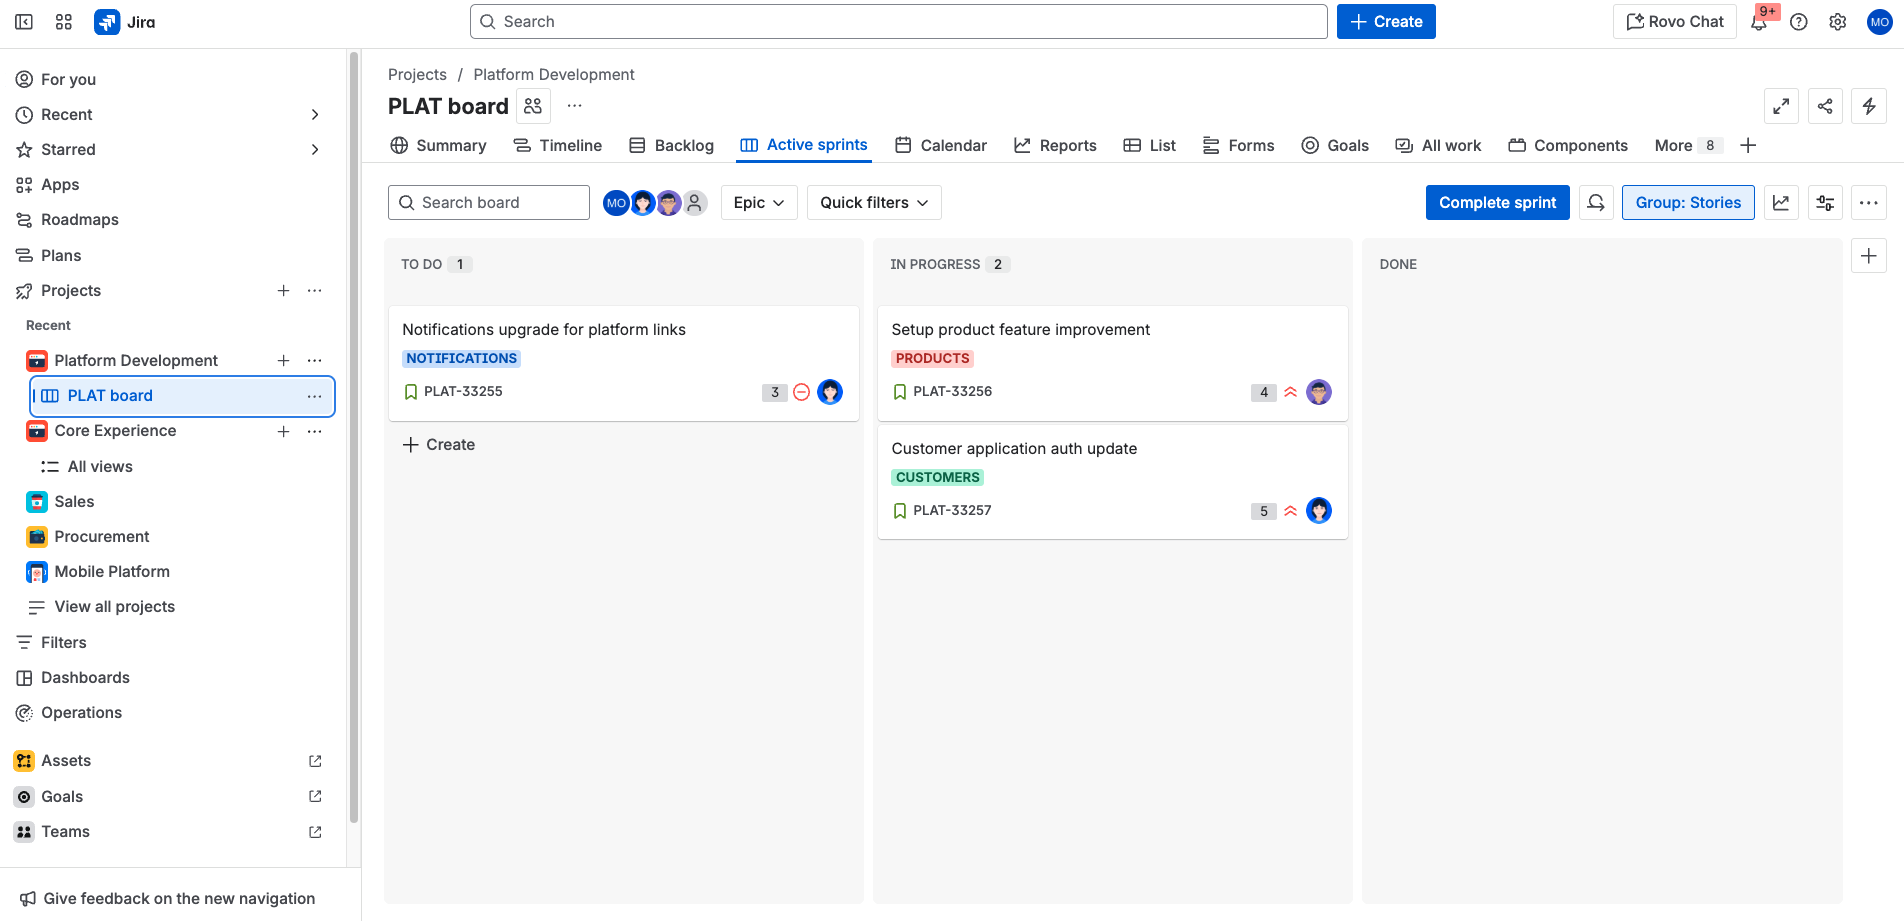
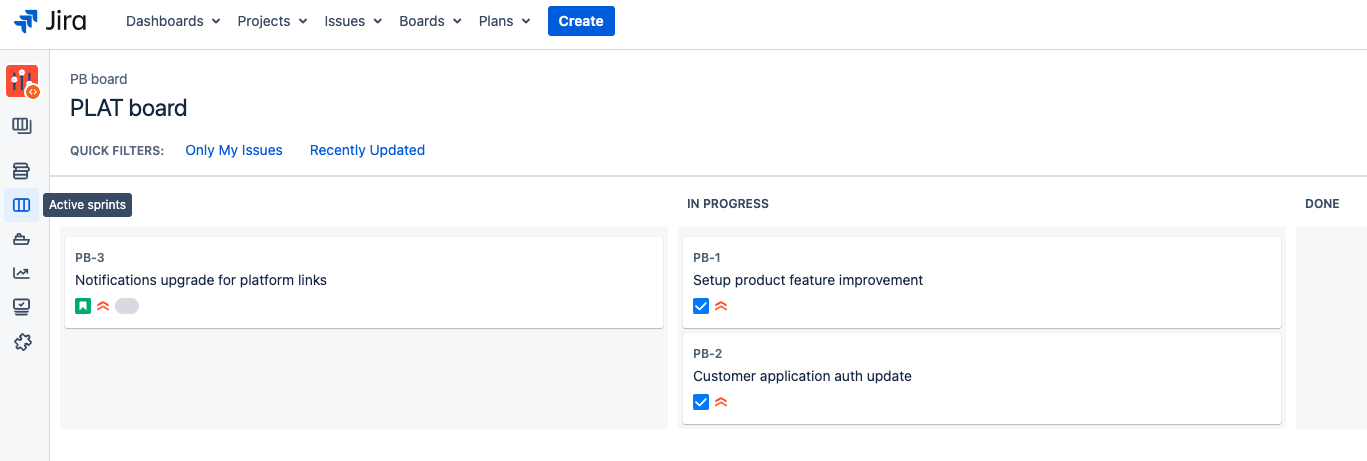
スペース ボードとバックログ ビューは、スクラムとカンバンのスペースの両方のバージョンで非常によく似ています。クラウドでは、ボードあたり 5,000 件の作業項目制限があり、スプリントのインサイトを閲覧することで、進捗を把握し、自信を持ってデリバリーできます。
作業項目ビューの主な変更点
Jira Cloud には、主なアクションと情報をより論理的にグループ化する新しい作業項目ビューがあるため、作業項目のスキャンとアップデートが容易になりました。通常、ボード上では 2 列、バックログでは 1 列で表示されますが、ウィンドウの幅に応じて変わります。
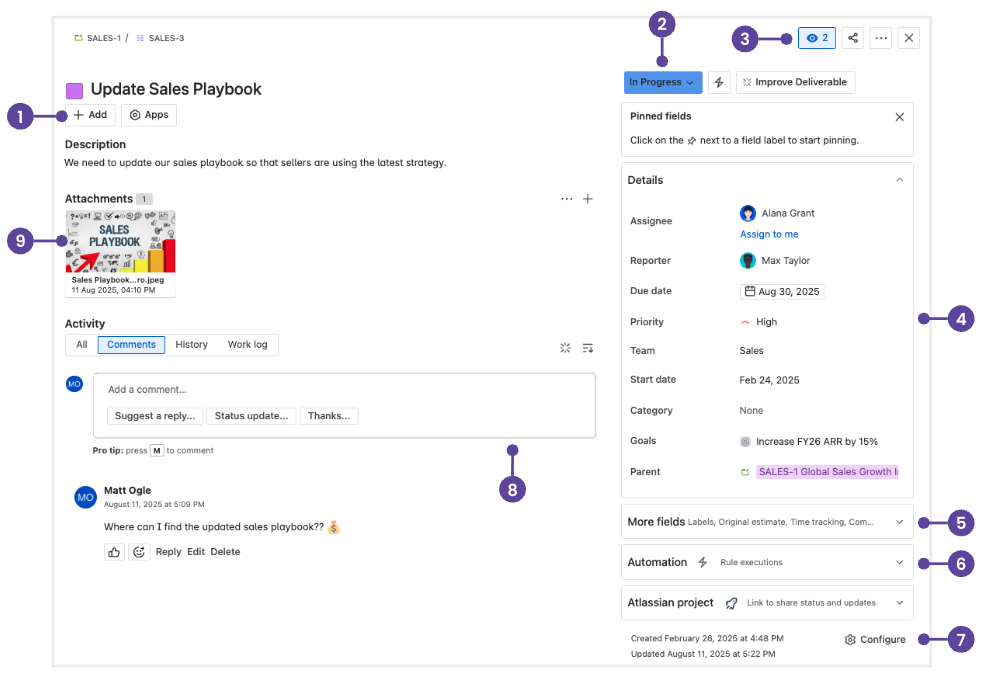
- クイック追加ボタン: 添付ファイル、サブタスク (企業管理対象スペース)、または子作業項目 (チーム管理対象スペース) の追加、Atlassian Marketplace アプリからの作業項目、URL、およびコンテンツにリンクします。
- 作業項目のトランジション: 下矢印 (⌄) を選択して、ステータスの更新やワークフロー ステップの表示を行ったり、その他の作業項目アクションを実行したりします。
- ウォッチ、投票、その他のアクション: [その他のアクション•••] メニューから、ウォッチ、投票、フィードバックの提供、移動や複製などのその他のアクションを実行します。
- 柔軟なレイアウト: Bitbucket などの開発ツールにリンクする [開発] パネル (管理者によって接続されている場合) など、作業項目を編成する情報を表示およびアップデートします。自分にとって最適な場所にフィールドを配置できます。右側のメニューで、[フィールドをさらに表示] リンクの下にあるものを含め、最も重要で使用頻度の高いフィールドを上部に固定します。これを行うには、フィールドの太字の名前にカーソルを合わせ、[最上部に固定] を選択します。
- その他のフィールド: 下矢印 (⌄) を選択すると、すべての作業項目フィールドが表示されます。
- 自動化:下矢印 (⌄) を選択すると、最近実行した自動化ルールが表示されます。
- 作業項目レイアウトを設定: 個々のスペースの作業項目ビューでフィールドを移動、非表示、変更します。
- アクティビティとドック コメント バー: コメント バーにメモ、最新情報、質問を追加します。チームメイトにタグを付けて通知したり、公開された作業項目に対するコメントを制限したりできます。
- 添付ファイル:添付ファイルをリスト・ビューとストリップ・ビューで切り替えるか、すべて同時にダウンロードしてデバイスで作業します。
ヒント: Jira Software クイック スタート アプリ ガイドをユーザーと共有して、ユーザーが上記の変更点を簡単に参照できるようにしましょう。
Jira スペースの新しい管理方法
Data Center ではスペースは会社レベルで管理されますが、クラウドでは会社レベルとチーム レベルのどちらでスペースを管理するかを選択できます。どちらのタイプでもコア機能は同じですが、特定の設定を求めている場合は、チームがどちらのタイプのスペースで作業しているかを把握しておくと役立つ場合があります。
チーム管理対象スペースは、クラウド インスタンスにある他のスペースから独立した強力でよりシンプルな設定を提供します。チームの誰でもチーム管理対象スペースを作成し、スペース管理者として機能できます。スペース管理者は、チーム管理対象スペースの設定を管理して完全に制御できます。これには、ワークフロー、カスタム フィールド、作業項目タイプ、権限などの設定が含まれます。Jira アプリまたはサイト管理者への連絡は不要です。企業管理対象スペースの場合、Jira アプリ管理者がこの種の設定変更を行う責任があります。
ヒント: Jira 管理者は、[Jira 設定] > [システム] > [グローバル権限] でスペース設定を設定および制御できます。
| | チーム管理対象スペース | 企業管理対象スペース |
|---|---|---|
既定 | チーム管理対象スペース 既定のスペース タイプ | 企業管理対象スペース 管理者が有効にできる |
概要 | チーム管理対象スペース 他のスペースから独立したシンプルな設定です。チーム管理対象スペースの設定と変更は、スペース管理者が行うことができ、その影響範囲は限定されているため、同じインスタンス上の他のスペースには影響を与えません。 | 企業管理対象スペース 複雑さと柔軟性を備えた高度な構成ですが、複数のスペース全体でワークフローを標準化する機能も備えています。Jira 管理者がスキームと画面を変更すると、その設定を使用している企業管理対象スペースすべてがそれに応じて変更されます。 |
構成 | チーム管理対象スペース
| 企業管理対象スペース
|
機能 | チーム管理対象スペース 基本 詳細な機能は不要なチームのための最新の Jira 機能。Basic Roadmaps
| 企業管理対象スペース 高度な設定 Jira の中心的機能のすべてを備えています。
|
使用するタイミング | チーム管理対象スペース
| 企業管理対象スペース
|
Jira Cloud の人気の新機能
クラウドへの移行を決めた理由としてよく挙げられる理由の 1 つは、Atlassian アプリの最新かつ最高の機能にアクセスできることです。アトラシアンはお客様とそのチームのために新しい価値とイノベーションを継続的にリリースしています。このセクションでは、最も人気のある Jira Cloud の新機能の厳選リストをご覧いただけます。
1. 自動化
Jira Cloud のネイティブ自動化エンジンには、クラウド専用で Data Center では利用できない、次のような強力な機能があります。
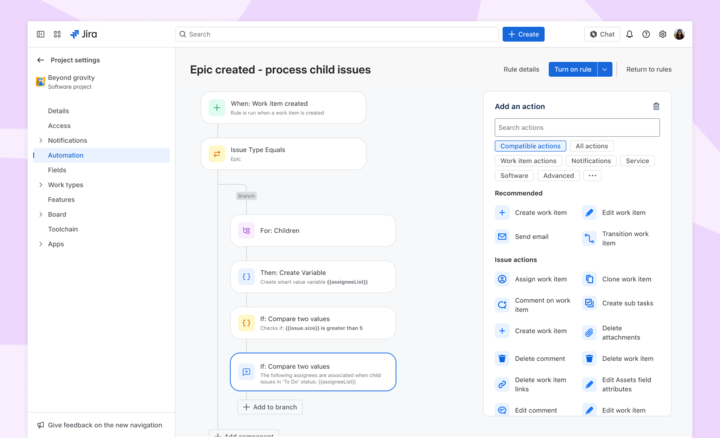
Jira Cloud には、すぐに使える詳細なトリガーと自動化機能が組み込まれています。プロセスとワークフローの自動化については、こちらをご覧ください。
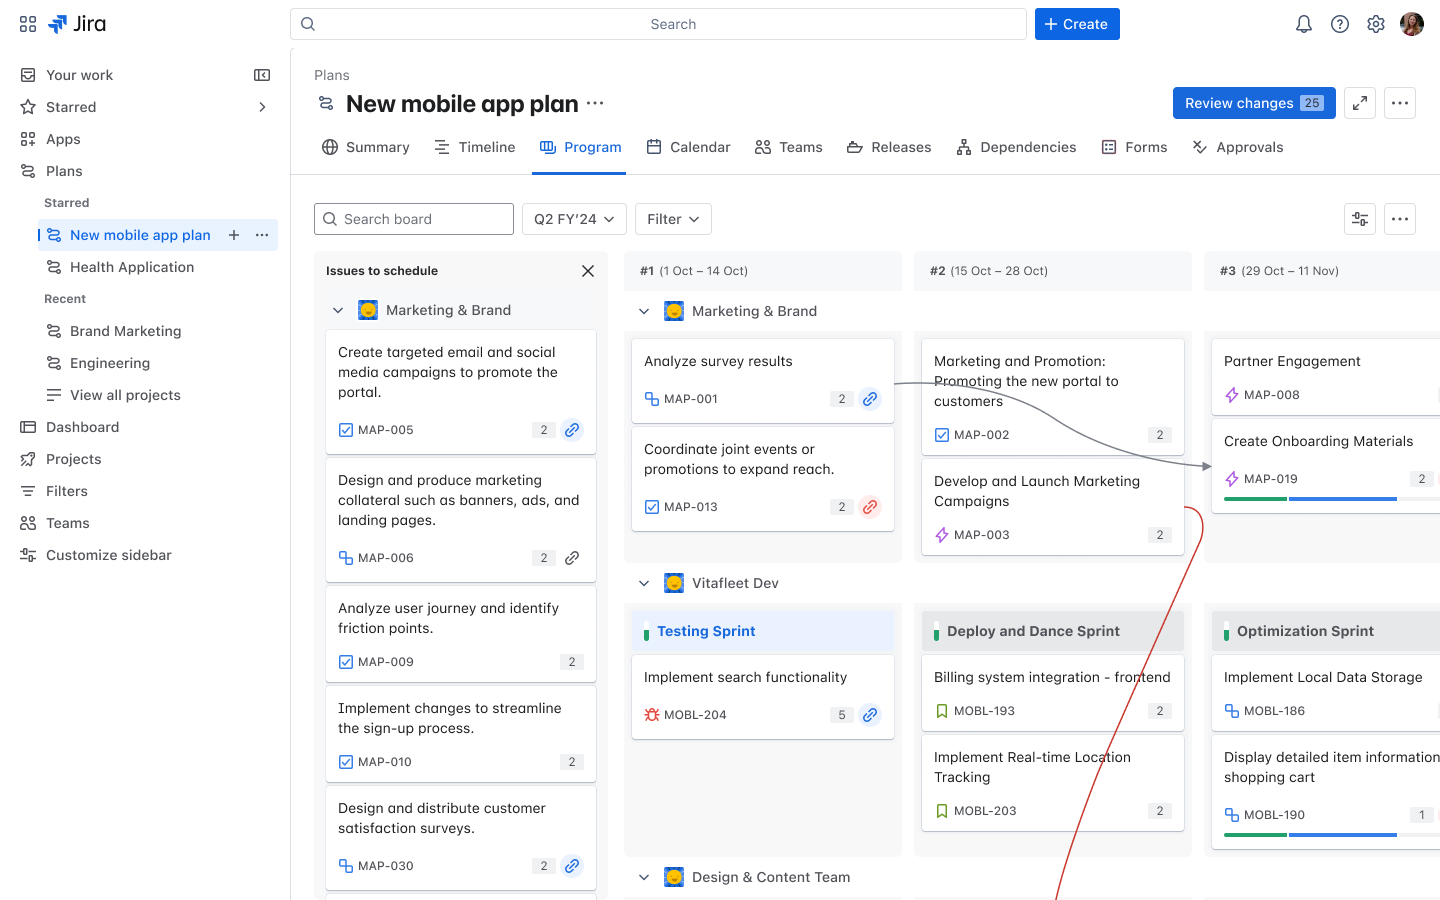
2. 計画機能 (Cloud Premium プランと Enterprise プランに含まれています)
プラン機能 (旧称「Advanced Roadmaps」) は、Data Center インスタンスでアプリとして使用されていた可能性がありますが、すべてのクラウド Premium プランと Enterprise プランですぐに利用できます。プラン機能は、企業管理対象スペースおよびチーム管理対象スペースで利用できます。
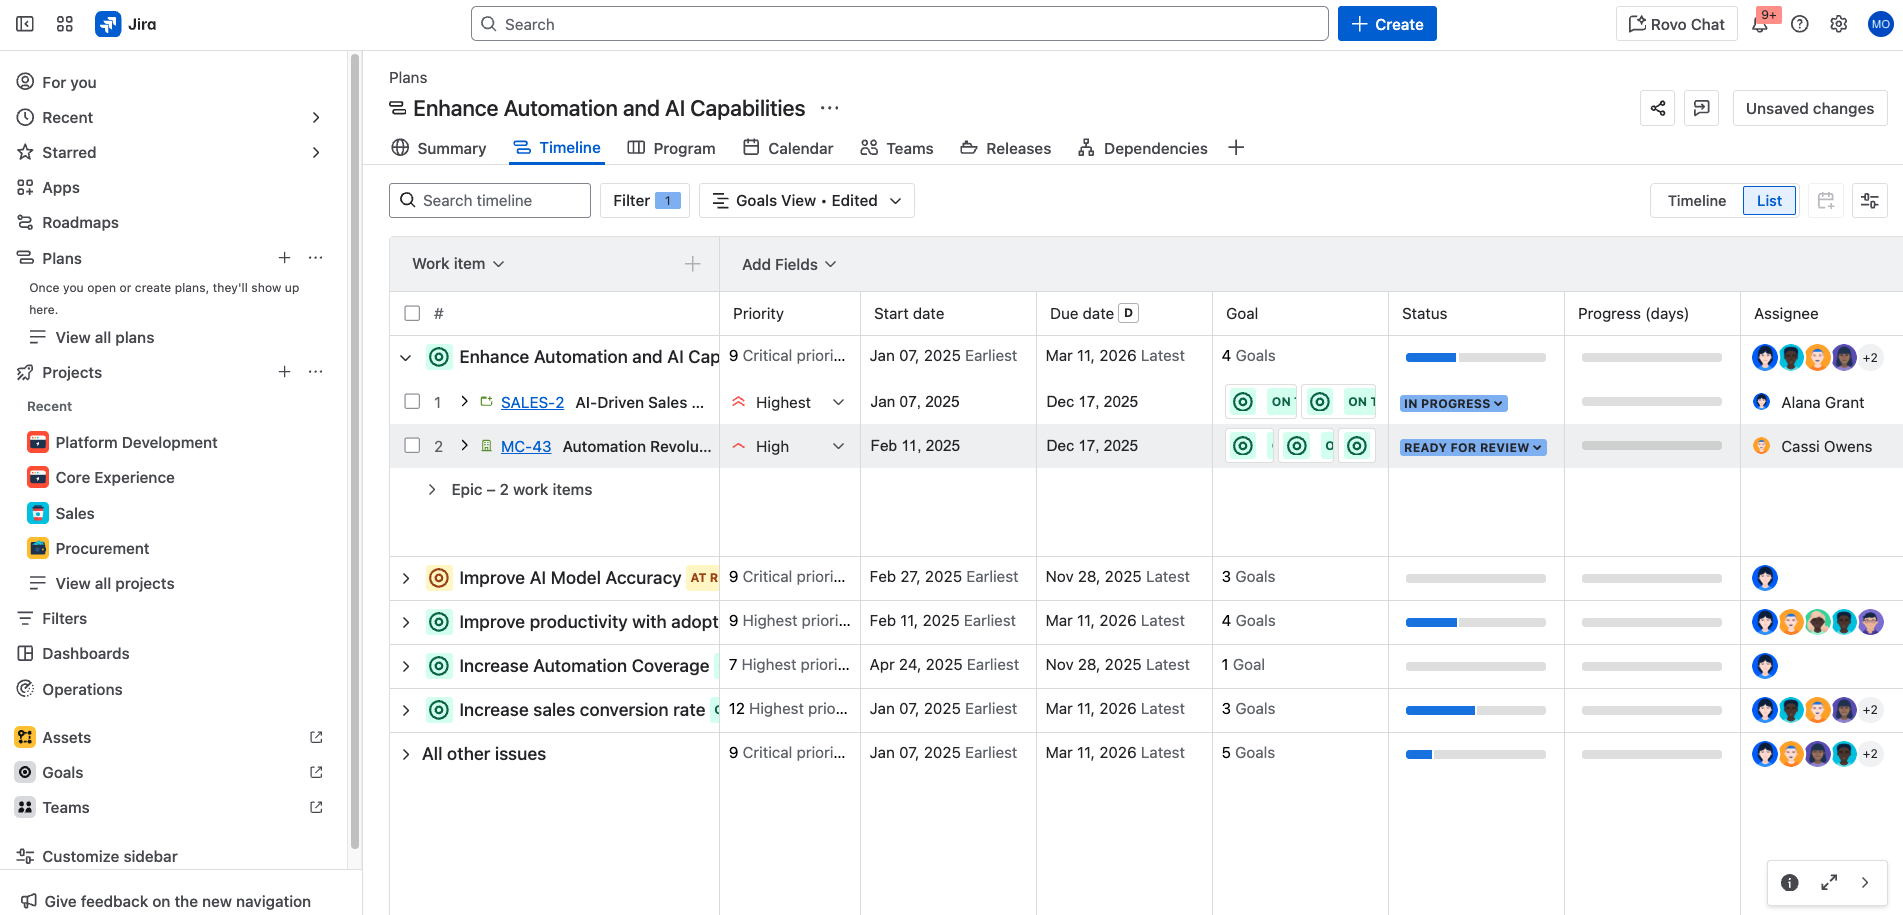
注: プラン機能には、すべての Jira スペース タイプの作業項目を含めることができます。
計画機能のクラウド バージョンには、Data Center で利用できるプログラム、つまりプランのグループを作成する機能は含まれていません。しかし、ほとんどの場合、プログラムは計画機能のカスタム階層レベルを通じて複製できます。高度な計画を開始する方法の詳細については、こちらをご覧ください。
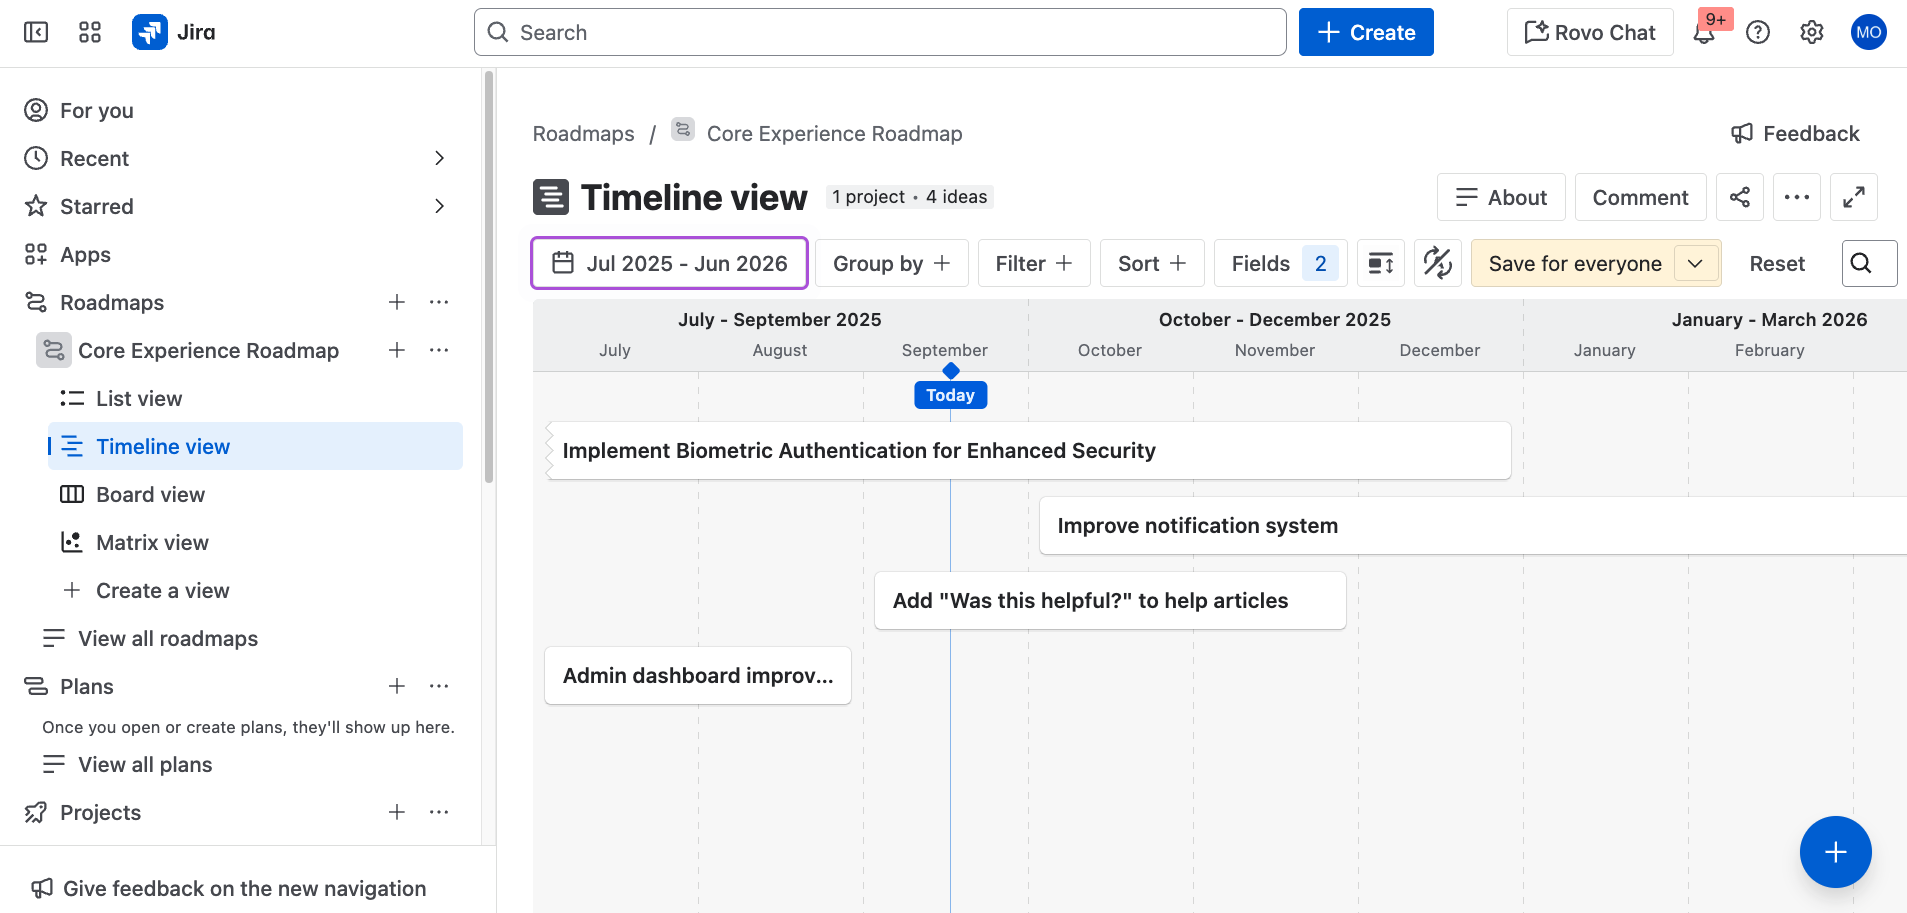
3. Basic Roadmaps
すべてのクラウド プランで、スペース固有のロードマップを使用できます。ロードマップでは、あなたのチームのエピックを作成、管理、視覚化できます。ロードマップは、作業を開始する数か月前に作業の概要を計画したり、複数のスプリント全体で大規模なストーリー グループを計画したりする際に便利です。プラン機能は複数のスペースにわたるロードマップを提供しますが、Basic Roadmaps は単一のスペース用です。
4. スペース テンプレート
Jira Cloud は、多くのユースケースに対応したすぐに使えるスペース テンプレートを 40 以上提供しており、さらに多くのテンプレートが定期的にリリースされています。Jira Enterprise プランには、管理者が既存のスペースの設定を再利用してスペース設定に費やす時間を短縮できるカスタム スペース テンプレートも用意されています。
5. DevOps インサイト
管理者が CI/CD パイプラインを Jira と統合している場合は、DevOps インサイトを利用できます。これには、サイクル期間およびデプロイ頻度のレポートと、インサイトが含まれており、リスクを分析し、顧客に価値を提供する頻度を測定するために使用できます。
6. 優れた統合
Jira Cloud を使用すると、Confluence などの他の Atlassian アプリと、MS Teams などのサードパーティ ツール、ご使用の開発ツールの統合がかつてなく簡単になります。
7. AI 機能
組み込みの AI は、よりスマートに、より速く、よりコラボレーティブに作業を行うのに役立ちます。ユーザーは手動のタスクや更新に時間を費やす代わりに、細かい処理を Jira AI に任せることで、インパクトの大きい作業に集中できます。Jira AI 機能を使い始める方法をいくつかご紹介します。
- 作業の分解: AI が生成した要約、説明、サブタスクを使って大まかなアイデアを分解し、扱いやすいタスクに変えます。
- ワークフロー ガイダンス: ワークフロー ビルダーや作業準備状況チェッカーなどの Rovo エージェントを使用して、プロセスを設計し、タスクが明瞭であることを確認し、スペースが順調に進んでいることを確認します。
- オンデマンド コンテキスト: 関連する Jira 作業項目、Confluence ページ、さらにはインライン定義をワークスペースで直接表示できるため、常に適切な情報を手元に置くことができます。
Jira で AI を使用する方法の詳細については、以下のリソースをご覧ください。
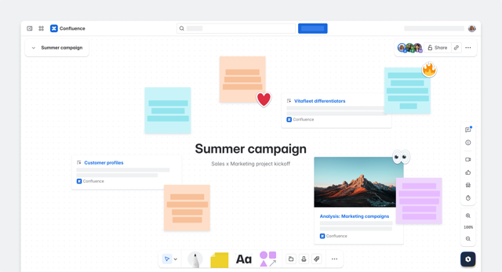
Confluence Cloud での主な違い
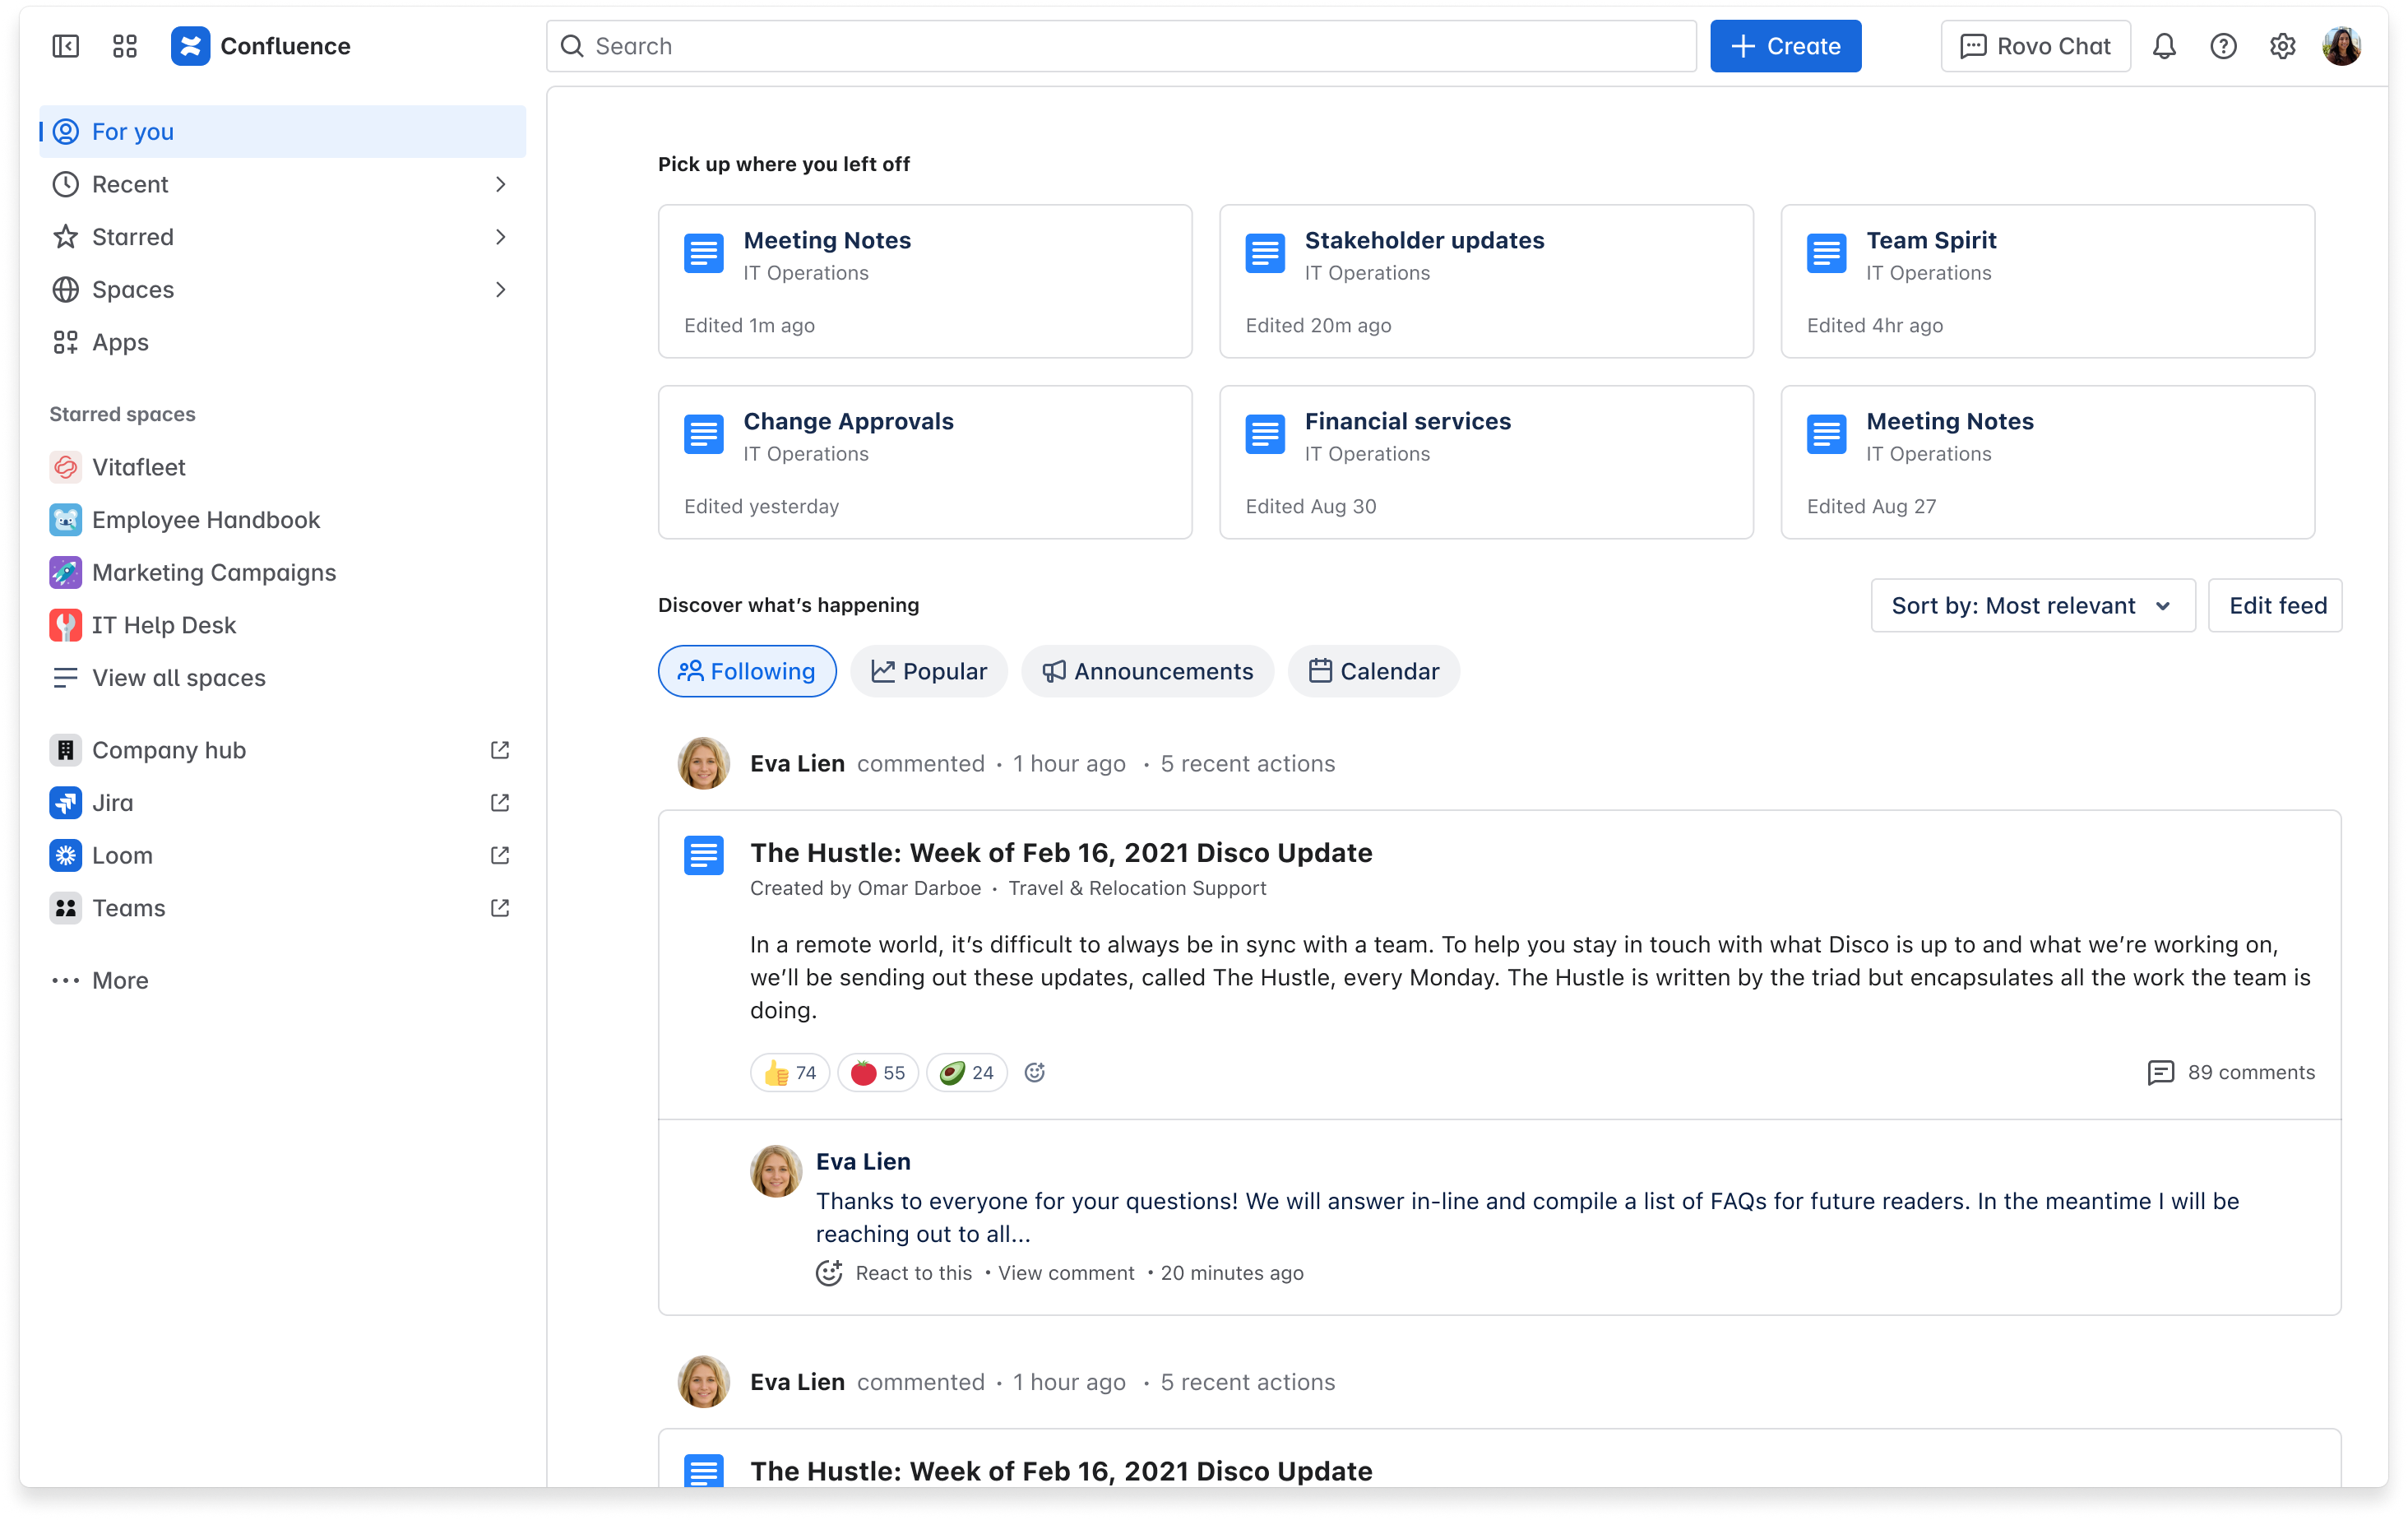
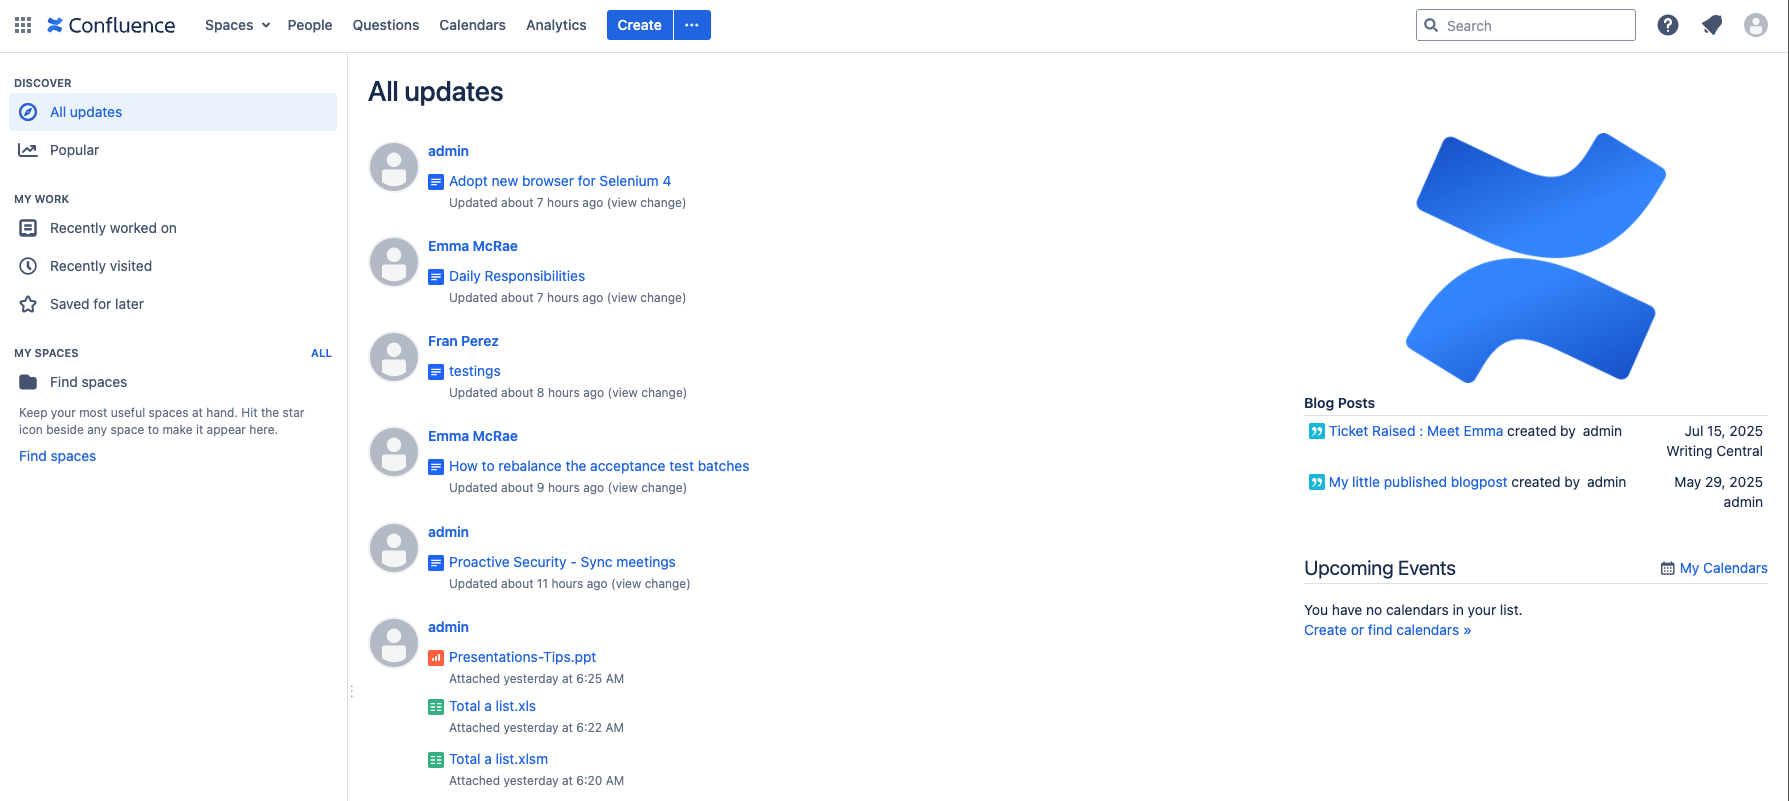
ホーム・ページ
クラウドとデータ センターのいずれも、ホームページへの共通のアクセス ポイントとして左上に "Confluence" のロゴが表示されています。クラウド ホームページのほとんどの要素は、データ センター ホームページにもあり、比較的簡単に見つられます。ただし、ホームページ自体は、次に示すように外観とレイアウトが大きく異なります。
ナビゲーション
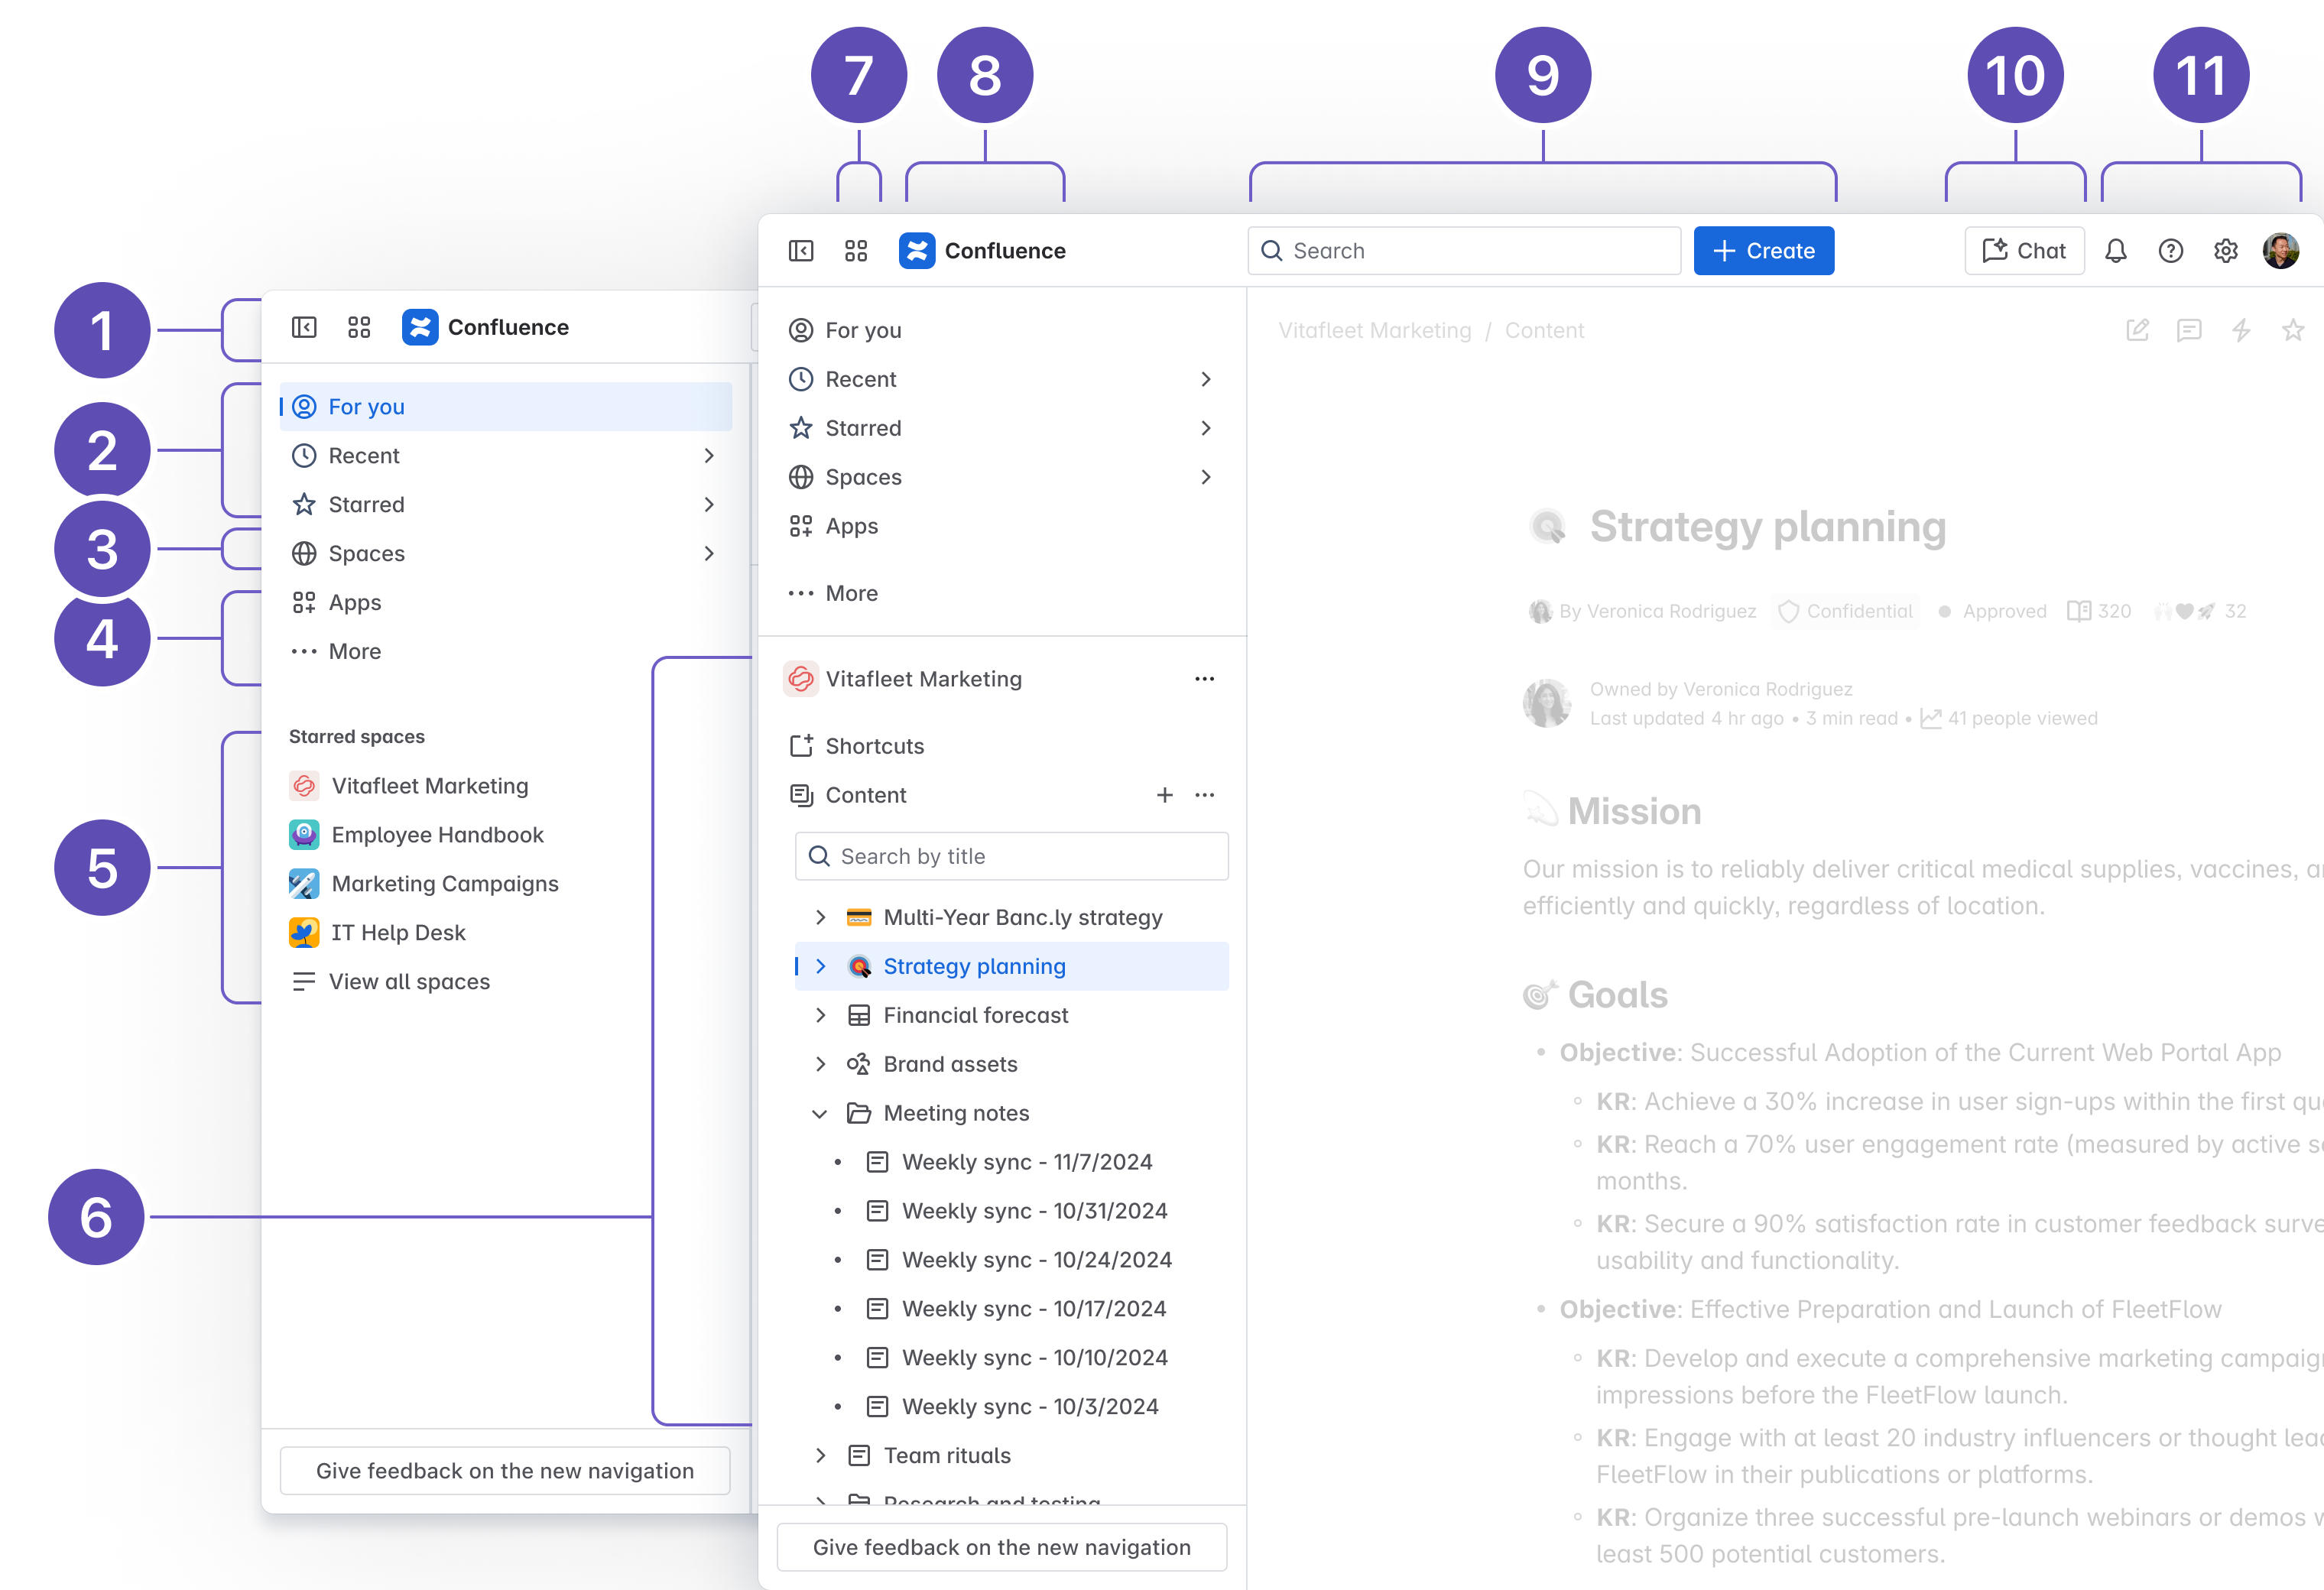
クラウドのナビゲーションは、必要なものをすばやく見つけられるように再設計されました。上部のナビゲーションは、検索や作成などの重要なアクションを効率化するために整理されています。その他の要素はカスタマイズ可能なサイドバーに表示され、Confluence 内での移動方法をより細かく制御できます。詳しくはブログをご覧ください。
-
折りたたみ可能なサイドバー: サイドバーを非表示にすると、余計なものが目に入らず、コンテンツをより広く表示できます。
- 主要な機能へのアクセス: [あなた専用の場所] では、サイト全体のトレンド コンテンツや、フォローしているユーザーの最新情報を確認できます。[最近] と [スター付き] を使用すると、最近表示したコンテンツ、編集したコンテンツ、またはスター付けを行ったコンテンツにすばやく戻れます。
- スペース: すべてのスペースを閲覧できます。スター付きのスペースは上部に、最近アクセスしたスペースはすぐ下にピン留めされます
-
アプリ & その他: Confluence サイトにインストールされているアプリを表示/管理します。注: 従来のナビゲーション バーにあった [カレンダー] と [アナリティクス] (Premium と Enterprise のみ) は、このメニューに表示されるようになりました。[その他] で Teams (旧称 People) などのアプリを探してピン留めすれば、簡単にアクセスできます。
-
スター付きのスペース: ご自身がスペース内にいないときは、スター付きのスペースがここに表示され、すばやくアクセスできます。
-
スペース コンテンツ: ご自身がスペース内にいる場合は、このセクションにスター付きのスペースではなくスペースのコンテンツ ツリーが表示されます。
-
アプリ スイッチャー: アトラシアン サイトやアプリの切り替えやサイドバーの折りたたみを行うことで、コンテンツを広く表示して、余計なものを省けます。
- Confluence ロゴ: Confluence ロゴをクリックすると、どこからでも [あなた専用の場所] に戻ることができます。
- 検索と作成: [検索] では、Confluence 全体のコンテンツ、スペース、ユーザーを検索できます。有効にすると、有料版では、Rovo 経由で AI を活用したアプリ横断検索が可能になります。[作成] では、リアルタイム文書、ページ、ホワイトボード、ブログ、データベース、スマート リンク、スペース全体など、あらゆるコンテンツ タイプを 1 か所で作成できます。
- Rovo チャット: AI を活用したチャット インターフェイスで、質問や会社のナレッジの検索を行えます。Rovo チャットは有料版で利用でき、管理者が有効にする必要があります。
- 通知、ヘルプ、設定、プロファイル: 最新情報を入手して、サポートを受け、エクスペリエンスをパーソナライズできます。
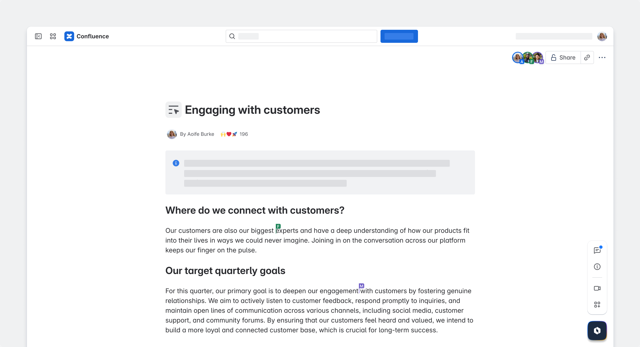
一般的なインターフェイス
どちらのバージョンにも、スペース コンテンツをナビゲートするためのサイドバーが含まれていますが、一部の要素は移動しています。重要な変更点の 1 つは、スペース設定がサイドバーのスペース名の横にある [その他の操作 (•••)] にあることです。
編集者
クラウド エディターで重要なアップデートが行われました。これは、クラウドでユーザーが体験する最大の違いの 1 つです。
- フローティング アクション ツールバー: コメントやページの詳細など、頻繁に使用するツールが右側の専用フローティング ツールバーに表示されます。これまでよりも見つけやすくなり、編集ツールバーに埋もれることもありません。
- ピン留めできる編集ツールバー: 作業方法を選択できます。ツールバーをインラインで表示して編集時間を短縮するか、上部にピン留めしてより固定的に編集しましょう。
- テンプレート: テンプレートが豊富に揃うライブラリを活用すれば、すぐに作成を開始できます。
- マクロ: クラウドでは、古いマクロ (特にパフォーマンスを低下させるマクロ) が削除され、よりシンプルな組み込みコマンドに置き換えられました。削除されたマクロと代替方法のリストは、こちらから確認できます。クラウドでは現在、ユーザー マクロをサポートしていません。

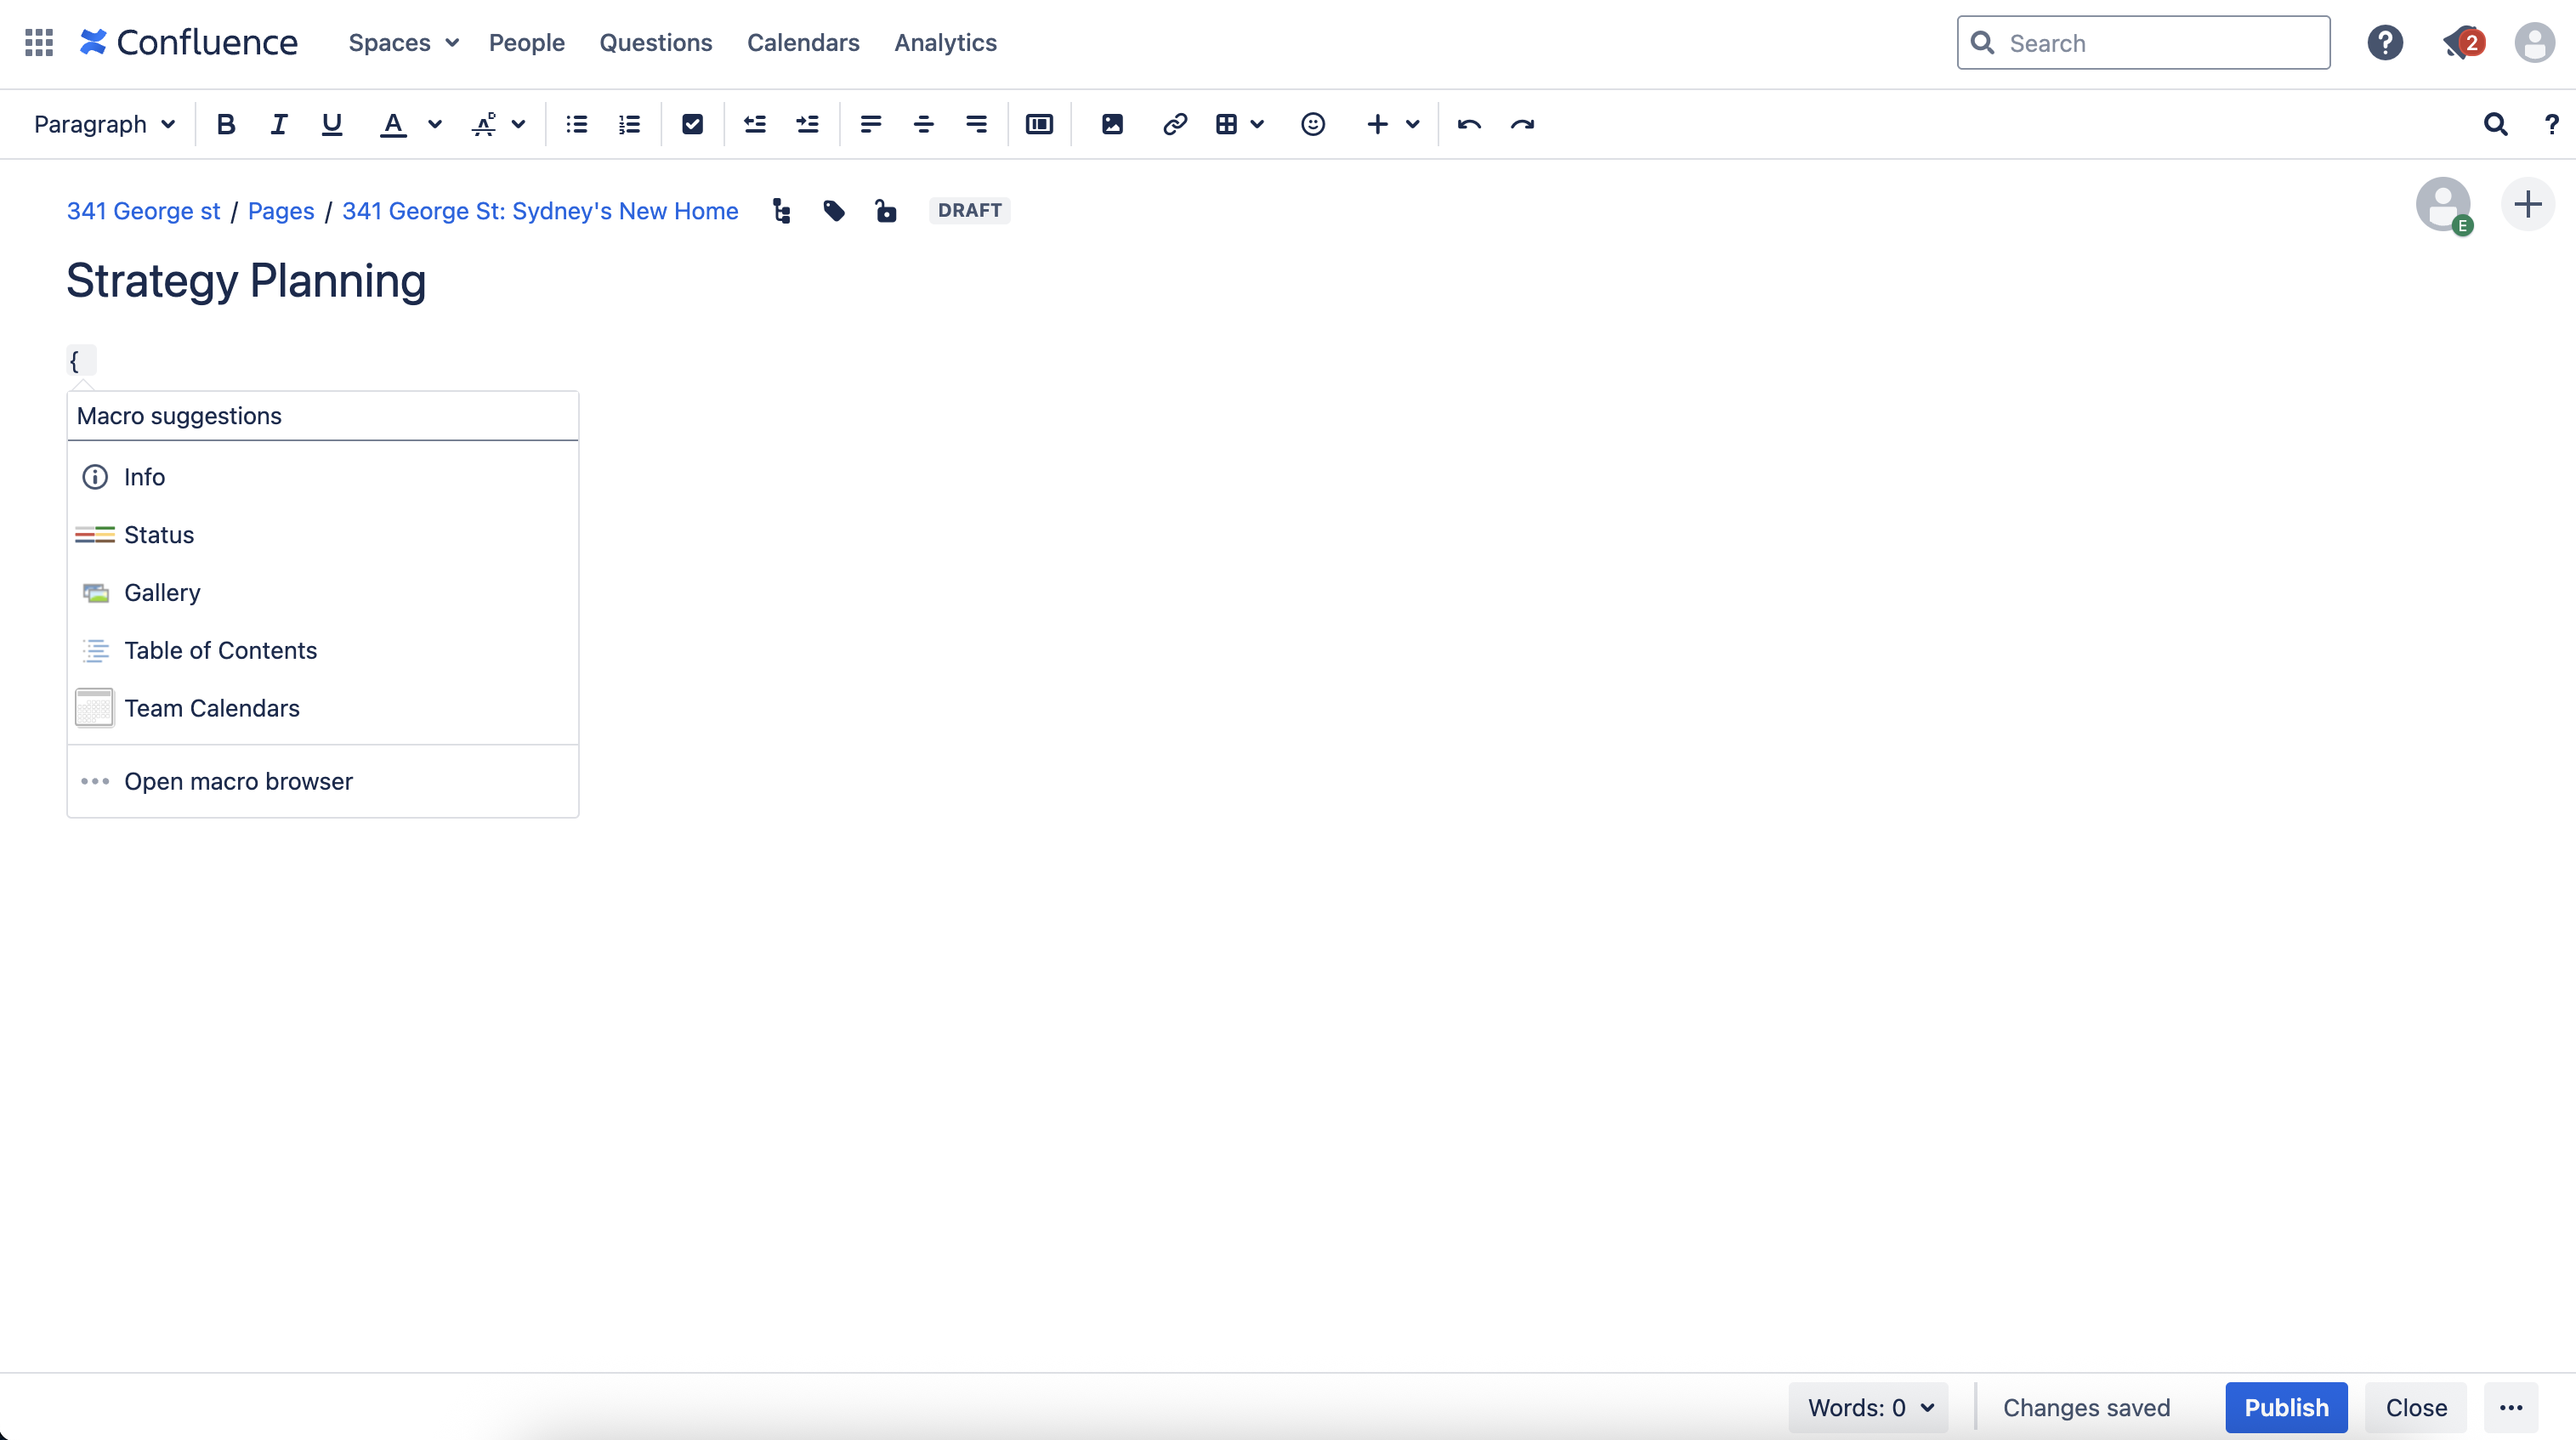
エディタのオートコンプリートのキーボード ショートカット
パワー ユーザーが注目する最大の変更点の 1 つは、エディターで使用できるオートコンプリート ショートカットです。データ センターのエディターに慣れているユーザーは、マクロの挿入に Wiki マークアップ表記 "{" をよく利用するでしょう。クラウドでは、スラッシュ コマンド "/" の使用に切り替える必要があります。これは、入力中にマクロ、要素、ツールにアクセスできる、単一の効率的な方法です。
操作 | クラウドのオートコンプリート文字 | Server/Data Center のオートコンプリート文字 |
|---|---|---|
| 表 | クラウドのオートコンプリート文字
| Server/Data Center のオートコンプリート文字 | |
| リンク | クラウドのオートコンプリート文字
| Server/Data Center のオートコンプリート文字 [ |
| 画像 | クラウドのオートコンプリート文字
| Server/Data Center のオートコンプリート文字 ! |
| マクロ | クラウドのオートコンプリート文字
| Server/Data Center のオートコンプリート文字 { |
| 見出し | クラウドのオートコンプリート文字 # | Server/Data Center のオートコンプリート文字 h1. |
| リスト (番号なし) | クラウドのオートコンプリート文字 * | Server/Data Center のオートコンプリート文字 * |
| リスト (番号付き) | クラウドのオートコンプリート文字 1. | Server/Data Center のオートコンプリート文字 # |
ヒント:Confluence クイック・スタート製品ガイドをユーザーと共有して、ユーザーが上記のショートカットに簡単にアクセスできるようにします。
その他のエディタの変更
- インライン コメント: クラウドでは、ページの編集中、表示中にかかわらず、インライン コメントの追加が同じように機能します。
- コメントするテキストをハイライトします。
- 表示される [コメントを追加] ボタンをクリックします。
- コメントを入力して、[保存] (Ctrl+S または ⌘+S) を押します。
- アンカー・リンク:クラウドでは、すべての見出しに対してアンカー・リンクが自動的に作成されます。見出し以外のリンクは、引き続きアンカー・マクロによって指定する必要があります。
- 添付ファイルの追加: クラウドに添付ファイルを追加するには、ファイルのリンクをコピーしてページに直接貼り付けます。注: 共有ファイル ライブラリから添付ファイルの埋め込みやリンクを行うことに慣れているユーザーは、ワークフローを調整する必要がある場合があります。
- 表の編集: クラウドでの表の編集が、より直感的に操作できるように再設計されました。長期的に見ると簡単に作業できるようになりましたが、慣れるまでは違和感を覚えることもあるため、チームに対する事前の周知をご検討ください。
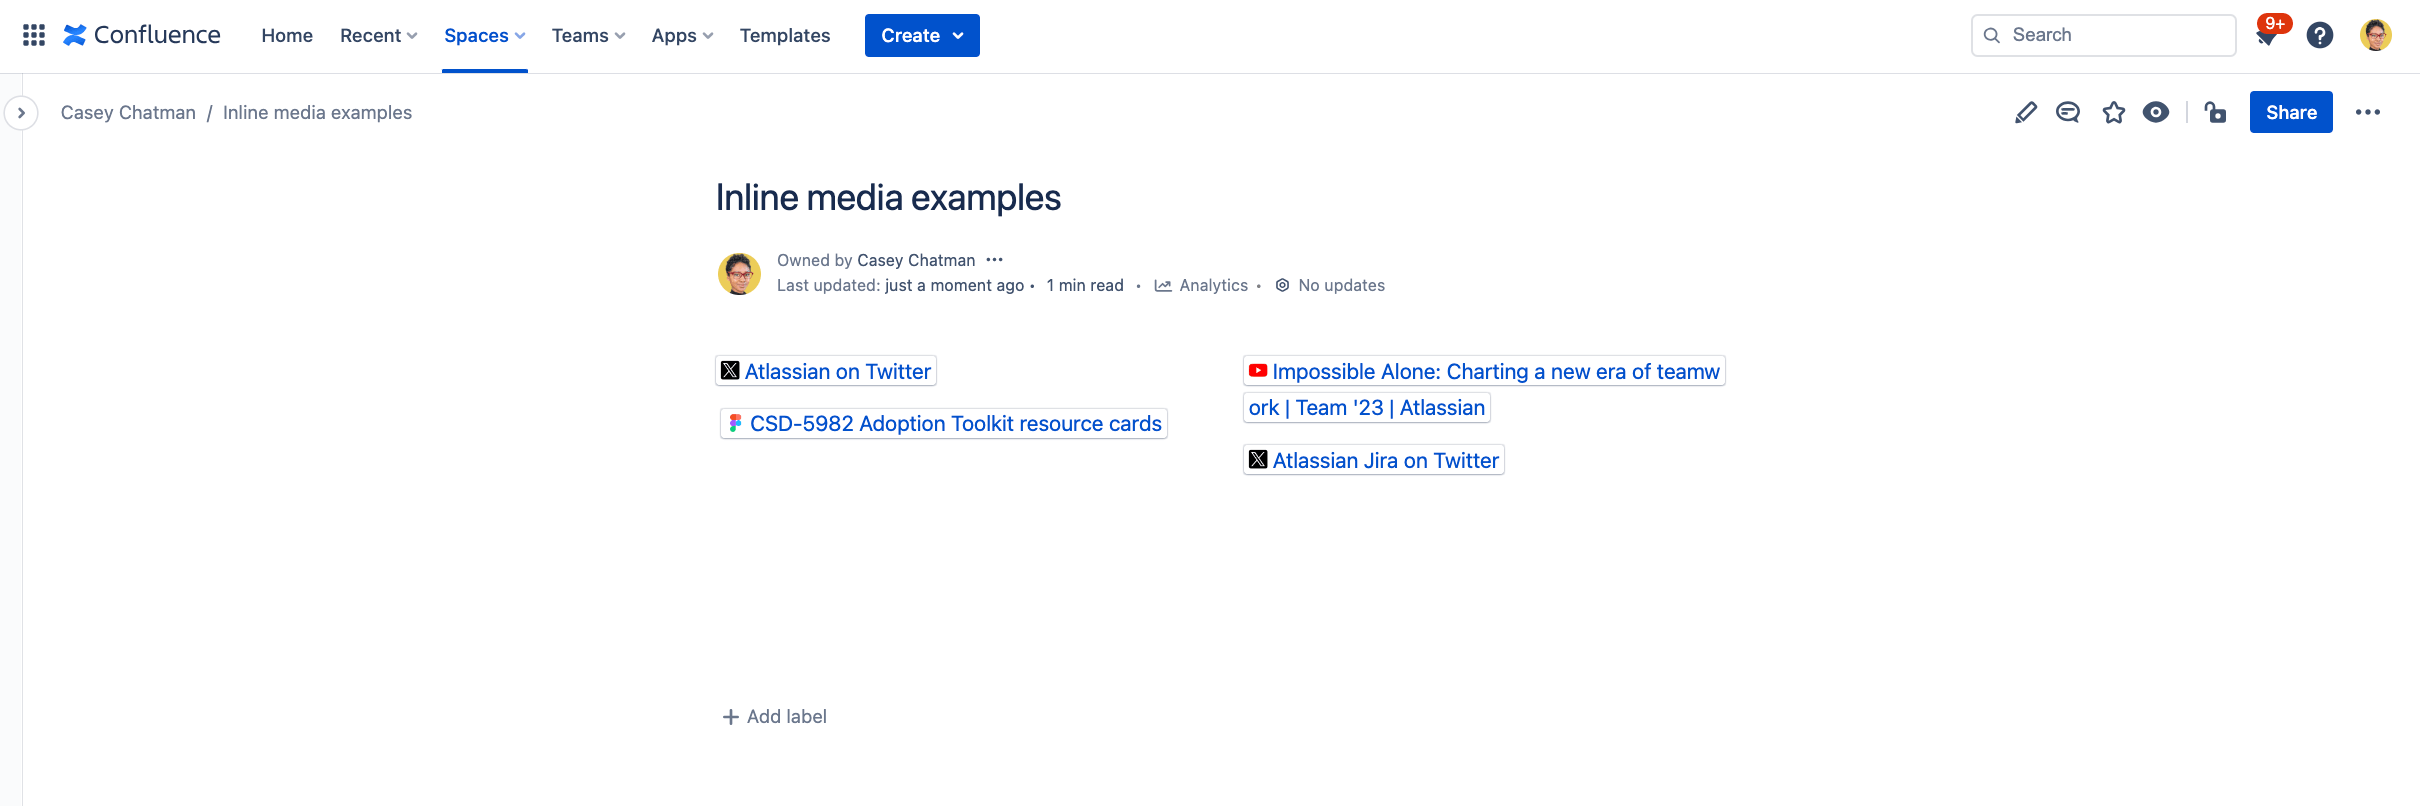
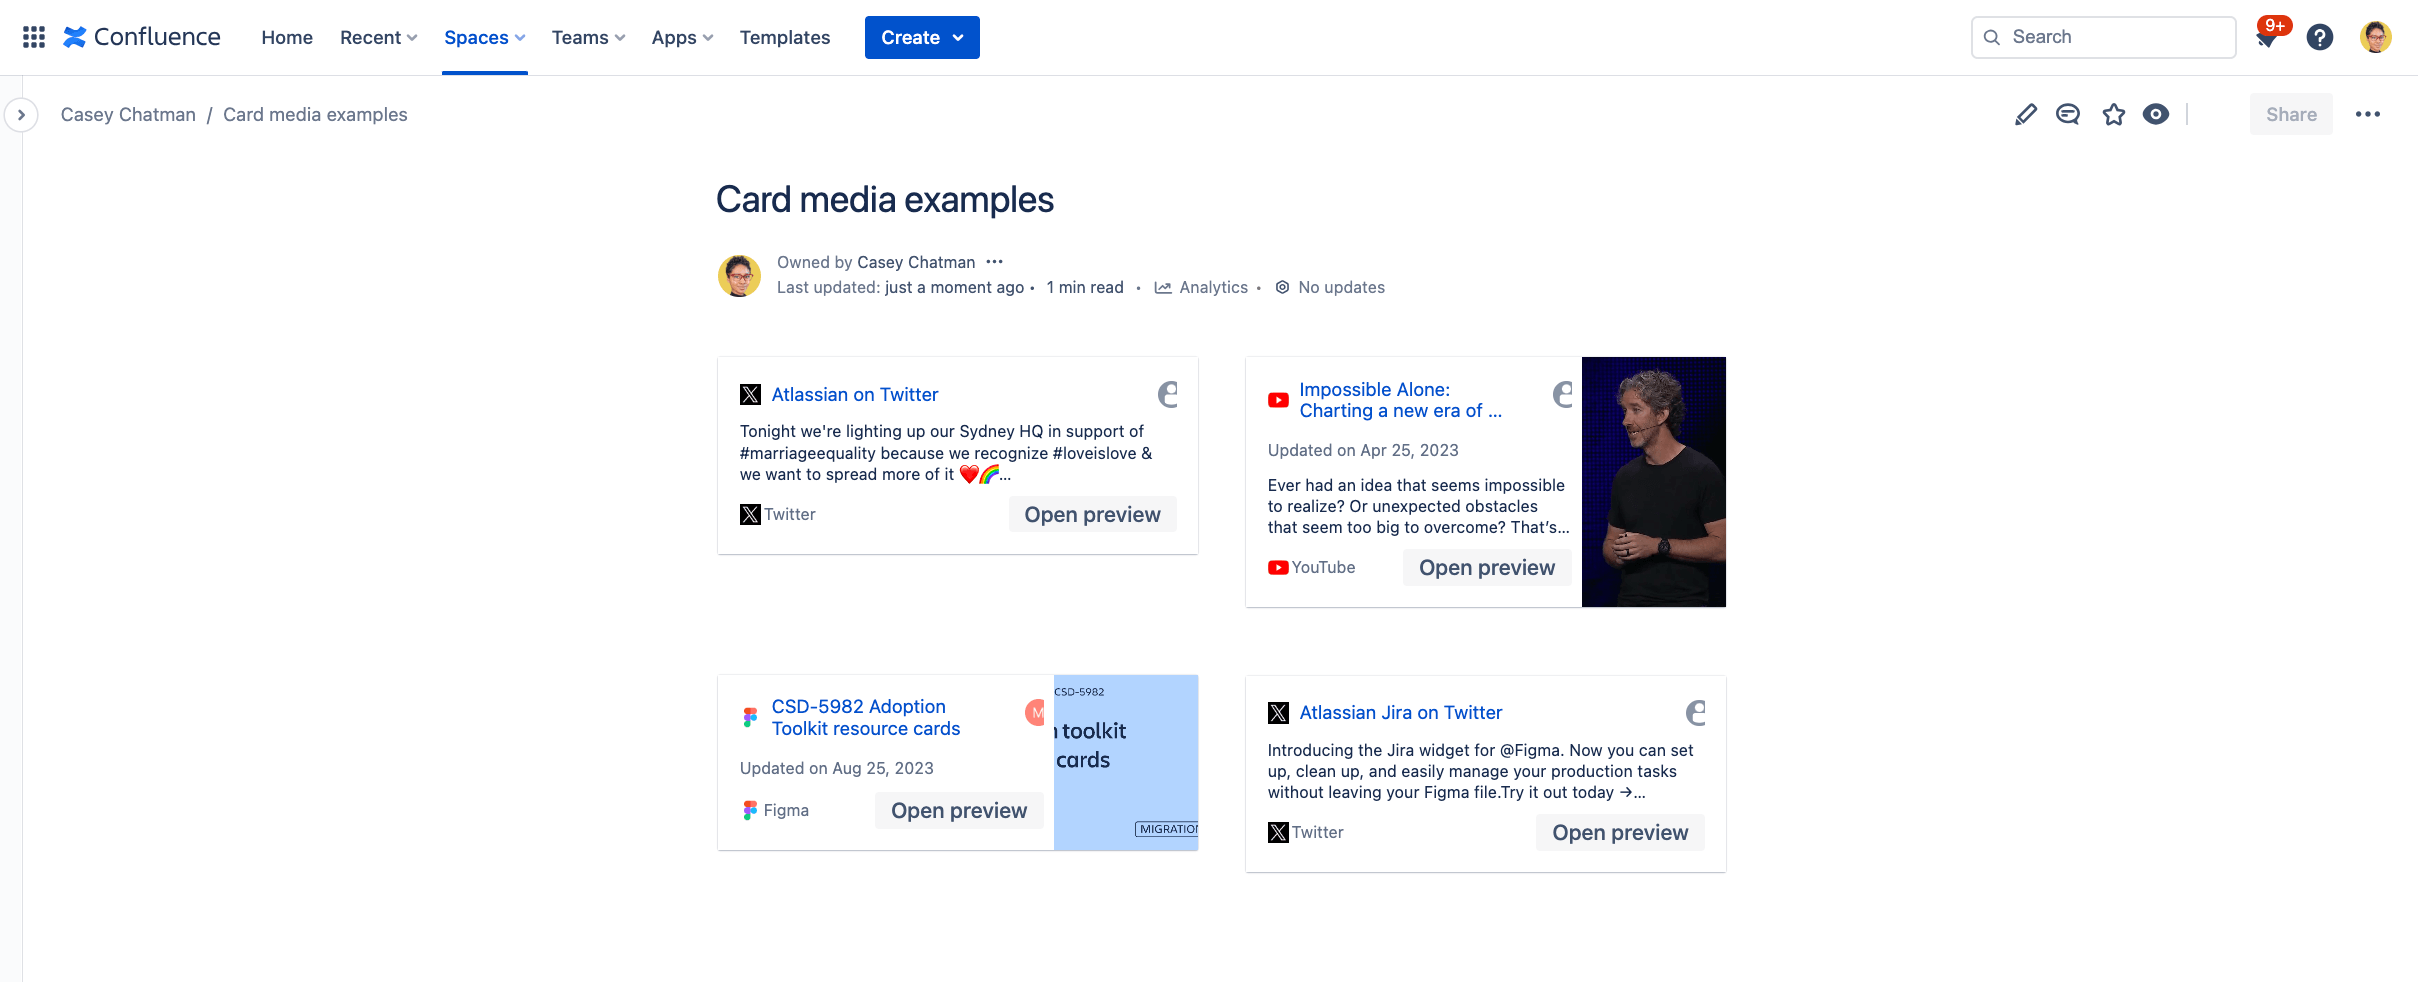
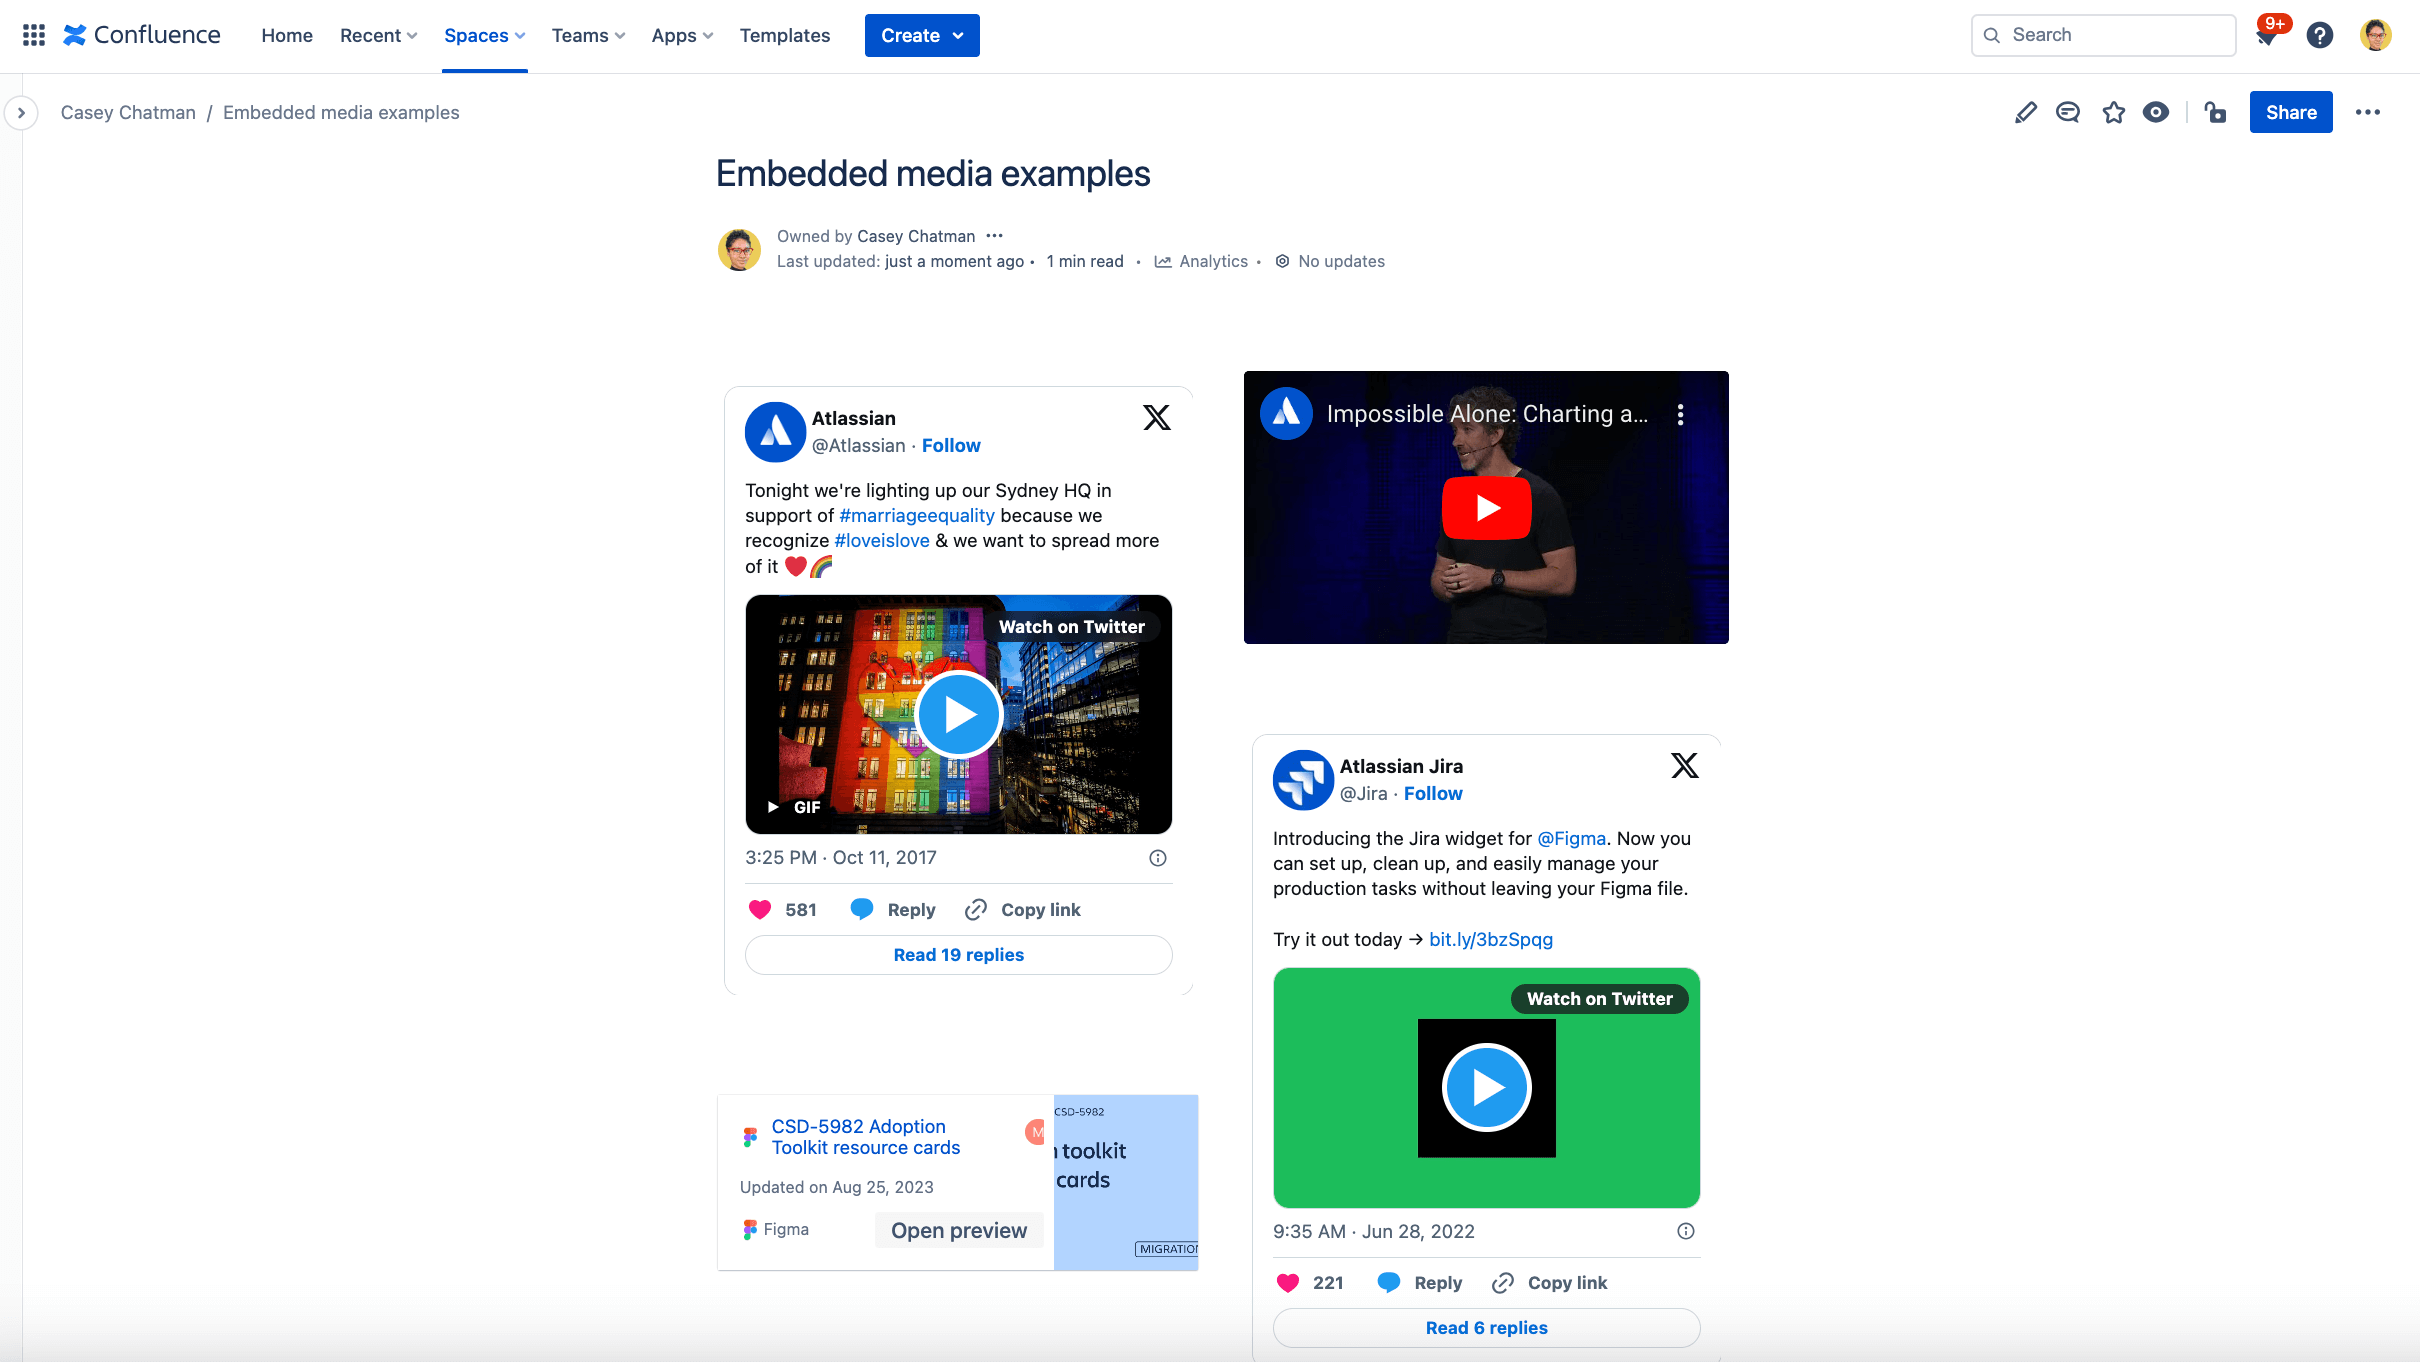
スマート リンク
スマート リンクは、Confluence ページ (または Jira 作業項目) 内のリンクに関する重要なコンテキストを、そのページから離れることなく表示します。サポートされているリンクをエディターに貼り付けると、自動的にスマート リンクに変換され、重要な詳細をすばやくプレビューできます。
スマート リンクは、アトラシアンのツール (Confluence、Jira、Loom、Trello、Bitbucket など) や多くのサードパーティ アプリ (Google Drive、Figma、Slack など) でも機能します。
各スマート リンクの表示方法を選択できます。表示オプションは次のようにいくつかあります。
コンテンツをハイパーリンクするオプションの詳細は、スマート・リンクについてご確認ください。
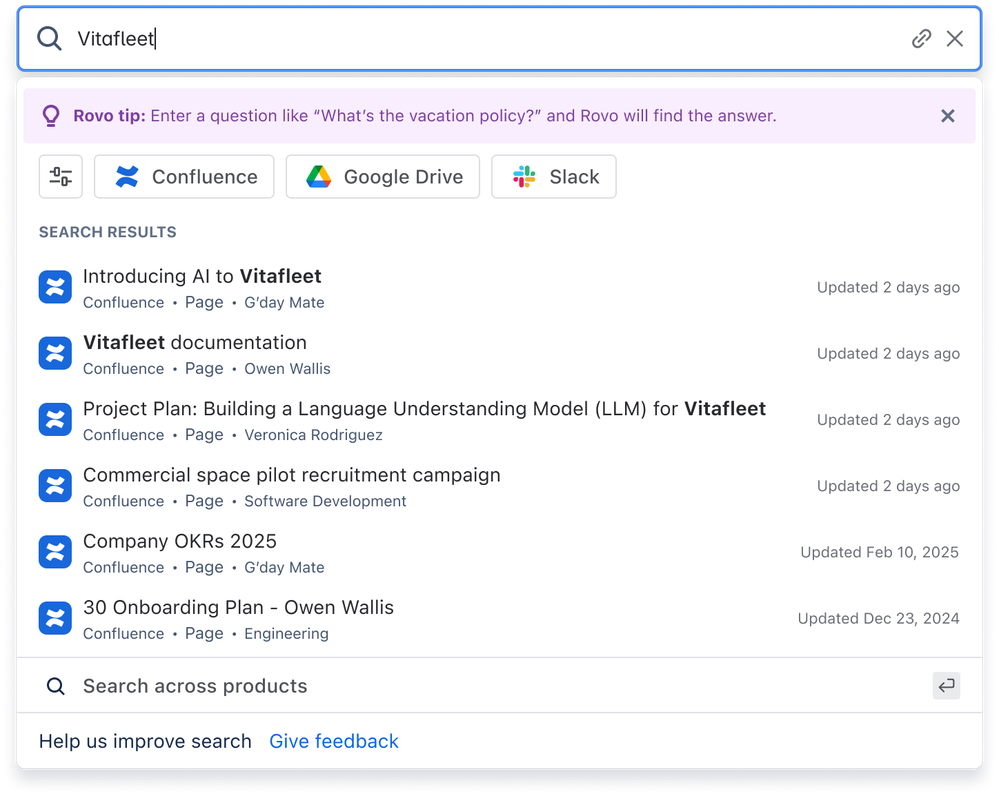
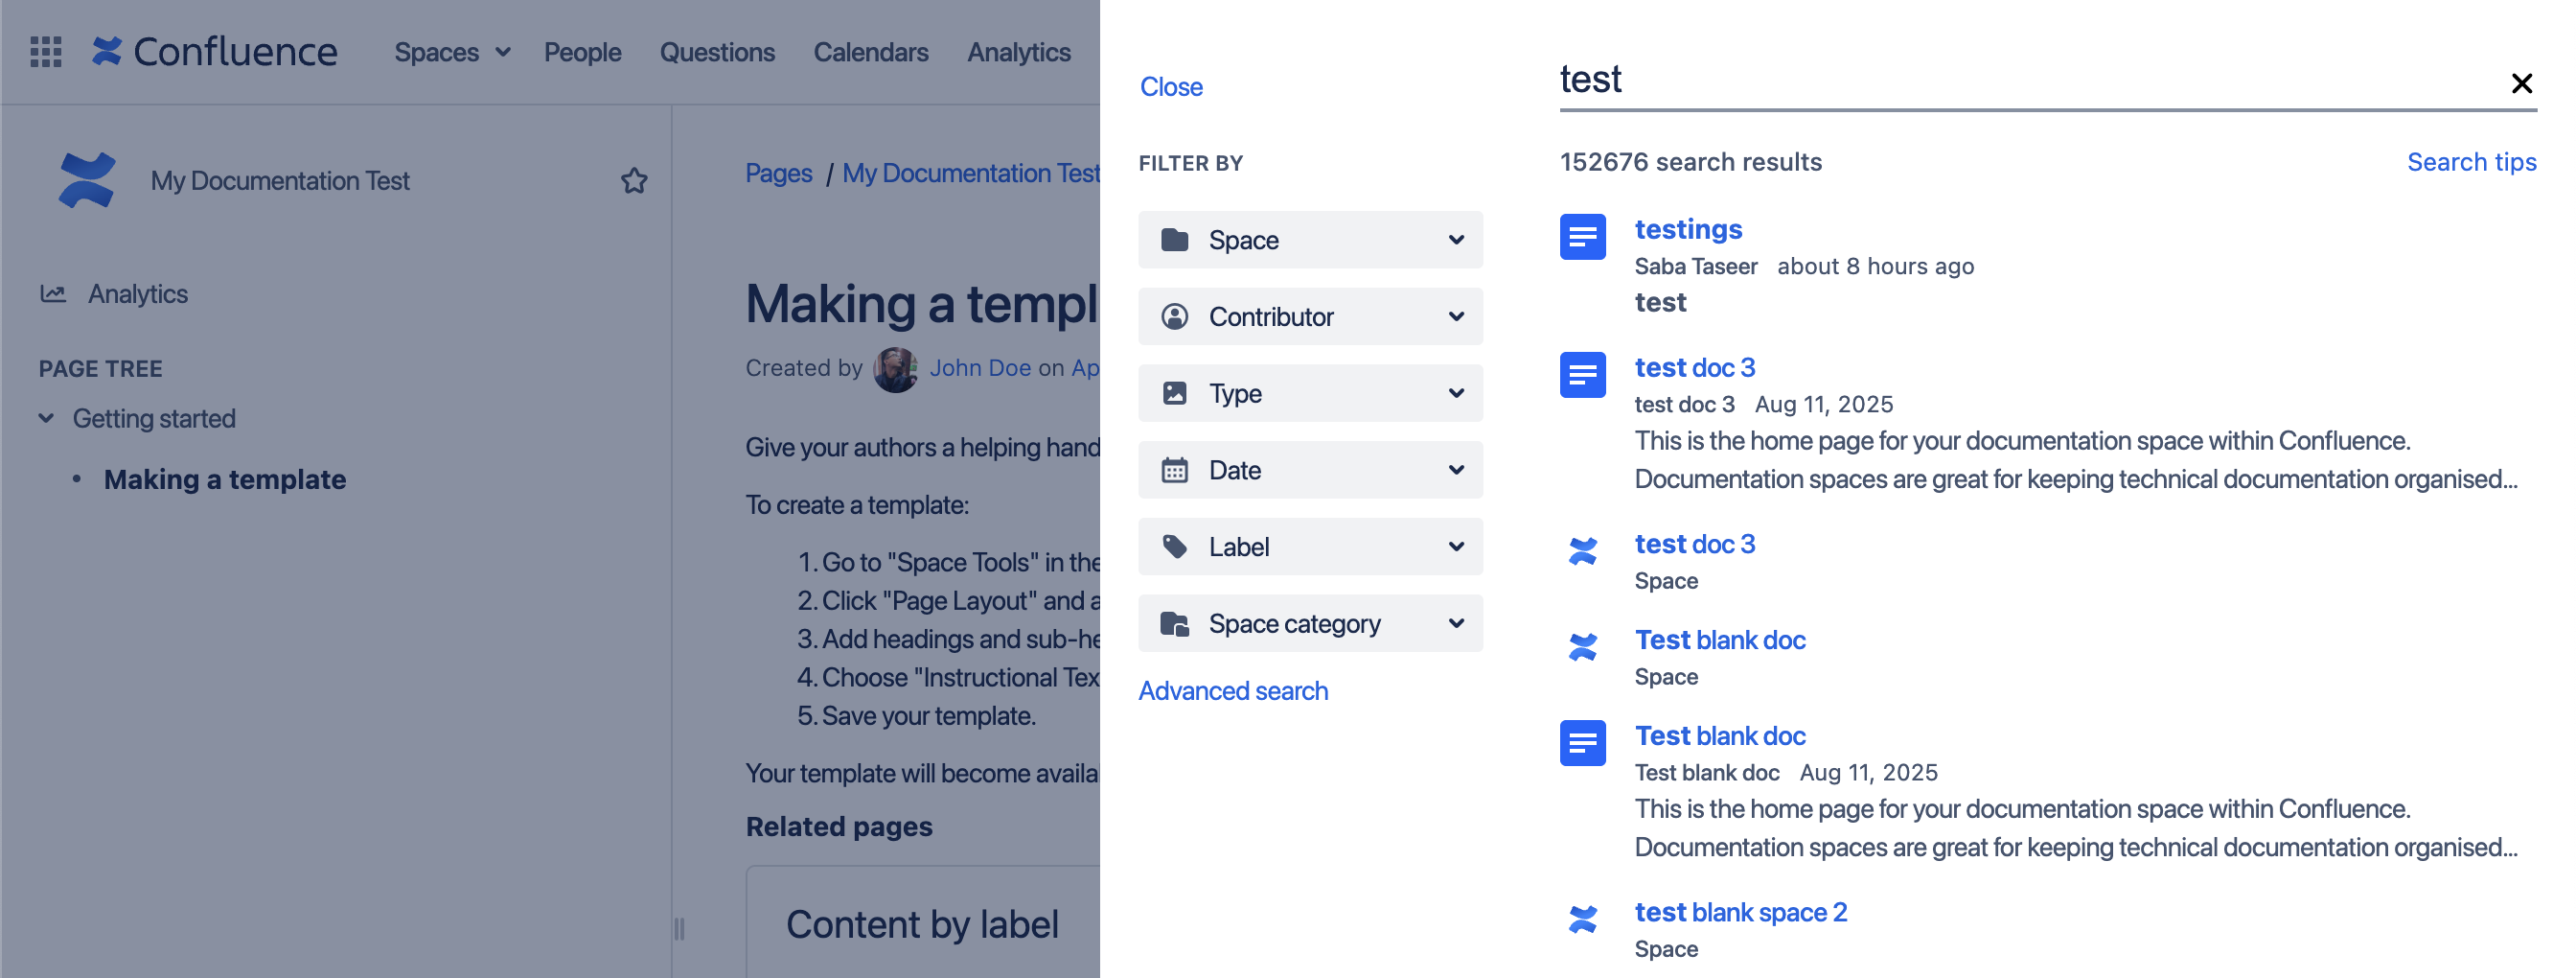
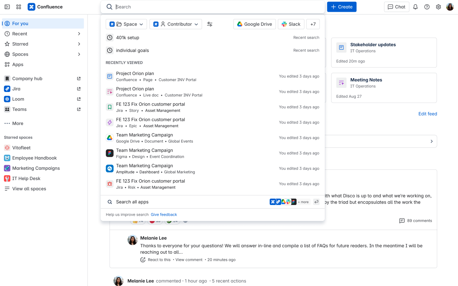
検索
クラウドでの検索は、より速く、より関連性が高く、柔軟性があります。有料サブスクリプション (Standard、Premium、Enterprise) をご利用の場合、Rovo AI を有効化すると検索が強化され、検索結果が次のように向上します。
- Jira、Google Drive、Slack などのツールにおけるアプリ間の結果
- 自然言語による質問に対する AI 生成の回答、引用ソース付き
その他のコンテンツ タイプ
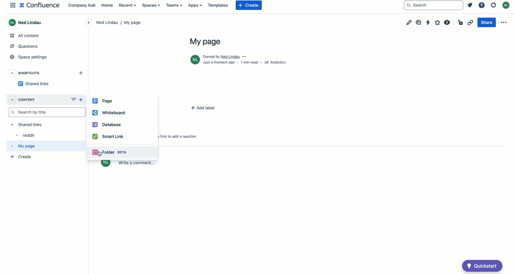
Confluence Cloud は、ページやブログ以外にも、さまざまなワークフローに適したマルチモーダル コンテンツ作成をサポートしています。
- リアルタイム文書: 公開しなくても、リアルタイムでコラボレーションできます。
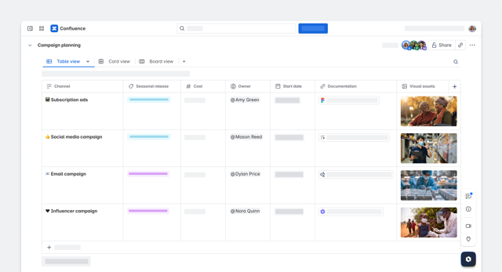
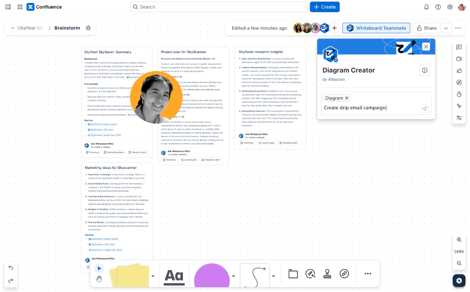
- ホワイトボード: アイデアの視覚的なブレーンストーミング、図式化、マッピングを行えるデジタル ホワイトボードです。
- データベース: 構造化された情報をカスタマイズ/フィルタリング可能なビューに整理します。成果物を追跡し、リソースを管理して、さまざまなツールから得たナレッジを一元化します。
- フォルダー: スペースにフォルダーを追加して、関連する作業をまとめておくことができます。フォルダーは、関連するすべての作業を保存する場所として使用される、シンプルなコンテナーであるとお考えください。
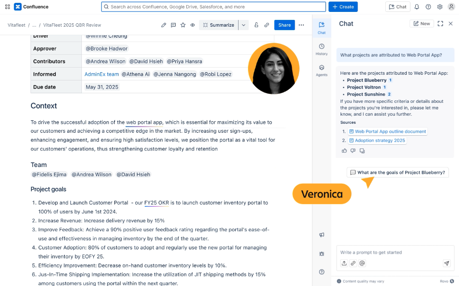
AI 機能
Rovo が組み込まれた Confluence Cloud では、チーム間でのナレッジ共有やコラボレーションをより簡単にすばやく行えます。
- 情報をすばやく検索: Confluence ナレッジ ベースを検索して、Rovo チャットにわかりやすい言葉で質問すれば、ページや情報が即座に表示されます。
- ルーチン作業の自動化: すぐに使えるエージェントを使用して、コンテンツの下書き、タスクの管理、ワークフローの合理化を行います。
- AI アシスト付き編集: Confluence ページでテキストをハイライトして、[文章を改善する] で AI エディターを起動すると、トーンの調整、文法の修正、記述したコンテンツの改善をすばやく行えます。
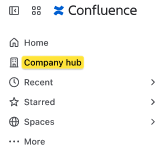
会社ハブ
Confluence Cloud Premium と Enterprise で利用できる会社ハブは、カスタマイズ可能な中央ホームページです。ここでは、組織全体が主要な最新情報、お知らせ、検証済みリソースにアクセスできます。
既定では、アプリ管理者とサイト管理者のみがハブを表示してセットアップできます。ただし、他の信頼できるユーザーにも表示方法と編集に関する権限を付与できます。
対象となるユーザーは、左側のサイドバーにある会社ハブにアクセスして、会社のニーズに合わせてカスタマイズを開始できます。
Jira Service Management Cloud の主な相違点
新しいスペース タイプ
標準の IT サービス管理およびカスタマー サービス管理のテンプレートに加えて、Jira Service Management Cloud には、Jira Service Management Data Center では利用できない人事、マーケティング、財務、営業、法務などの他のチーム向けのスペース テンプレートもあります。
テンプレートを探す
事前設定済みのテンプレートを使って、すぐにスペースを使い始めましょう。あるいは、あなたのチームの作業方法をご紹介ください。テンプレートのアイデアの提出はこちら。

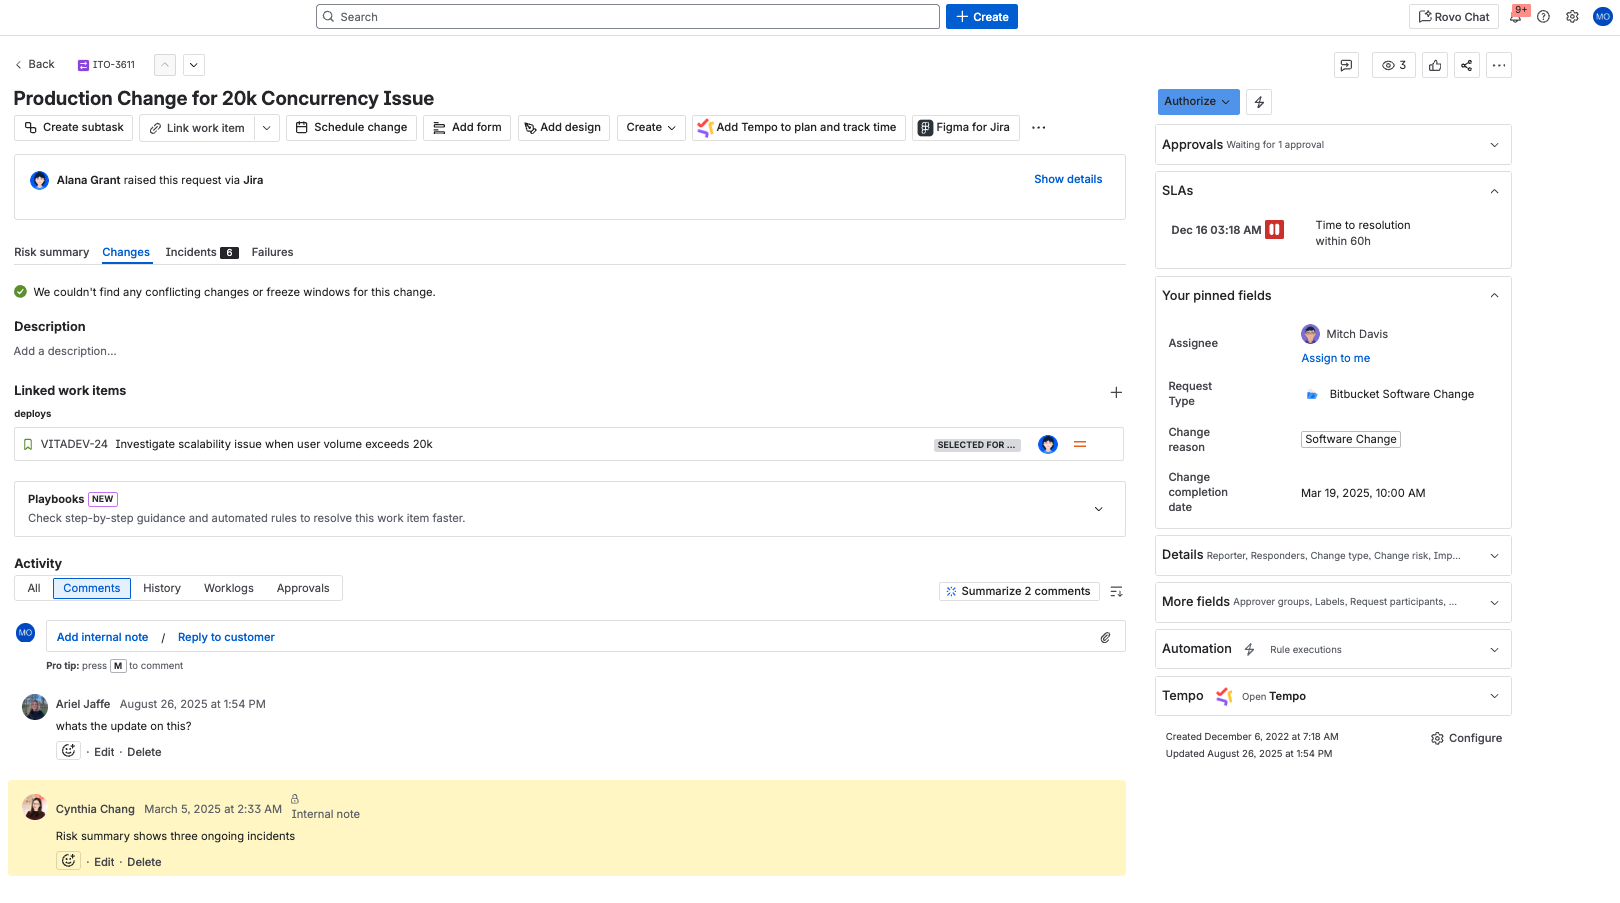
作業項目ビューへの変更
上記の「Jira」セクションで概要を説明した新しい Jira 作業項目ビュー機能が、Jira Service Management を含むすべての Jira アプリで利用できるようになりました。これは、ユーザーにとってより優れた、より一貫した機能を意味します。以下のスクリーンショットを参照して、すべてがどのようにして統合されているかをご確認ください。
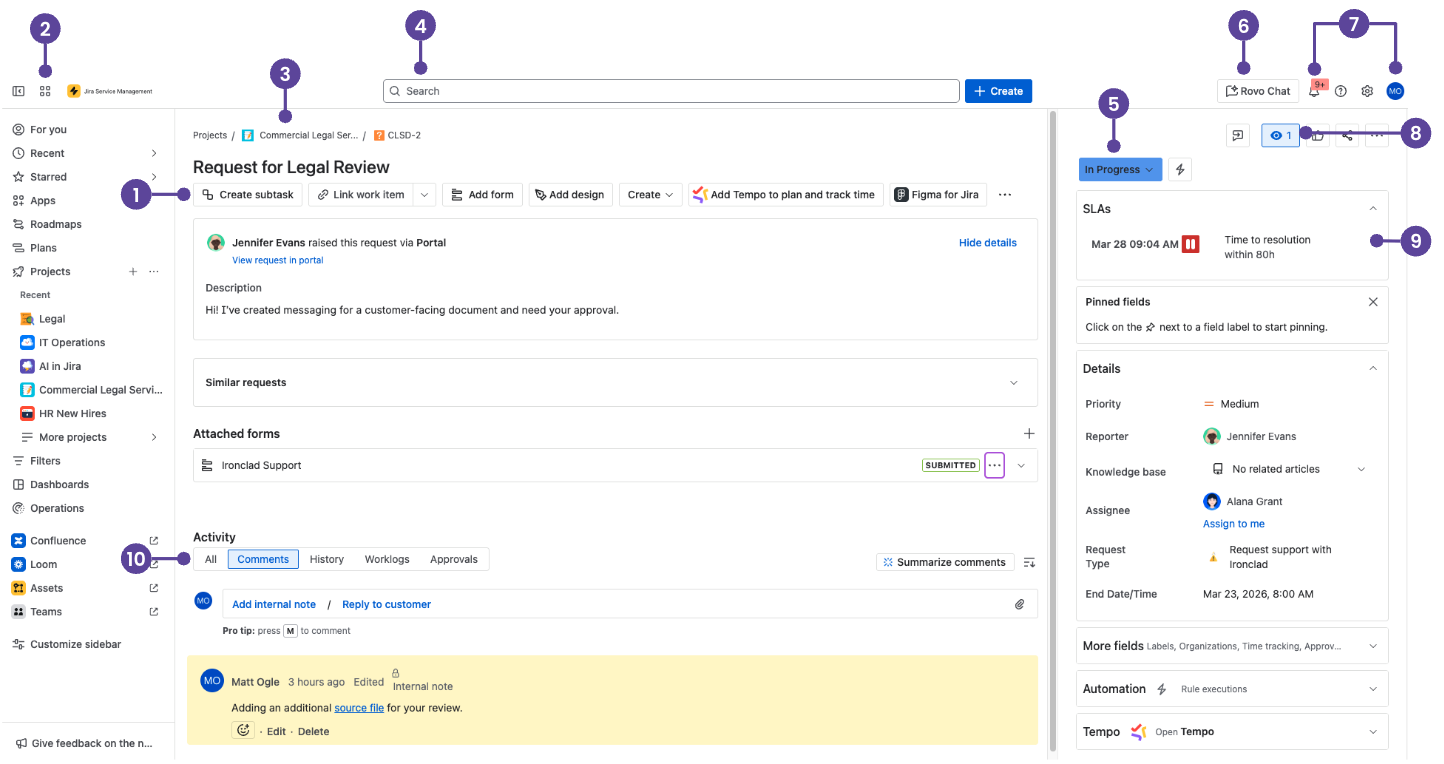
- クイック追加ボタン: サブタスクを作成するか作業項目をリンクし、Web または Confluence のリンクを追加し、Atlassian Marketplace アプリのコンテンツを追加します。
- アプリ スイッチャー: Atlassian アプリやサードパーティ アプリ (Confluence、Talent、Miro など) を切り替えたり、他のサイトに移動したりできます。
- キューに戻る:ワンクリックでキューに戻ります。
- 検索: 作業項目、スペース、ボード、キュー、フィルター、およびユーザーを検索します。有効にすると、有料版では、Rovo 経由で AI を活用したアプリ横断検索が可能になります。
- 作業項目のステータス: ステータスを選択し、作業項目のステータスを変更するトランジションを選択します。
- Rovo チャット: AI を活用したチャット インターフェイスで質問をしたり、会社全体のナレッジを調べたりできます。Rovo チャットは有料版で利用でき、管理者が有効にする必要があります。
- 通知、ヘルプ、設定、およびプロファイル: Jira Service Management で何が起こっているかを確認したり、ヘルプを利用したり、設定 (Jira Service Management 管理者のみ) やパーソナル設定をカスタマイズしたりできます。
- ウォッチや共有などのアクション: 作業項目を監視したり、[アクション] メニューで移動や複製などの他のアクションを実行したりできます。
- コンテキスト フィールド: SLA、リクエスト参加者、および作業項目の説明に役立つその他の情報を含めることができます。コンテキスト フィールドで、[フィールドをさらに表示] (またはチーム管理対象スペースの場合は [その他のフィールド]) を選択すると、作業項目ビューで通常は非表示になっている空のフィールドを表示できます。
- コメント バー: コメントを追加するには、[内部メモを追加] を選択してチームだけが閲覧できるコメント (黄色で強調表示) を投稿するか、[顧客に返信] を選択してリクエストを出した人を含めます。添付ファイルを追加するには、[添付ファイル] のクリップ型アイコンを選択します。
ヒント:Jira Service Management クイック・スタート製品ガイドをユーザーと共有して、ユーザーが上記のショートカットに簡単にアクセスできるようにします。
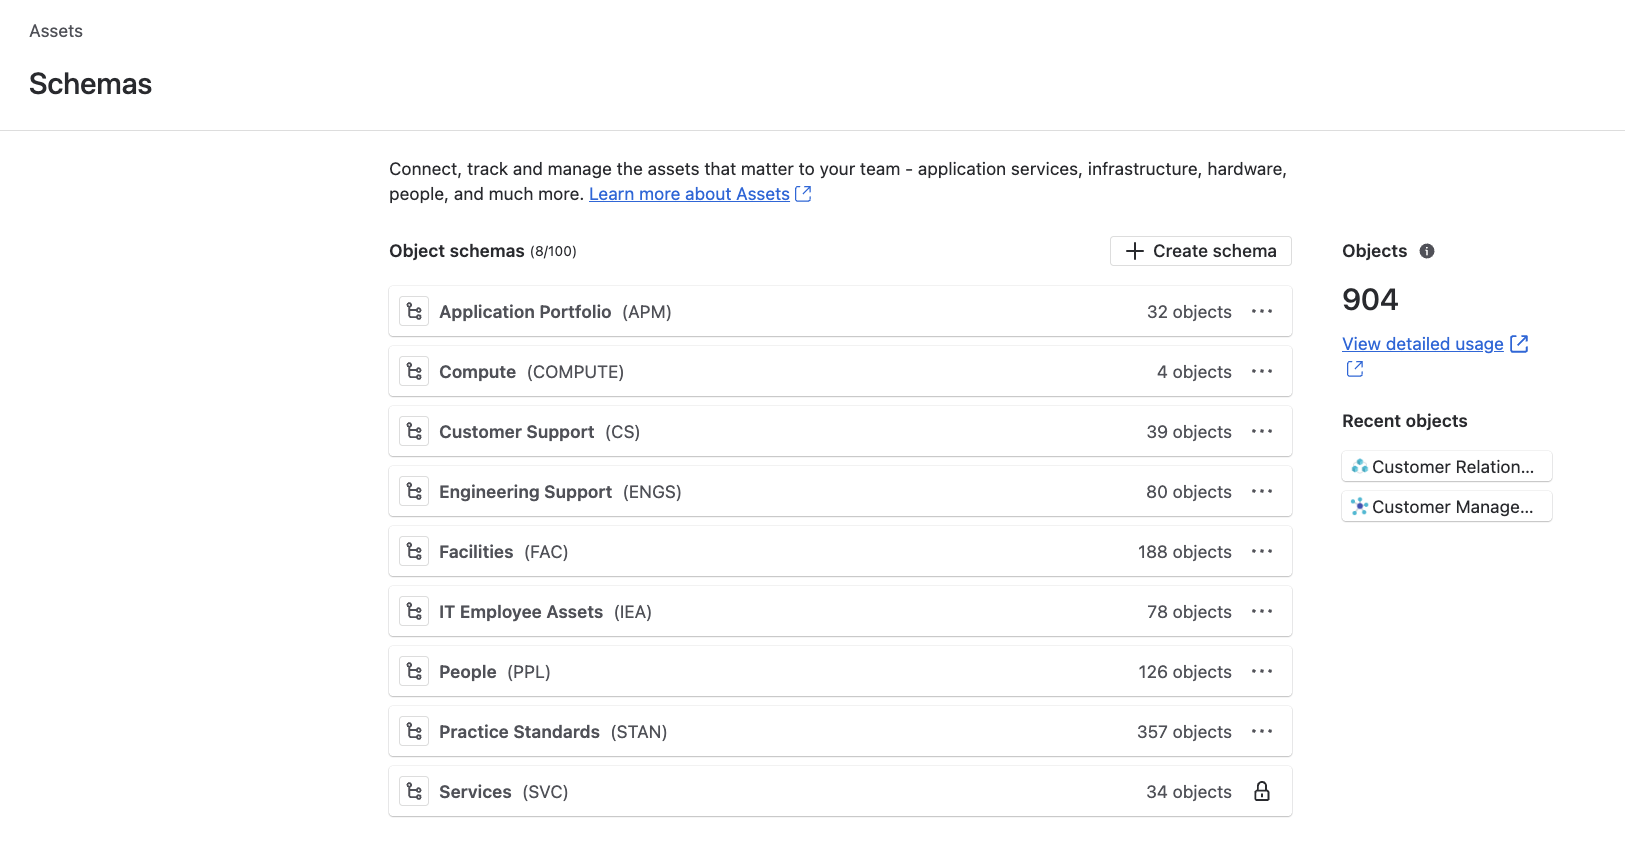
クラウド内のアセット
アセットは、Jira Service Management のネイティブなアセットと構成の管理ツールです (Jira Service Management Cloud Premium と Enterprise に含まれます)。保存されているアセットと構成アイテムはオブジェクトと呼ばれ、オブジェクト タイプごとにグループ化され、スキーマ内に編成されて重要な関係を視覚化します。これは、企業管理対象スペースのみと互換性があります。
キューおよび新しいエージェント向け機能
新しいエージェント機能により、サービス チームは作業項目をより効果的にトリアージし、リクエストの詳細を一目で確認し、顧客に迅速に対応できるようになりました。
顧客への返信は簡単です
キュー・アクションでトリアージが高速化されます
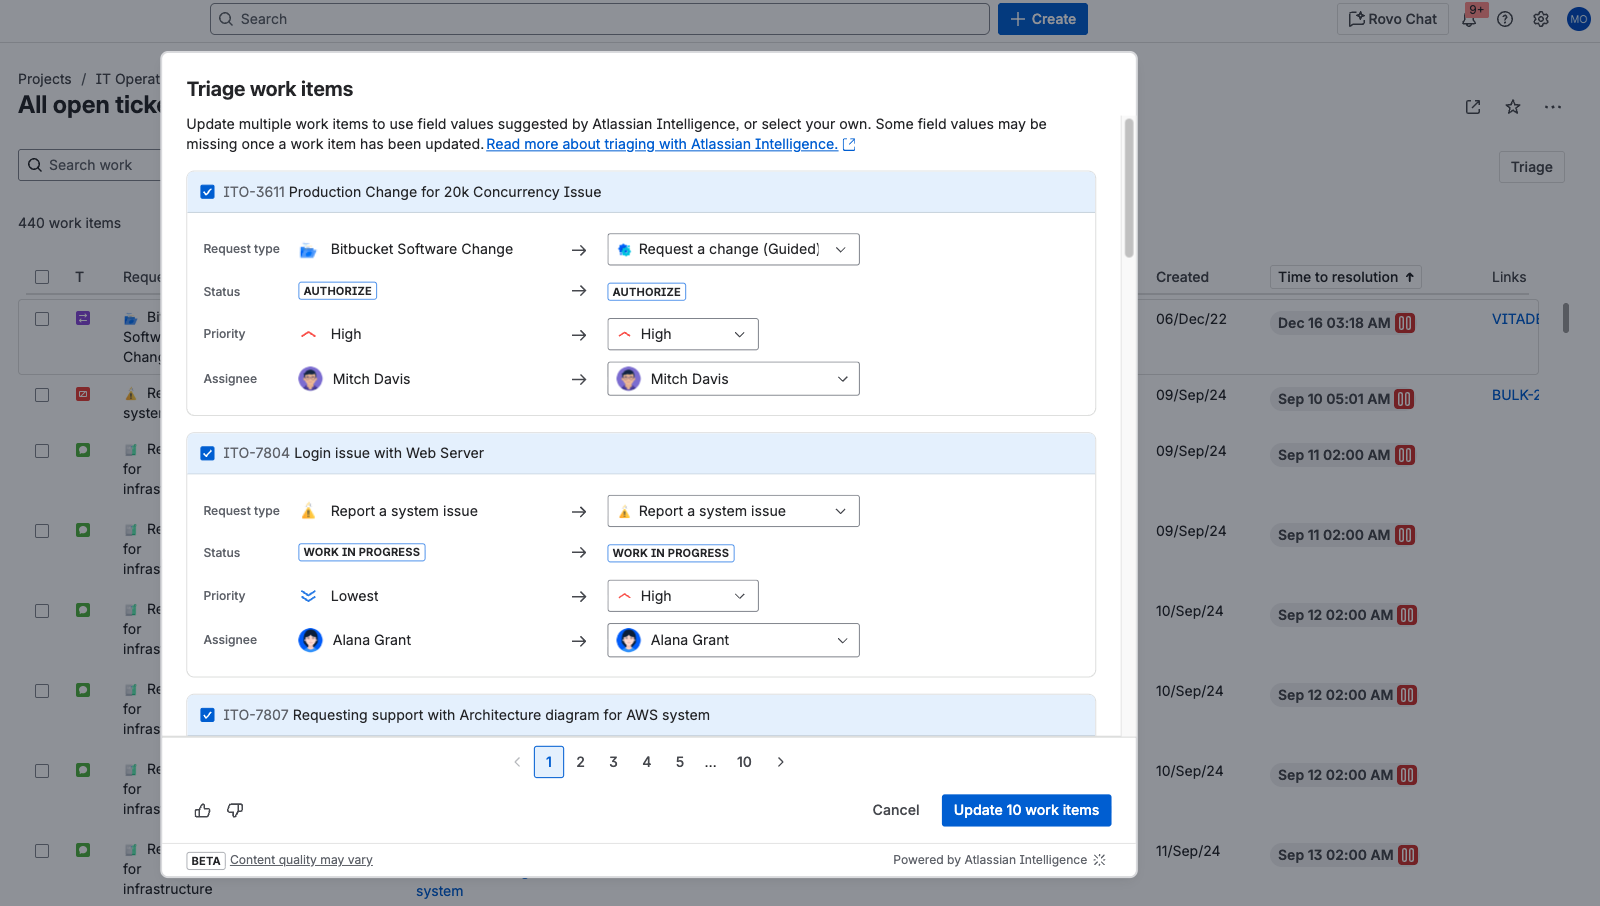
エージェントはお気に入りにすばやく移動できます

注:上記の各改善点の詳細については、このコミュニティ投稿をご参照ください。
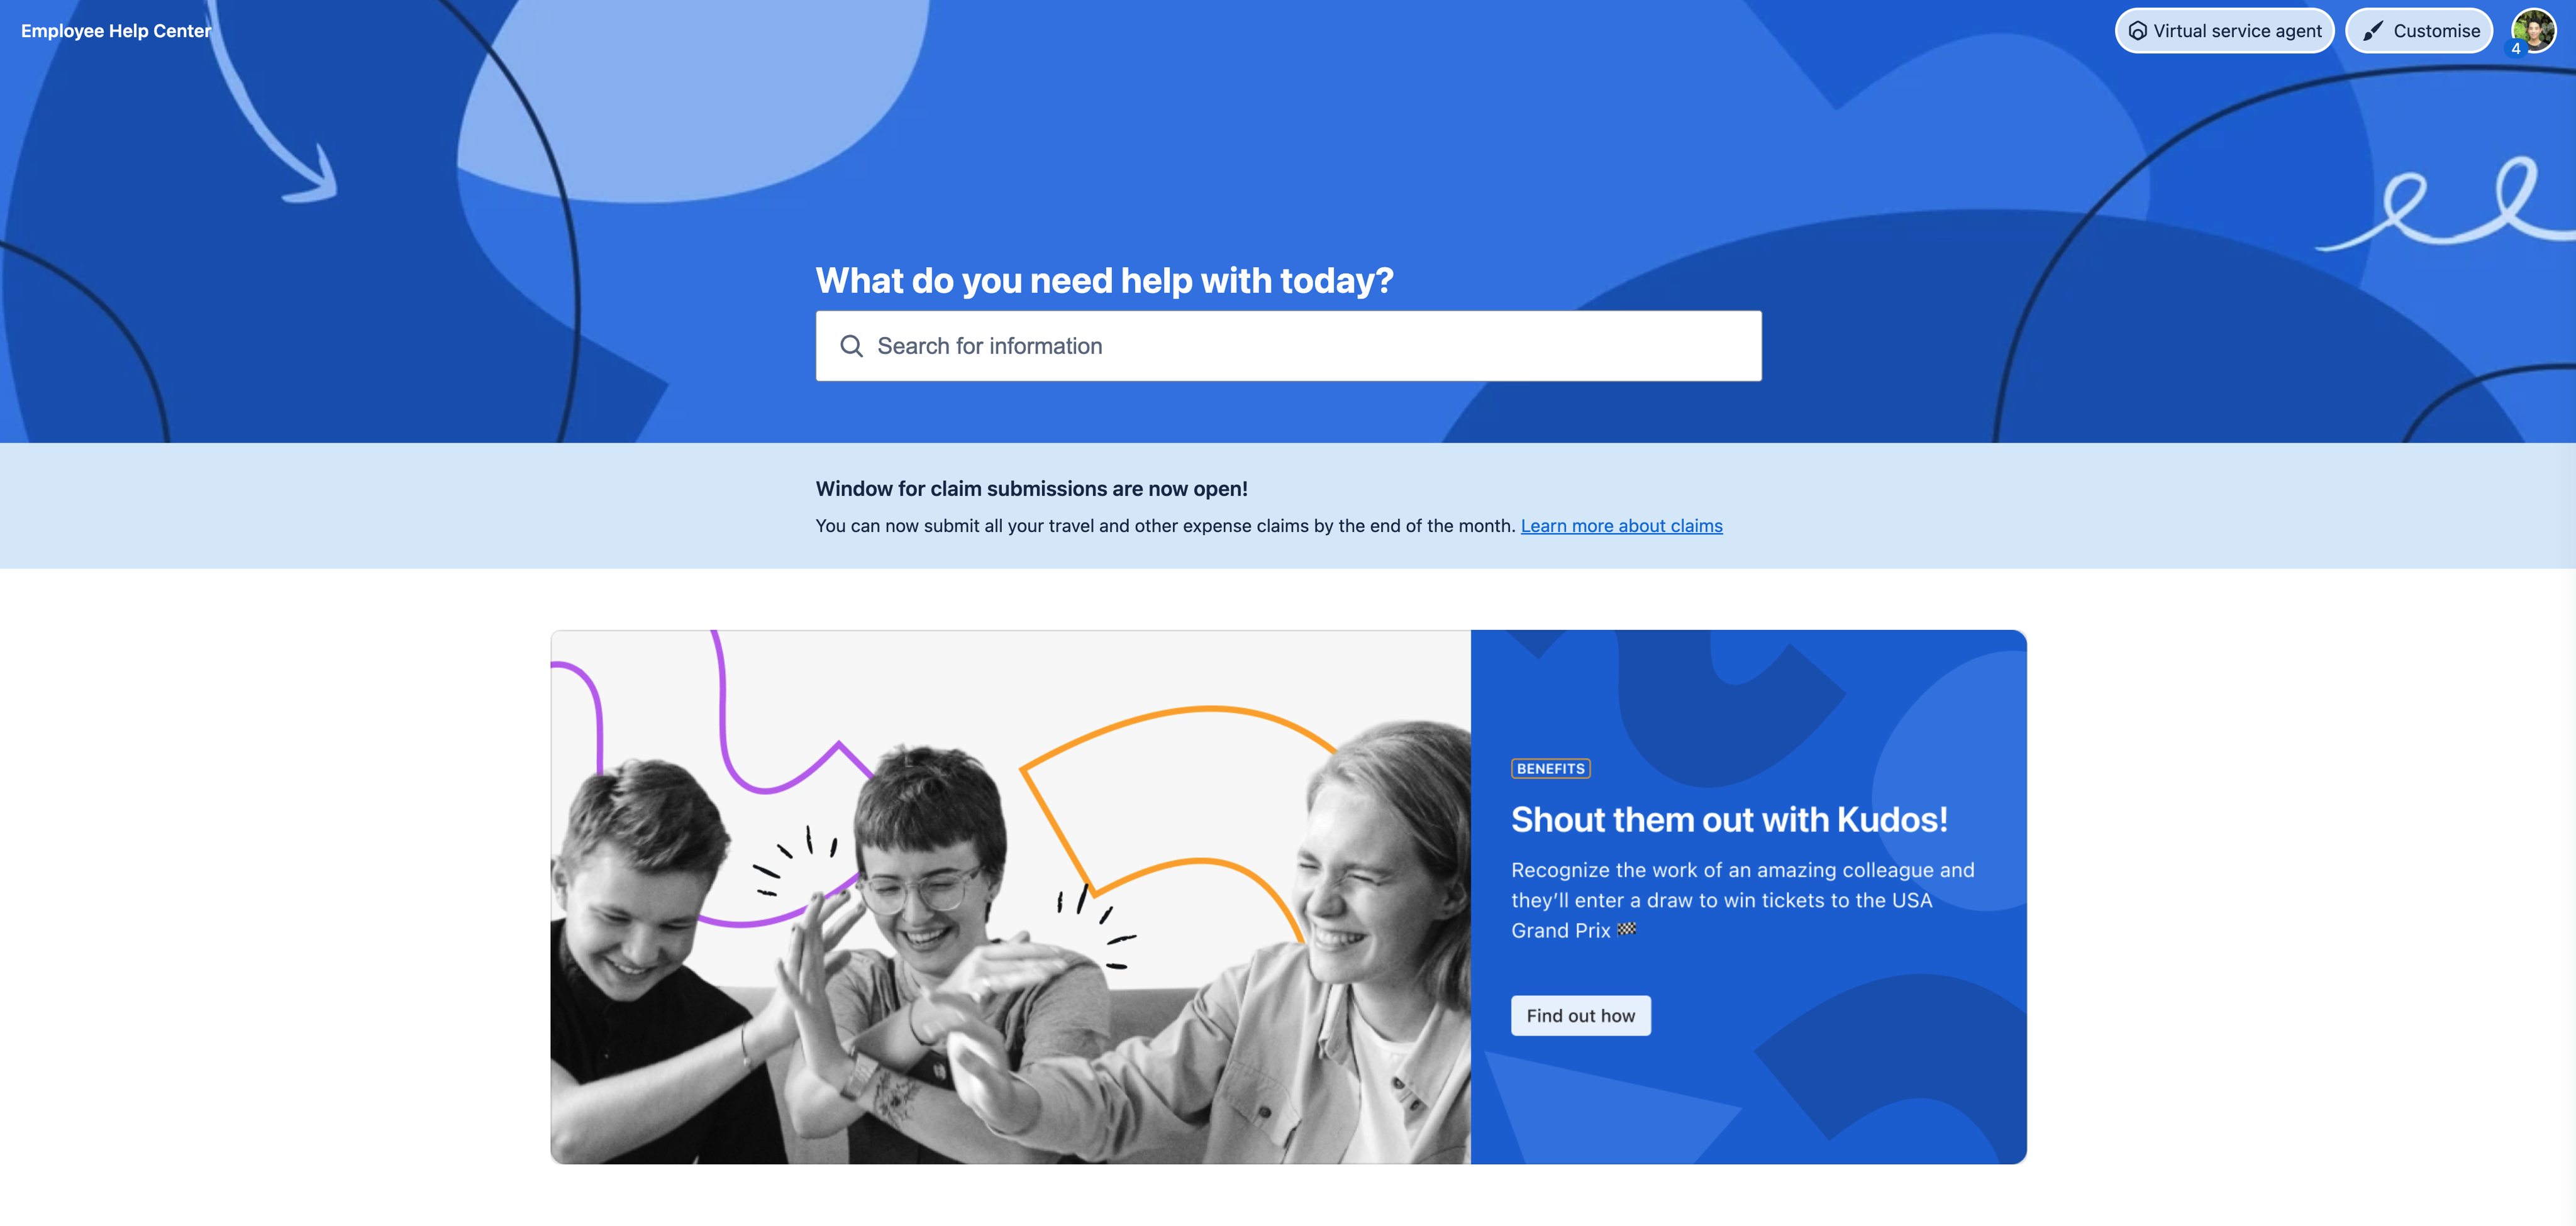
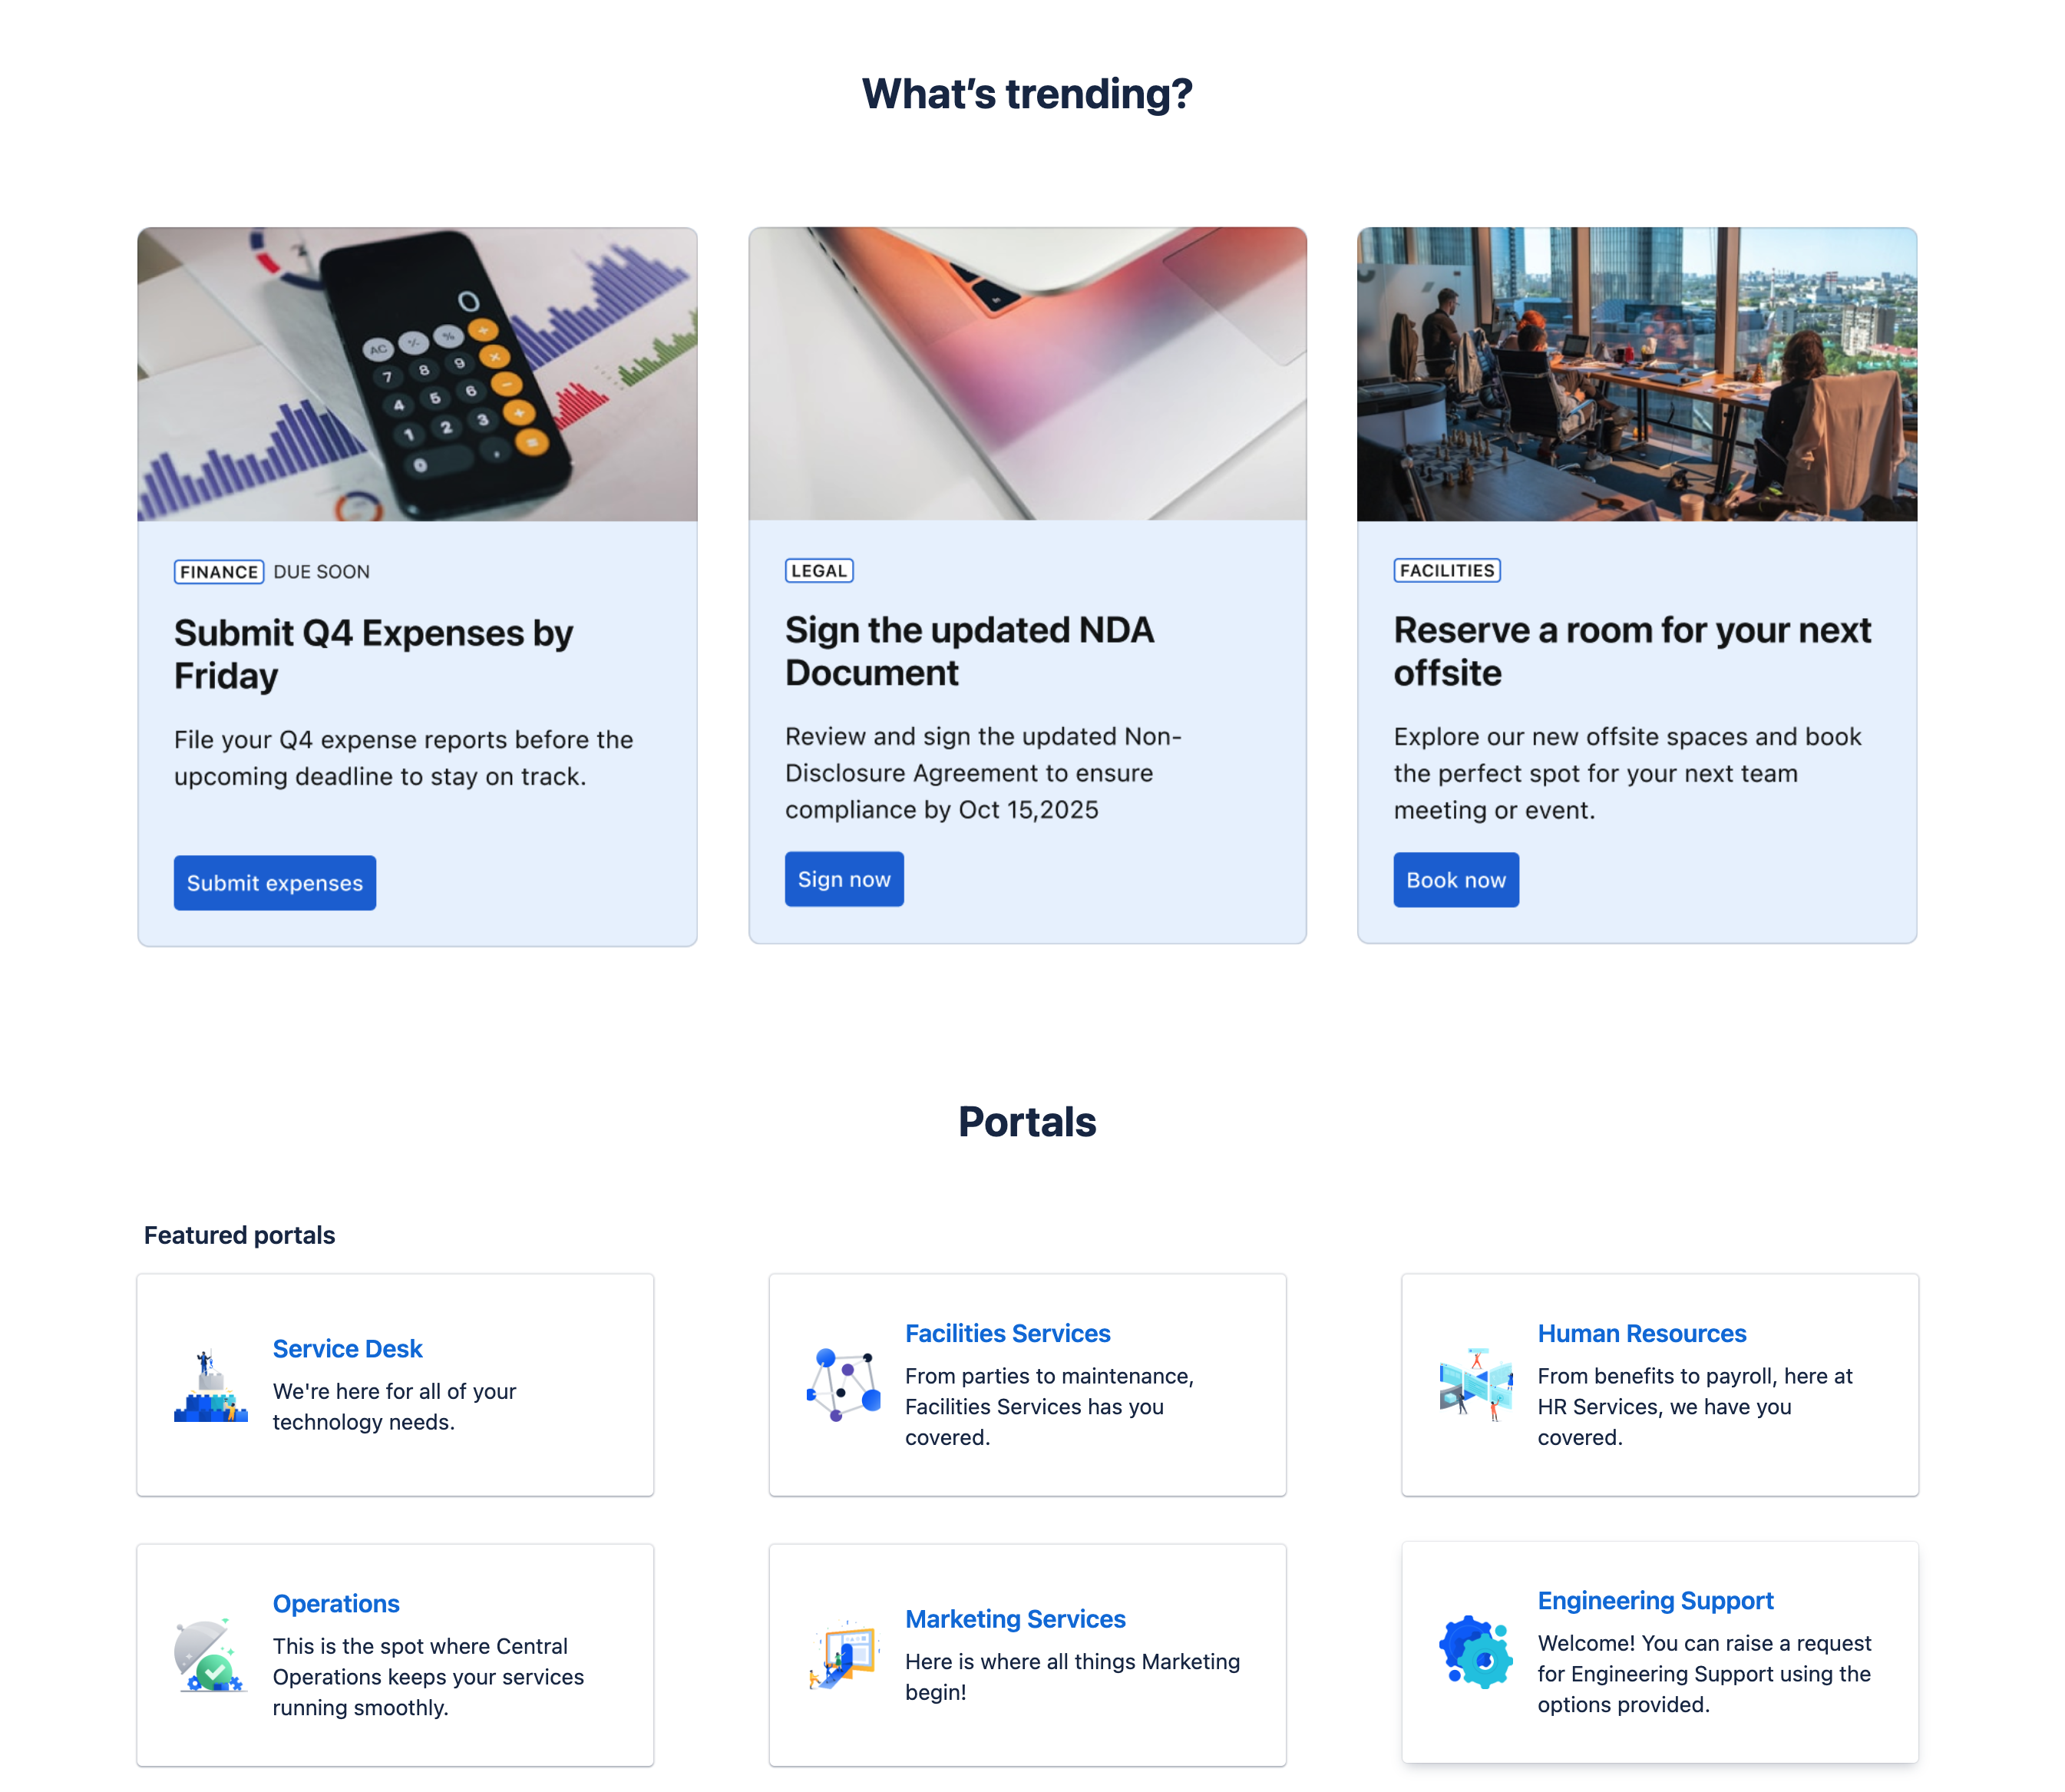
ヘルプ・センターとポータルの相違点
クラウドは、以下のような、より多くのブランディング機能とカスタマイズ機能を提供します。
- ログイン画面のメッセージとヘルプ・センターのレイアウトを編集します
- 顧客のリクエスト・リストの列をカスタマイズする(ステータスのアップデートを求めているリクエストをすばやくフィルタリングして見つける)
-
ヘルプ センターのカスタム ドメインを設定する
-
Forms for Jira を使って、動的フォーム、チェックリスト、特定の検証ルールを実装する
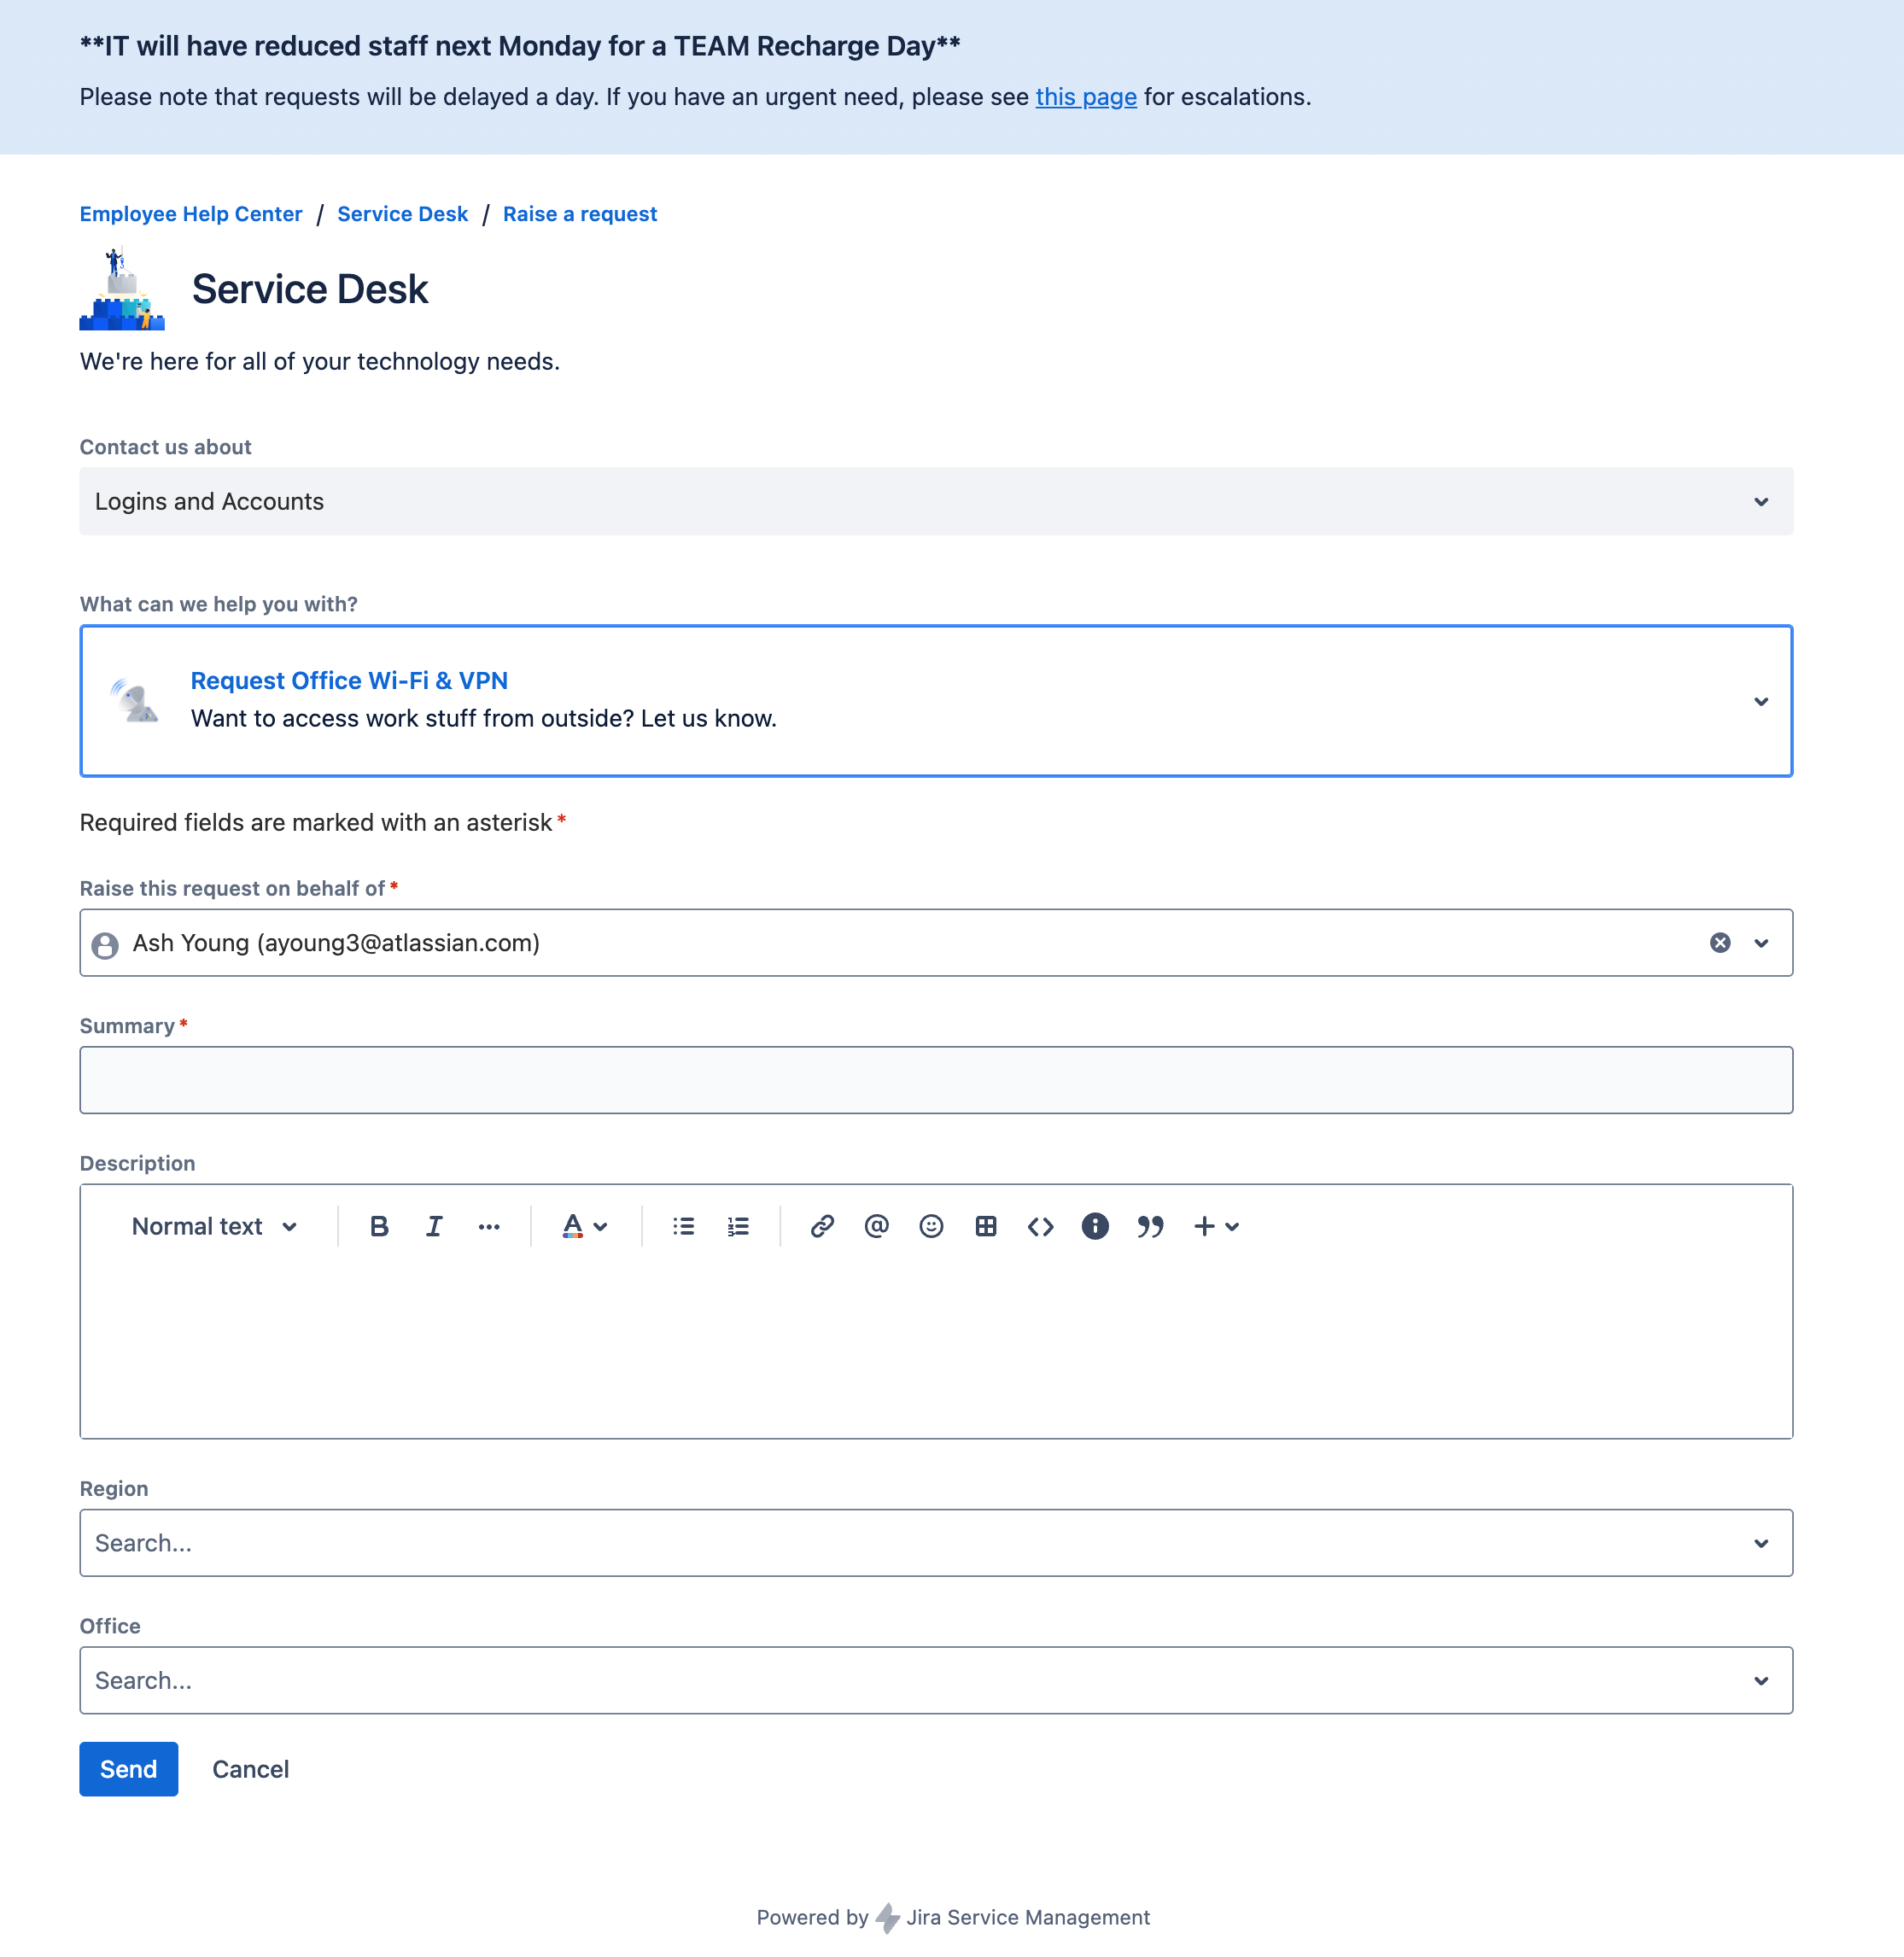
ヘルプ・チャネル
Data Center と同様に、クラウドでのリクエストはヘルプ センター、メール、API を介して作成できます。
Jira Service Management Cloud では、サイトとアプリの任意のページにポータル ウィジェットを埋め込み、顧客からリクエストを収集できます。ウィジェットが実際にどのように機能するかご確認ください。
注: Atlassian Cloud アプリには、通知を送信するように設定された内部 SMTP サーバーが付属しています。この内部 SMTP サーバーは設定不可ですが、自分のドメインに代わってメールを送信するように Jira Service Management Cloud を設定できます。自分のドメインのカスタム「スペース メール アドレス」を使用する方法については、「独自のドメインでメールを送信するよう Confluence Cloud を設定する」をご確認ください。
インシデント管理機能
アラート、オンコール・スケジュール、インシデント・コマンド・センター、ポスト・モーテム、ハートビートなどの Opsgenie の機能は、Jira Service Management Cloud にバンドルされています。
変更管理機能
クラウドの変更管理には、チームが変更をより適切に計画、スケジュールし、本番環境に展開するのに役立つ追加機能があります。接続された CI/CD ツールによる変更カレンダーと変更管理の自動化により、見落としがなくなります。
AI 機能
Jira Service Management には、チームが優れたサービス体験をより効率的に、より少ない手作業で提供できるようにする強力な AI 機能が含まれています。AI を使ってサービス管理の成果を加速する方法をいくつかご紹介します。
- 常時稼働のセルフサービス サポート: 階層 1 のサポート対話を自動化して、ユーザーに対してナレッジ ベースから正確な回答を提供することで、よくあるリクエストを即座に解決します。これにより、反復的なチケットを削減して、エージェントの時間を節約します。
- 迅速なトリアージと応答: AI を活用した提案とアクションでサービス チームの生産性を高めます。キューの優先順位付け、作業項目の要約、最適な担当者の特定、トラブルシューティングの推奨手順、迅速な解決のための回答の下書きを自動的に行います。
- インテリジェントなインシデント管理: AIOps 機能によりインシデントの検出ルールと応答を合理化します。これにより、クリティカルなアラートに優先順位を付けて、関連するインシデントや変更を特定し、根本原因を提案して、適切なチーム メンバーに作業項目をルーティングすることで、より迅速かつ効果的な解決を実現します。
ユーザーをサポートする
Rovo is Atlassian’s AI that connects knowledge, people, and workflows so teams can move faster. Rovo is included for all eligible Standard, Premium, and Enterprise plans of Jira, Confluence, Jira Service Management, and the Teamwork Collection of apps.
ヒント: Atlassian Cloud アプリの新機能、リリース、最新のスケジュールについては、以下をご覧ください。
- アトラシアンのブログに登録して、毎週更新されるメールをお受け取りください。ログイン後、ウォッチ アイコンをクリックするだけで簡単に登録できます。
- クラウド ロードマップに登録して、四半期ごとのハイライトをお受け取りください。これにより、今後の変更に積極的に備え、最新のアプリ開発に関する最新情報を入手できます。
アトラシアンのクラウド導入から 2 週間で、ユーザーが順応するにつれて生産性が低下することに気付くかもしれません。その間に提供できる追加のサポートを準備することで、生産性を高く保ちます。たとえば、次のことを検討することをおすすめします。
- ヘルプ センターの作成: 移行後は、バグの登録、質問、フィードバックの共有を行う場所をユーザーに知らせる必要があります。Confluence のナレッジ ベースを使用して、"ハウツー" 資料向けに、チーム管理対象の Jira Service Management プロジェクトを簡単にセット アップできます。もしくは、サービス デスク システムで "移行" リクエスト タイプを作成して、このタイプのリクエストを受信して処理します。ユーザーがクラウドに慣れてきたら、そのスペース/リクエスト タイプをアーカイブしましょう。
- ドロップイン トレーニング セッションの開催: UAT に関わった推進者、スペース管理者、チーム メイトが、移行を実施したあとの最初の週に、オープン ドロップイン セッション (Zoom/MS Teams 経由) を毎日数時間行います。こうしたセッションにユーザーが適宜参加することで、質問や緊急の課題の提起を行えます。これらのセッションは、起票するサポート チケットの数を最小限に抑えるのに役立ちます。
- 迅速な対応を行うチャンネルへの人員配置: MS Teams またはユーザーが社内でやり取りする任意のチャット プラットフォームで専用チャンネルを作成すると便利です。チャンネルに投稿された質問にすぐ回答できるように、サポート エージェントと推進者の当番表を用意しておきましょう。
- アンケートの管理: アンケートは、チームの感情を把握して集計するための強力なツールです。改善の機会や成功事例を浮かび上がらせたり、リーダーシップチームに報告したりするのに役立ちます。シンプルなアンケートをさまざまな間隔で実施することで、経時的な感情の変化や進捗を明らかにできます。

AI enabled apps
While Rovo is the interface for AI-powered experiences across your Atlassian apps, you must enable AI in the admin settings to unlock the full suite of advanced features. In other words, Rovo is always available for eligible customers, but it’s intelligence becomes more powerful when you both connect your Atlassian apps to Rovo (so it can use their data to search information, answer questions, and power agents) and turn on AI features like public web search.
Select which Atlassian apps can be accessed by Rovo and AI features. This allows you to tailor the AI experience to your organization’s needs and compliance requirements. Admins can also:
- Enable Beta features for each app, giving teams early access to new AI capabilities.
- Enable web searches, allowing Rovo to surface public web information alongside your internal content.

Rovo MCP Server
Manage which domains are allowed to connect to the Rovo MCP (Model Context Protocol) server.
- Automatically connect to AI tools that Atlassian partners with. You can block supported domains if you do not want them to access your Atlassian apps.
- Add and manage your own trusted domains to authorize access to the Rovo MCP server.

ヒント: [アトラシアンの管理] (admin.atlassian.com) は、ユーザー アクセスの管理やサービスの追加から、堅牢なセキュリティ ポリシーの実装、利用状況や請求の追跡まで、クラウド組織を管理するための一元化されたアプリです。[アトラシアンの管理] は、あらゆる管理責任を 1 か所にまとめます。
Rovo apps
Rovo is made up of different experiences, including Search, Chat, Studio, and a growing set of Agents. Each is uniquely designed to help your teams work smarter, move faster, and break down silos.
- Rovo Search: Find relevant information quickly and efficiently across your Atlassian apps and connected third-party SaaS apps.
- Rovo Chat: Uncover personalized insights, get relevant answers, and take action through a conversational interface.
- Rovo Studio: Quickly create custom agents, build automations, model digital and physical assets, curate content hubs, and build Forge apps, with or without code.
- Rovo Agents: Create custom agents to map to every type of workflow by adding unique knowledge, skills, and popular external tools, including MCP servers, that fit your teams' needs.
Rovo Search
Rovo Search is your centralized interface for discovering relevant information across your Atlassian apps and connected third-party data sources. You can access Rovo Search:
- At the top of your Atlassian apps

-
In the app switcher

-
Through Rovo’s browser extension where the Rovo Search bar is displayed each time you open a new browser tab.

Using Rovo Search is simple. Just type your prompt into the search bar in plain language and Rovo indexes your connected data to generate contextualized, smart answers. You can also filter your results by last updated, type, and contributor to find the exact information you need.
Relevant information, insights, citations, and historical prompts are displayed via the Knowledge Card directly in the search interface. If you find something important or frequently referenced, you can use Bookmarks to save those results for quick access later.
Use Cases
- Quickly find Jira work items, Confluence pages, and information from third-party apps without switching tools.
- Get instant answers to “how-to” questions or policy lookups.
- Bookmark onboarding materials or key resources for new team members.
TIP: Use these search prompts for optimal search results and answers.
Rovo Chat
Rovo Chat is your conversational AI interface where you can ask questions, brainstorm, get personalized insights, speed up learning, and take action faster using your organization’s knowledge. You can access Rovo Chat in several ways:
- In the top navigation bar near your profile icon
-
In the app switcher

-
Through Rovo’s browser extension in the center of each new browser tab


Open the chat interface and type your question or select a suggested conversation starter. Rovo Chat responds with personalized, actionable insights and can suggest follow-up prompts or actions to keep the conversation going. You can also take direct actions right from the chat window, such as assigning Jira work items, generating Confluence pages, visualizing data, and identifying incident root causes.
For more complex needs, Deep Research allows you to request comprehensive reports that synthesize information from Atlassian apps, connected third-party data sources, and, if ‘Web search’ is toggled on in Administration, the public web!
Use Cases
- Onboard new users by answering “how do I…” questions or summarizing lengthy Confluence pages.
- Create Jira tickets or Confluence pages.
- Dig deeper into topics or company knowledge with deep research and in-line definitions.
TIP: Use these chat prompts for optimal search results and answers.
Rovo Studio
Rovo Studio is your no-code/low-code builder for creating custom AI agents, automations, hubs, assets, and more. You can access Rovo Studio directly from the app switcher.

To get started, describe what you want to build using natural language. Studio guides you through creating custom agents, automation rules, company hubs, and assets. You can add unique knowledge, actions, and integrations to your agents, set up automations that trigger processes across your apps, and centralize resources in dynamic hubs. Assets can be linked to Jira Service Management and other Atlassian tools to accelerate service delivery.
Use Cases
- Non-technical users can automate routine processes.
- Build custom agents for business teams like HR, Finance, and Marketing.
- Centralize onboarding resources or project documentation in a Hub.
ヒント: [アトラシアンの管理] (admin.atlassian.com) は、ユーザー アクセスの管理やサービスの追加から、堅牢なセキュリティ ポリシーの実装、利用状況や請求の追跡まで、クラウド組織を管理するための一元化されたアプリです。[アトラシアンの管理] は、あらゆる管理責任を 1 か所にまとめます。
Rovo Agents
Rovo Agents are specialized AI assistants that enhance team productivity by collaborating in real time with users and other agents. You can access Rovo Agents in several ways:
- Within the Rovo Chat interface

-
In the Confluence or Jira editor by typing the shortcut /ai
-
Through Rovo’s browser extension via the Rovo Chat interface

Rovo offers a range of built-in agents that integrate seamlessly into your team’s workflows. You can also extend your capabilities with Marketplace partners (installed by admins), or create custom agents using Rovo Studio.
To get started, clarify your objective and find the right agent for your needs. Each agent has a profile that details its creator, instructions, knowledge sources, available actions (Skills), and conversation starters.
- Instructions define the agent’s behavior and functionality.
- Knowledge is the information that you provide to an agent to improve the accuracy and helpfulness of its responses.
- Skills allow the agent to perform tasks on your behalf.
- Conversation starters are suggested prompts or questions that help you initiate interactions.
After creating an agent, start a conversation with a prompt and start executing actions. Once you’re familiar with how they work, set up some automations to save time. If your agent proves to be high value, favorite it for later or share it with colleagues that would also benefit.
Use Cases
- Automate repetitive tasks like ticket triaging content drafting and reviews, and code analysis.
- Get workflow guidance and process recommendations.
- Accelerate incident response and change management.
ヒント: [アトラシアンの管理] (admin.atlassian.com) は、ユーザー アクセスの管理やサービスの追加から、堅牢なセキュリティ ポリシーの実装、利用状況や請求の追跡まで、クラウド組織を管理するための一元化されたアプリです。[アトラシアンの管理] は、あらゆる管理責任を 1 か所にまとめます。
クラウドにおけるガバナンス
組織がデータ センターからクラウドへのトランジションに取り組む際には、新しいクラウド環境の微妙な違いと、それに応じて管理者責任がどのように変化するのかに着目することでしょう。このセクションでは、データ センターとクラウド アプリの各アトラシアン管理者ロールに関連する主な責任、権限、ワークフローをご説明し、各ロールがクラウドにおけるツール設定、ユーザー管理、セキュリティ、全体的なガバナンスに与える影響に焦点を当てます。
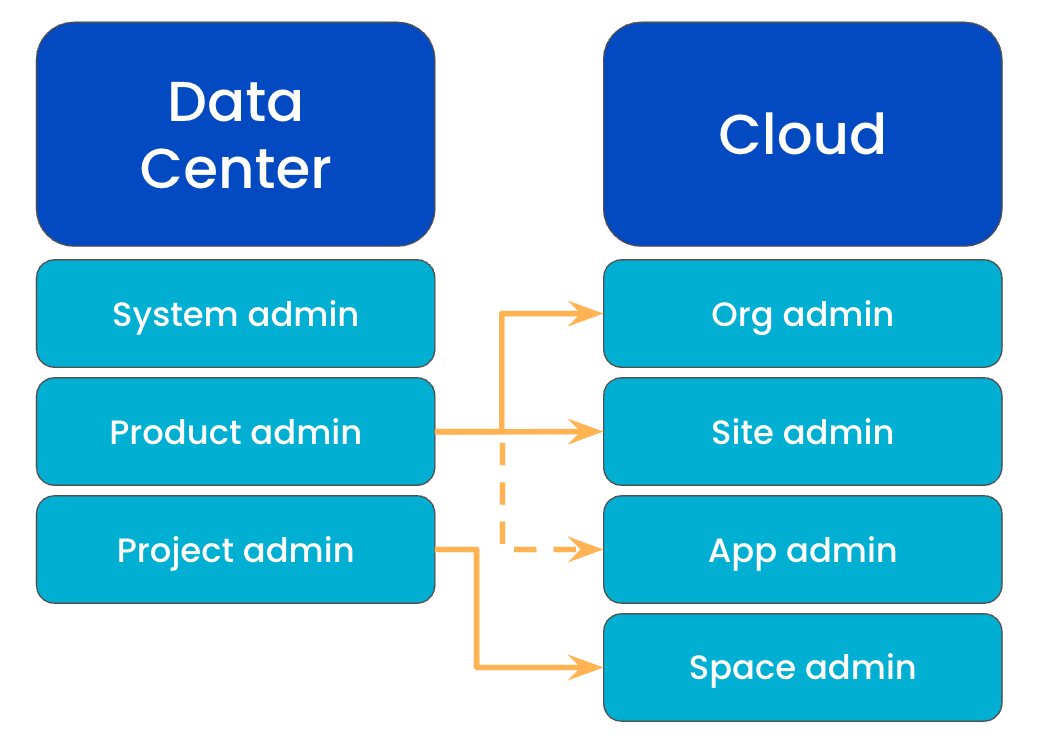
データ センターの管理者ロール
管理者ロールとは、組織がさまざまな責任を管理者 1 人に委任するのではなく、多数の管理者に対して委任するシステムです。ユーザーがアクセスして設定できる内容は、そのユーザーの管理者タイプに応じて異なります。データ センターには、システム管理者、製品管理者、スペース管理者という 3 つの管理者ロールがあります。これらのロールとクラウドの管理者ロールとの関連性について、以下でご説明します。
システム管理者
システム管理者は、物理サーバー、ハードウェア、計画的/計画外のダウンタイムを管理します。製品管理者と同じ権限に加えて、ハードウェアとサーバーへのアクセス権、さらにすべてのシステム設定を変更する権限を持ちます。
製品管理者(または Jira 管理者)
製品管理者は、自分が管理するアプリのほとんどのシステム設定を変更できます。また、製品管理者はシステム管理者も兼任します。これは、いずれの管理者ロールも重複する権限を持っているためです。製品管理者はグループ コントロールで権限を割り当て、新しいスペース、フィールド、ユーザーの作成、さらにワークフローの変更を行えます。
プロジェクト管理者
プロジェクト管理者は、それぞれのプロジェクトでのロールの割り当てによって 1 人のユーザーに割り当てられます。彼らはプロジェクトのさまざまな設定を変更する権限を有しています。
プロジェクト管理者は、プロジェクト管理者機能の拡張も行えるため、特定の条件においてワークフローや画面を調整できます。たとえば、アクティブなアプリ インスタンスにステータスが含まれている場合は、そのステータスを追加できます。ステータスの新規作成や既存のステータスの編集は行えません。プロジェクト管理者は、カスタム フィールドを追加、再配置、削除できますが、作成は行えません。
クラウドにおける管理者の役割
データ センターと同様に、クラウドの管理者ロールにはいくつかの種類があり、同時に複数の管理者ロールを保持できます。ご自身がどの管理者ロールを保持できるのか、さらに組織内の他のメンバーにどのロールを割り当てられるのかは、[アトラシアンの管理] (admin.atlassian.com) で従来のユーザー管理エクスペリエンスと一元化されたユーザー管理エクスペリエンスのどちらを使用しているかで異なります。
ヒント: [アトラシアンの管理] (admin.atlassian.com) は、ユーザー アクセスの管理やサービスの追加から、堅牢なセキュリティ ポリシーの実装、利用状況や請求の追跡まで、クラウド組織を管理するための一元化されたアプリです。[アトラシアンの管理] は、あらゆる管理責任を 1 か所にまとめます。
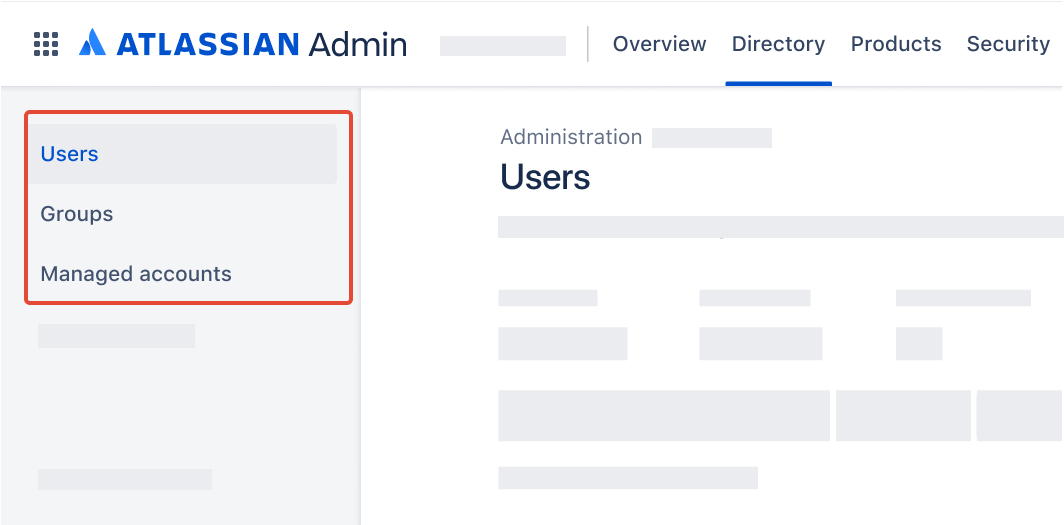
利用しているユーザー管理エクスペリエンスを確認する
確認するには、admin.atlassian.com で自分の組織にアクセスし、「ディレクトリ」タブを選択します。ここに「ユーザー」と「グループ」の各リストがある場合は、一元化されたユーザー管理を使用しています。
サイト管理者または組織管理者として、「ユーザー」は「Product site(製品サイト)」の下で確認できます。
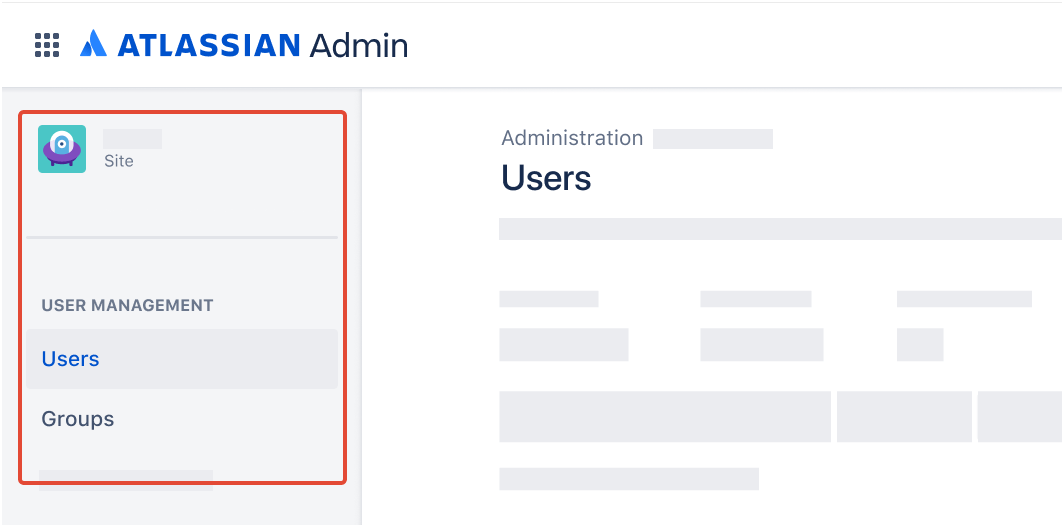
組織管理者として、「ユーザー」は「ディレクトリ」タブで確認できます。
管理者ロールは、元のユーザー管理エクスペリエンスと一元化されたユーザー管理エクスペリエンスの両方で使用できます。
組織管理者
組織を作成すると、自動的に組織管理者(最高レベルの管理者)になり、「アトラシアンの管理」ですべての管理タスクを実行できます。1 つのアカウントの紛失または侵害が発生した場合に備えて、複数の組織管理者を配置することをおすすめします。
TIP: Take this learning course to ramp up quickly as an org admin!
サイト管理者
従来のユーザー管理エクスペリエンスにおけるサイト管理者は、自分が割り当てられたサイト (とサイト内にあるすべてのアプリ) のユーザー、グループ、管理設定を管理します。さらに、自分が割り当てられたサイト内のすべてのコンテンツにアクセスできます。このロールでアクセスできる請求管理には制限があります。
一元化されたユーザー管理エクスペリエンスにおけるサイト管理者は、サイトへの新しいアプリの追加や、サイトにインストールされたアプリの管理など、自分が管理している特定のサイトに関連するタスクを実行できます。なお、このロールでアクセスできる請求管理には制限があります。一元化されたユーザー管理エクスペリエンスのサイト管理者は、ユーザーまたはグループを管理できません。
サイト管理者の違いに関する詳細は、こちらをご確認ください。
アプリ管理者
アプリ管理者は特定のアプリの管理設定を管理します。[アトラシアンの管理] にはアクセスできません。Jira 管理者を除き、アプリ管理者は自身が管理するアプリ内のコンテンツにアクセスできます。アプリ管理者は、一人で 1 つ以上の Atlassian アプリを管理する場合があります。
スペース管理
スペース管理者は特定のスペースの管理設定を管理します。グローバル管理、またはサイト全体の管理にはアクセスできません。スペース管理者は、ユーザーまたはグループのアクセス権の付与、設定の更新、ルック & フィールのカスタマイズなど、権限スコープ内で権限、コンテンツの表示方法、構成を制御します。ロックされたコンテンツの閲覧や、グローバル既定の上書きは実行できません。スペース管理者は、一人で 1 つ以上のスペースを管理する場合があります。
ユーザー アクセス管理者
組織管理者とは異なり、ユーザー アクセス管理者は [アトラシアンの管理] へのアクセスが制限されています。ユーザー アクセス管理者の主なタスクは、自身が管理するアプリへのユーザー アクセスの管理です。たとえば、ある組織には Confluence のアプリ アクセスを管理するユーザー アクセス管理者と、Jira のアプリ アクセスを管理する別のユーザー アクセス管理者がいます。
ユーザー アクセス管理者は、1 つまたは複数のアプリに割り当てられますが、それらのアプリにログインすることも、アプリを使用することもできません。つまり、ユーザー アクセス管理者は、そのアプリにアクセスするための追加のロールが付与されていない限り、自身が管理するアプリの請求対象ユーザーとしてカウントされません。
ヒント:この記事をお読みいただいて、各管理者ロールで使用できる機能をアトラシアンの管理でご確認ください。
ガバナンスのプロセスとプラクティスを最新の状態に保つ
管理者アクセスのリクエストを効果的に管理し、不正な変更を最小限に抑えて、コンプライアンスに準拠した管理環境を維持するためにも、組織、ユーザー、アプリ、スペースの各管理権限をリクエストするユーザーに対して、承認プロセスを確立することをご検討ください。専用のリクエスト タイプ、またはユーザーフレンドリーなフォームを作成して、ユーザーが必要なアクセスやリクエストの目的に関する重要な詳細を入力できるようにすると、このプロセスを効率化できます。
[アトラシアンの管理] では、組織管理者もユーザー アクセス設定の構成を行えます。これにより、管理者は、招待なし、または管理者の承認を得てアプリにアクセスできるドメインを指定できます。承認を必須に設定すると、そのドメインのユーザーがアプリへのアクセスを詳細とともにリクエストすることで、管理者がそのリクエストを承認または拒否できます。
このプロセスを実施することで、管理者は組織のアプリ ガバナンスの実践を管理し、確実に遵守できます。
進化するニーズに対応するには、アプリ ガバナンスのポリシーを定期的に見直して更新してください。組織の成長と変化する要件に合わせて定期的な確認 (毎年または隔年など) を実施しましょう。
ガバナンスの実践の見直しと強化のためにスペースに着手する際、アトラシアンはその過程で役立つ貴重なリソースを提供します。クラウド ガバナンスの責任を共有して、変更による影響を受ける可能性のある社内の関係者と意見を一致させるために、チーム プレイブックで次のプレイをご覧ください。
プロセス中に行われた議論や合意を記録して文書化し、ガバナンス関連の取り組みの明確性、合意、成功を確保するには、次の Confluence テンプレートをご利用ください。