Atlassian Supplier
Categories
submit your invoice via e-invoicing
Submit an invoice with a PO
Log into Coupa Supplier Portal to start submitting your electronic invoice. If you do not have a CSP account, please start here.
Step 1
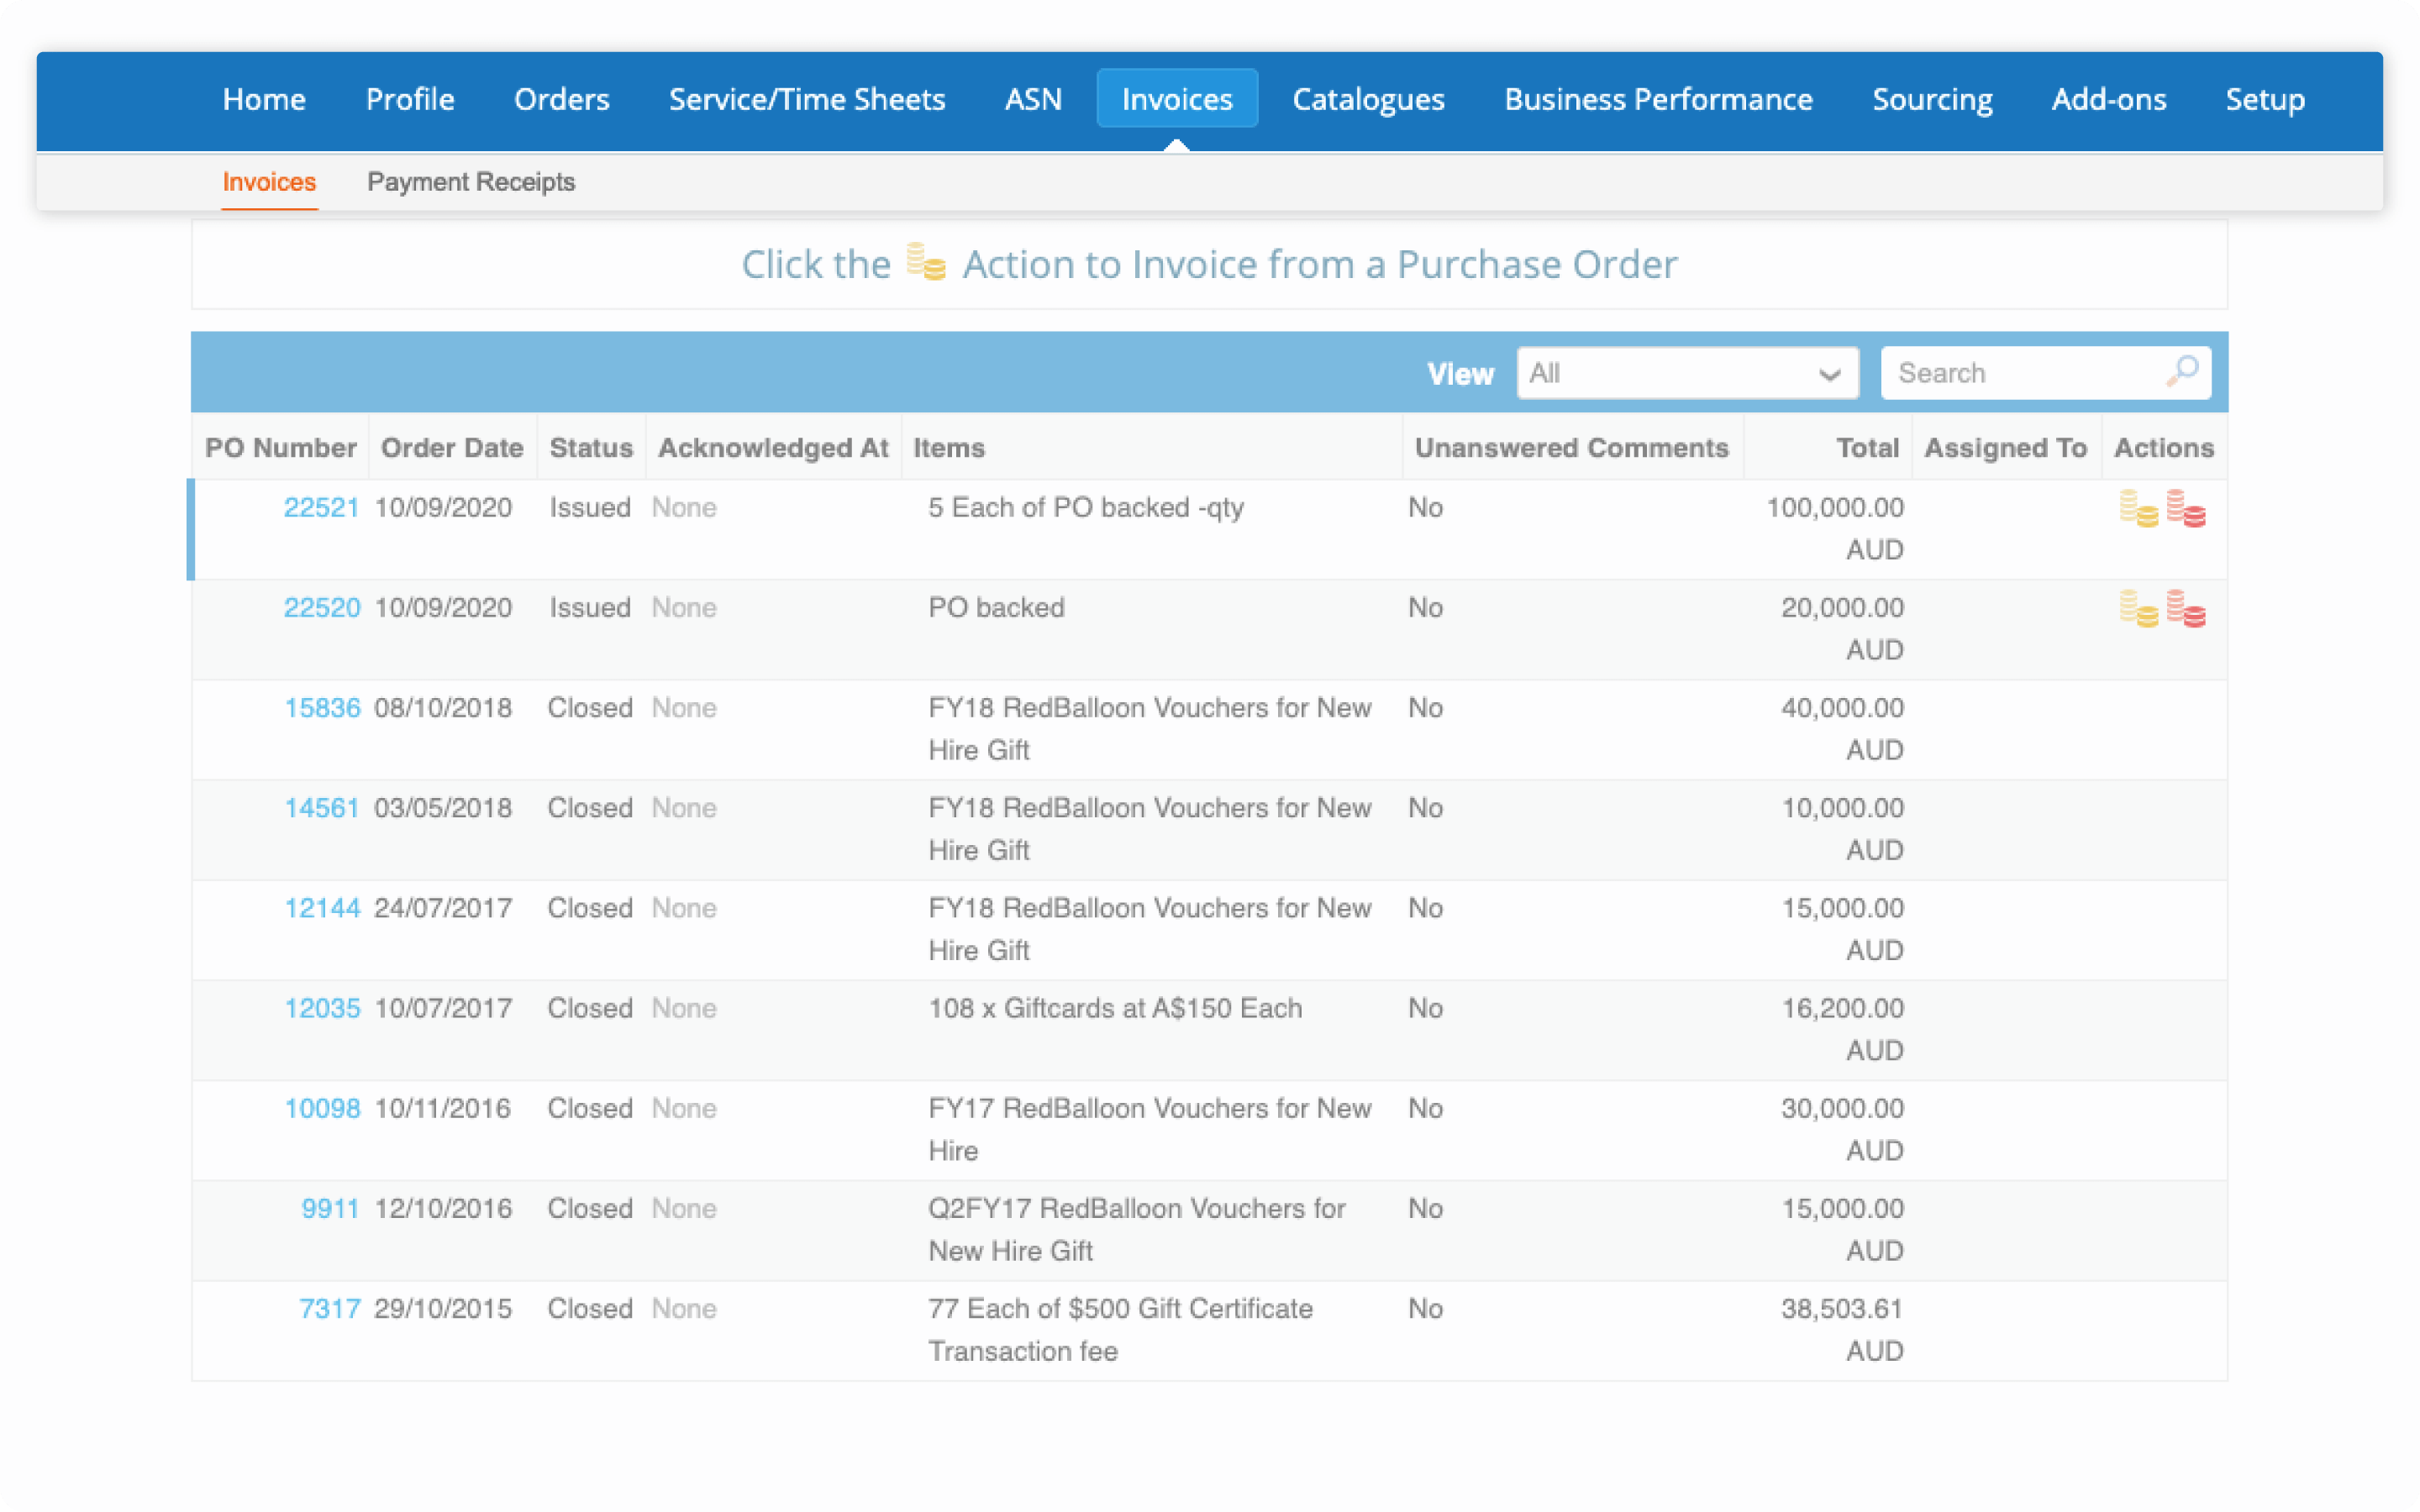
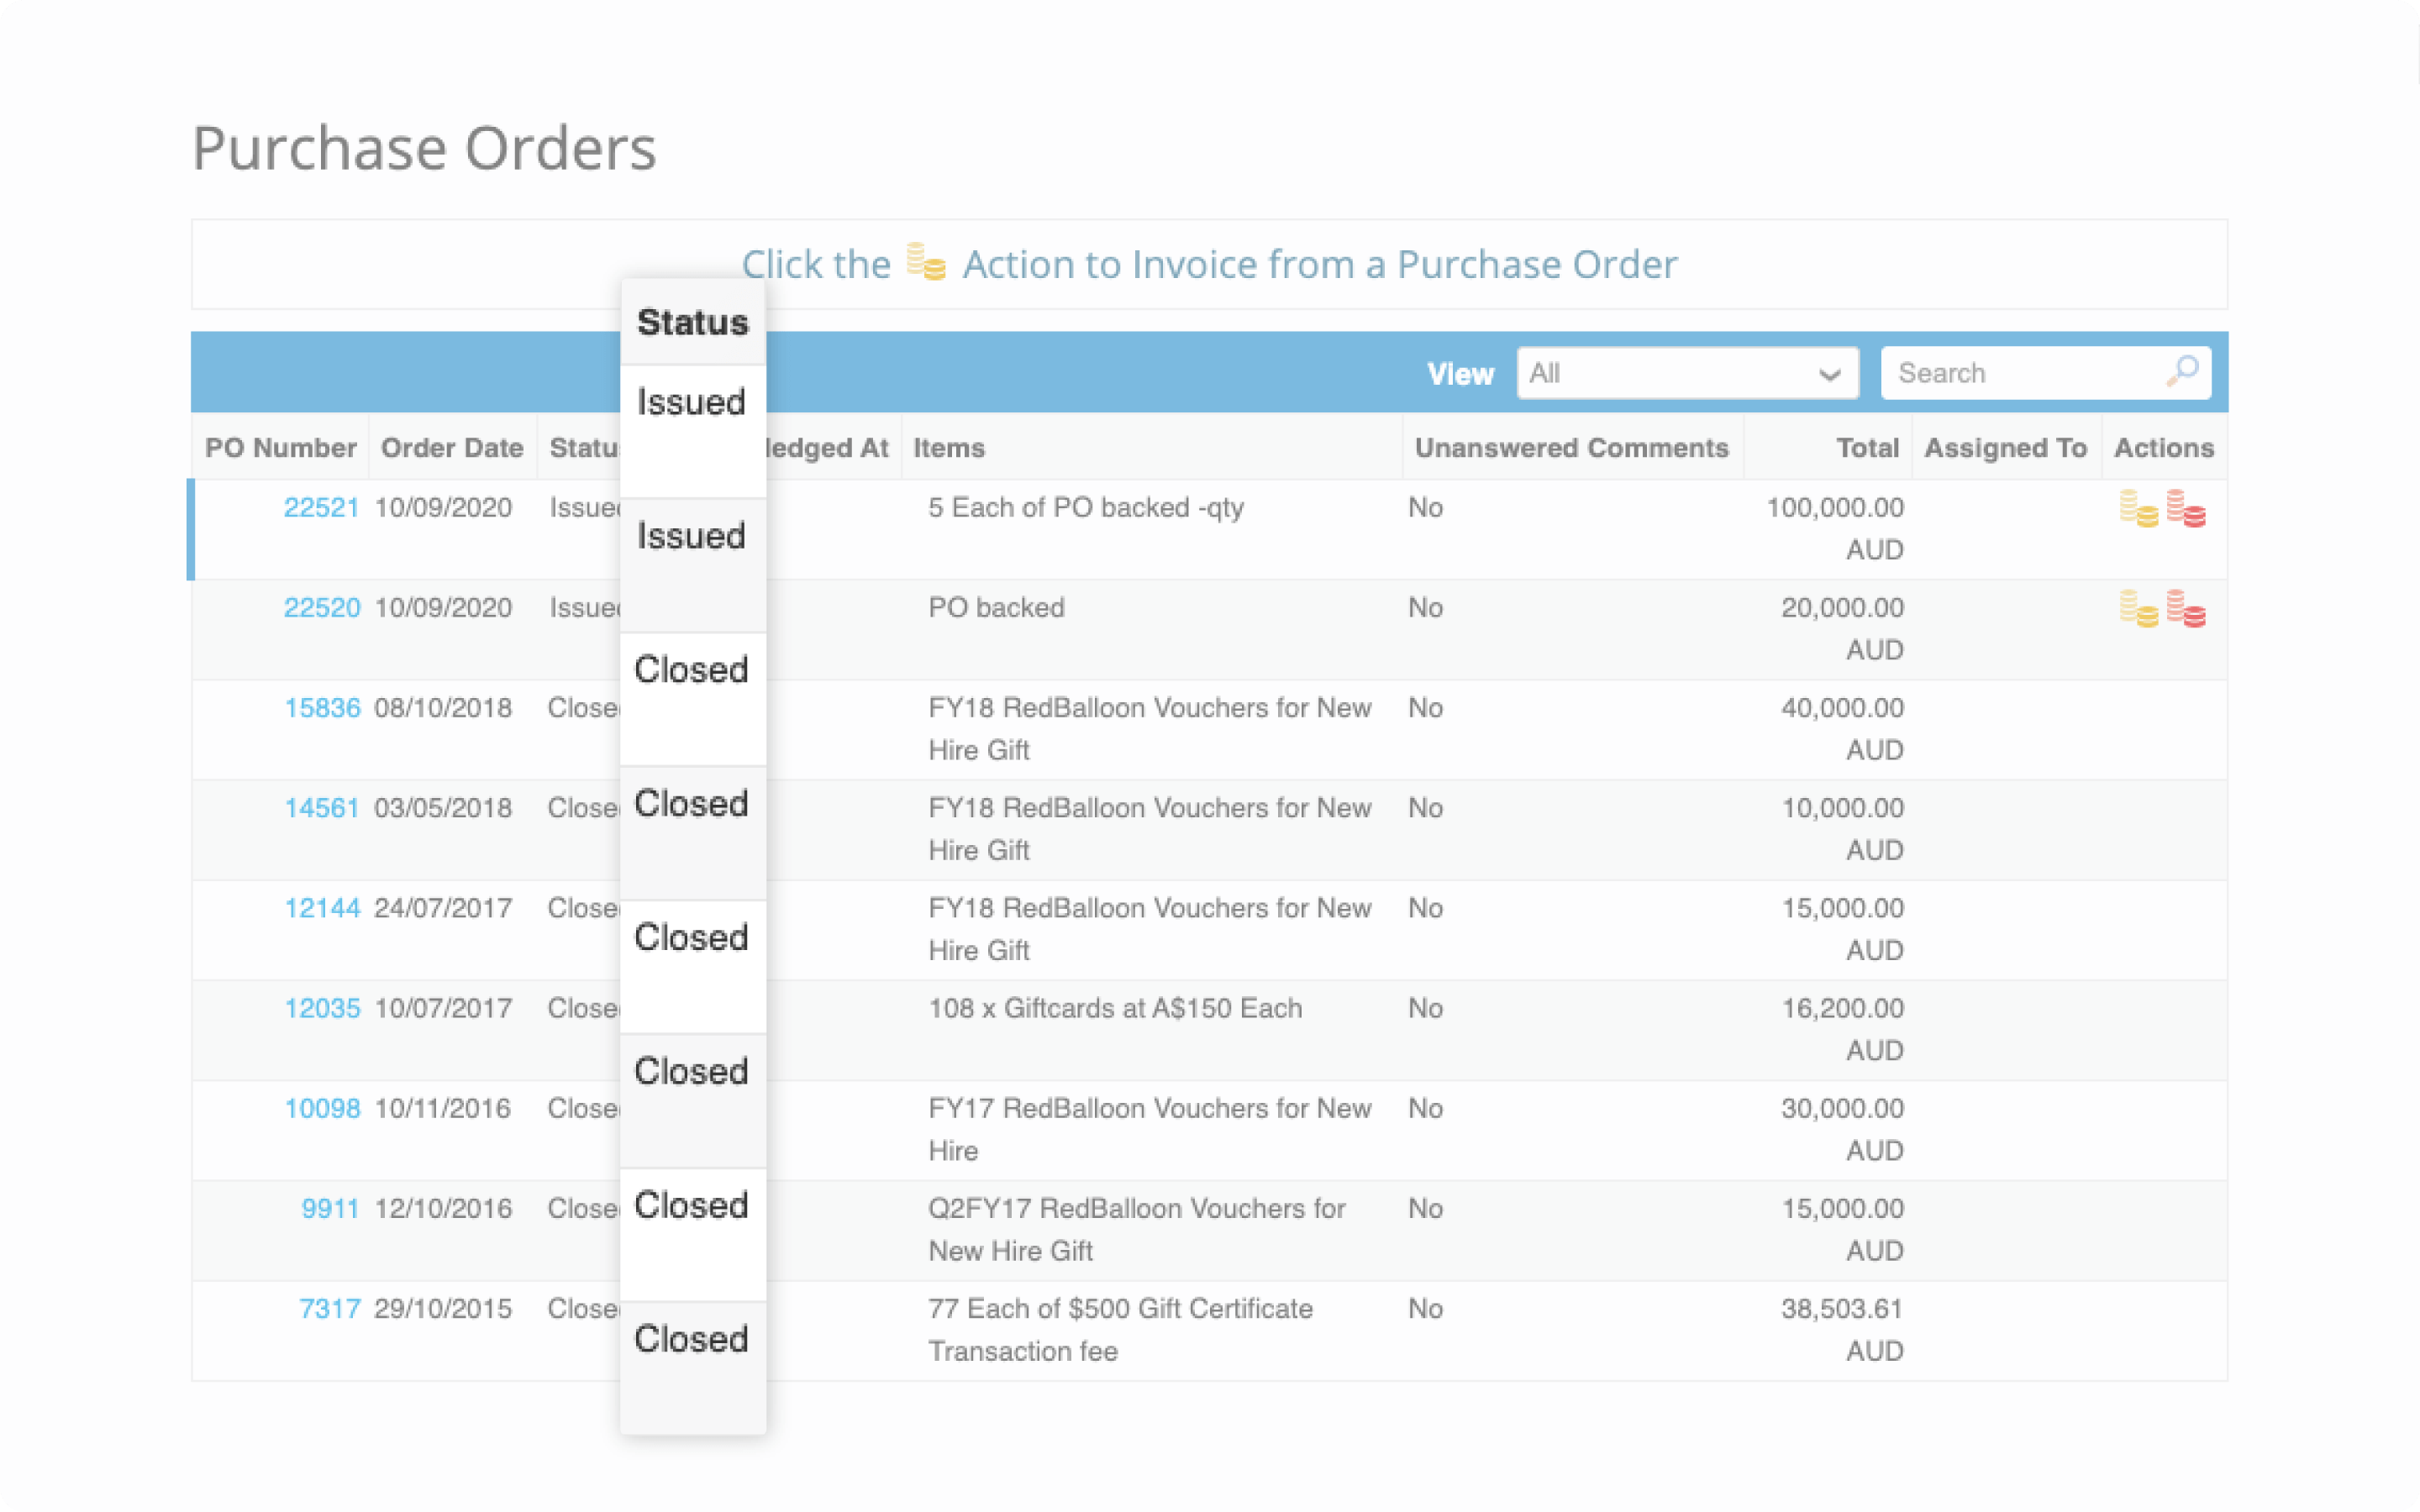
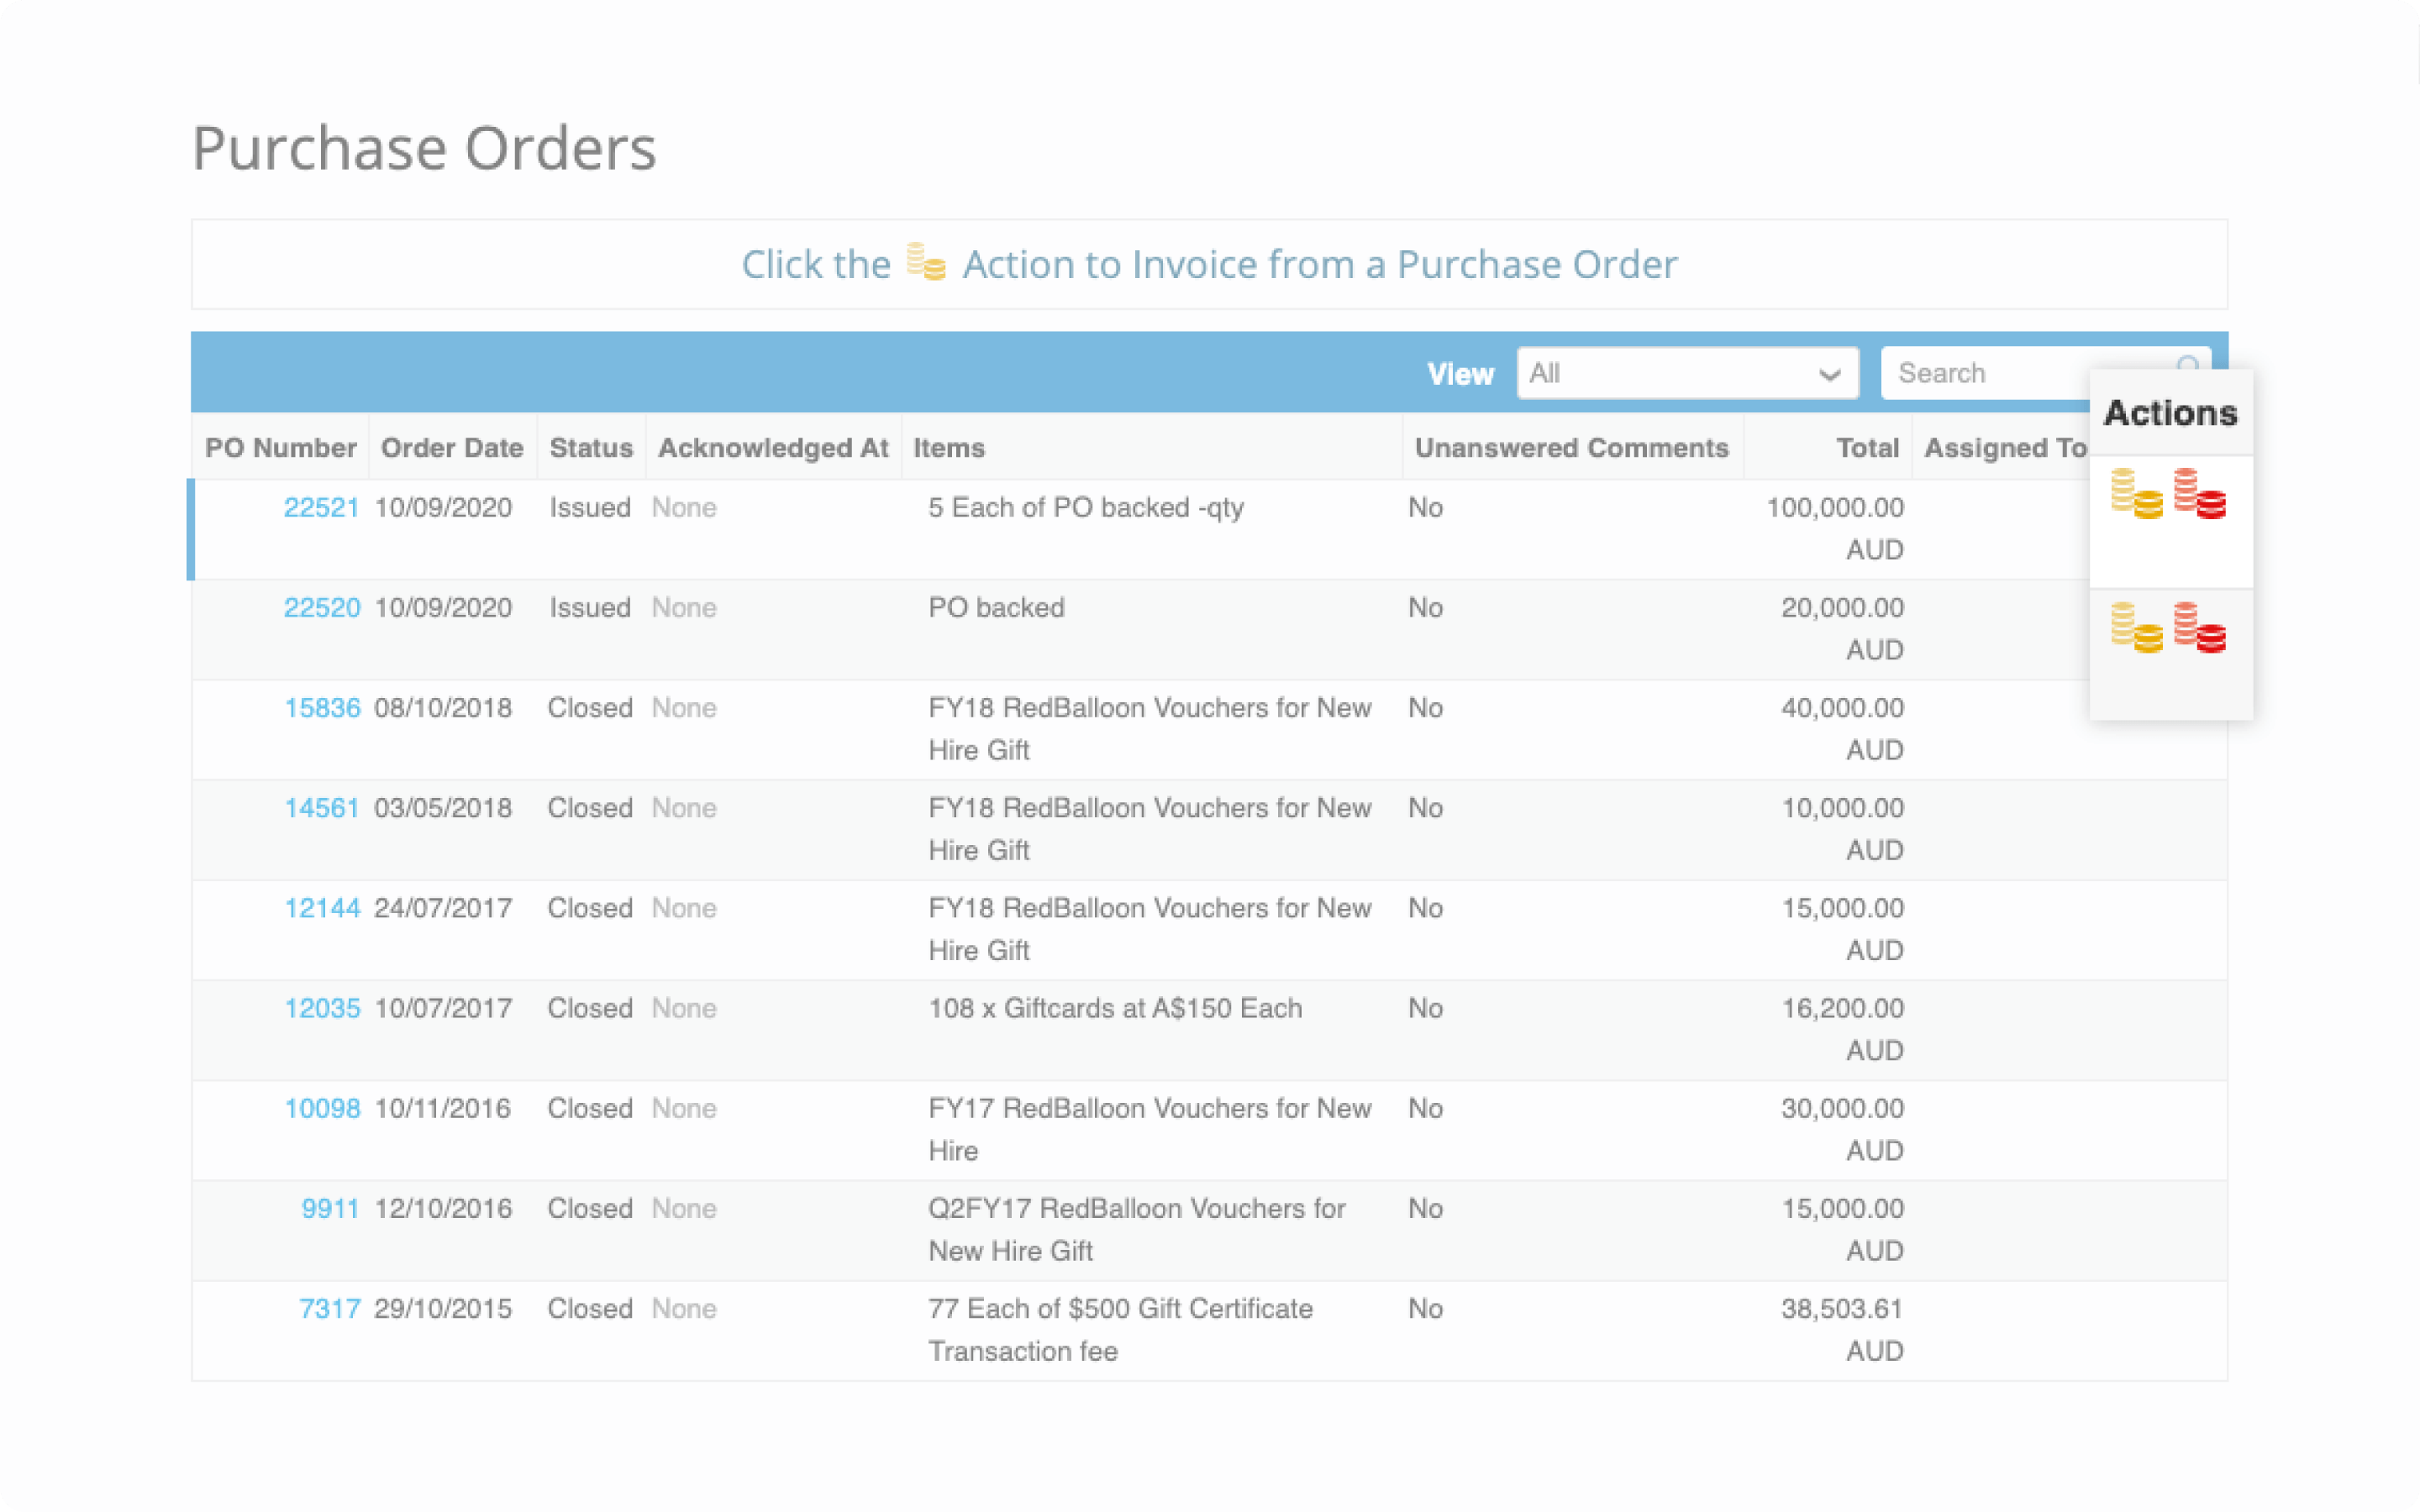
Go to Orders tab then search for your PO.
Step 2
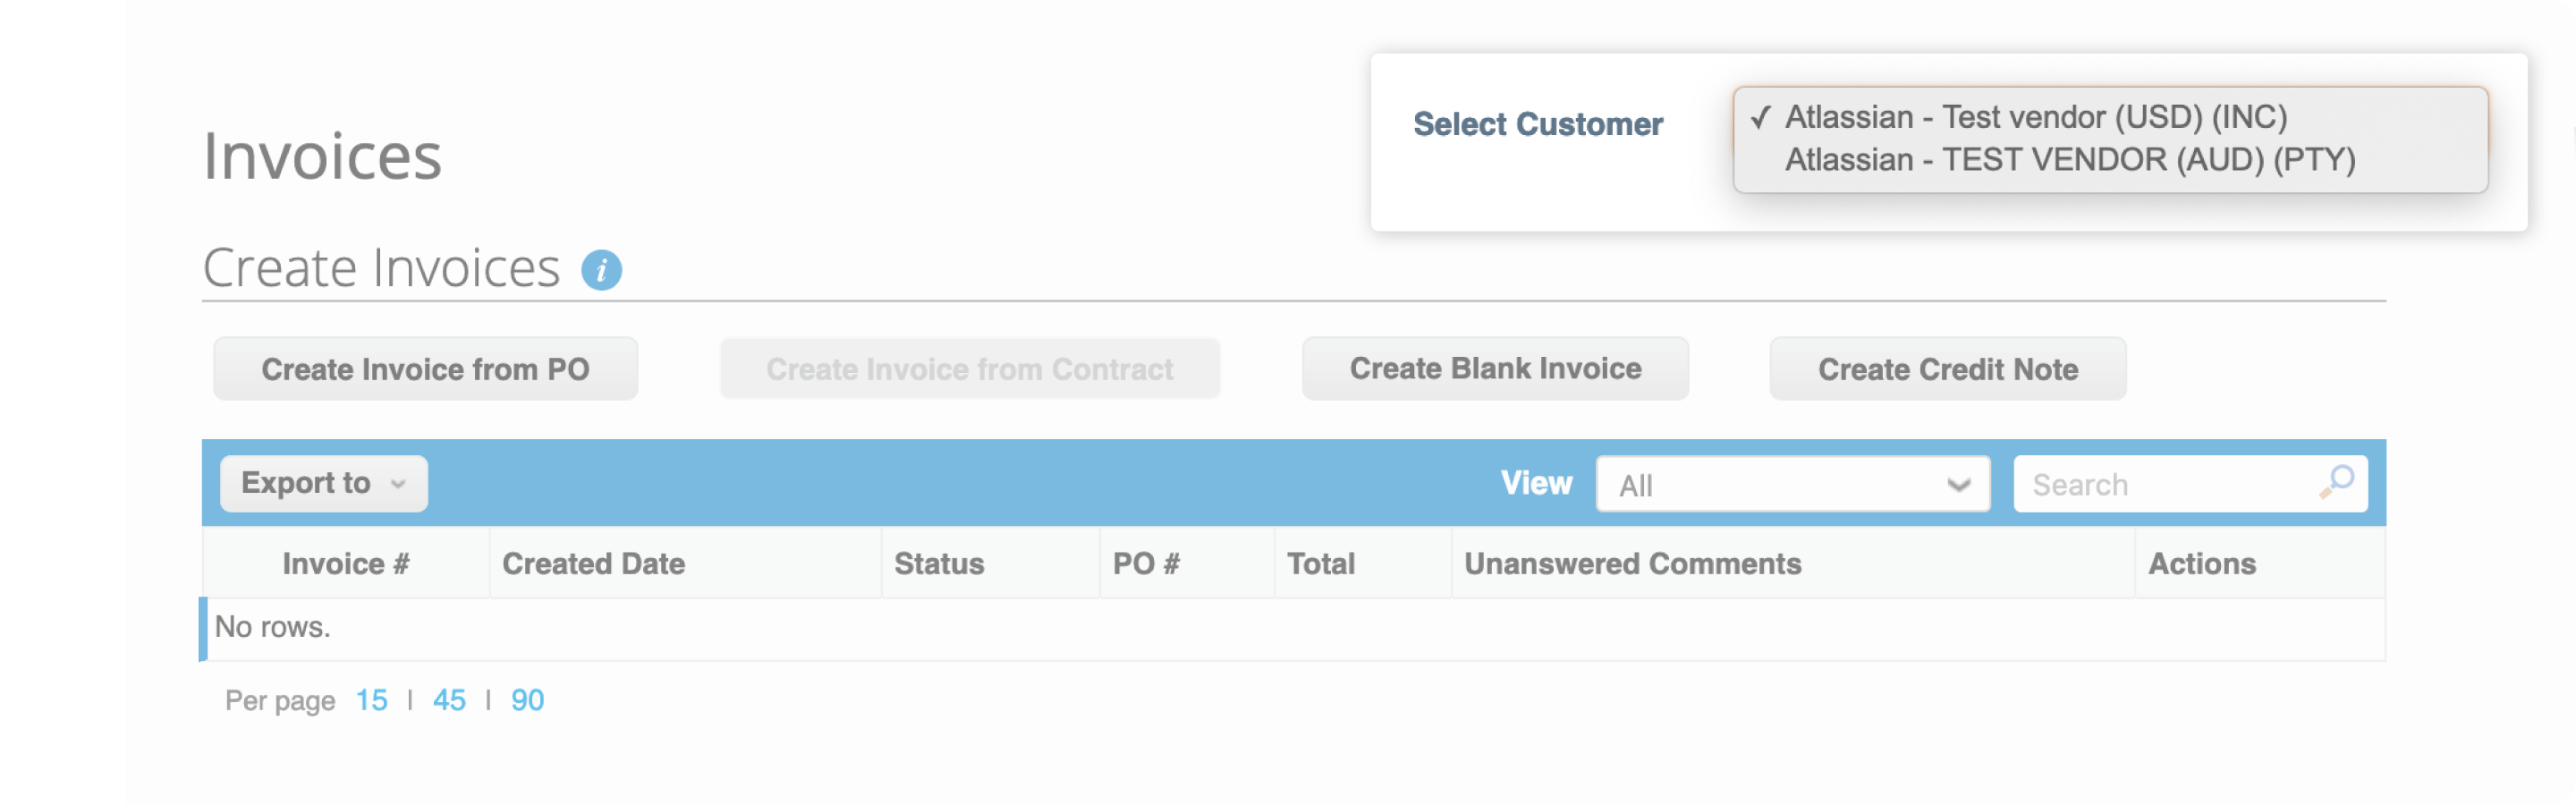
If you are transacting with multiple Atlassian subsidiaries or invoicing in different currencies, make sure you select the appropriate Atlassian entity for your transaction.

Step 3
All your POs will be displayed. Select the corresponding PO that the invoice is for.
Step 4
Make sure the PO status is Issued.
If the status of the PO is Closed, reach out to your Atlassian contact person.
Step 5
Click on the Yellow coins icon
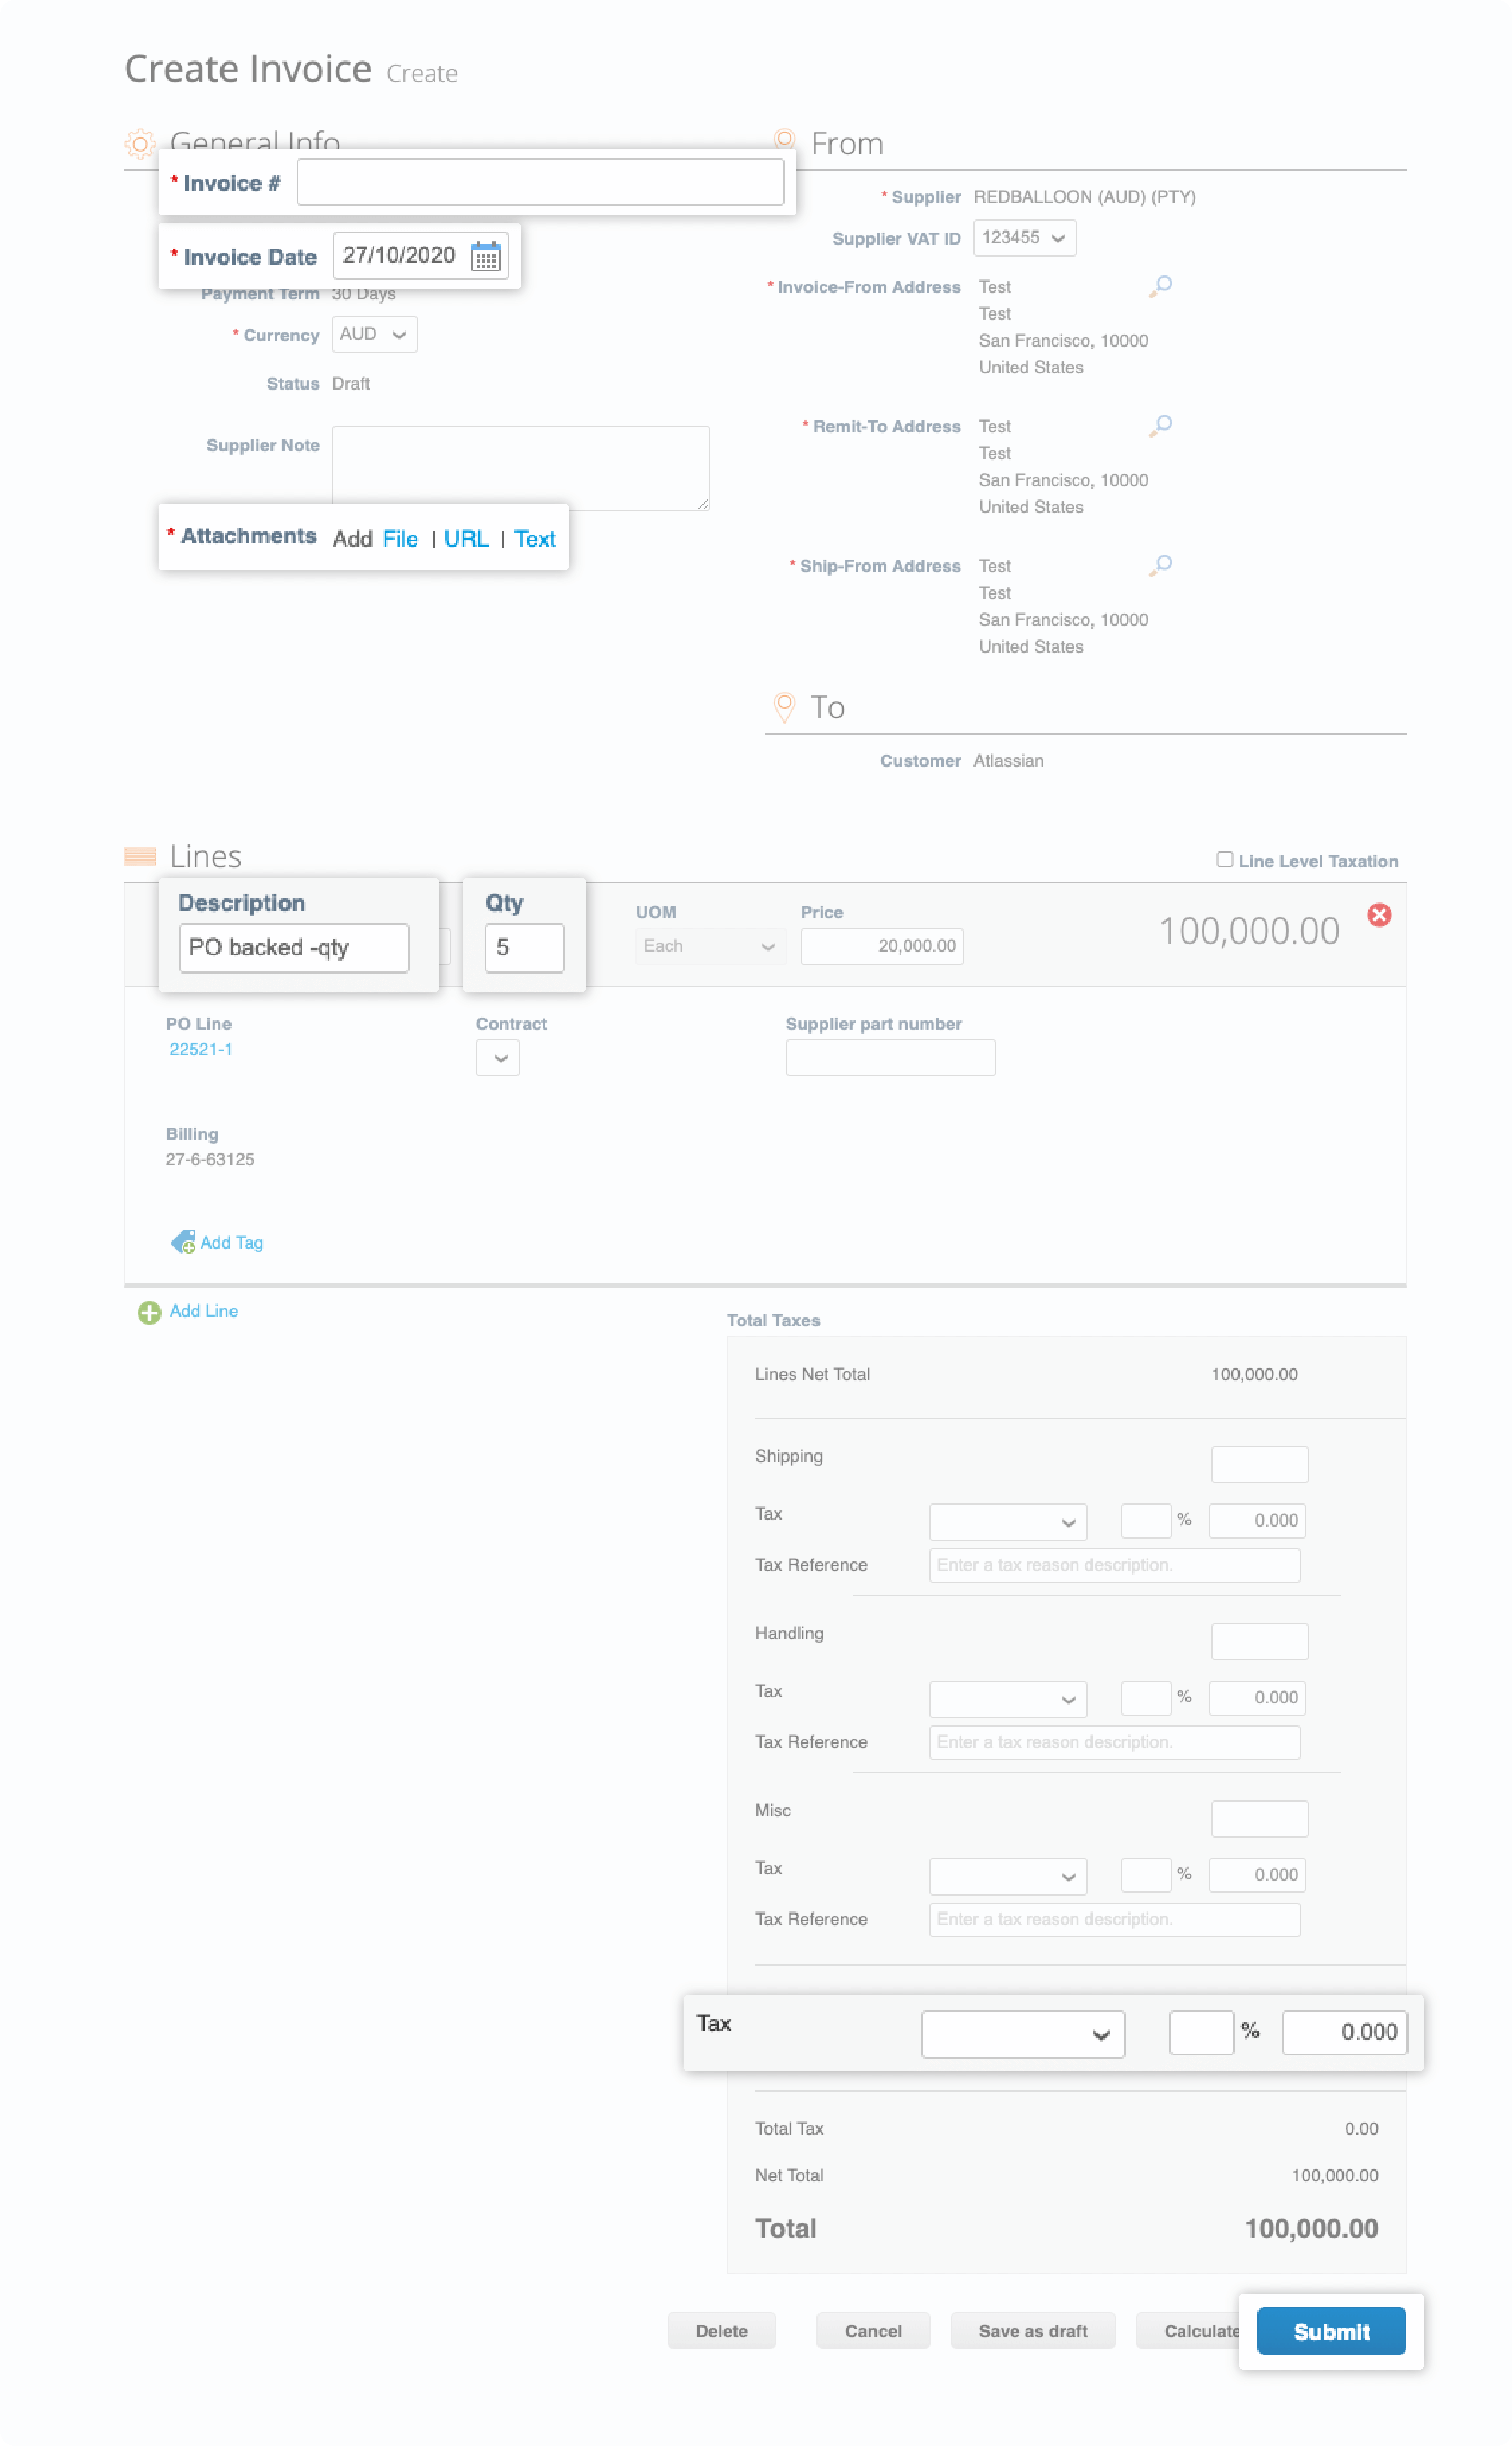
Step 6
You will be directed to an invoice window to input the pertinent details. The fields with * are required.
- Invoice number
- Invoice date
- Attachments - Invoice copy and other supporting documents if applicable
- Edit the description related to the invoice you are submitting
- Edit the quantity, if applicable
- Select the tax code, if applicable
Click Submit and you are done!