


Automate approval workflows in Jira Service Management with Insight
Use the asset and configuration management feature to auto-send any kind of issue to the right person.
Jira Service Management can be used for many different purposes, depending on an organization’s ITSM needs. Processes like change requests, new laptop requests, purchase orders, vacation requests, and expense approvals can all be deployed in an Atlassian environment.
What do all those processes have in common? Approvals! But if your system relies on manually updating every request to assign an approver, you may end up with bottlenecks in the resolution pipeline, which can negatively impact your team’s overall productivity.
Automatically routing your issues to approvers gives you many benefits:
- You save precious time.
- You don’t need to select the approver when creating the issue. This is especially useful when you’re working with issues created on behalf of another person, where the manager may be unknown.
- You prevent the reporter from selecting the wrong person as the approver and wasting time as the request bounces around trying to find the correct person.
Fortunately, Jira Service Management is very flexible and offers numerous ways to inject automation into your workflows. By using the Insight asset and configuration management feature to manage your organization’s structure and roles, you can automate the process of sending any kind of Jira issue to the appropriate approver based on either the requestor or other information in the issue’s fields.
What this means for your team
Let’s take a closer look at the process using a new laptop request as an example.
In this scenario, our company has a number of managers who oversee the budgets for their individual teams. When an employee wants to request a new piece of hardware, they need their manager’s approval. So in this case, we want the approver for the laptop requests to be automatically set as the reporter’s manager.
How do you accomplish this with Insight?
First, enter relevant information in Insight
Insight is an asset and configuration management feature in Jira Service Management Premium, Enterprise, and Data Center plans. But, as we’ll see, Insight can store far more than just standard assets and configuration items. Each entry in Insight is called an “object.”
The first step to improve approvals in Jira Service Management is to create an Insight object schema (a container of assets, configuration items, or in this case, employees) for your organization’s staff. This can be done by importing data with LDAP (Data Center only), CSV, or JSON files, or by entering it manually.
You’ll end up with something like the image below, where we can see a list of employees on the left side and specific details (attributes) about an individual employee in the center. You define all the employee information stored in Insight – home address, office location, department – whatever you need to know about your employees.
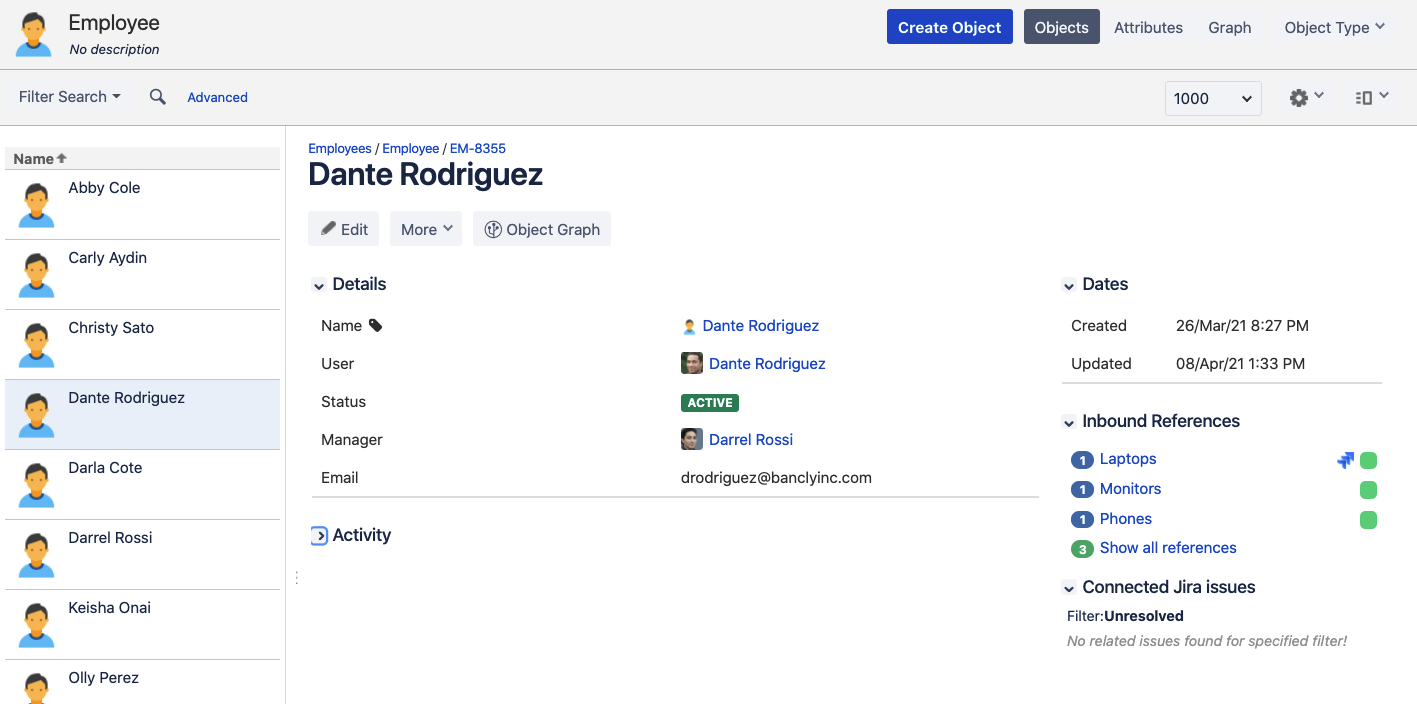
In this case, we see the following attributes:
- Name – the name we have given the entry in Insight
- User – a link to the employee’s Jira user profile
- Status – this could be things like “Active,” “On parental leave,” “No longer employed,” etc. These are useful for onboarding and off-boarding workflows.
- Manager – a link to the employee’s manager’s Jira user profile
- Email – a text field with the employee’s email address
Then, create the automation rule
The next step is to set an automation rule to assign the employee’s manager as an approver. We’ll use a Jira Automation rule to accomplish this.
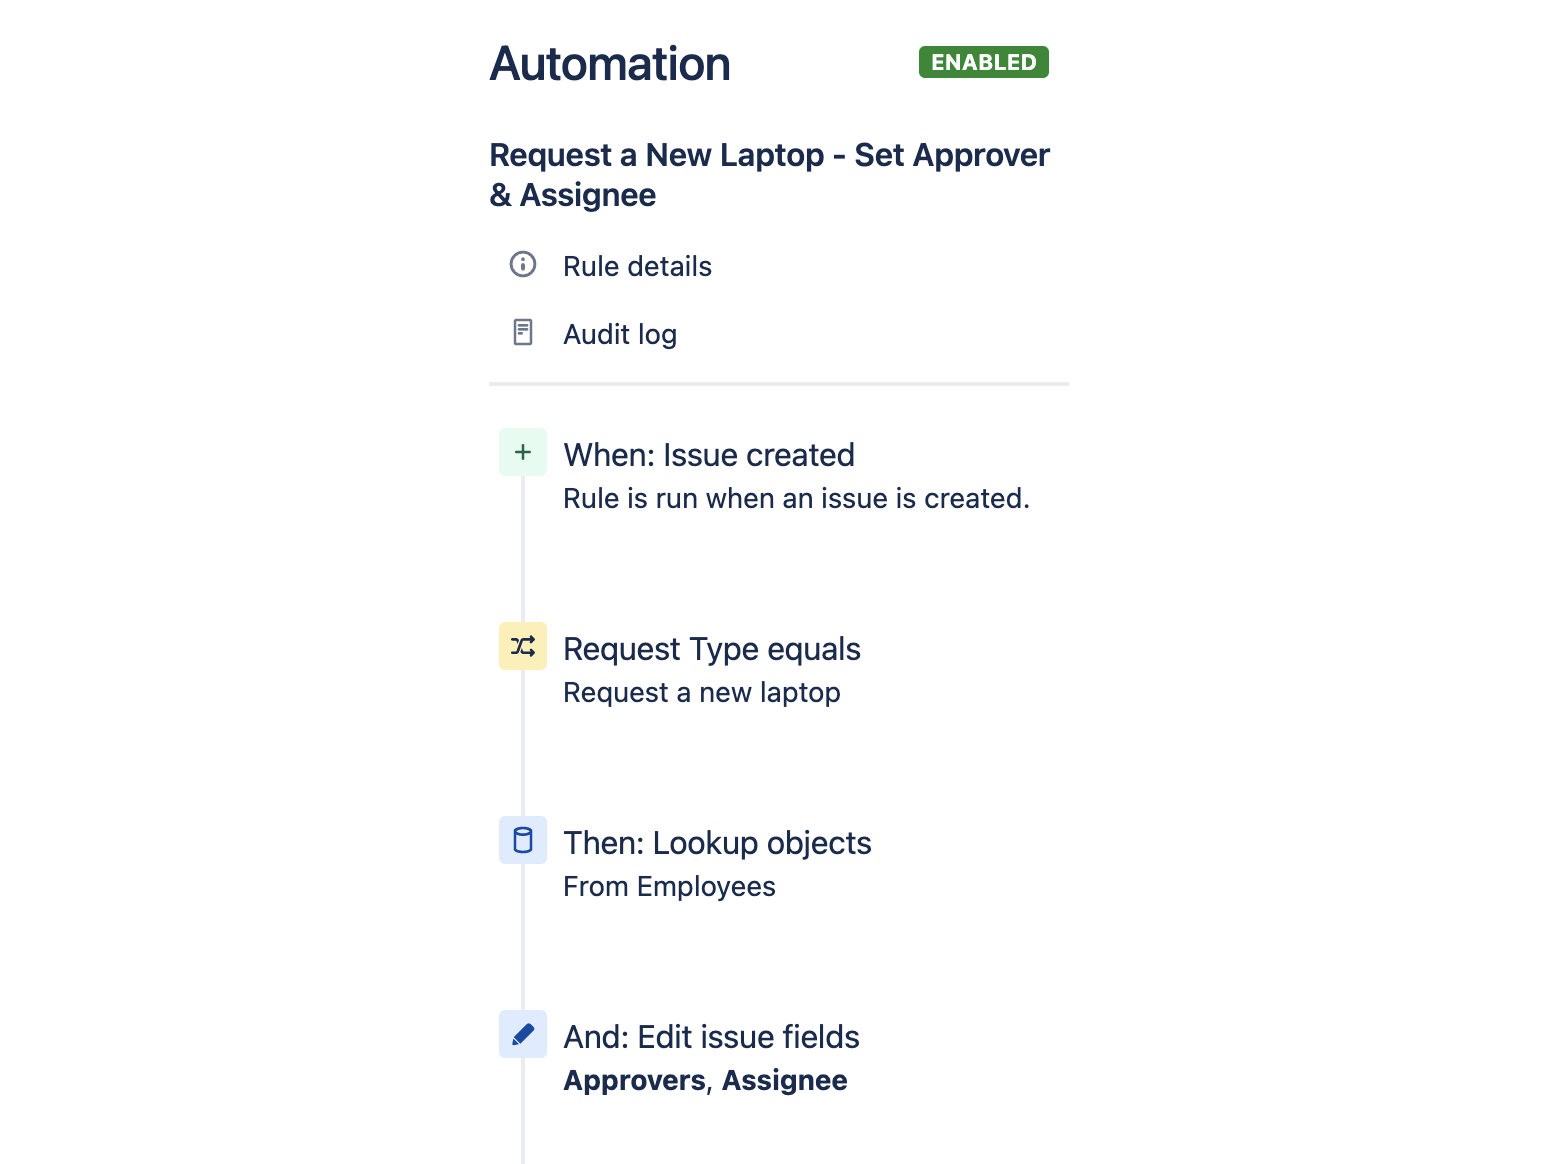
Let’s look at each step:
- We trigger this rule whenever an issue is created within our project. This step doesn’t require any configuration.
- Next, we only take action if the request type is a specific type – in this case, “Request a new laptop.” But this could easily be “Vacation request,” “Purchase request,” or even “Change request.”
- Then, we ask the automation rule to look up certain objects in Insight based on our criteria.
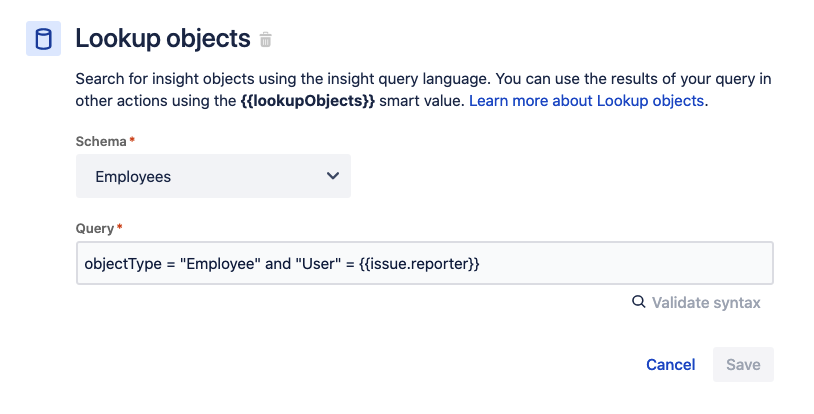
Here, we tell it to look in the Employees object schema, where our Employee objects live. Then we use Insight Query Language (IQL) to find the reporter in Insight. Essentially, we’re saying “find an object of the type ‘Employee’ where the ‘User’ attribute is the same as our ‘Request a new laptop’ issue’s reporter.
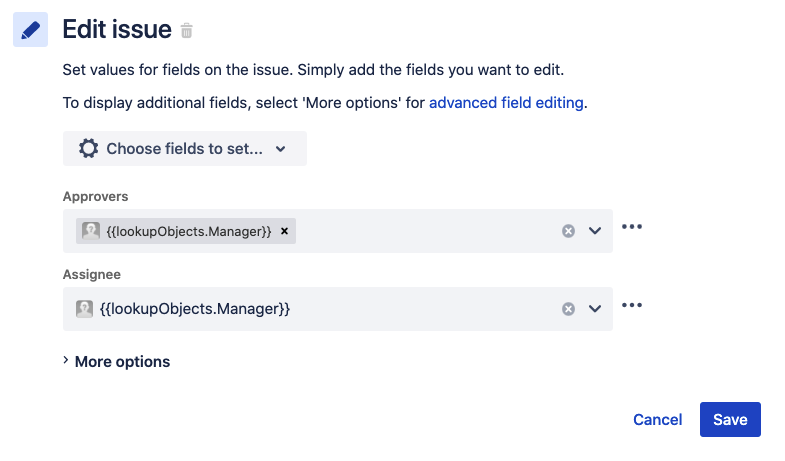
4. Finally, we set the approver and assignee for our issue, based on the reporter’s Insight object we found in step three. We tell it to set both the “Approvers” and “Assignee” fields of the issue. The value we set them to is the value of the “Manager” attribute of the employee as defined in Insight.
That’s all there is to it! Now, when we run this rule, we can see the automations triggering in the History section.
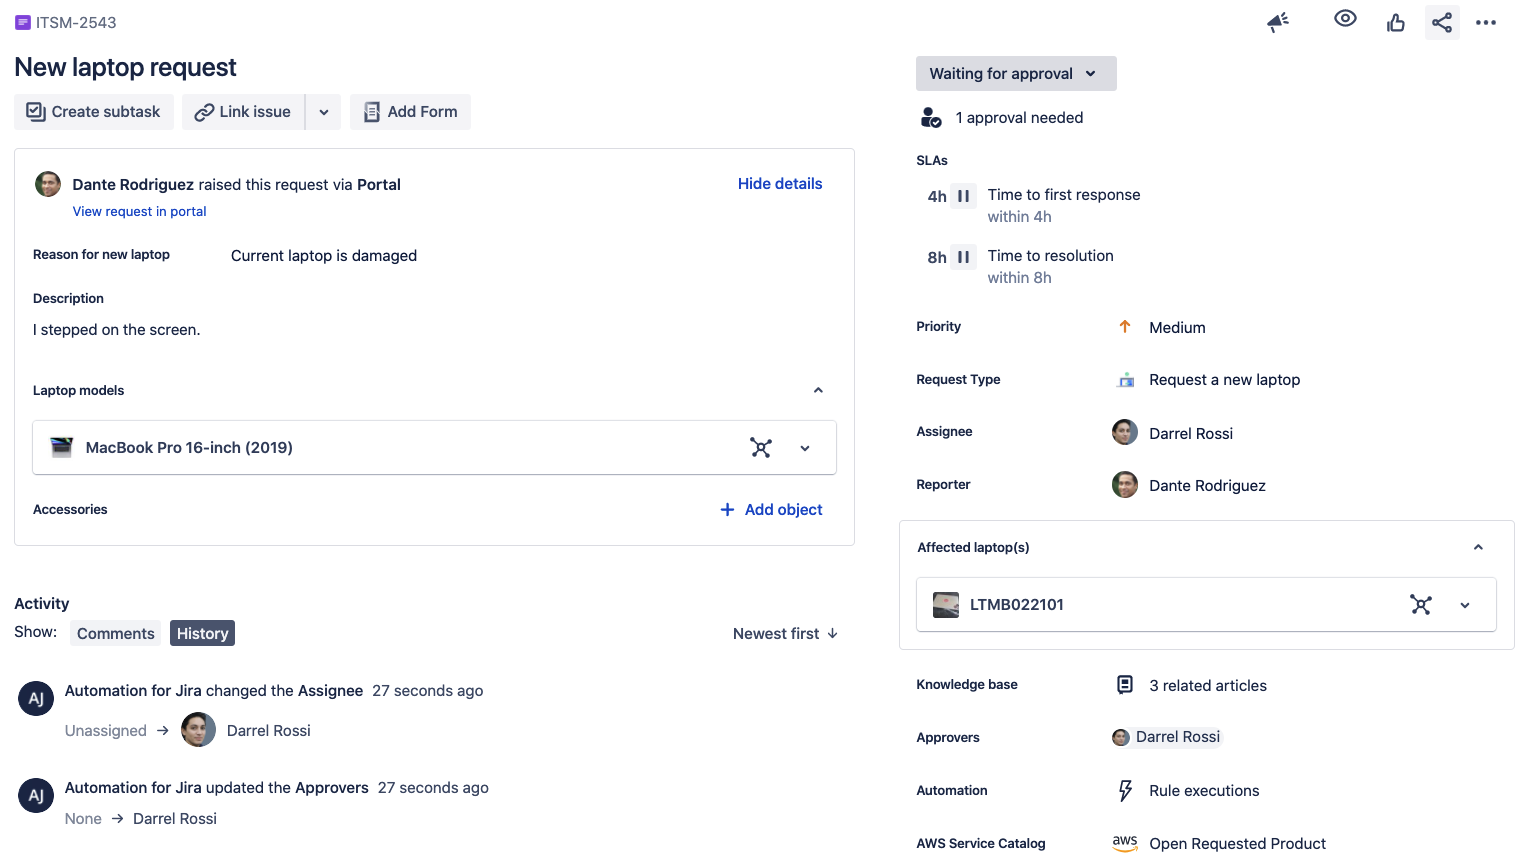
You might also notice there’s a laptop model and affected laptop attached to this issue. These laptops are objects pulled from Insight too. You can learn more about Insight for asset and configuration management here.
Summary
You can document your company’s employees within Insight to speed up approval workflows, but this is just one example of the many ways Insight can help streamline these processes.
You could define your Change Advisory Boards within Insight and have them automatically added as approvers depending on what change request comes in. You could define service or hardware owners in Insight to automatically route incident and problem issues to them. We even have Jira Service Management users who automatically create a relevant Jira Software issue when an incident comes in for in-house apps, and automatically assign members of the developer teams as watchers and assignees using Insight. That can massively improve communication between Dev and Ops and help them resolve their incidents faster.
Automated approvals are just one of the many ways Jira Service Management helps provide high-velocity service management to your organization. Click below to learn more!