プル リクエストがマージされたときの Jira Automation ルール
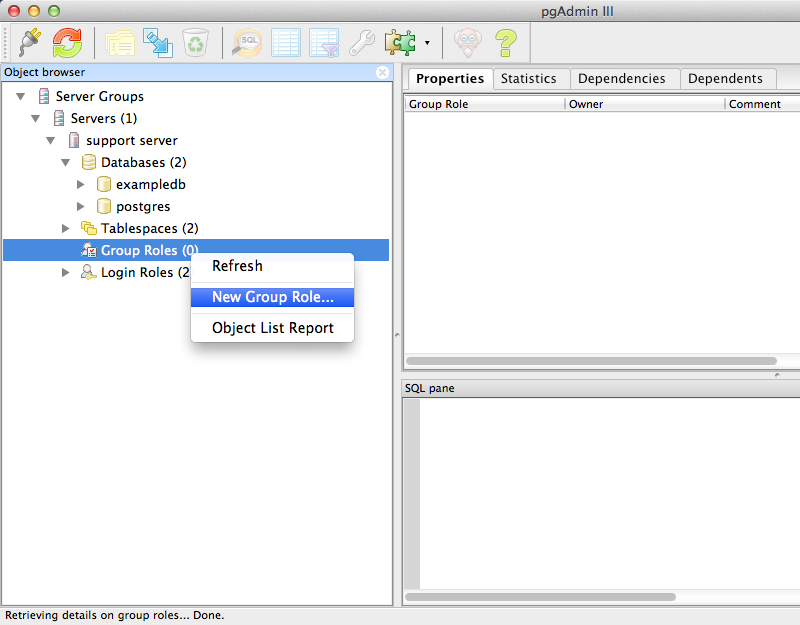
Connect to your PostgreSQL server instance using pgAdmin > right-click on ‘Group Roles’ and select ‘New Group Role’.
![No need to create a password for the Group role](https://wac-cdn.atlassian.com/dam/jcr:480c5a82-1293-4507-a698-05e1850fa2dc/connect-to-postgresql-server.png?cdnVersion=2526)
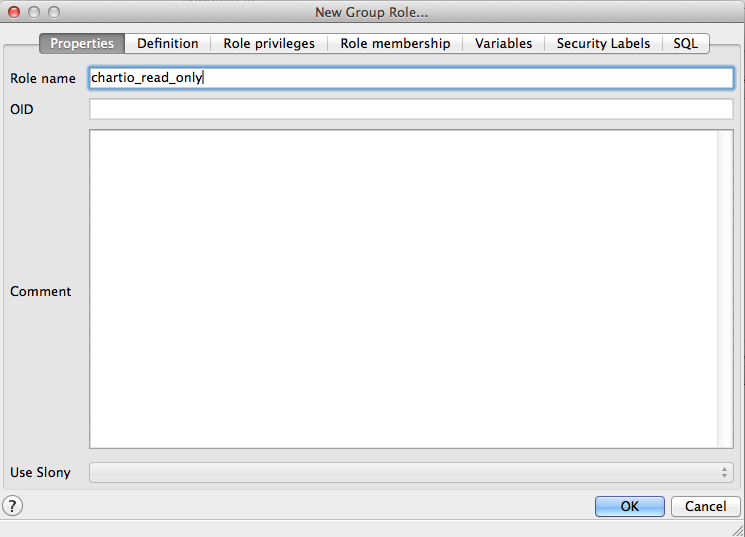
Give the role a descriptive name > click ‘OK’. You do NOT need to create a password for the Group role; we will create a password for the Login role created later in this document.
![Select the database that you would like Chartio to connect to as the Default database](https://wac-cdn.atlassian.com/dam/jcr:69b75e95-595d-4140-8d22-db4e57dfd6e6/gourp-role.png?cdnVersion=2526)
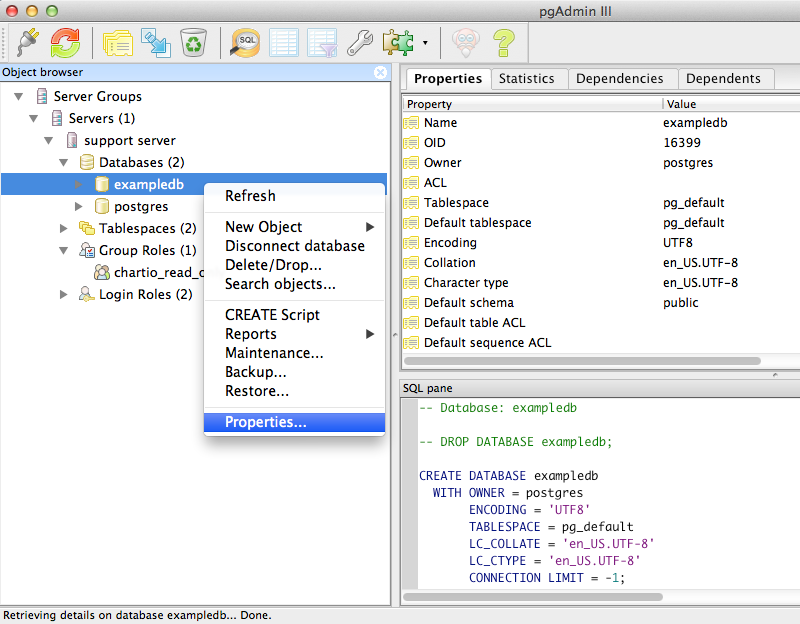
Expand ‘Databases’ > right-click on the database you would like to connect to Atlassian Analytics > select ‘Properties’.
![Click the database you would like to conenct to Chartio](https://wac-cdn.atlassian.com/dam/jcr:fe827018-4d83-4535-ad5c-b0f494e429eb/choose-database.png?cdnVersion=2526)
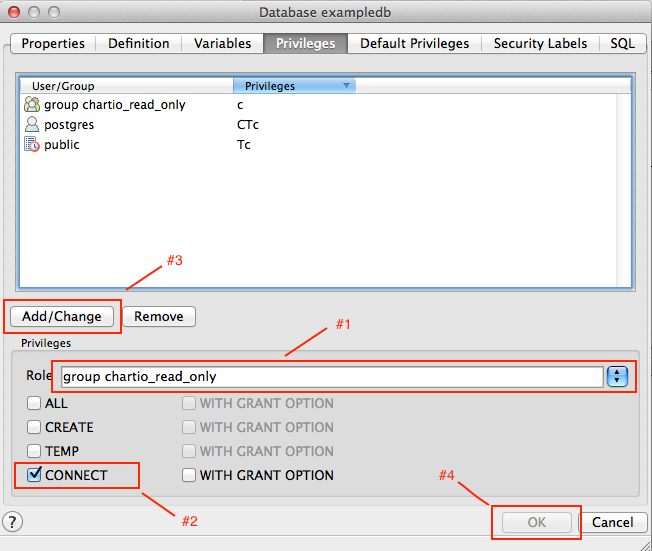
In the ‘Privileges’ tab select the newly created group from the ‘Role’ drop-down menu > check the ‘Connect’ box > click ‘Add/Change’ > click ‘OK’.
![Click the Connect box in the Priviledges tab and choose OK](https://wac-cdn.atlassian.com/dam/jcr:0042b9c5-40fa-46cc-932e-2a370cb21a3f/connect-privileges.png?cdnVersion=2526)
Click the expand arrow next to your database > expand ‘Schemas’ > right-click ‘public’ > select ‘Grant Wizard’.
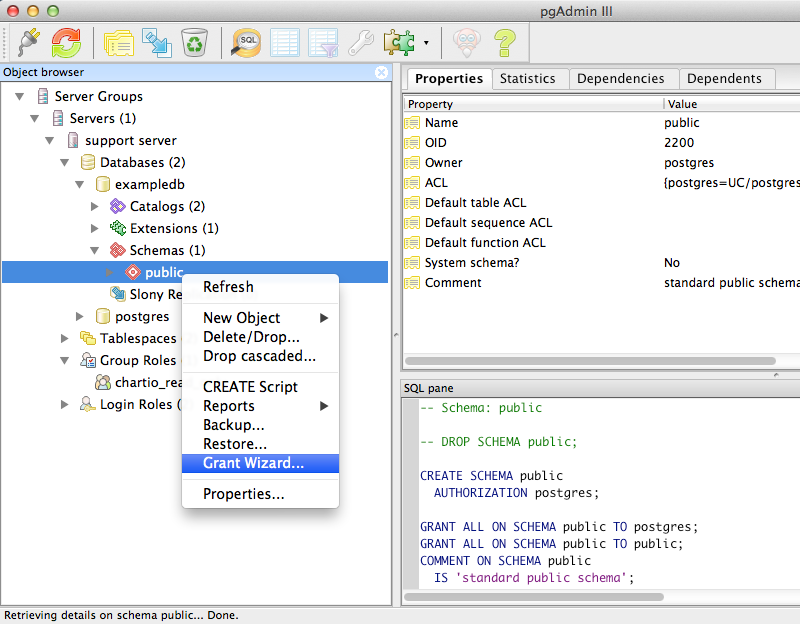
![Select Grant Wizard](https://wac-cdn.atlassian.com/dam/jcr:95a61553-e00f-461a-91ac-045435ca9c4d/select-grant-wizard.png?cdnVersion=2526)
On the ‘Selection’ tab click ‘Check All’.
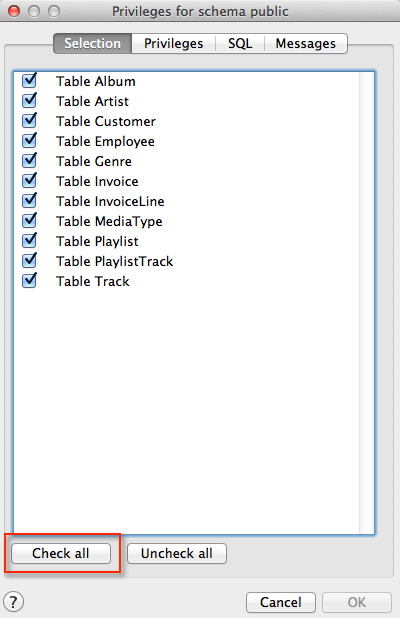
![Click check all](https://wac-cdn.atlassian.com/dam/jcr:4bed400d-181f-4e37-aedd-0994ff2a7488/check-all.png?cdnVersion=2526)
In the ‘Privileges’ tab select the newly created group from the ‘Role’ drop-down menu > check the ‘Select’ box > click ‘Add/Change’ > click ‘OK’.
If your schema is not ‘public’, you will also need to grant USAGE permissions on the schema.
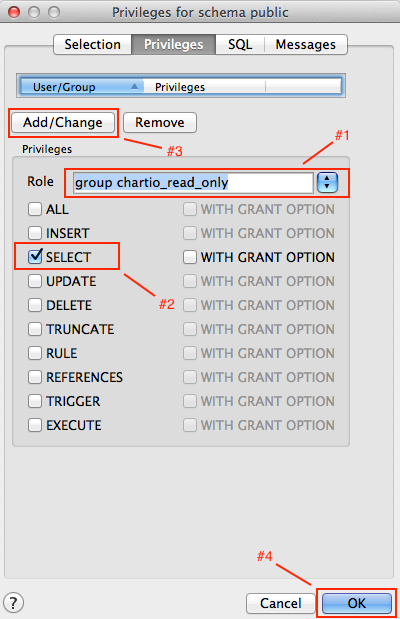
![Grant USAGE permissions, if necessary](https://wac-cdn.atlassian.com/dam/jcr:9f9b1db5-1528-494c-8e10-69dcd5fc2f3b/grant-usage-permissions.png?cdnVersion=2526)
Under your server tree right-click ‘Login Roles’ > select ‘New Login Role’
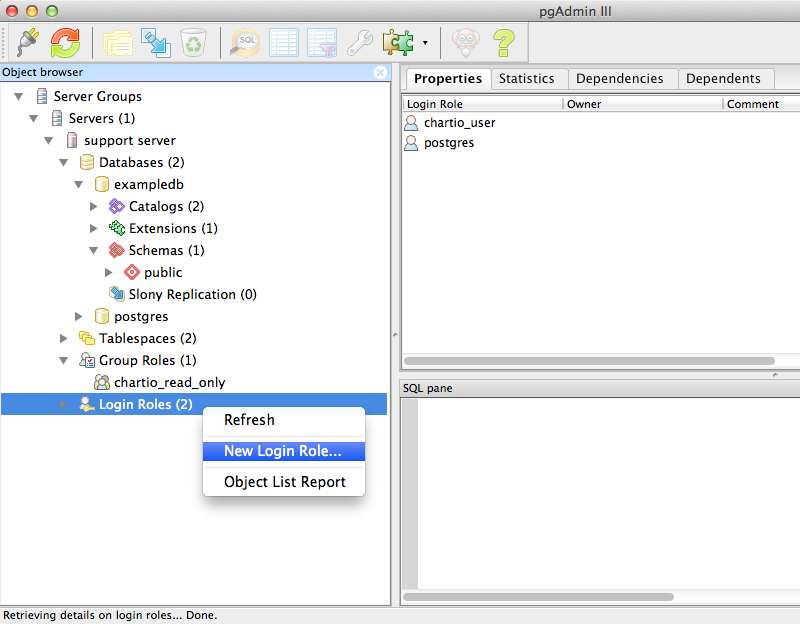
![Right-click to select New Login Role](https://wac-cdn.atlassian.com/dam/jcr:0a0b453a-bed0-4a04-9d94-b3301ccfa56f/new-login-role.png?cdnVersion=2526)
Type a descriptive name for the user.
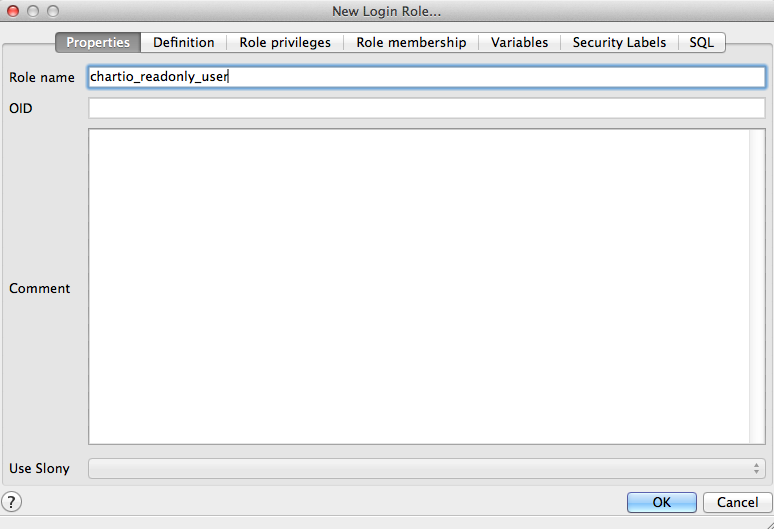
![Add a name](https://wac-cdn.atlassian.com/dam/jcr:f0daaeb4-d6ec-4940-acf8-33136d4706e0/role-name.png?cdnVersion=2526)
On the ‘Definition’ tab enter a secure password.
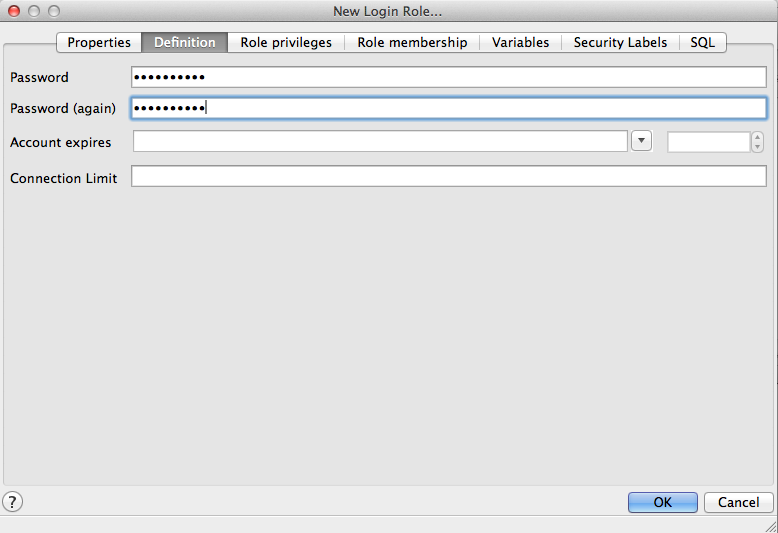
![Enter a password](https://wac-cdn.atlassian.com/dam/jcr:69250f41-81ee-4f7f-b91a-3a09b60bed92/password.png?cdnVersion=2526)
On the ‘Role membership’ tab add the newly create group to the ‘Member’ window > click ‘OK’.
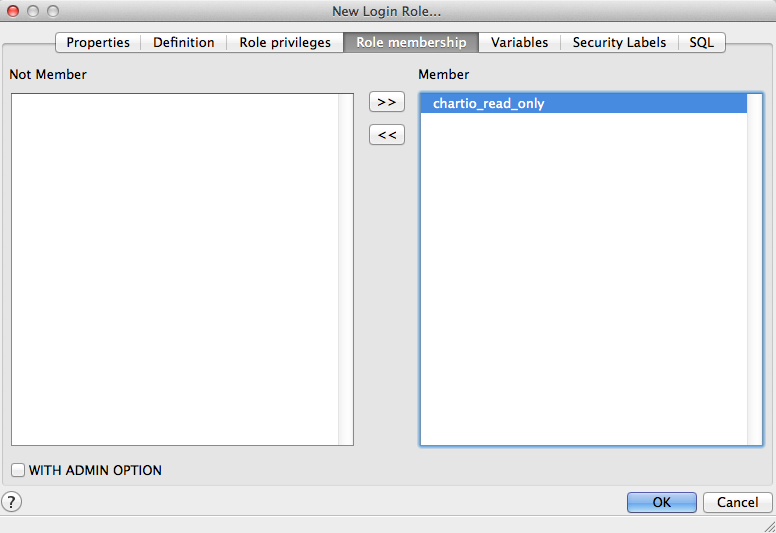
![Final result](https://wac-cdn.atlassian.com/dam/jcr:e7e443b5-6bc3-4e0e-b6d5-7d84983ca859/role-membership.png?cdnVersion=2526)
You have successfully created a new read-only user for your database. Use the credentials created for the Login role when setting up your PostgreSQL connection for Atlassian Analytics.
For information on creating a user with psql, see this article.
For more information on connecting your PostgreSQL database to Atlassian Analytics, see our documentation.