

Redesigning a Homepage in 20 Minutes: Figma MCP + Atlassian Design System MCP + Rovo Dev CLI
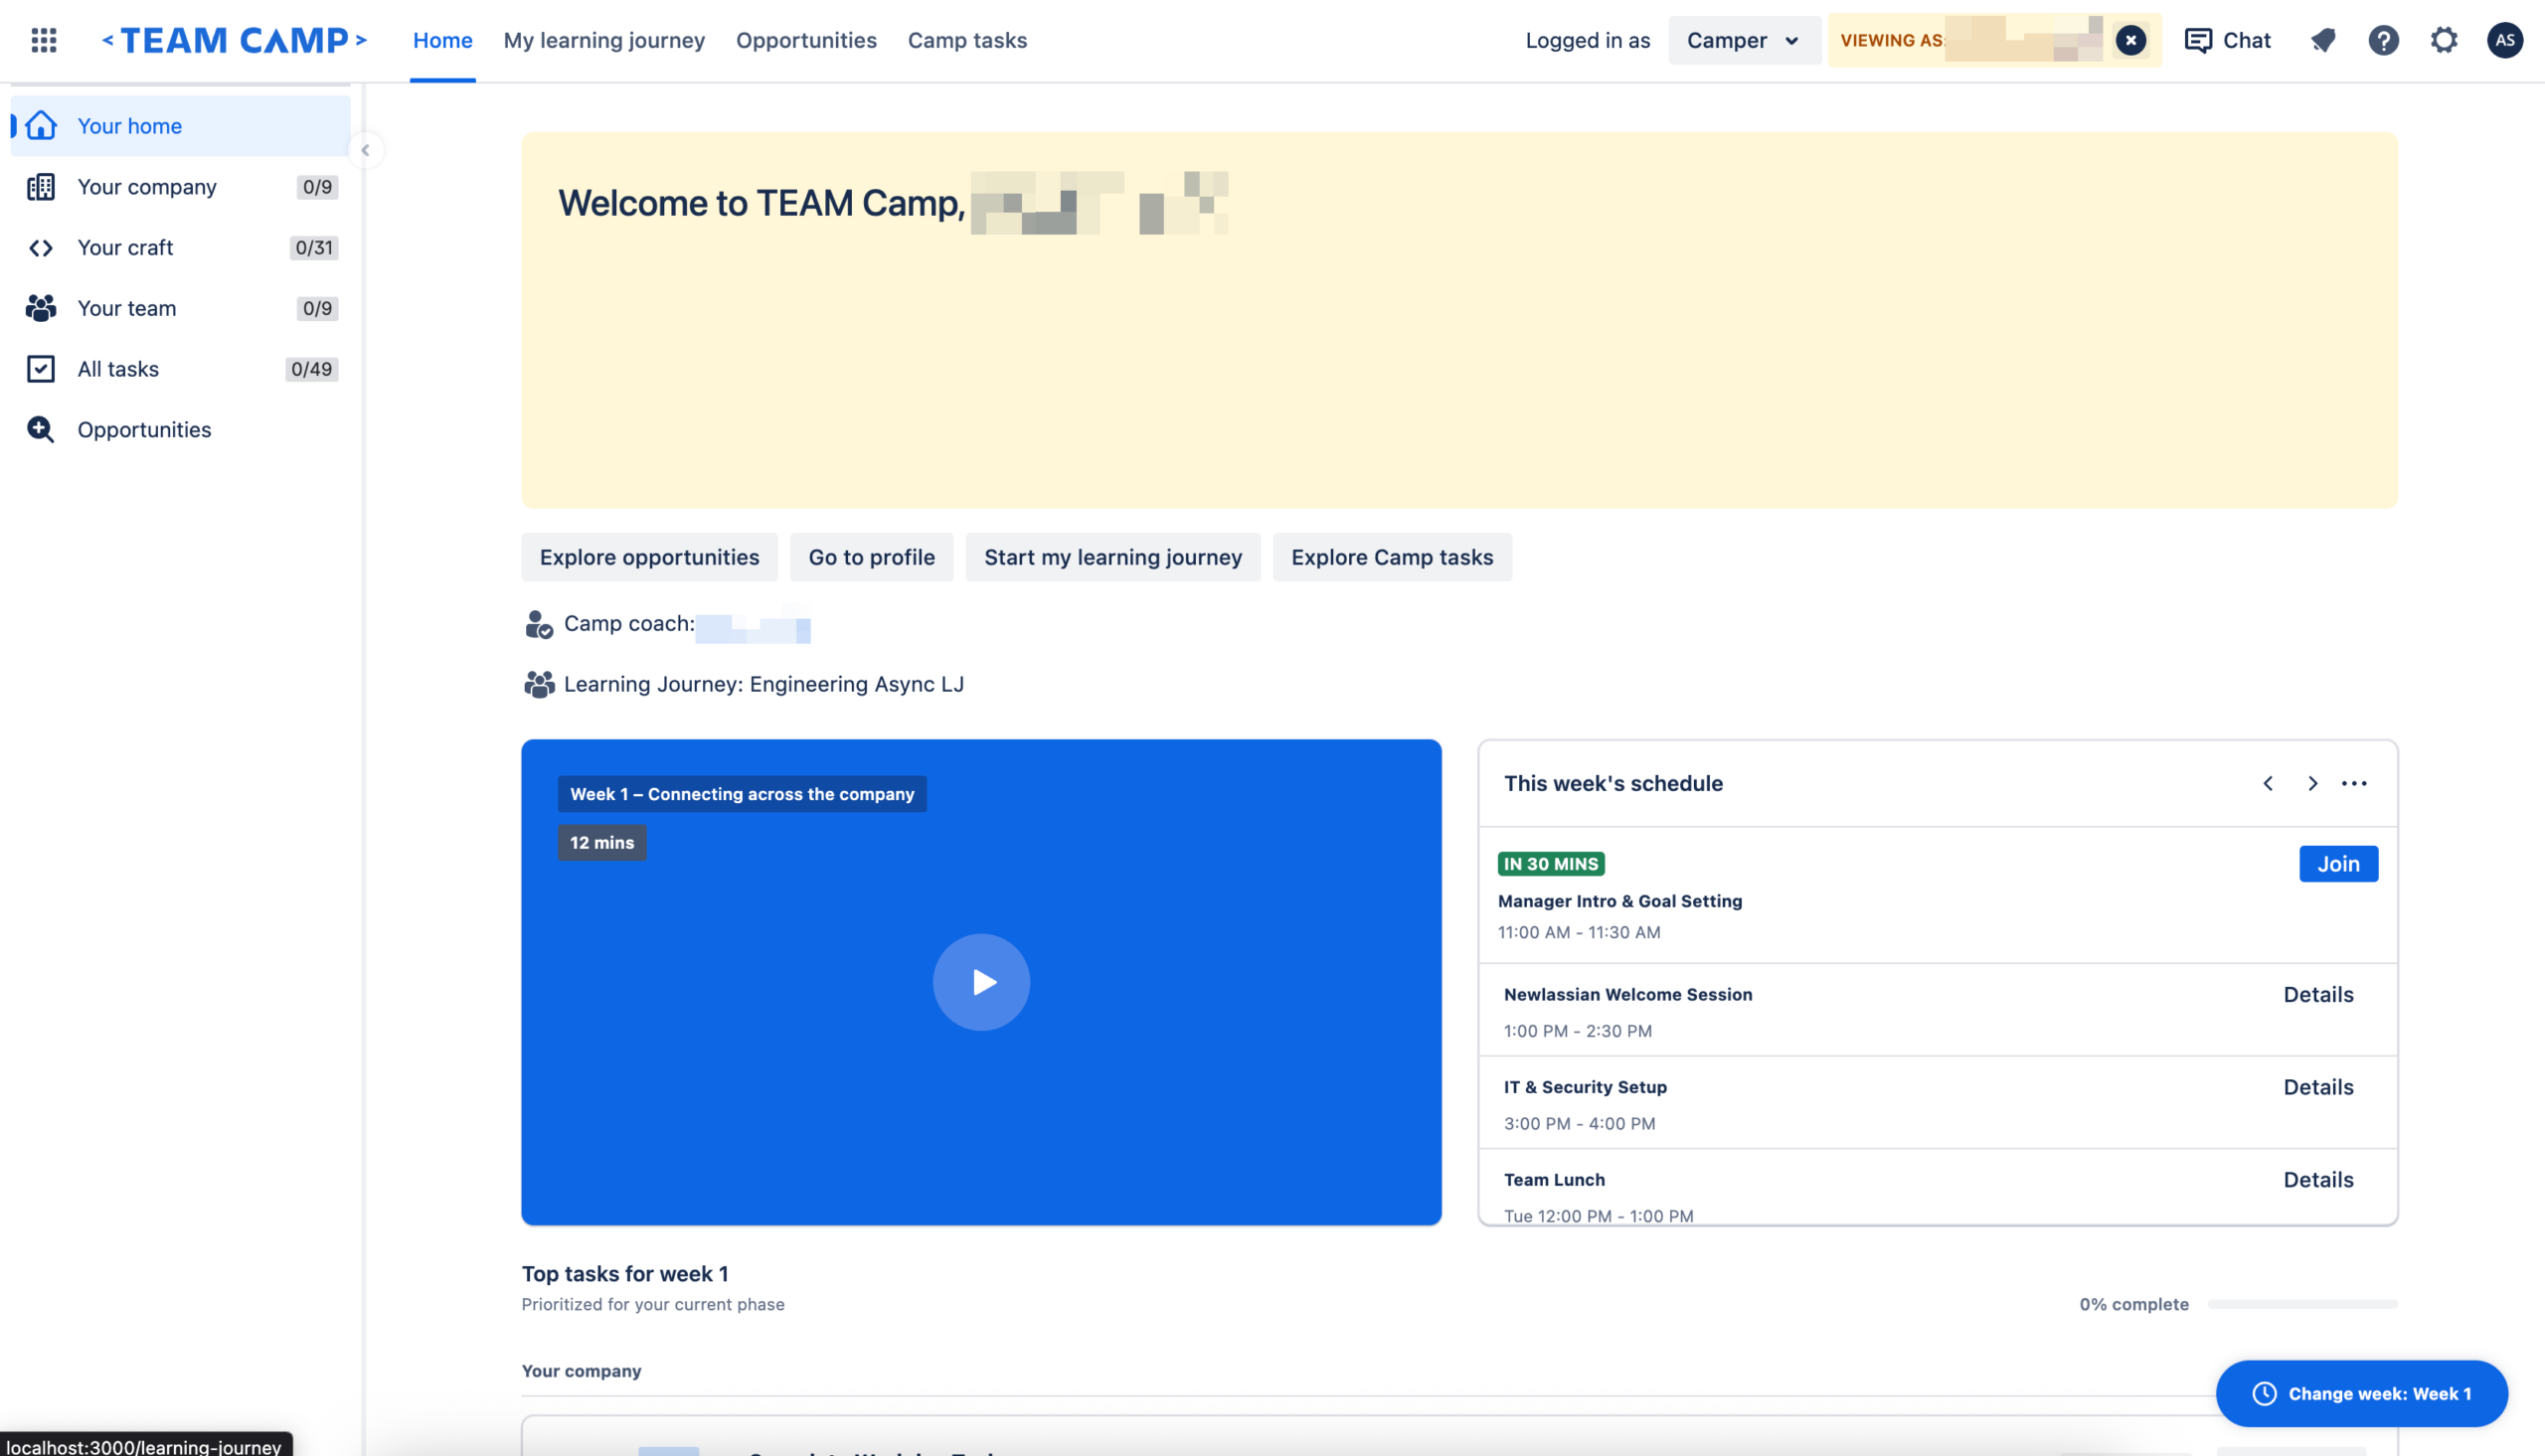
Before vs after
From 4 days of developer effort to 20 minutes using RovoDev CLI and MCP servers.

TL;DR
We redesigned an entire application homepage — from Figma mockup to production-ready React code — in under 20 minutes. No copy-pasting design tokens. No guessing component APIs. No pixel-pushing in DevTools.
The Secret Behind the Redesign
The secret? Connecting Figma MCP, the Atlassian Design System (ADS) MCP, and Rovo Dev CLI into a single AI-powered workflow.
This post walks through exactly how we did it, what MCP tools were invoked under the hood, and the code that came out the other side.
The Problem
We had an existing homepage that needed a complete visual overhaul.
Traditionally, this kind of redesign takes a frontend engineer a full 3-4 days or more — interpreting the design, looking up tokens, finding the right components, wiring styles, writing tests. We wanted to see: can AI collapse that into minutes?
The Setup: RD CLI and Two MCP Servers Working Together
We configured two MCP (Model Context Protocol) servers in our development environment:
Figma Desktop MCP
Connects to the Figma desktop app and extracts design data directly from your Figma files.
{
  "figma-desktop": {
      "url": "http://127.0.0.1:3845/mcp",
      "transport": "http"
  }
}
Atlassian Design System MCP
Provides access to all ADS components, tokens, icons, and accessibility guidelines.
{
  "atlassian-design-system-mcp": {
      "command": "npx",
      "args": ["-y", "@atlaskit/ads-mcp"]
  }
}
Rovo Dev CLI
The AI coding agent that orchestrates the workflow — reading designs, querying design system guidance, generating code, and running tests.
With all three connected, we had a pipeline: Figma design → AI interpretation → ADS-compliant code → tested output.
Step-by-Step: What Happened in Those 20 Minutes
Step 1: Extract the Design from Figma
We gave Rovo Dev the Figma node URL for the new homepage design. Under the hood, two Figma MCP tools were invoked simultaneously:
get_design_context — Extracted the full design tree: layout structure, colors, typography, spacing, component hierarchy, and content. This returned a structured representation of every element in the frame, including:
- Frame dimensions and auto-layout properties
- Fill colors (the amber
#F5CD47hero, the#0C66E4video card) - Text content, font sizes, weights, and line heights
- Border radii, padding, and gap values
- Nested component structure
get_screenshot — Captured a pixel-perfect screenshot of the design for visual reference. This gave the AI a “ground truth” image to verify its interpretation against.
The combination of structured data + visual screenshot meant the AI didn’t have to guess — it had both the semantic structure AND the visual target.
Step 2: Query the Atlassian Design System
Before writing a single line of code, Rovo Dev queried the ADS MCP using the ads_plan tool. This was the key differentiator from just “generating code from an image.”
The query included:
Tokens requested:
color.background.warning(for the amber hero banner)color.background.brand.bold(for the blue video card)color.text, color.text.subtle, color.text.inverseelevation.shadow.overflow, elevation.surface.raisedspace.200, space.300, space.400, space.500border.radius.200
Components requested:
Box, Inline, Stack, Flex, Grid(layout primitives)Heading, Button, Lozenge, ProgressBar, Checkbox, Badge
Icons requested:
play, chevron-left, chevron-right, more, clock, video
The ADS MCP returned:
- Exact import paths for each component
- Usage guidance and API documentation
- Token values and when to use them
- Icon component names and their packages
- Accessibility requirements for each component
This meant the generated code used real design system tokens (not hardcoded hex values), real ADS components (not generic HTML), and correct accessibility patterns from the start.
Step 3: Read Existing Code Patterns
Rovo Dev also read the project’s coding patterns documentation (stored in .rovodev/code-patterns.md) to understand:
- How the project structures components
- Styling conventions (xcss over raw CSS)
- Import alias patterns (
~src/...) - Test conventions
- How existing pages compose layouts
This ensured the generated code didn’t just look right — it fit the codebase.
Step 4: Generate the Components
With design data, ADS guidance, and codebase patterns all in context, Rovo Dev generated six new components and updated two existing files:
| Component | What It Does |
|---|---|
WelcomeHeroBanner.tsx | Amber hero with welcome message, week label, description, and illustration |
WeeklyVideoCard.tsx | Blue card with video thumbnail, play button overlay, and duration badge |
WeeklySchedulePanel.tsx | Schedule panel with event list, time badges, and Join/Details actions |
TopTasksSection.tsx | Tasks grouped by category with progress bar and interactive checkboxes |
ChangeWeekFab.tsx | Floating action button for week selection |
CamperHomeSidebar.tsx | Left sidebar with nav items, icons, and completion count badges |
Each component used:
- ADS
Box, Flex, Stack, Gridfor layout (not raw divs with CSS) - ADS
Headingwith proper heading levels - ADS
Lozengefor status badges - ADS
Button(both default and new API) for actions - ADS
ProgressBarfor task completion - ADS
Checkboxwith properaria-labelfor accessibility - Design tokens via
xcss(e.g.,color.background.warning.boldfor the amber banner,color.background.brand.boldfor the video card) - ADS icons from
@atlaskit/icon/core/*and@atlaskit/icon/utility/*
Step 5: Compose the Layout
The main HomePage.tsx was updated to compose all new sections in a layout matching the Figma:
┌─────────────────────────────────────────┐
│         WelcomeHeroBanner               │
├───────────────────┬─────────────────────┤
│  WeeklyVideoCard  │ WeeklySchedulePanel │
├───────────────────┴─────────────────────┤
│         TopTasksSection                 │
│  ┌─ Your company ──────────────────┐    │
│  │  □ Task 1                       │    │
│  │  □ Task 2                       │    │
│  ├─ Your craft ────────────────────┤    │
│  │  □ Task 3                       │    │
│  └─────────────────────────────────┘    │
├─────────────────────────────────────────┤
│  [Existing sections preserved]          │
└─────────────────────────────────────────┘
                              [⏰ Change week: Week 1]  ← FAB
The sidebar was wired into the route system using the project’s lazyWithSidebar utility for code-split loading.
Step 6: Fix Issues & Pass Tests
The AI didn’t just generate and walk away. It ran the existing test suite and iteratively fixed three issues:
- Double
React.lazywrapping — The sidebar was wrapped inReact.lazytwice (once manually, once bylazyWithSidebar), causing a “Element type is invalid” error. Fixed by exporting the sidebar as a plain named export. - Duplicate welcome text — Both the old
HomeBannerand newWelcomeHeroBannerrendered the same welcome string, causinggetByTextto find multiple elements. Fixed by removing the oldHomeBannerand moving its action buttons inline. - Accessibility violation — Checkboxes in
TopTasksSectionhad empty labels, failing the axe-core audit. Fixed by adding descriptivearia-labelattributes.
Final result: all 3 tests passing, including the accessibility check.
The Final Output
10 files changed. 1,381 lines added. 70 lines removed.
A complete homepage redesign — new hero banner, video section, schedule panel, task tracker, sidebar navigation — all using proper ADS components and tokens, all accessible, all following existing codebase patterns.
Branch: feature/camper-homepage-redesign
Why This Matters
Speed
20 minutes instead of a full 4-5 developer days. The AI handled the mechanical translation (design → tokens → components → layout) while the developer focused on intent and review.
Consistency
Because the ADS MCP was queried before code generation, every component used the correct design tokens and component APIs. No hardcoded colors. No wrong spacing values. No deprecated component usage.
Accessibility
The ADS MCP provided accessibility guidance alongside component APIs. The generated code included proper heading hierarchy, ARIA labels, and keyboard-navigable patterns from the start — and the test suite verified it with axe-core.
Code Quality
The generated code followed the project’s existing patterns because Rovo Dev read the codebase conventions first. The output looked like it was written by a team member who knows the codebase, not by an AI that only saw a screenshot.
The MCP Tool Chain: A Summary
| Step | MCP Server | Tool | Purpose |
|---|---|---|---|
| 1 | Figma Desktop | get_design_context | Extract design structure, colors, typography, spacing |
| 1 | Figma Desktop | get_screenshot | Capture visual reference of the target design |
| 2 | ADS MCP | ads_plan | Get component APIs, token values, icon imports, a11y guidance |
| 3 | Rovo Dev | Code reading | Read existing patterns, test conventions, route setup |
| 4 | Rovo Dev | Code generation | Create 6 new components + update 4 existing files |
| 5 | Rovo Dev | Test runner | Run tests, fix issues iteratively until all pass |
Try It Yourself
- Install the Figma MCP — Enable the Figma desktop app integration
- Install the ADS MCP — Connect the Atlassian Design System server
- Point Rovo Dev CLI at a Figma node — Share the node URL and describe what you want
- Review the output — The AI generates, tests, and fixes; you review and refine
The future of frontend development isn’t about replacing developers — it’s about removing the tedious translation layer between design and code, so developers can focus on the parts that actually require human judgment.