
I am still incredibly excited by Docker. The more I think about it, the more I foresee a revolution in software deployment architectures for SaaSs – yes, SaaSs … I am speaking Parseltongue.
If you remember my previous article, I wrote a guide on how to deploy a Java application – Stash – with Docker. That worked pretty well, but I deferred further automation to a later date.


In this second post I am going one step further with automation, exploration, and awesomeness. My long-term plan is simple: one-button cluster deployment of all Atlassian products configured and linked together, ready to go. The latest Docker release makes things even more convenient with container naming and linking support.
In this installment I’ll cover:
- Automated build of containers for Stash, Jira, and PostgreSQL.
- How to inspect containers and wire them up.
- The Dockerfiles that automate building the images from scratch.
- Tips and repeatability.
Let’s ride further down the automation line.
Before we start: install Docker
A few prerequisites are needed before we start:
- On Linux, install Docker and you’re ready.
- On Mac, install Vagrant and run:git clone https://bitbucket.org/atlassianlabs/atlassian-docker
cd atlassian-docker
vagrant up
(wait … wait … wait…)
You’ll get an Ubuntu 13.04 ready with Docker already running. Now you can ssh into the box with:
vagrant ssh
After you ssh into the Vagrant instance type sudo docker pull base to pull the docker images called base (Ubuntu 12.10 at the moment).
The short version: Install Stash and Jira with PostgreSQL in a jiffy
I brought down the effort of setting up Stash, Jira with PostgreSQL in three containers to a single command. Change directory (cd) into the shared vagrant folder that links your host to the vm (or clone the atlassian-docker project again in the container) and run:
/vagrant/build_and_deploy_stash_jira.sh
You’re done. Now wait for the whole build to complete and for the Java
processes to startup (it can take several minutes). After that you can access:
- Stash on http://localhost:7990
- Jira on http://localhost:8080
- PostgreSQL running on port 5432.
Now you can proceed to perform the initial web initialization of Stash and Jira: You’ll be required to enter IP address, ports and database credentials of PostgreSQL. Read below to get the credentials and to learn to inspect the containers.
Inspecting And Wiring Containers
If you’ve been following along, now when you query Docker about the running
containers we get three:
sudo docker ps

ID                  IMAGE                         COMMAND                CREATED             STATUS              PORTS
d11f14b62f75        durdn/jira-6.1.1              /opt/jira/bin/start-   3 minutes ago        Up 3 minutes
c63a987b160f        durdn/stash-2.9.1             /opt/stash/bin/start   4 minutes ago        Up 4 minutes
216abca5886f        zaiste/postgresql             /bin/su postgres -c    5 minutes ago        Up 5 minutes
Stash, Jira, and PostgreSQL are running isolated by themselves in three different containers.
Next step is wiring Stash and Jira to PostgreSQL, and Stash and Jira to each other. You’d think you can just use localhost and use the proper ports everywhere… but you can’t. Containers can’t use localhost because each isolated container is its own localhost.
Because of this, if we want to set up Stash and Jira to use PostgreSQL we have to enter the IP address and port of the database container. Each container has its own randomized hostname and IP Address. So while Docker stabilizes and an official orchestration API emerges, we have to concoct the wiring ourselves.
It’s pretty straightforward, really.
Get the IP addresses of all your containers
We can list all our running containers IDs with:
sudo docker ps  -q

d125c595ac47
74d0c29e6f14
d8fa20d554d2
And pairing the container IDs with their respective IP Addresses:
paste <(sudo docker ps | tail -n +2 | awk {'printf "%s\t%s\n", $1, $2 '}) <(sudo docker ps  -q | xargs sudo docker inspect | tail -n +2 | grep IPAddress | awk '{ print $2 }' | tr -d ',"')

d11f14b62f75    durdn/jira-6.1.1     172.17.0.23
c63a987b160f    durdn/stash-2.9.1    172.17.0.22
216abca5886f    zaiste/postgresql    172.17.0.19
Now we can set up Stash and Jira to point to PostgreSQL running (in my case) on 172.17.0.19:5432 and link Stash and Jira to each other by IP address. Note the credentials below.
Database credentials for Stash:
user: stashuser
database: stash
password: jellyfish
Database credentials for Jira:
user: jiradbuser
database: jiradb
password: jellyfish
Under the hoods: Dockerfiles and container wiring
Nifty huh? “Yes, but teach me something new,” you say. What does the pre-packaged
script do under the hoods? It builds containers from Dockerfiles. Let me show
you how.
If you ran the script above you don’t need to execute what is below,
but if you want to start from scratch and do everything step by step you can follow along.
Zero-setup PostgreSQL container (with a shortcut)
To setup PostgreSQL I took a shortcut. If we wanted to, we could write our own Dockerfile, but in this case I built on the work of others. Kind fellow Zaiste provided a Docker image running a stock PostgreSQL.
sudo docker pull zaiste/postgresql
Now you can start PostgreSQL up with a single command:
sudo docker run -d -name postgres -p=5432:5432 zaiste/postgresql
This starts PostgreSQL as daemon on the default port and exposes the same port outside of the container (5432). We also assigned a name – postgres – to the container for easy reference.
Change directory (cd) into the shared vagrant folder that links your host to the vm (or clone the atlassian-docker project again in the container) and initialize the databases and users with a simple:
cd /vagrant
./initialise_db.sh
Databases are initialized.
Quick-setup of Stash in a container
Next we can build a Stash 2.9.1 container with a single command. cd into the shared vagrant folder that links your host to the vm (or clone the atlassian-docker project again in the container):
cd /vagrant/stash
sudo docker build -t durdn/stash-2.9.1 .
This will run the Dockerfile that automates so much for us. It will:
- Install git and Java 7.
- Download Stash tarball and install it.
- Set the proper environment variables and folders.
Now the container is ready to be started. We can now start it with docker run:
sudo docker run -d -name stash -link postgres:db -p 7990:7990 durdn/stash-2.9.1
(wait) ....
To check the status of the startup phase you can type:
sudo docker logs stash
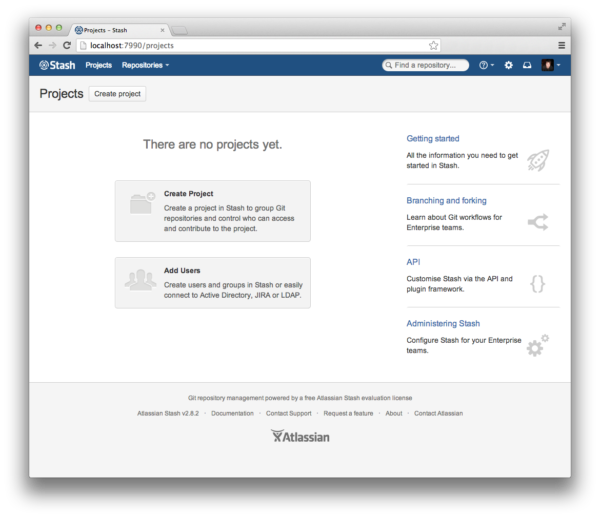
Done. You now have a running Stash instance at address
http://localhost:7990

Quick-setup Jira container
Building and starting Jira also becomes similarly trivial:
cd /vagrant/jira
sudo docker build -t durdn/jira-6.1.1 .

sudo docker run -d -name jira -link postgres:db -link stash:stash -p 8080:8080 durdn/jira-6.1.1
(wait) ....
Done as well. You can now finish Jira setup at the address
http://localhost:8080


Building containers on your own: the Dockerfiles
You can automate the setup of a container by writing a Dockerfile. The difference between a Dockerfile and say, a puppet or chef manifest, is that every RUN command in a Dockerfile will create a new container – persisted and re-usable – of the status of the machine after the command is executed.
The net result is not only that you’ll have a container that is set up like you want, but further tweaks and descendant containers will reuse all the common steps already performed before.
In my case for example, setting up Stash required installing Java 7. Since all the apt-get trickery to install Java was saved in cached containers, installing Jira – which reused most of the RUN statements – ran in 10th of the time.
Here for your perusal the commented Dockerfiles that take care of the entire setup:
Stash Dockerfile
# Basics

from base:latest
maintainer Nicola Paolucci <npaolucci the at sign atlassian.com>
run apt-get update
run apt-get install -q -y git-core

# Install Java 7

run DEBIAN_FRONTEND=noninteractive apt-get install -q -y software-properties-common
run DEBIAN_FRONTEND=noninteractive apt-get install -q -y python-software-properties
run DEBIAN_FRONTEND=noninteractive apt-add-repository ppa:webupd8team/java -y
run apt-get update
run echo oracle-java7-installer shared/accepted-oracle-license-v1-1 select true | /usr/bin/debconf-set-selections
run DEBIAN_FRONTEND=noninteractive apt-get install oracle-java7-installer -y

# Install Stash

run apt-get install -q -y curl
run curl -Lks http://www.atlassian.com/software/stash/downloads/binary/atlassian-stash-2.9.1.tar.gz -o /root/stash.tar.gz
run mkdir -p /opt/stash
run tar zxf /root/stash.tar.gz --strip=1 -C /opt/stash
run mkdir -p /opt/stash-home

# Launching Stash

workdir /opt/stash-home
env STASH_HOME /opt/stash-home
expose 7990:7990
cmd ["/opt/stash/bin/start-stash.sh", "-fg"]
Jira Dockerfile
# Basics

from base:latest
maintainer Nicola Paolucci <npaolucci the at sign atlassian.com>
run apt-get update
run apt-get install -q -y git-core

# Install Java 7

run DEBIAN_FRONTEND=noninteractive apt-get install -q -y software-properties-common
run DEBIAN_FRONTEND=noninteractive apt-get install -q -y python-software-properties
run DEBIAN_FRONTEND=noninteractive apt-add-repository ppa:webupd8team/java -y
run apt-get update
run echo oracle-java7-installer shared/accepted-oracle-license-v1-1 select true | /usr/bin/debconf-set-selections
run DEBIAN_FRONTEND=noninteractive apt-get install oracle-java7-installer -y

# Install Jira

run apt-get install -q -y curl
run curl -Lks http://www.atlassian.com/software/jira/downloads/binary/atlassian-jira-6.1.1.tar.gz -o /root/jira.tar.gz
run /usr/sbin/useradd --create-home --home-dir /usr/local/jira --shell /bin/bash jira
run mkdir -p /opt/jira
run tar zxf /root/jira.tar.gz --strip=1 -C /opt/jira
run mkdir -p /opt/jira-home
run echo "jira.home = /opt/jira-home" > /opt/jira/atlassian-jira/WEB-INF/classes/jira-application.properties

# Launching Jira

workdir /opt/jira-home
run rm -f /opt/jira-home/.jira-home.lock
expose 8080:8080
cmd ["/opt/jira/bin/start-jira.sh", "-fg"]
Assorted Tips
- Note! I was initially confused by the CMD directive. The directive is not executed during the build command. It represents what gets executed when you launch docker run.
- You can commit and tag running containers. This allows you go to back in time, backup and restore their state. For example:
sudo docker commit -m="Postgres initialized with stash and jira empty dbs" bb159ea1d4f3 zaiste/postresql webinar-1 sudo docker commit -m="Bare Stash install using postgres container" 32300b6049b0 durdn/stash-2.9.1 webinar-1 sudo docker commit -m="Bare Jira install using postgres container" 2f754350fd20 durdn/jira-6.1.1 webinar-1 - Once you have some images committed and tagged you can resume them anytime. For example to resume a PostgreSQL container:
sudo docker run -d -h="postgres" -p=5432:5432 zaiste/postgresql:webinar-1 /bin/su postgres -c "/usr/lib/postgresql/9.2/bin/postgres -D /var/lib/postgresql/9.2/main -c config_file=/etc/postgresql/9.2/main/postgresql.conf" - To resume Stash and Jira:
sudo docker run -d -p=7990:7990 -e STASH_HOME=/opt/stash-home durdn/stash-2.9.1:webinar-1 /opt/stash/bin/start-stash.sh -fg sudo docker run -d -p=8080:8080 durdn/jira-6.1.1:webinar-1 /opt/jira/bin/start-jira.sh -fg - To stop/remove old containers you can use their names or IDs:
sudo docker stop jira
sudo docker rm jira
Read more about Docker on our Developer Blog.