
Atlassian + Slack
Together, Atlassian and Slack are committed to building deep and powerful integrations that enable teams to collaborate and iterate quickly. We provide tools that empower teams to stay aligned and efficient in order to unlock the power of creativity and deliver first-class results.

Your team may qualify for 50% off new Slack paid plans.
A modern, lightweight help desk that lets you create and manage requests directly in Slack with Jira Service Management
Slack-first ticketing
We meet your team where they work, not the other way around.
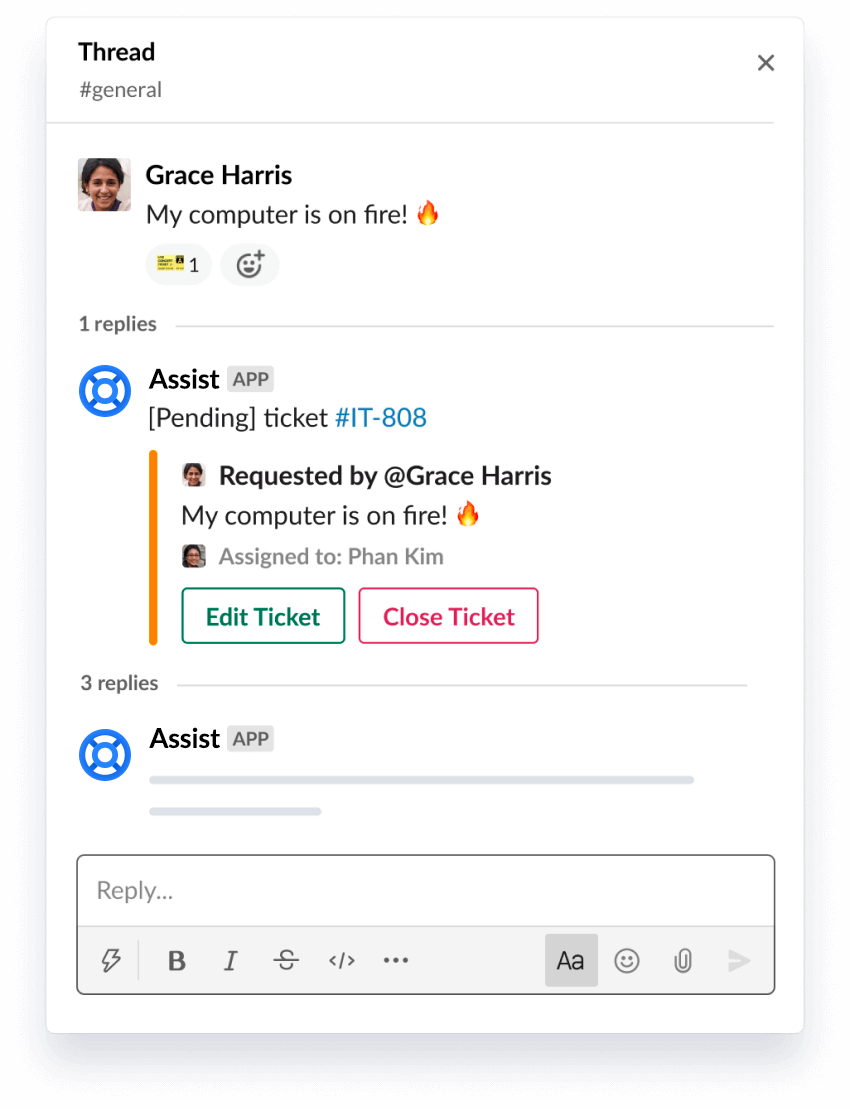
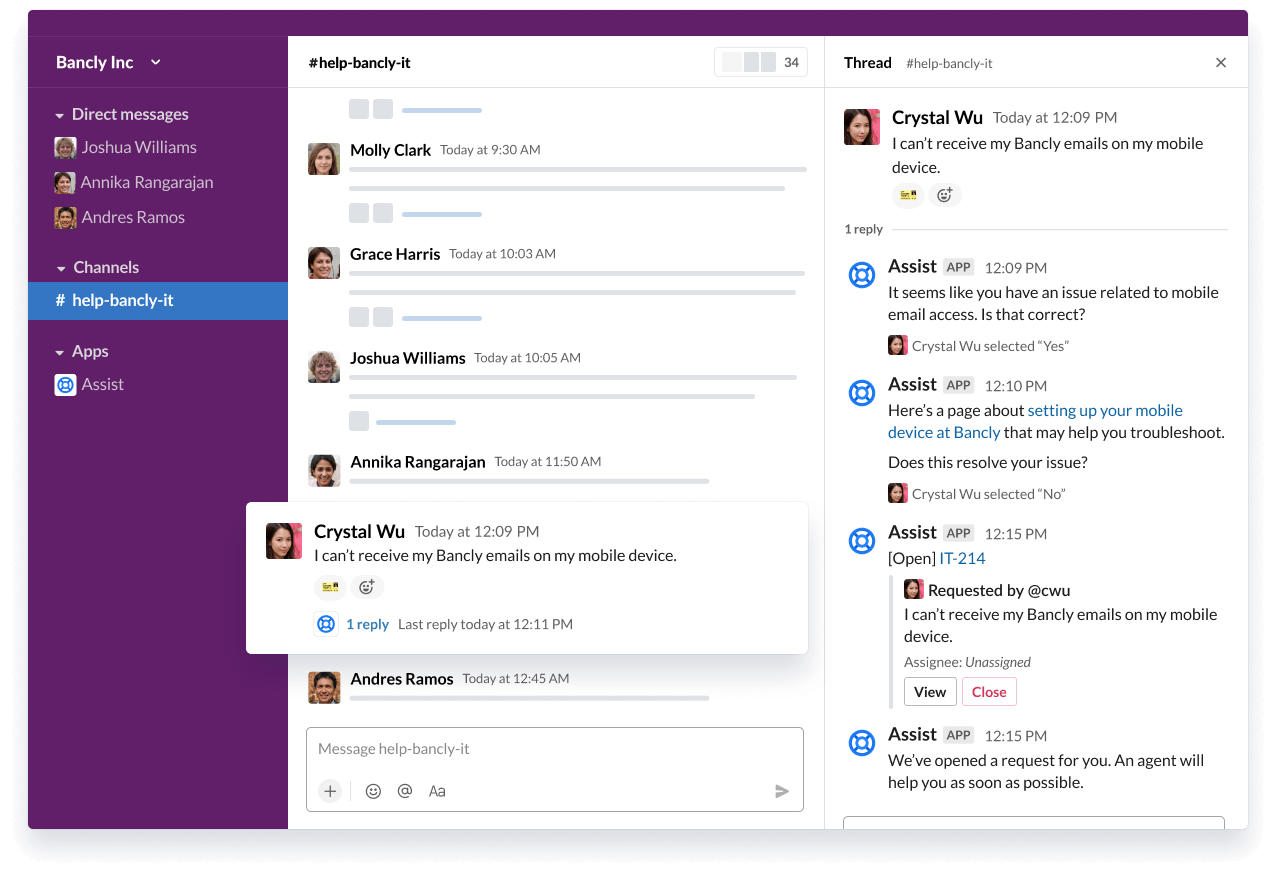
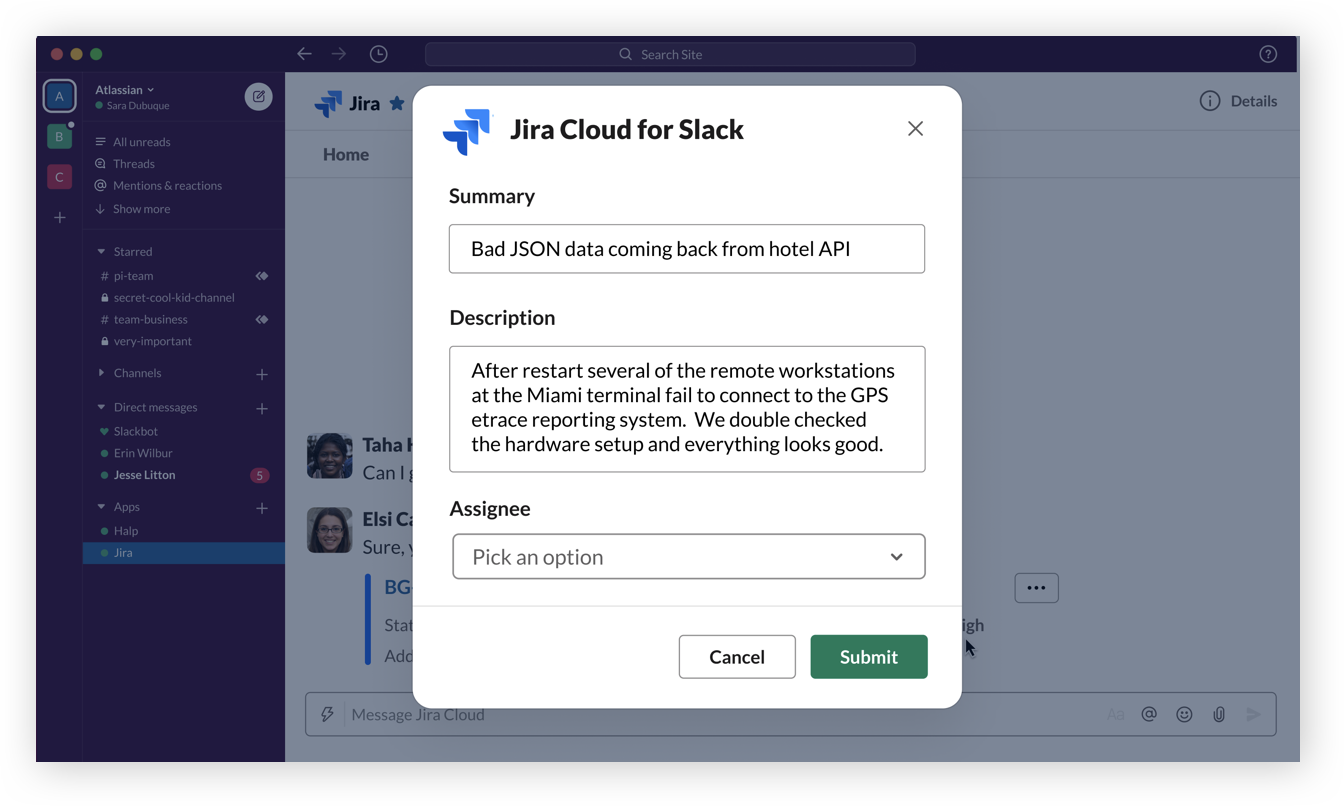
Quickly turn messages into tickets
Use a simple emoji reaction to turn any Slack message into a trackable ticket.
The smartest way to resolve requests in Slack
Supercharge your service frontline with Jira Service Management’s AI-powered virtual agent technology and deliver exceptional support at scale.
.png?cdnVersion=1577)
Get started
Install Assist in your Slack workspace and get set up in minutes. Learn more.

Better notifications than email
Cut through the the noise by only surfacing issues that matter, with built-in filters with dimensions like, "whether they’re watching", "mentioned on", "assigned to", or "reporter."
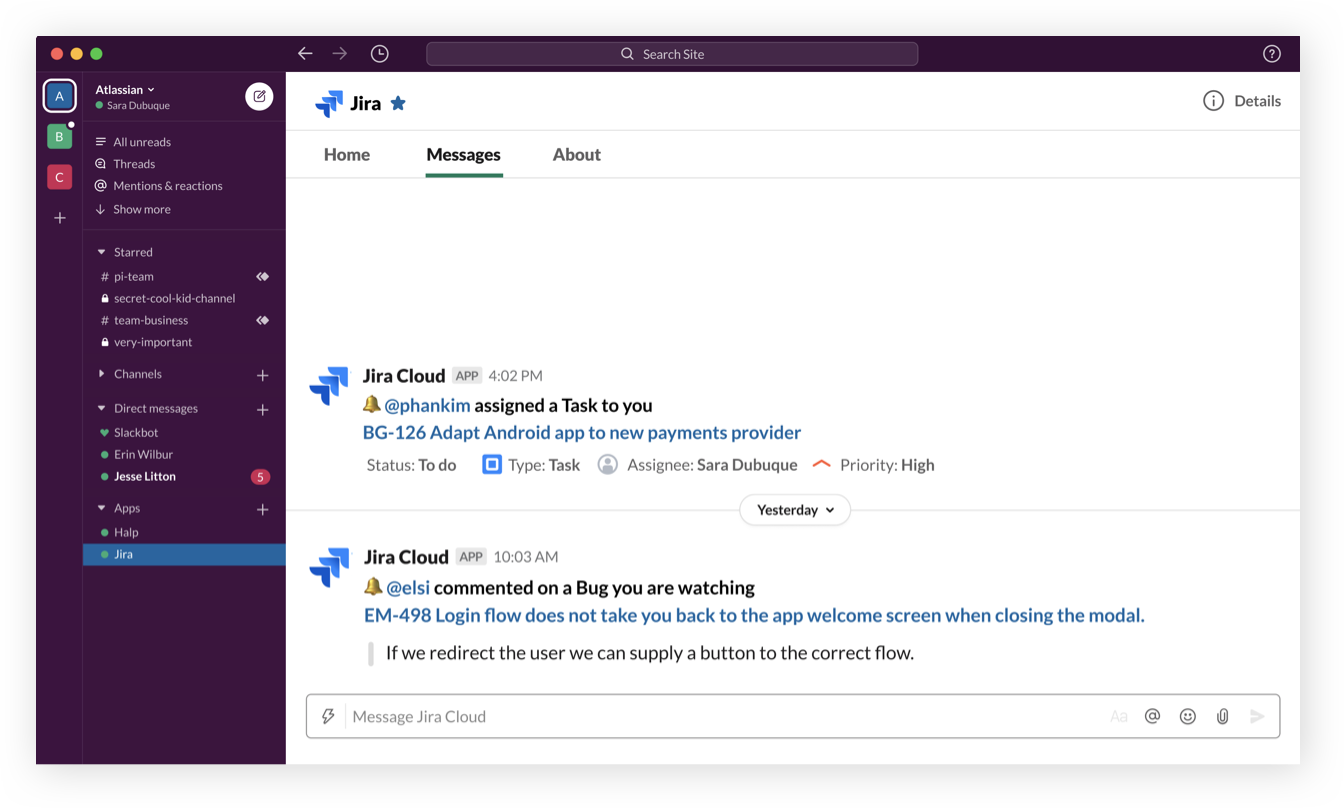
Get immediate context with issue previews
Teams that use Jira and Slack together can leverage the integration to unlock issue previews, and skip the song and dance of going and forth from chat to Jira.
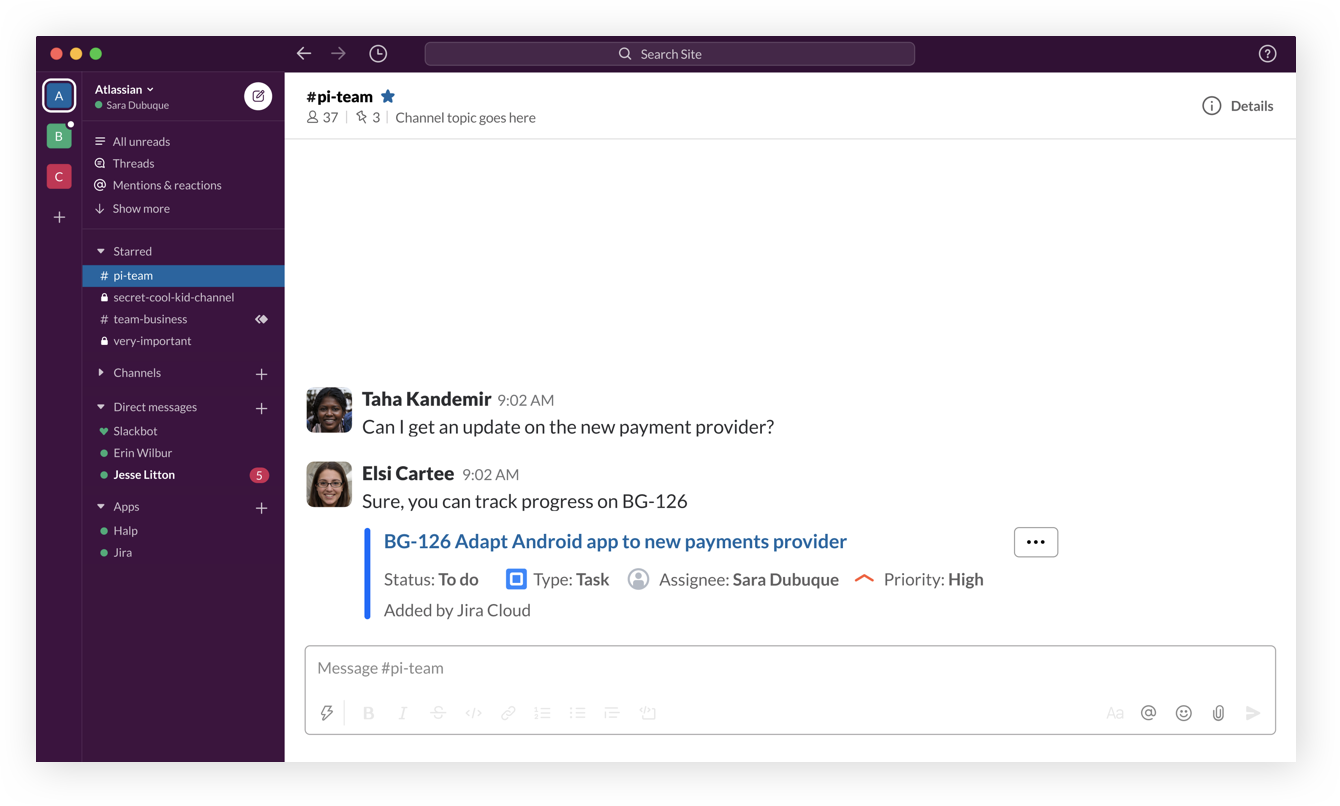
Take action directly from Slack
Create Jira tickets, change ticket status, assign teammates, and more - all directly from Slack.
Get started
In Slack, invite @jira to a channel and verify your account. Learn more.

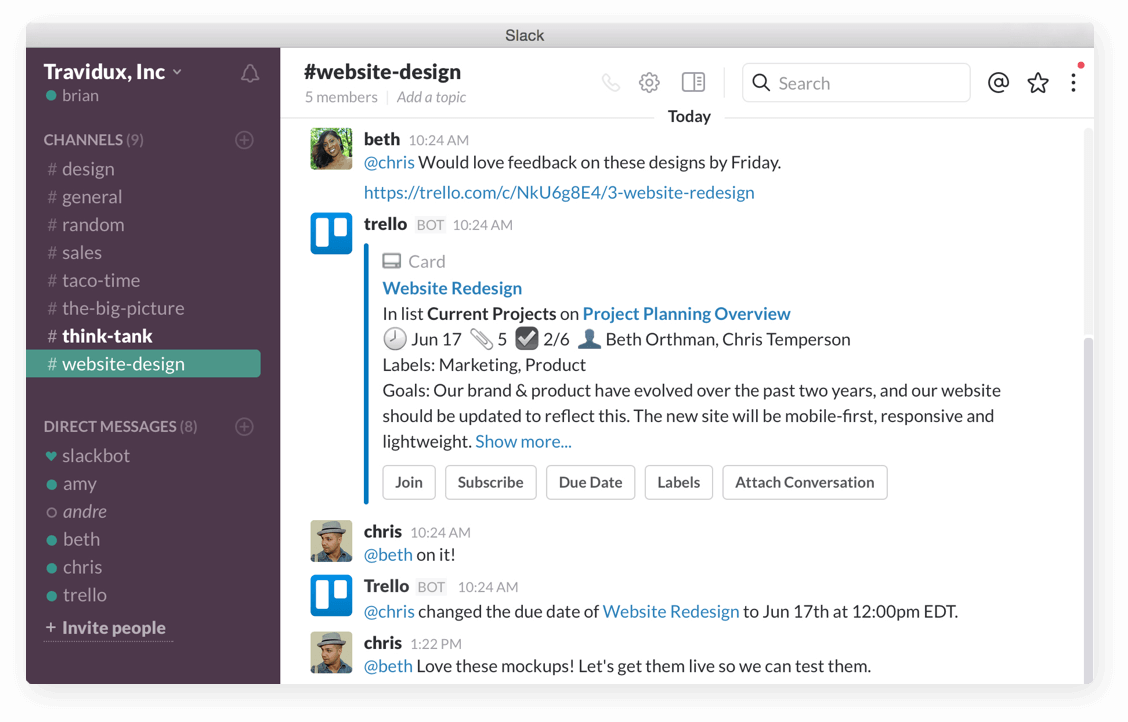
Quit the tab tango
Add new Trello cards to boards directly from Slack without needing to hop through the app-switching hoop.
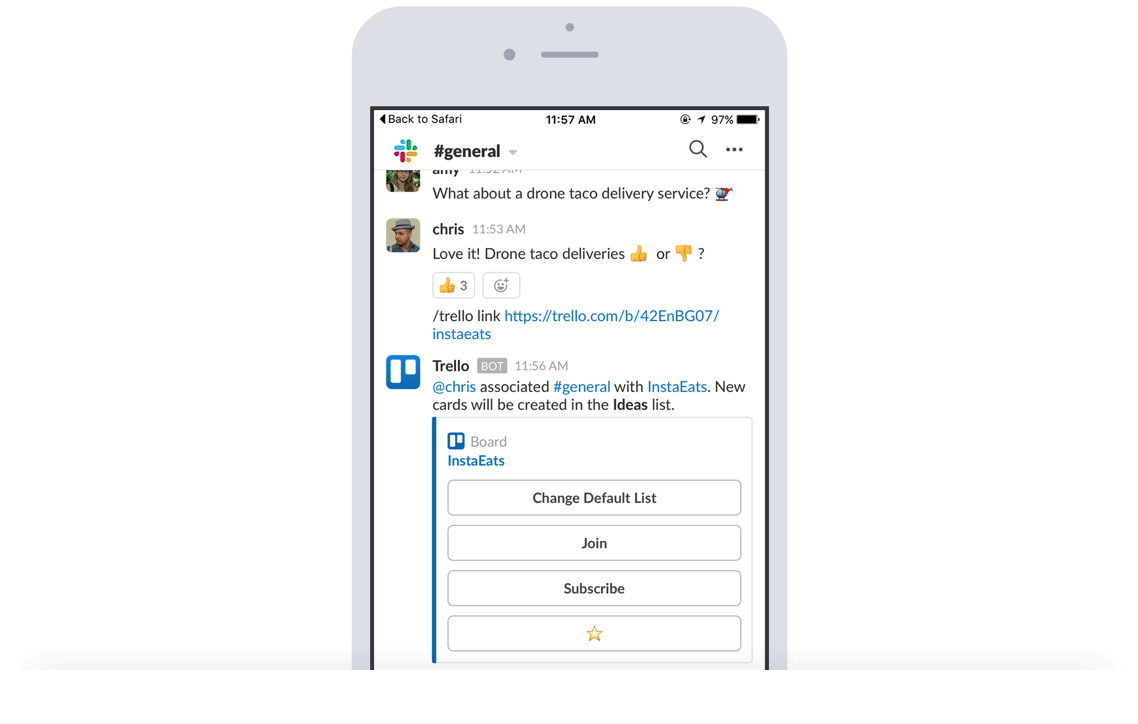
Easy on the eyes insights
Paste a Trello link into a Slack channel to automatically display key insights like members, descriptions, comments, and more.
Steer the ship from Slack
Attach conversations from Slack to Trello cards, change due dates, join cards & boards, and subscribe to cards.
Get started
Take team collaboration out of isolation. Trello and Slack just work better together. Learn more.

Fine-tune notifications
Customize and receive granular notifications to stay on top of changes across your spaces, pages (even child pages!), and blogs.
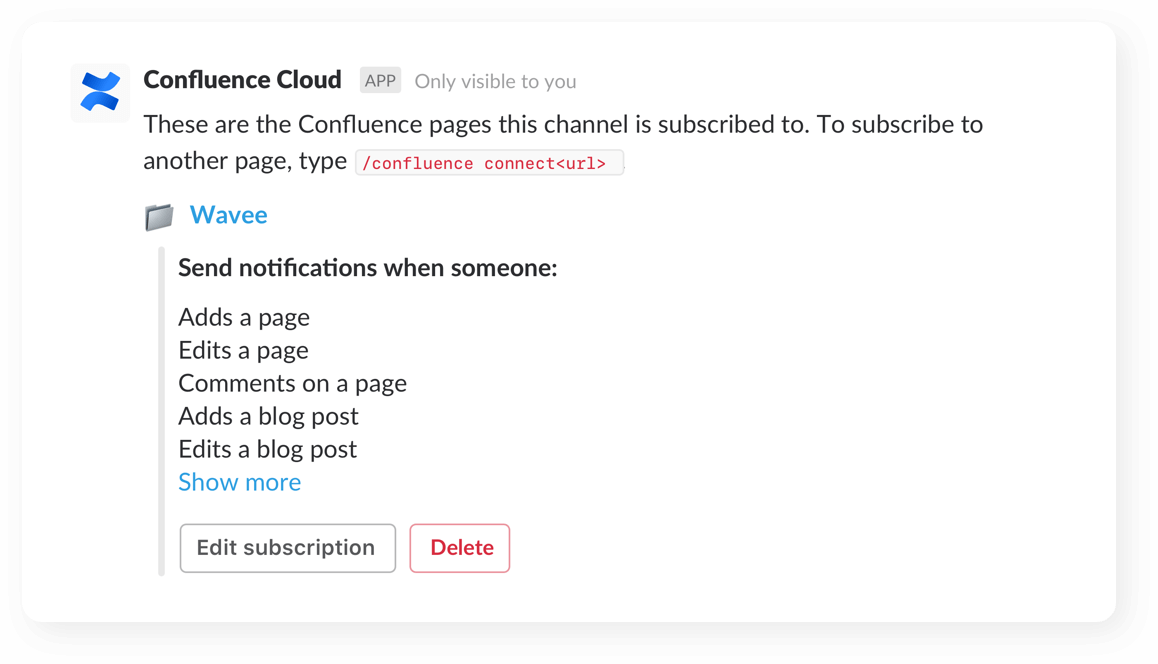
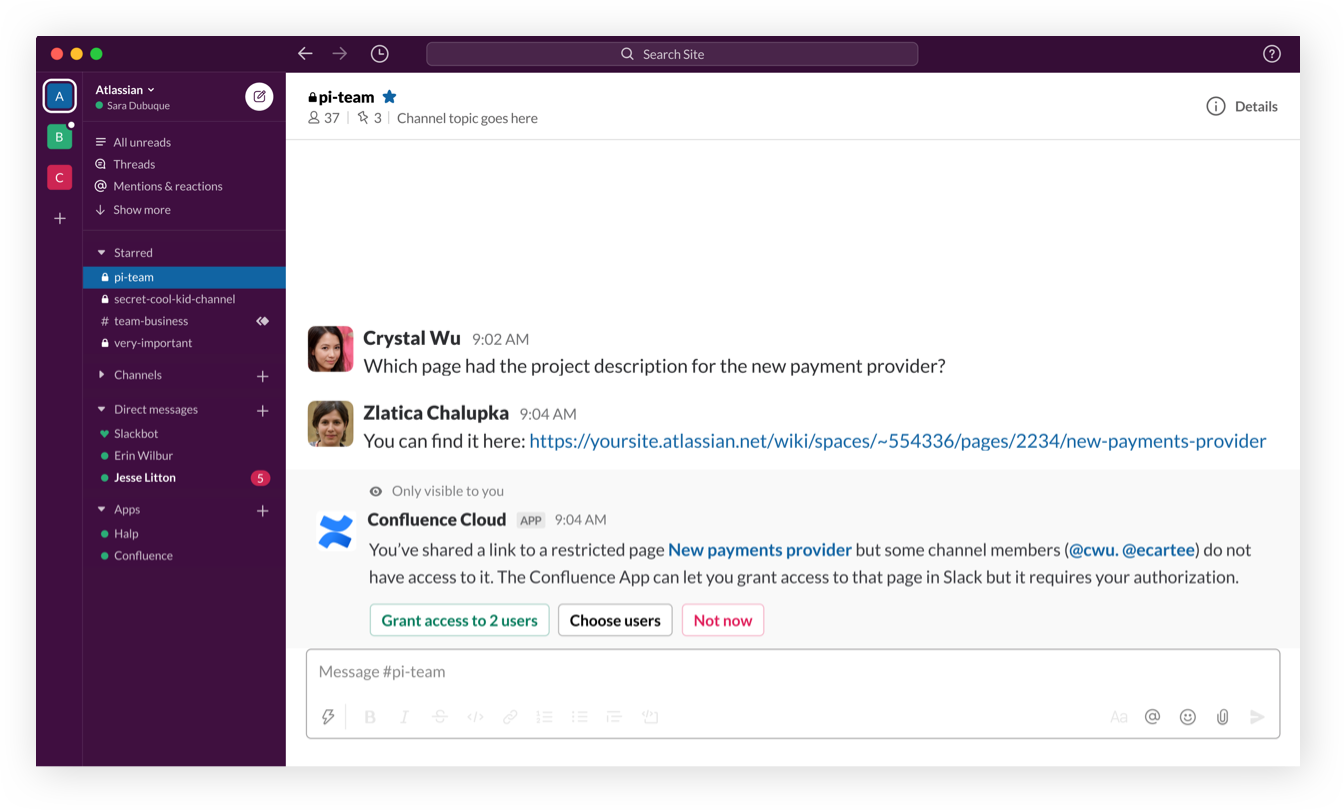
Grant access
When a link to a restricted Confluence page is shared, users can grant team members access directly through Slack.
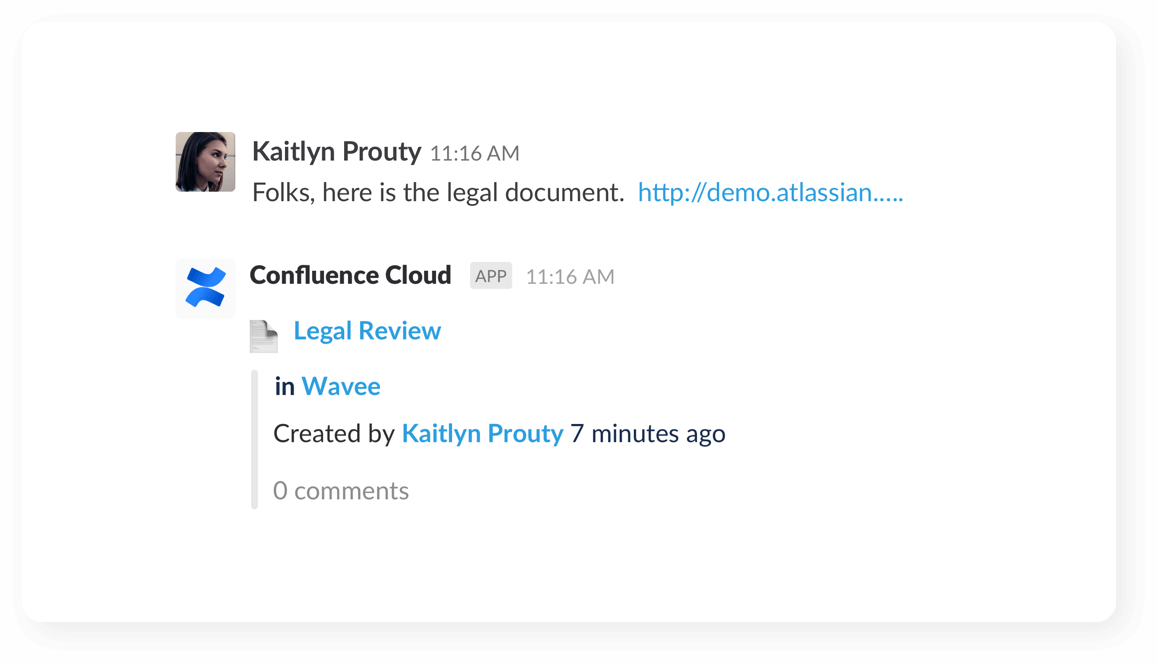
Preview your work
See link previews of pages, blogs and comments when you share them with your team in your channel.
Get started
Have one place to stay on top of all of your work in Confluence, straight from within Slack. Learn more.

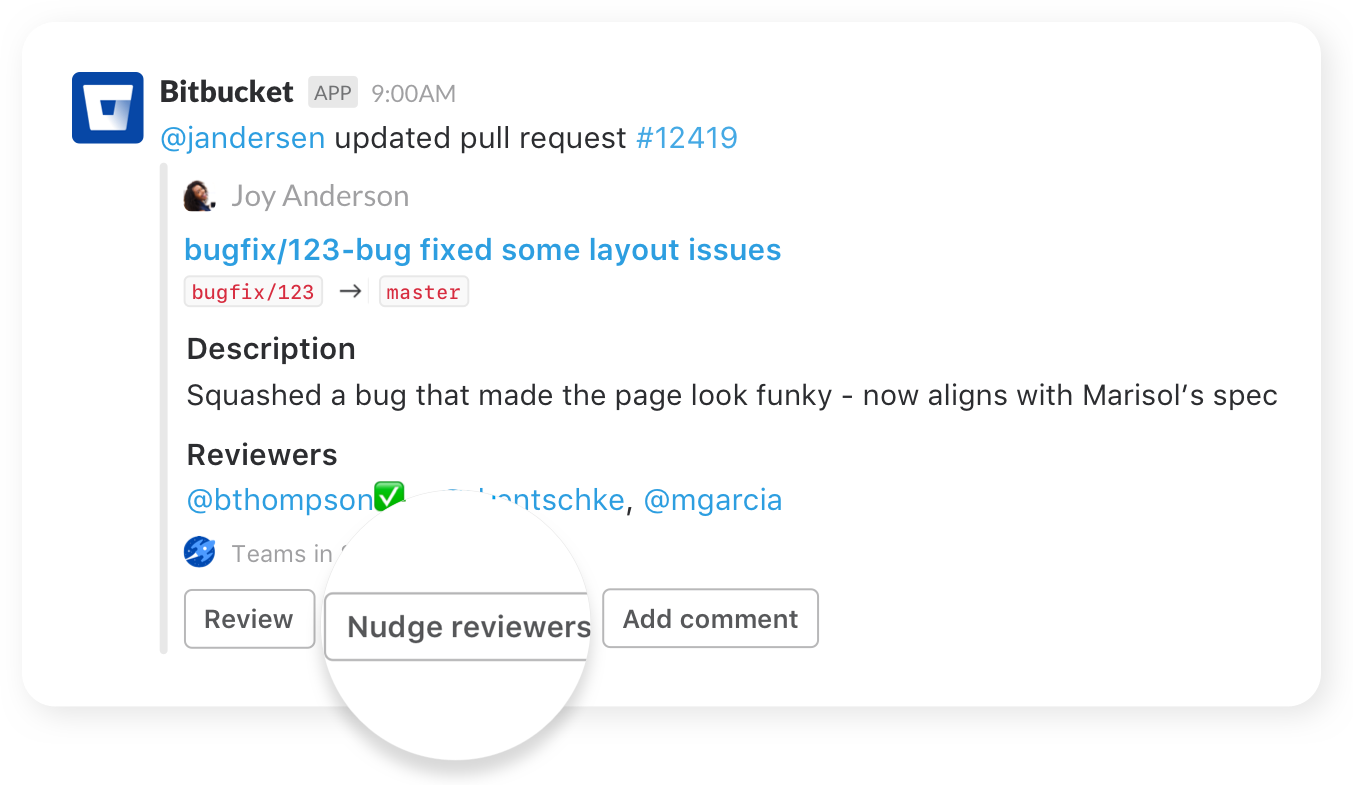
Nudge teammates
Send friendly nudges to teammates about missing approvals on pull requests.
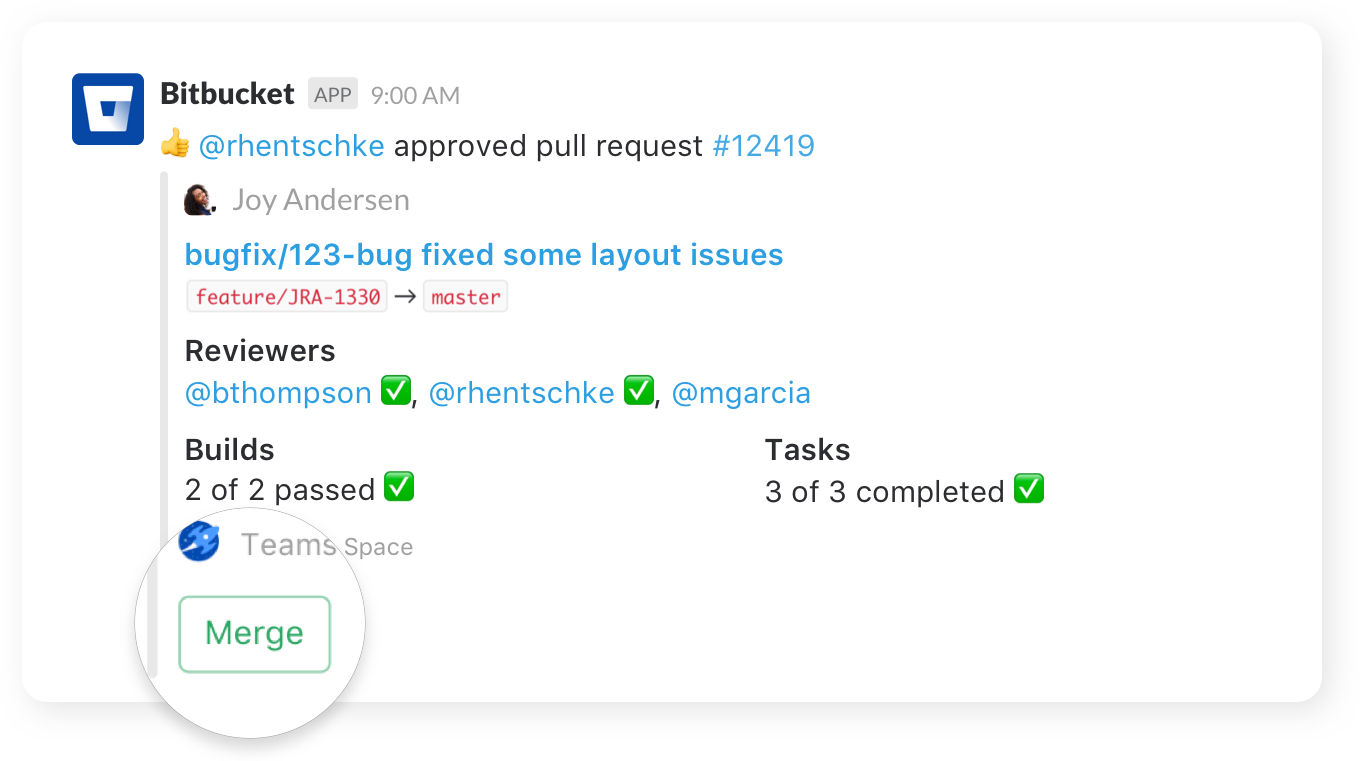
Take action
Create, merge, and comment on a pull request, or re-run a failed build, all without leaving your channel.
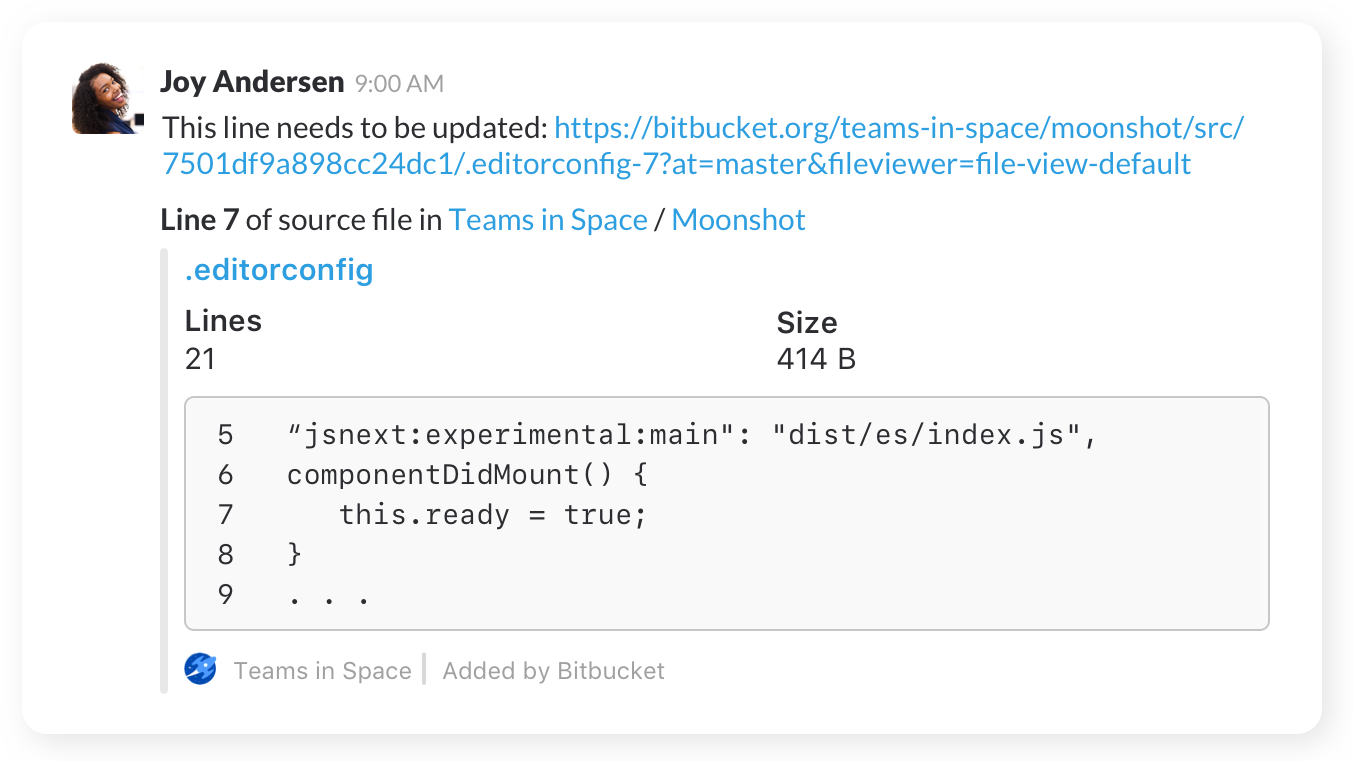
Share code
Share code examples, or indicate areas that need a particular change, with inline code snippets.
Get started
Once you’ve added the app to Slack, navigate to your repository’s settings, click on “Chat notifications” to configure your notification preferences. Learn more.

Save time and manage alerts in seconds
Notify teams of Opsgenie alerts and incidents in real-time.
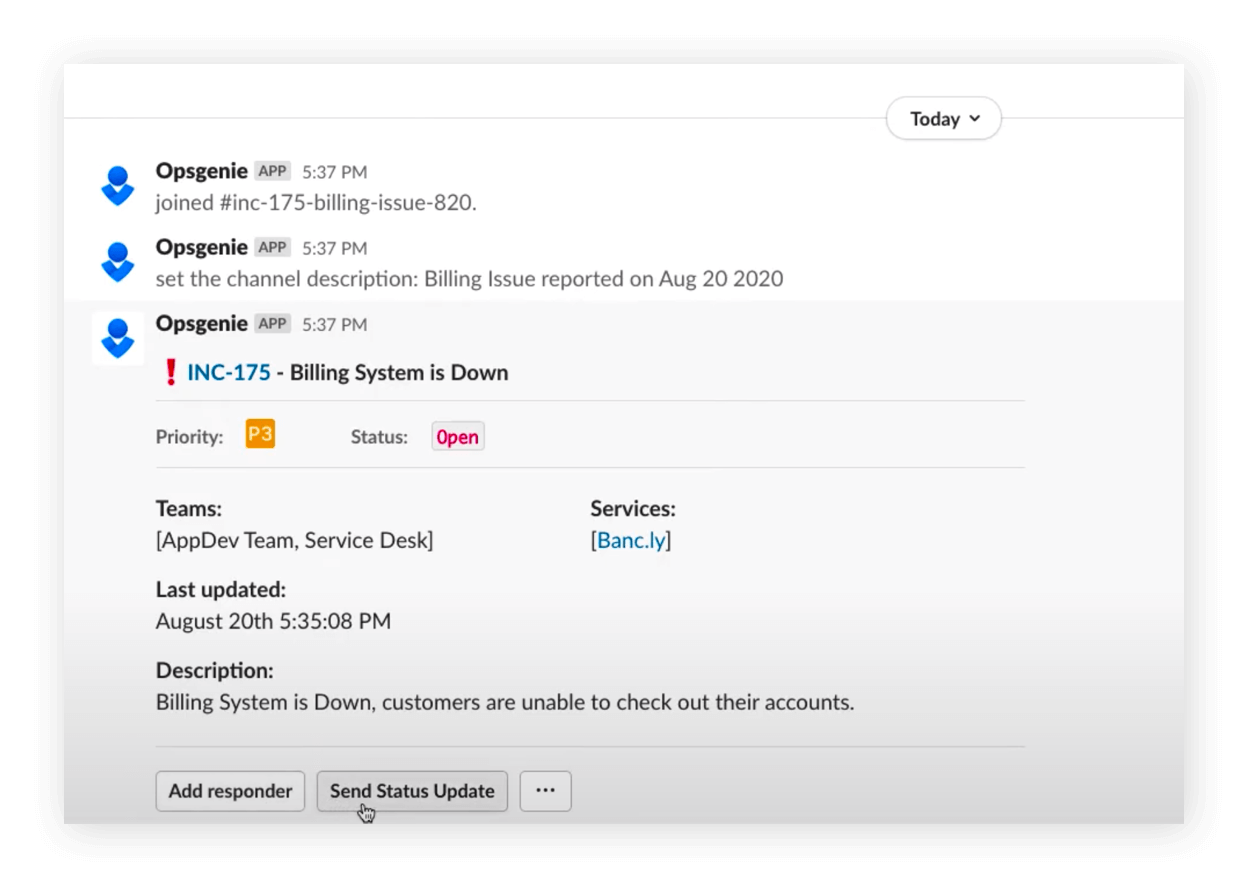
Stay updated
Push key information from Slack to the Opsgenie Incident Timeline.
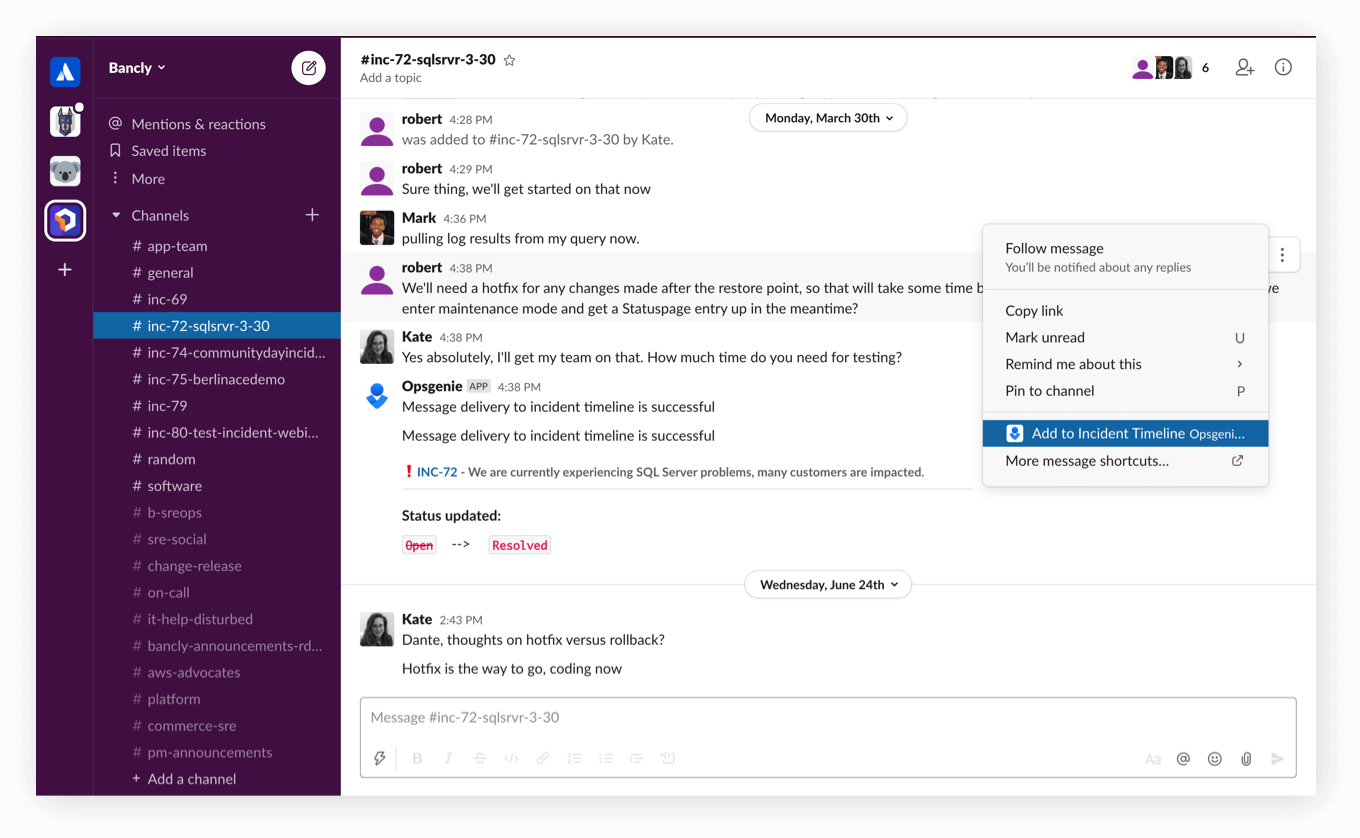
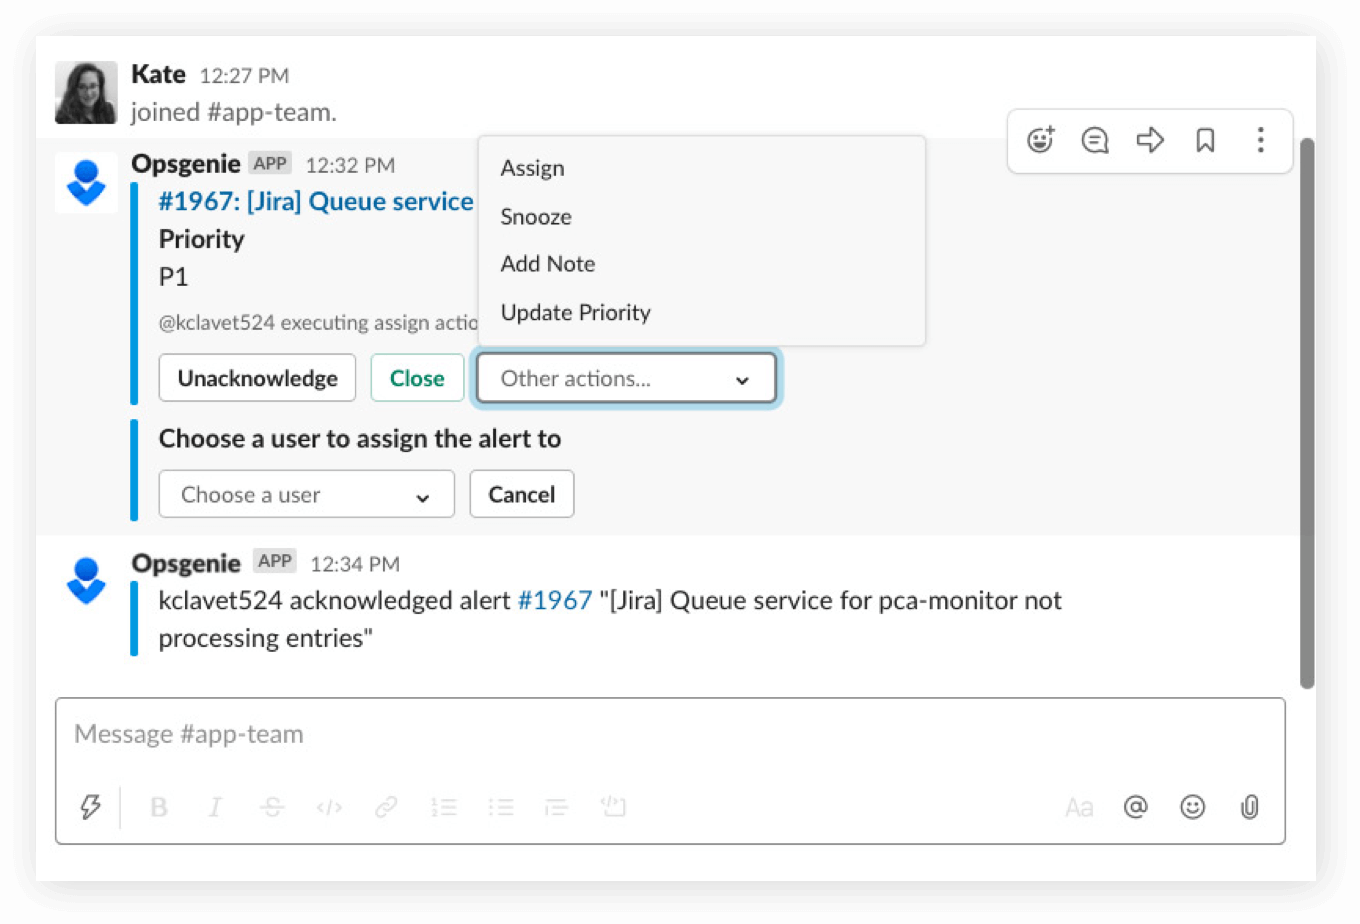
Streamline work with Opsgenie and Slack
Take action from Slack to assign, take notes, and more for Opsgenie alerts and incidents
Get started
Set up Slack with Opsgenie today. Learn more.

Subscribe Slack channels
Keep the entire team in sync by enabling Statuspage notifications for the services you rely on.
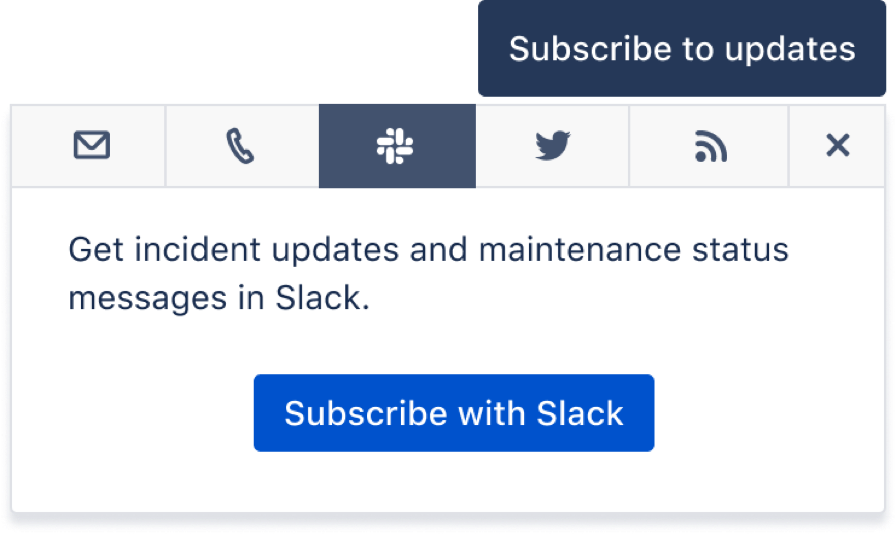
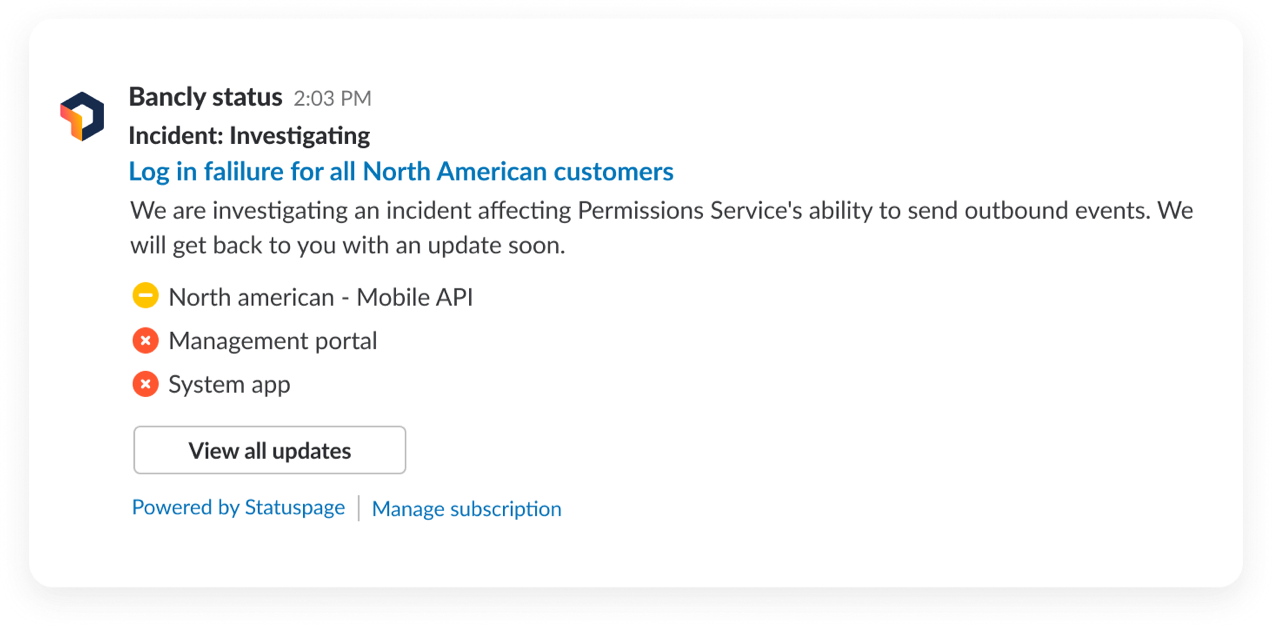
Incident status updates
During incidents or scheduled maintenance, end-users and internal teams need to be informed. Send incident status updates into subscribed Slack channels.
Get started
Here’s how to enable Slack subscriptions on your Statuspage. Learn more.
To get Statuspage updates in Slack, add the Statuspage app to your Slack workspace.
Why Slack and Atlassian?

Get real-time updates on the work that’s most important to you
With each of Atlassian and Slack’s integrations, you and your teams can get real-time Slack notifications from Atlassian projects that are most relevant to you.
Gain rich context, save everyone time
When product links are shared in a channel, your team can easily glean the title, status, owner, and more without ever having to leave Slack. Everyone saves time because they’re on the same page.
Avoid context switching – take action directly from Slack
With Atlassian and Slack, you can keep your work moving forward – open Jira tickets, respond with feedback in a Confluence comment or nudge your colleagues on Bitbucket pull requests – all directly from Slack.
Discover how to build and ship better and faster using the Jira for Slack integration
How and why to use Slack's threaded messages in channels and apps

7 Steps to more effective teamwork with Atlassian and Slack
Teams across the world rely on Atlassian+Slack
With the Slack and Atlassian integrations, “Every comment someone makes on the Confluence page or in InVision gets pushed to Slack, so we get real-time updates.”


View the Integrations
See how to connect your Atlassian and Slack products.

News & Articles
Read the latest Slack-related news and articles on the Atlassian Blog.

Atlassian Customers
Your team may qualify for 50% off new Slack paid plans.
SUBSCRIBE TO OUR NEWSLETTER
Apps & Integrations Digest by Atlassian
Get expert tips and the latest news on best-of-breed tools and apps that integrate with Atlassian products