
Articoli
Tutorial
Guide interattive
Integration testing tutorial with Bitbucket Pipelines

Sten Pittet
Scrittore collaboratore
Learn how to run integration tests with Bitbucket Pipelines by having multiple services running in separate Docker containers in a pipeline.
Testing is a critical part of continuous integration and continuous delivery. And if you're practicing continuous deployment it will be the last line of defense against bugs before changes get released to your customers. Unit tests validating individual methods and classes are a great start to prevent issues, but you will also need to run integration tests that make sure that the different modules used by your application (application server, database, cache) interact properly together. We will see in this tutorial how you can run integration tests with Bitbucket Pipelines by having multiple services running in separate Docker containers in a pipeline.
Ora
30 minuti
Pubblico
Persone che non hanno familiarità con la continuous integration e/o Bitbucket Pipelines
Prerequisiti
- A Bitbucket Account
-
Node v4.6 or above to run the application
-
Docker Community Edition v17.03 or above to run MongoDB on your local machine
- A terminal to execute bash command
-
Git to manage the repository and push it back to Bitbucket Cloud
Step 1: Running the sample application locally
We will use a basic Node.js application that displays a message on the homepage and logs visits to a database. To focus on the Bitbucket Pipelines configuration, you can simply clone the application from your terminal.
git clone git@bitbucket.org:spittet/bitbucket-pipelines-services-tutorial.gitNow go to your local repository and run npm install to install the dependencies required by the application.
cd bitbucket-pipelines-services-tutorial
npm install
Before running the application, we will need to start a new MongoDB instance. Thanks to Docker this is something that you can easily do from your terminal.
docker run --name mongodb -d -p 27017:27017 mongoThen start your application and go to http://localhost:3000 to see it in action.
npm start
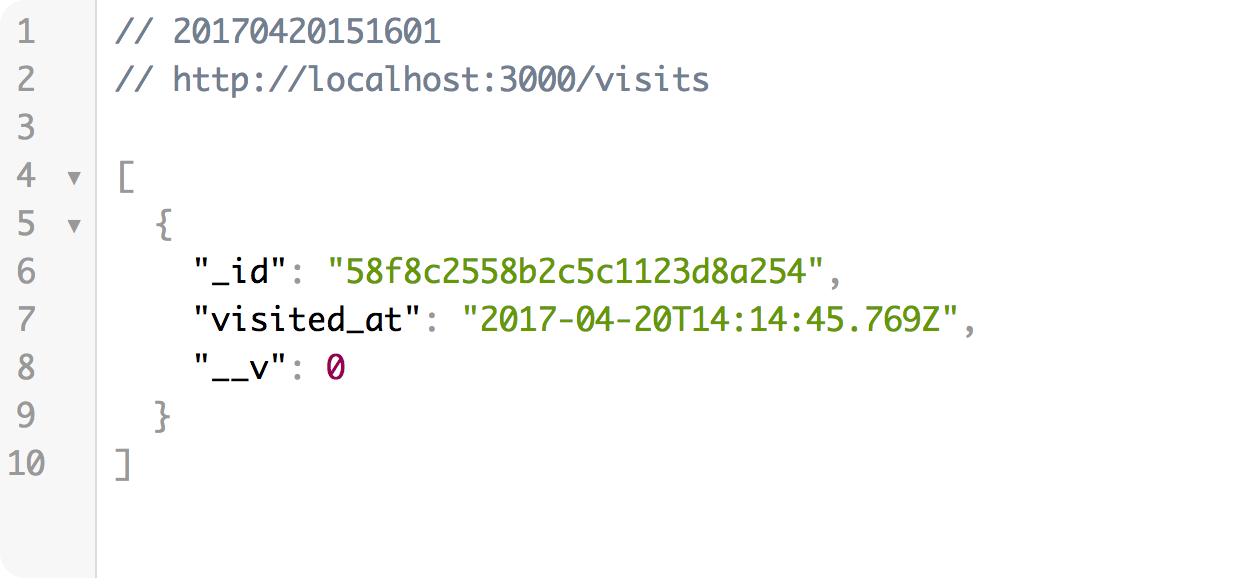
You can go to http://localhost:3000/visits to make sure that a visit has been properly logged into the database.
Finally, let's make sure that the tests are completing successfully locally via the command npm test. You should see two tests completing after running that command.
npm test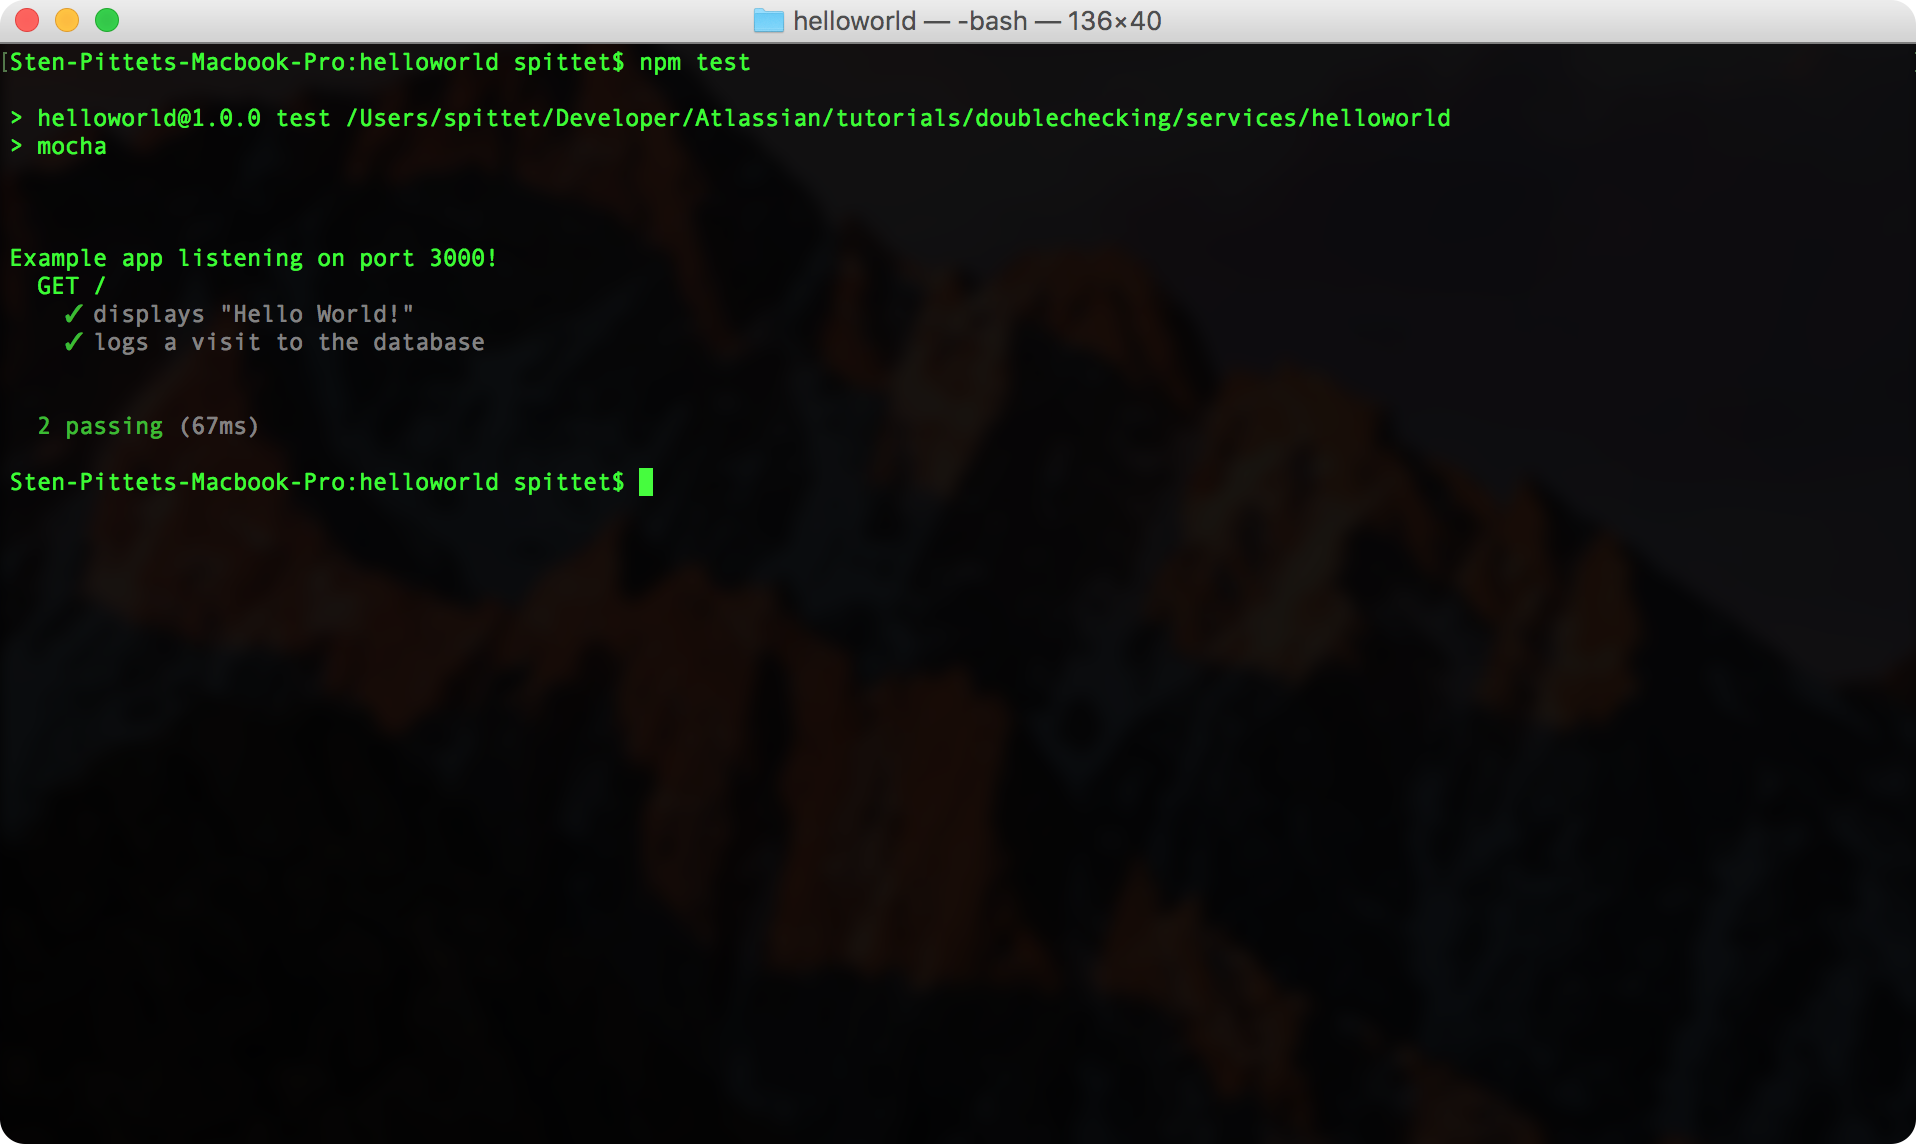
This sample application is running two different tests:
- One test that verifies that the application displays Hello World in the homepage.
- One test that verifies that a new visit is logged in the database whenever someone accesses the homepage.
The first test will pass even if the database is down but the second test is an integration test that verifies that the web application interacts properly with the database server. It could also be understood as a functional test since it verifies some of the business requirements of the application. You can learn more about the different types of tests in our guide.
We will now see how you can use Bitbucket Pipelines to automate the testing of your application and configure it to be successful with a database.
Step 2: Running tests automatically with Bitbucket Pipelines
Start by creating a new repository in your Bitbucket account and update the remote URL for origin to point to your Bitbucket repository.
git remote add bitbucket git@bitbucket.org:<account name>/<repository name>.git
git branch -m mainline
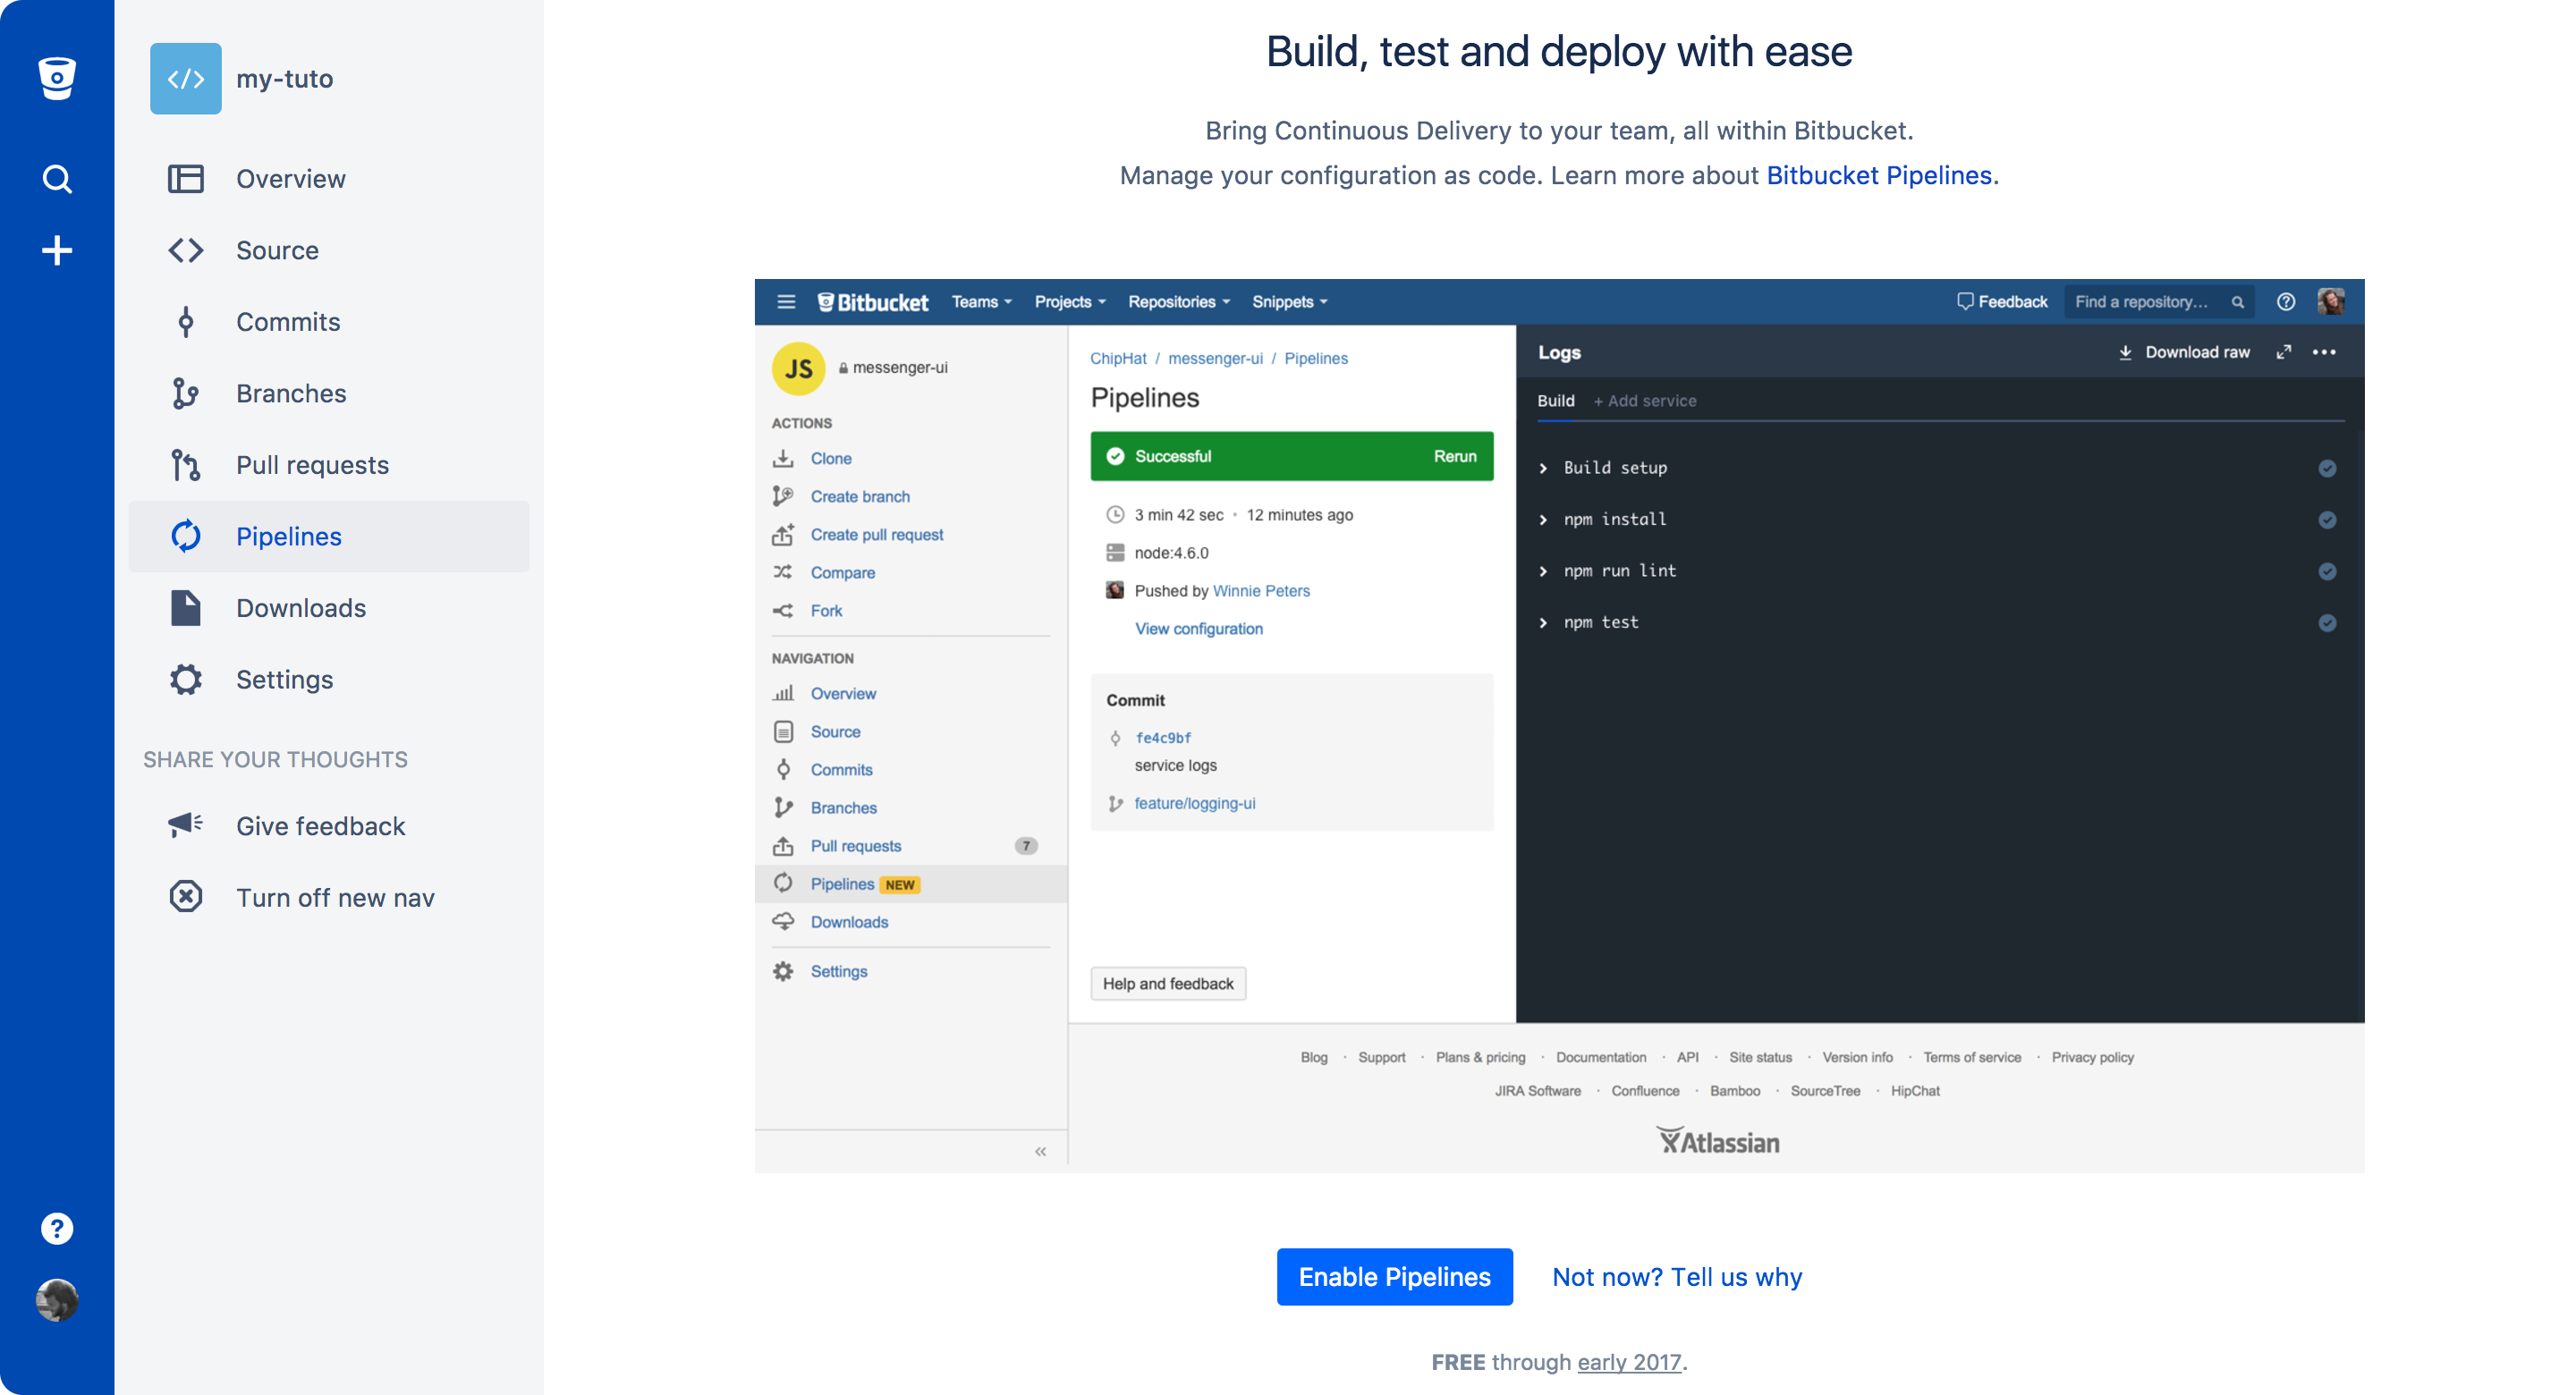
git push -u bitbucket mainlineGo to the Pipelines section of your repository to enable Bitbucket Pipelines.
You can use the default Javascript template in the next screen. It will already have the npm install and npm test commands that you need to install dependencies and run the test suite.
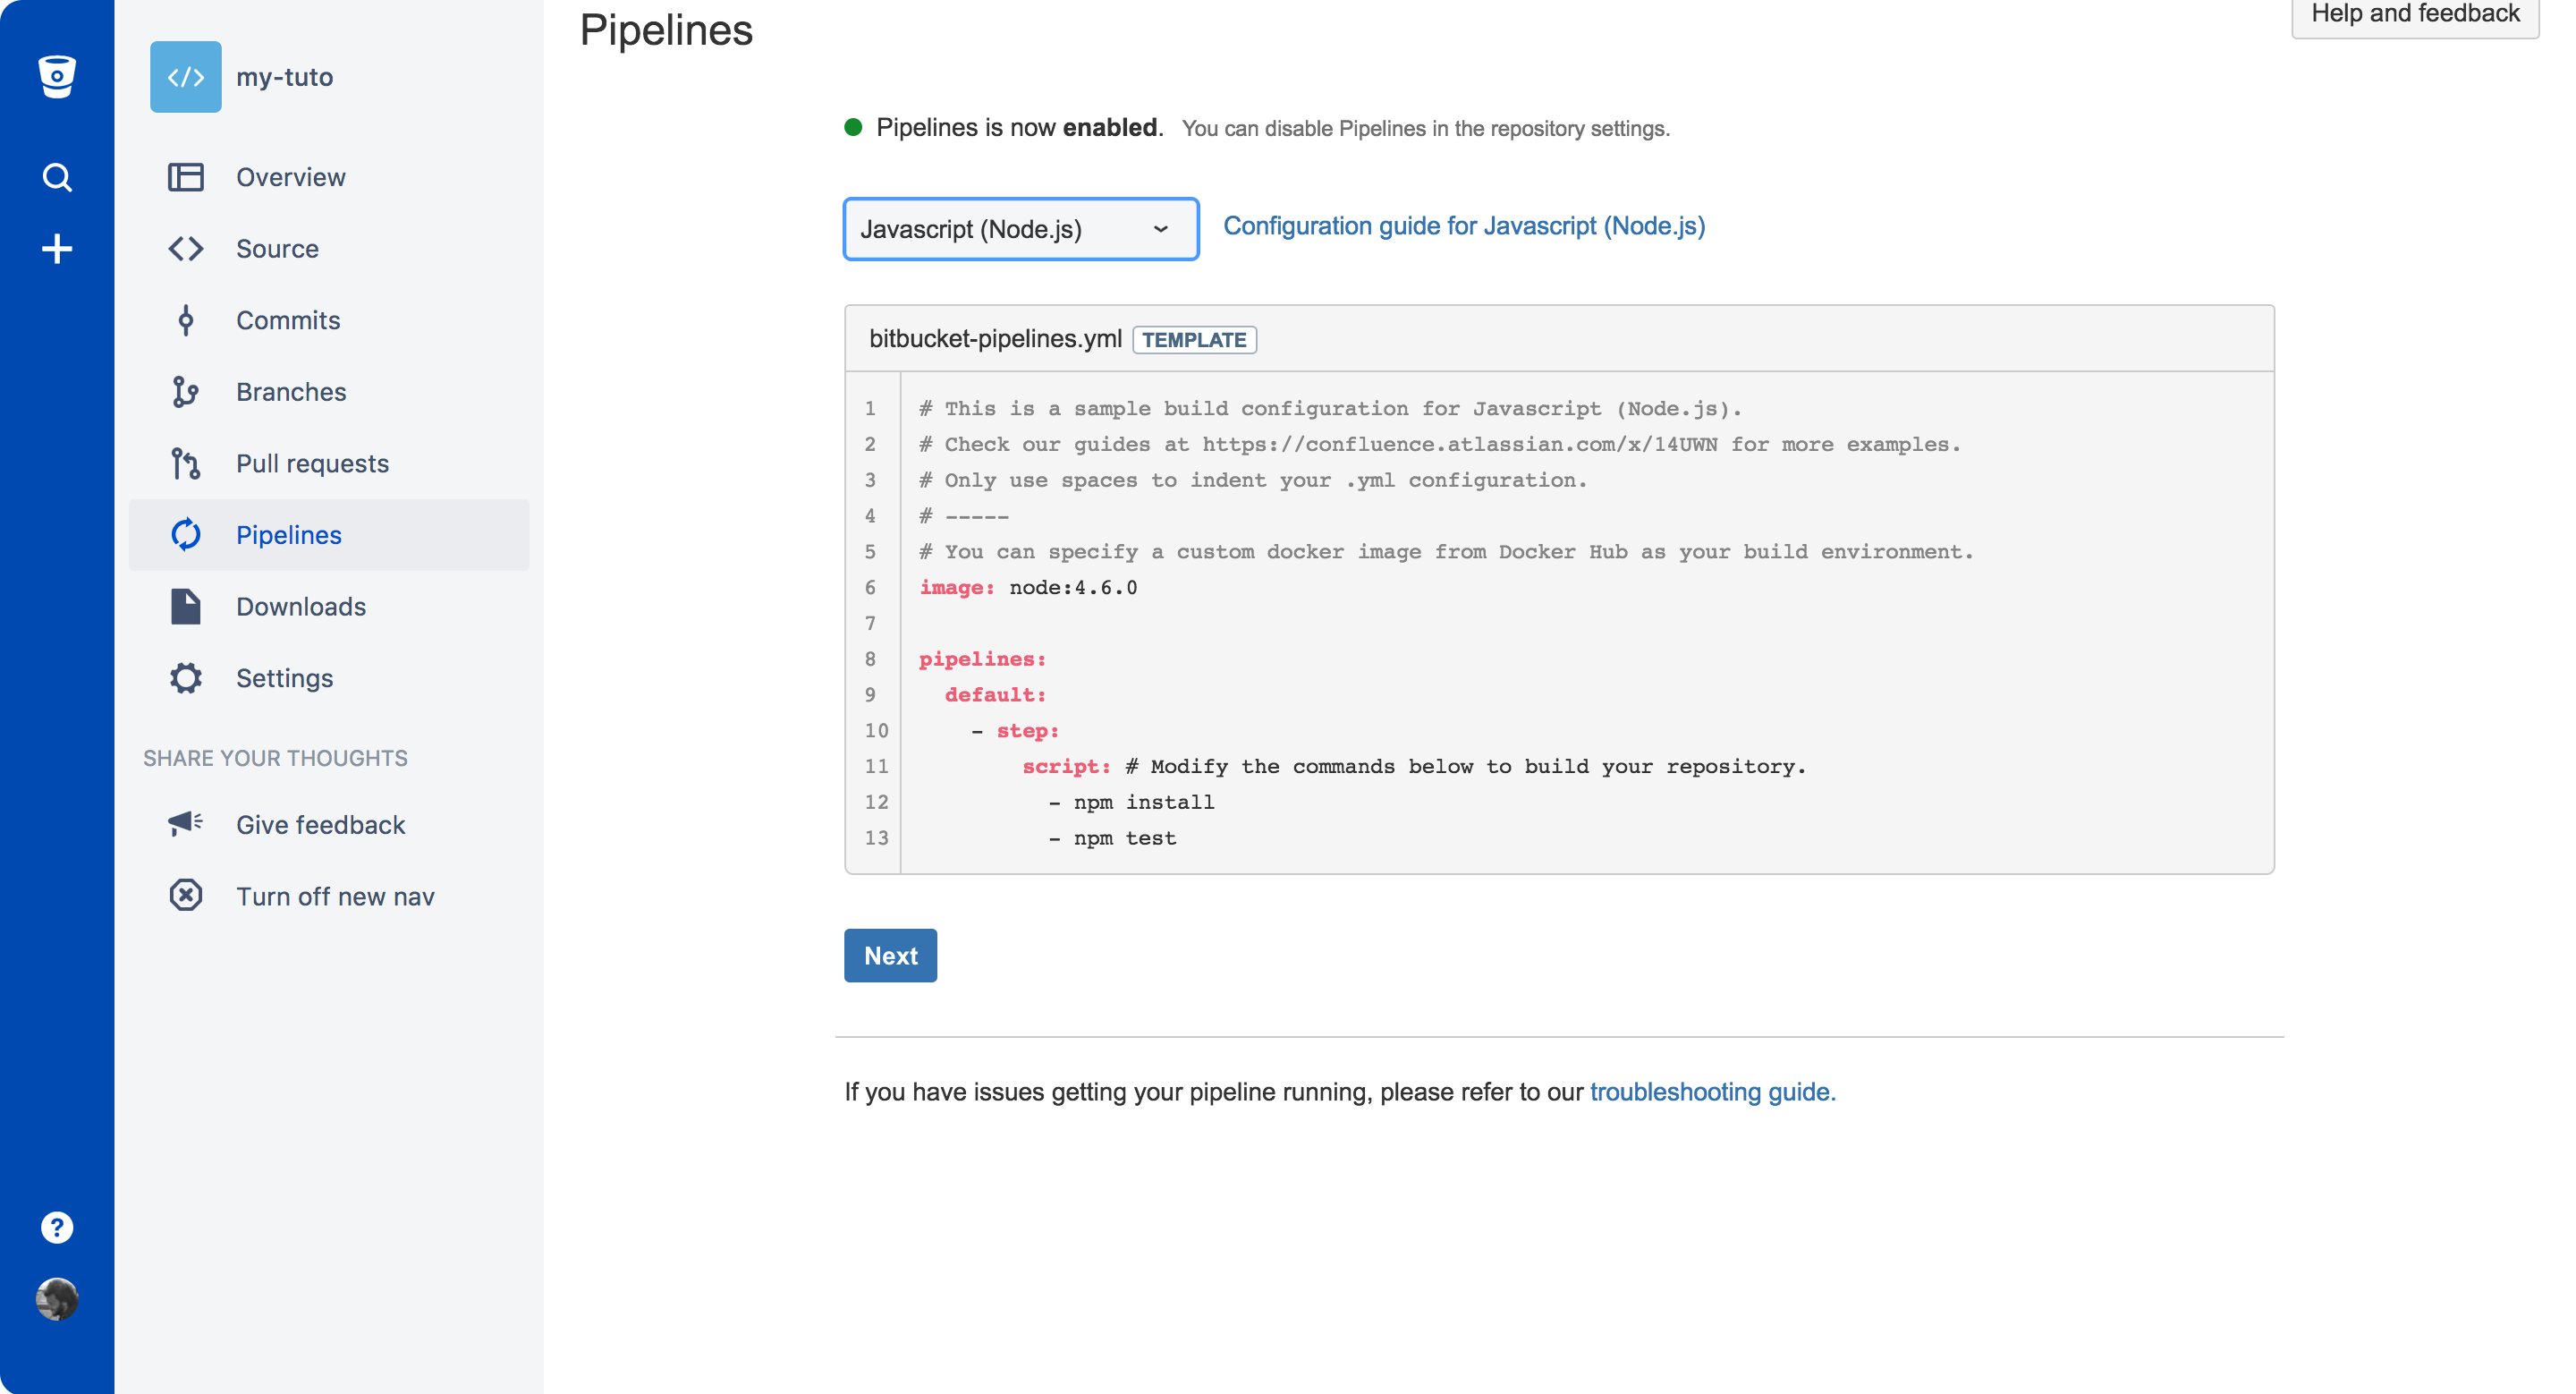
The bitbucket-pipelines.yml file should look something like this.
image: node:16

pipelines:
  default:
    - parallel:
        - step:
            name: Build and Test
            caches:
              - node
            script:
              - npm install
              - npm test
The database service is missing, but we will add it later on.
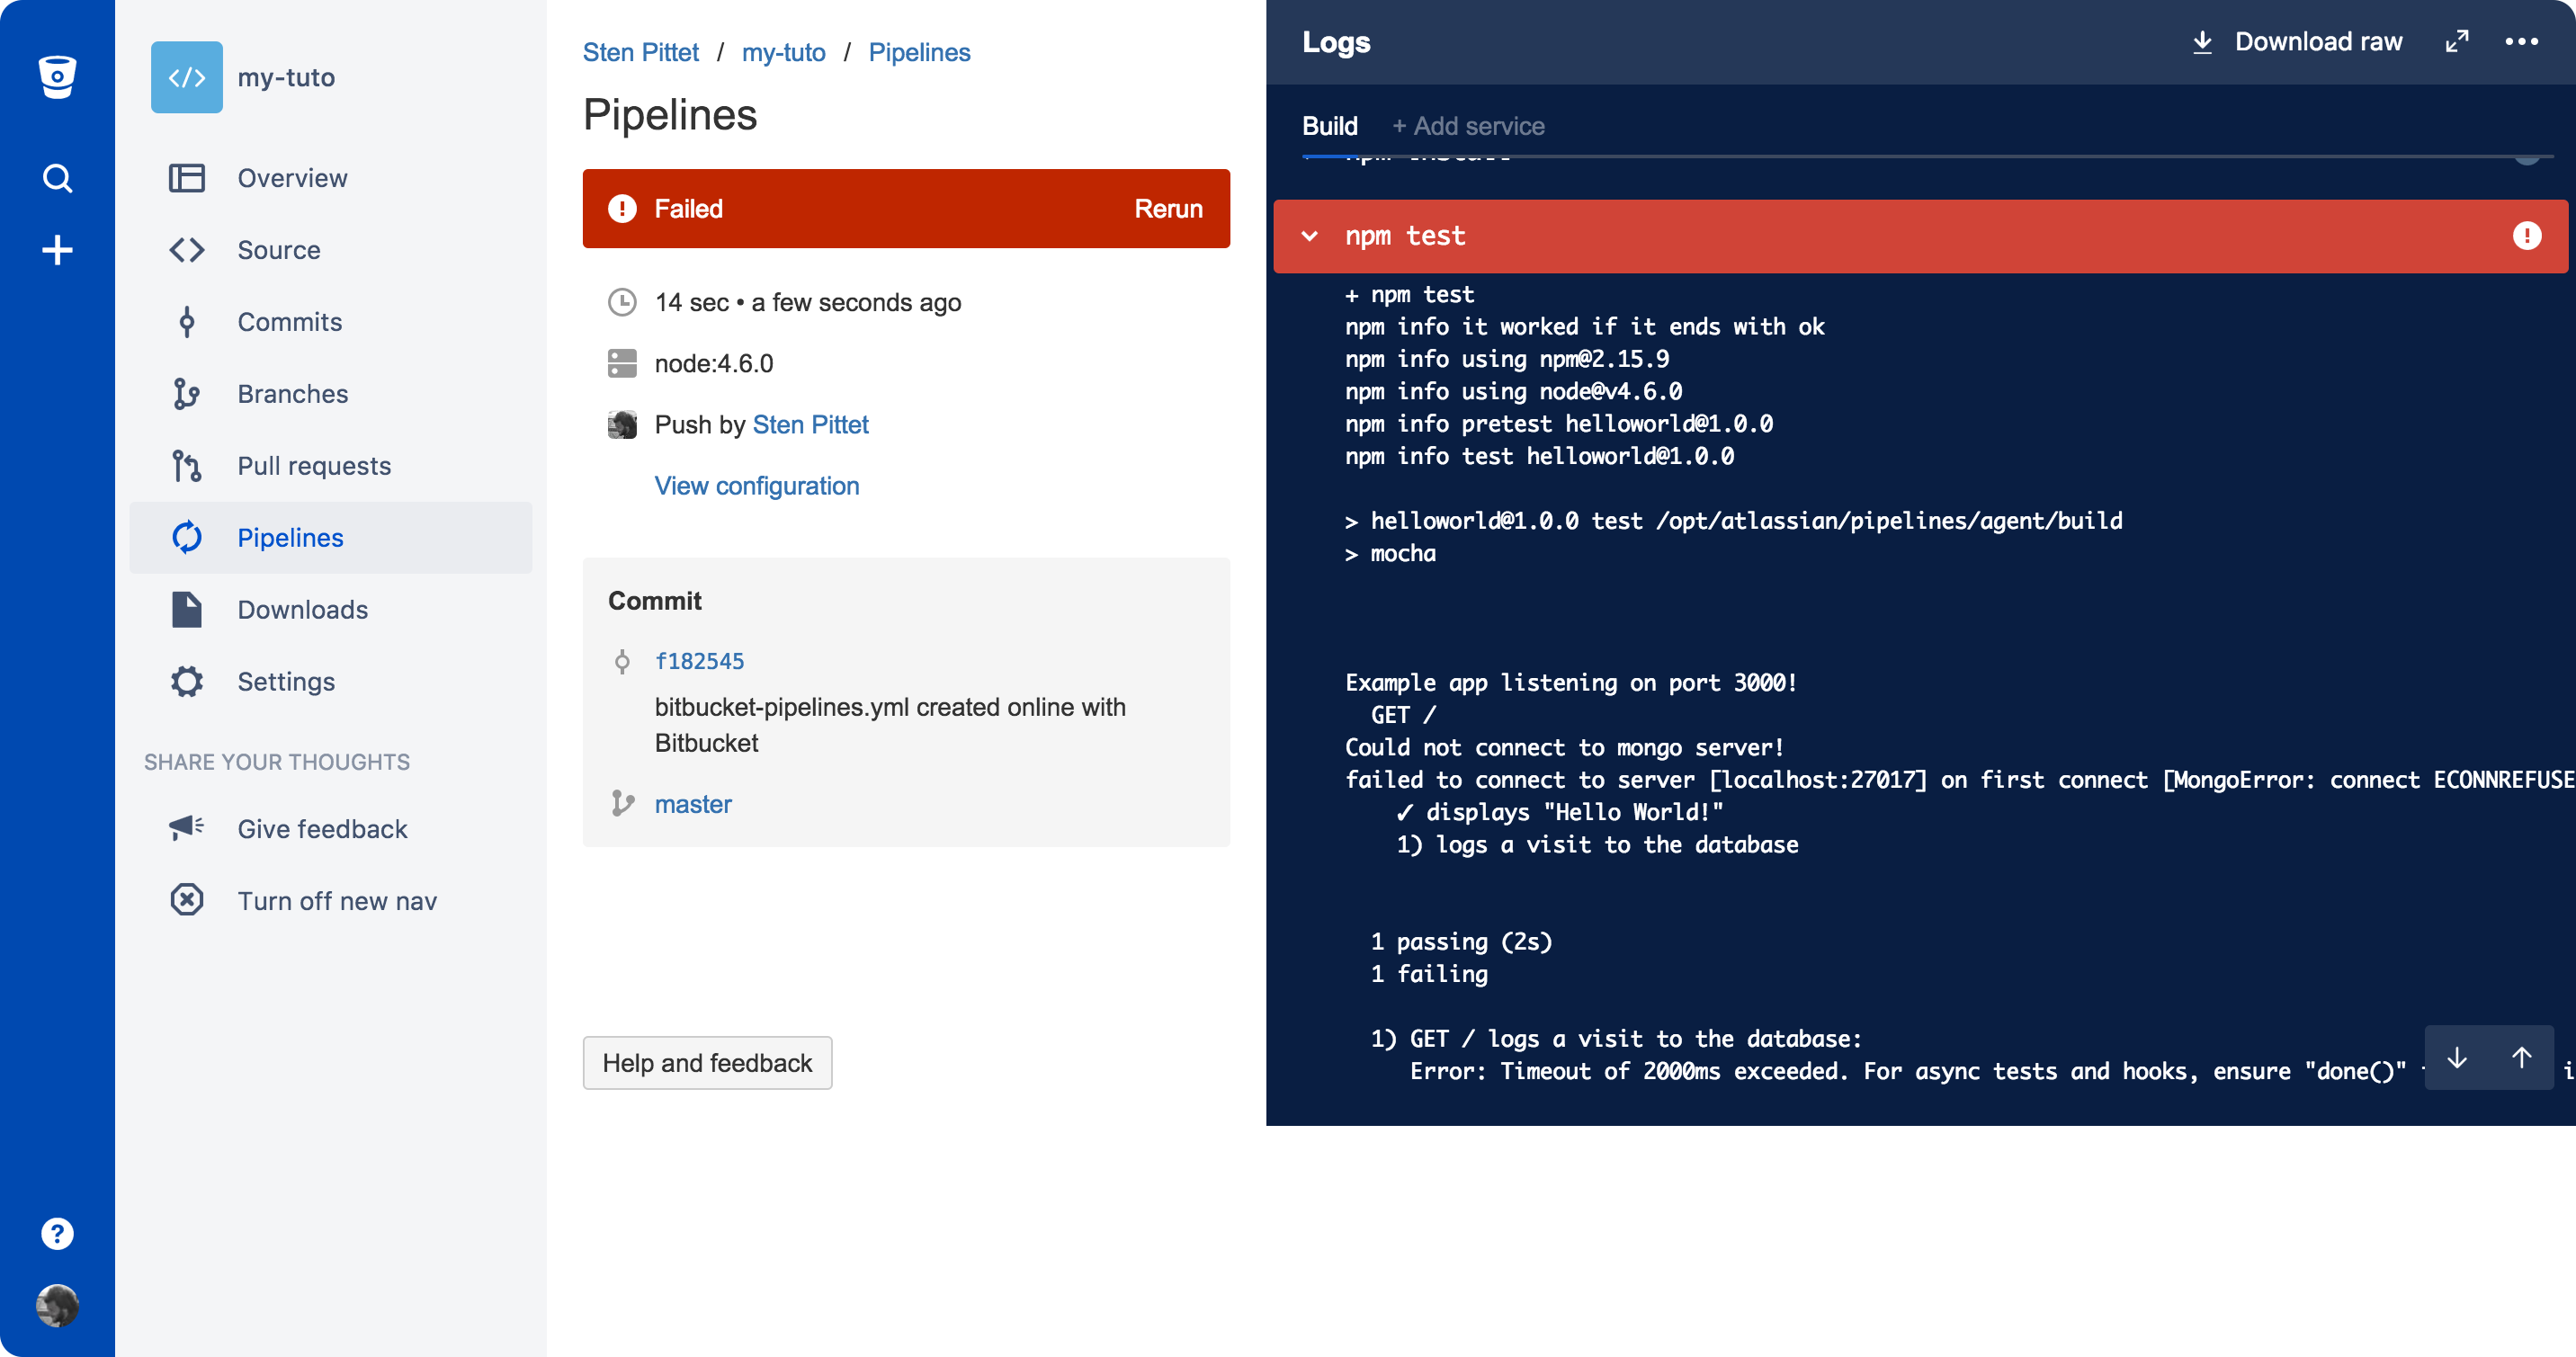
Once you commit your file, you will be redirected to the Pipelines section of your repository where you can see your first pipeline in progress. Your pipeline will fail because the second test cannot run properly without a database connection. If you click through to your pipeline, you should see a screen similar to the one below where it says that 1 test passed and 1 test failed.
In the next section, we will fix that issue by adding a new service definition to your Pipelines configuration.
Step 3: Adding a service definition for the database
With Bitbucket Pipelines you can run up to 3 extra Docker containers on top of the main application running in a pipeline. You can use these containers to run services such as a datastore, analytic tool, or any 3rd party service that your application may need to complete the pipeline. In our case, we will use a separate service container to run MongoDB.
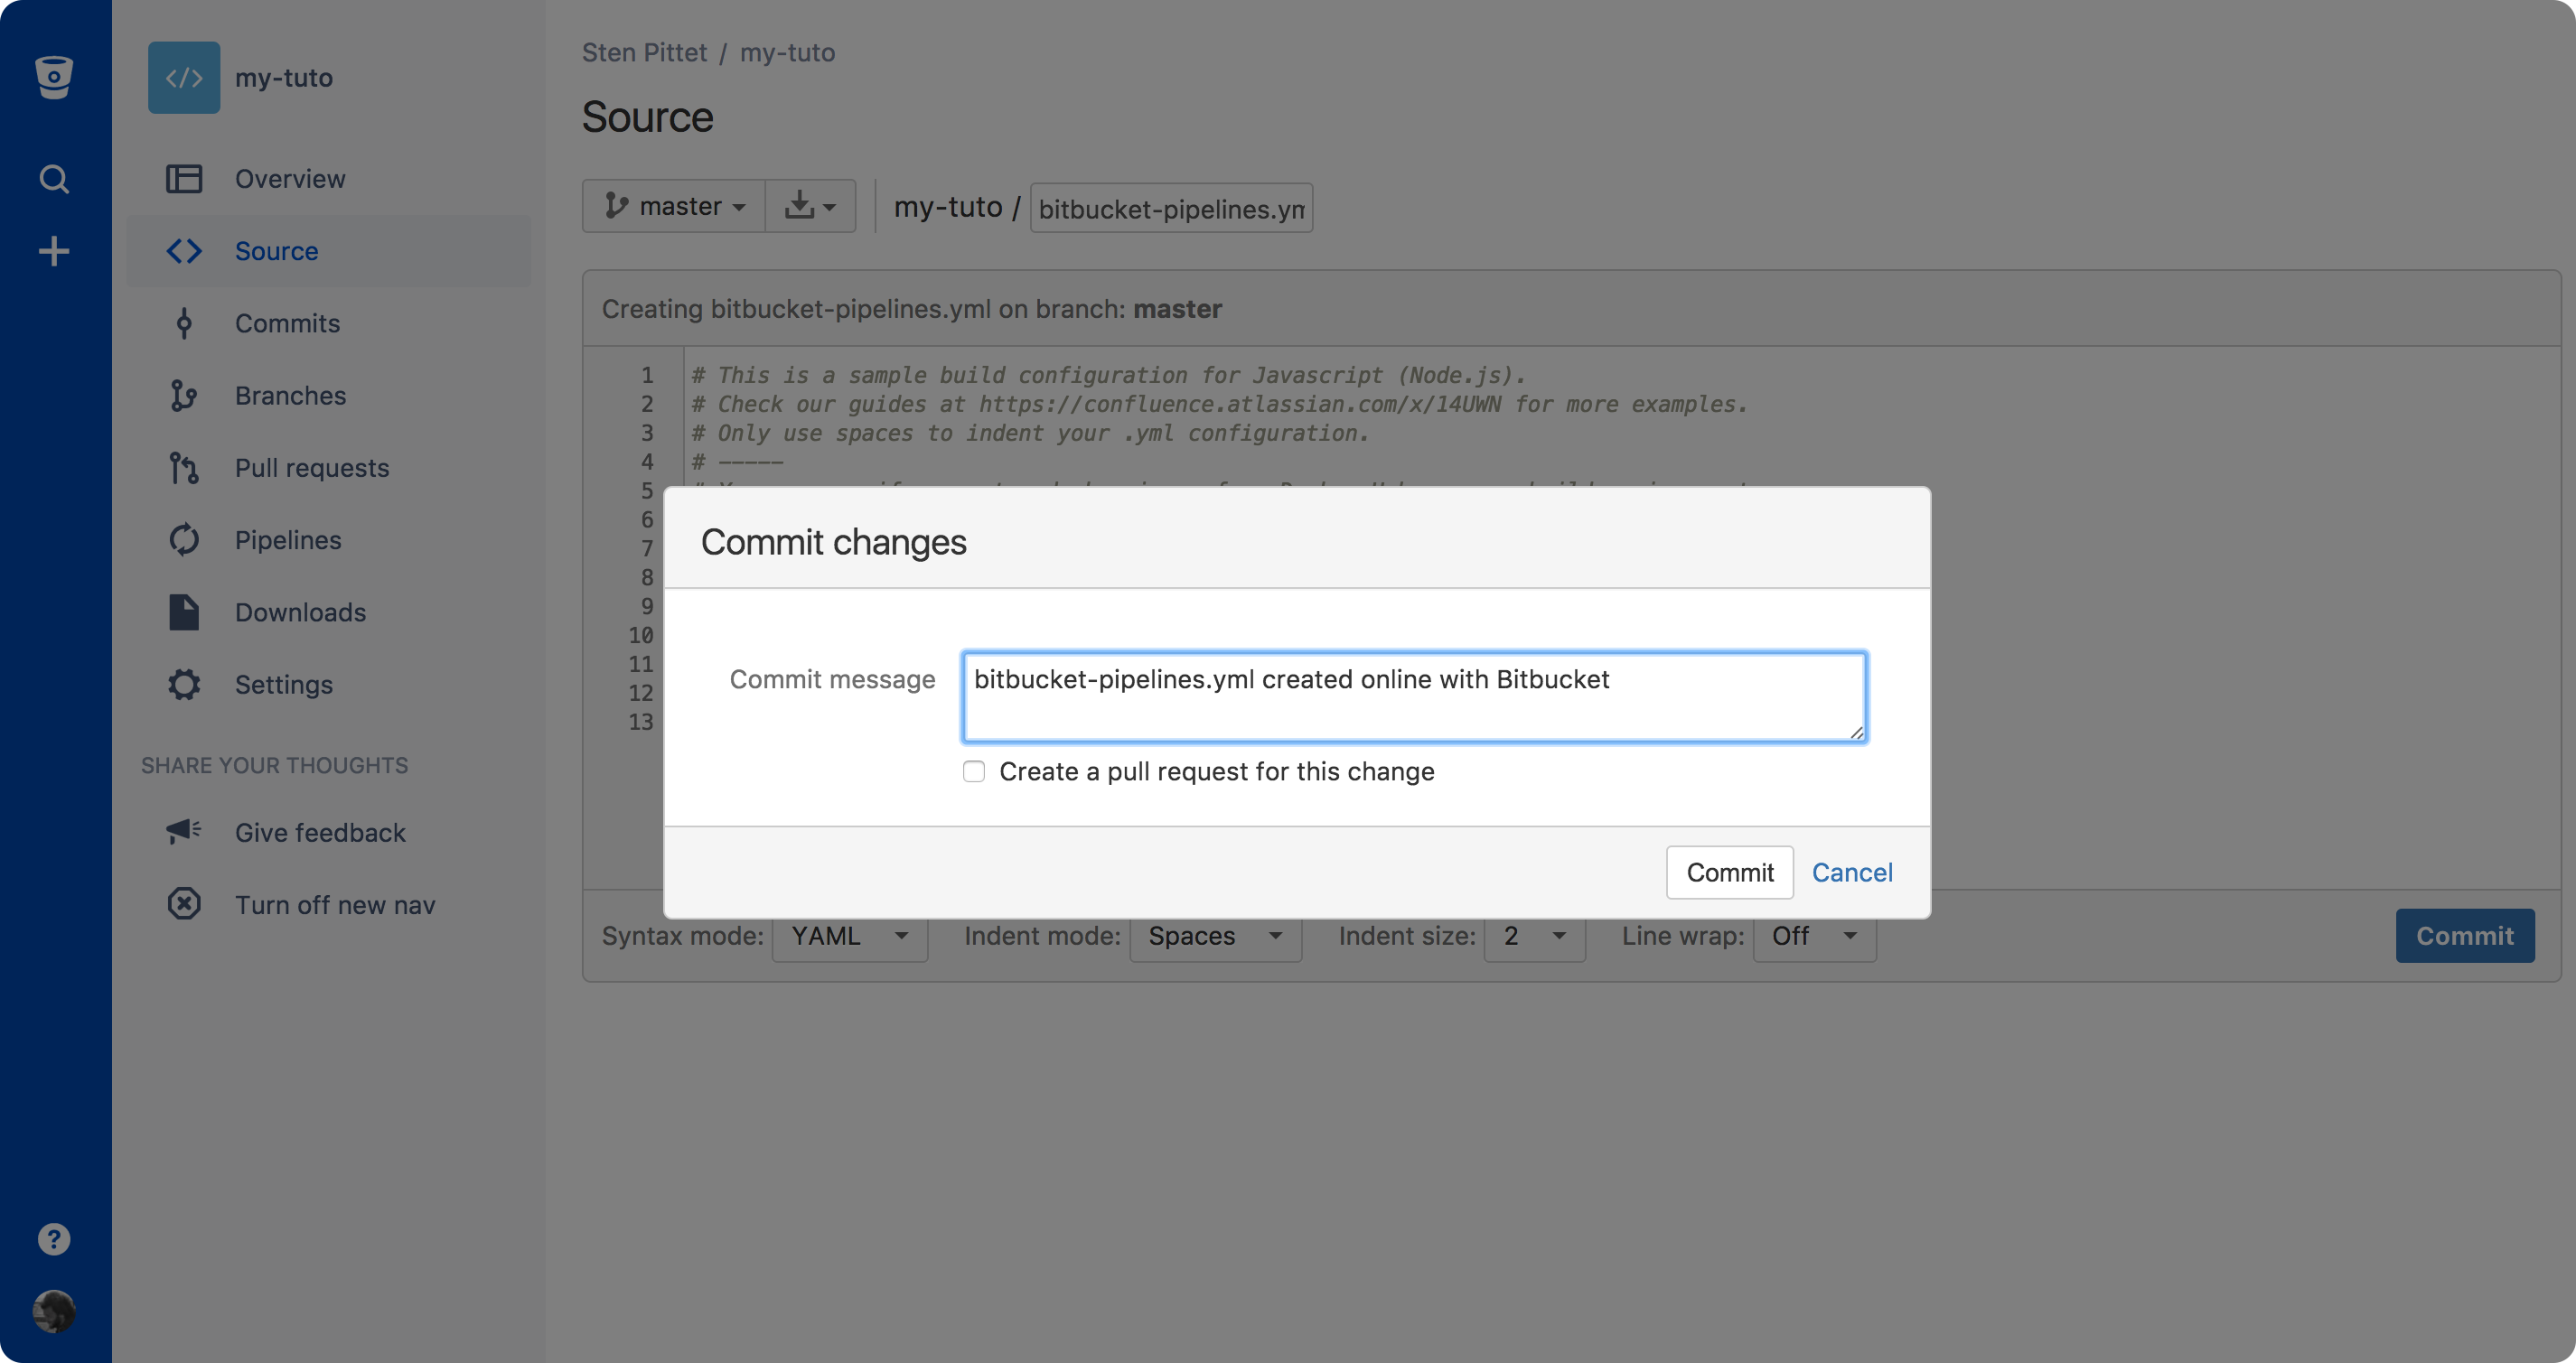
Go to the source section of your repository to see the list of files.

Click on the bitbucket-pipelines.yml configuration file to access it. You will find an Edit button in the top right corner that will let you edit the file and commit straight from your browser.
We need to add a service definition for our database at the bottom of the configuration file.
bitbucket-pipelines.yml
image: node:16

pipelines:
  default:
    - step:
        script:
          - npm install
          - npm test

definitions:
  services:
    database:
      image: mongo
In the case of MongoDB, we don't need any extra settings in the image definition, but some Docker images for datastores and services might need you to specify some environment variables. You can find a list of database examples in Bitbucket Pipelines documentation.
Before committing the file, you need to add the new service to the step that is executing the tests. The final Pipelines configuration should look like the code below.
bitbucket-pipelines.yml
image: node:16
pipelines:
default:
- step:
script:
- npm install
- npm test
services:
- database
definitions:
services:
database:
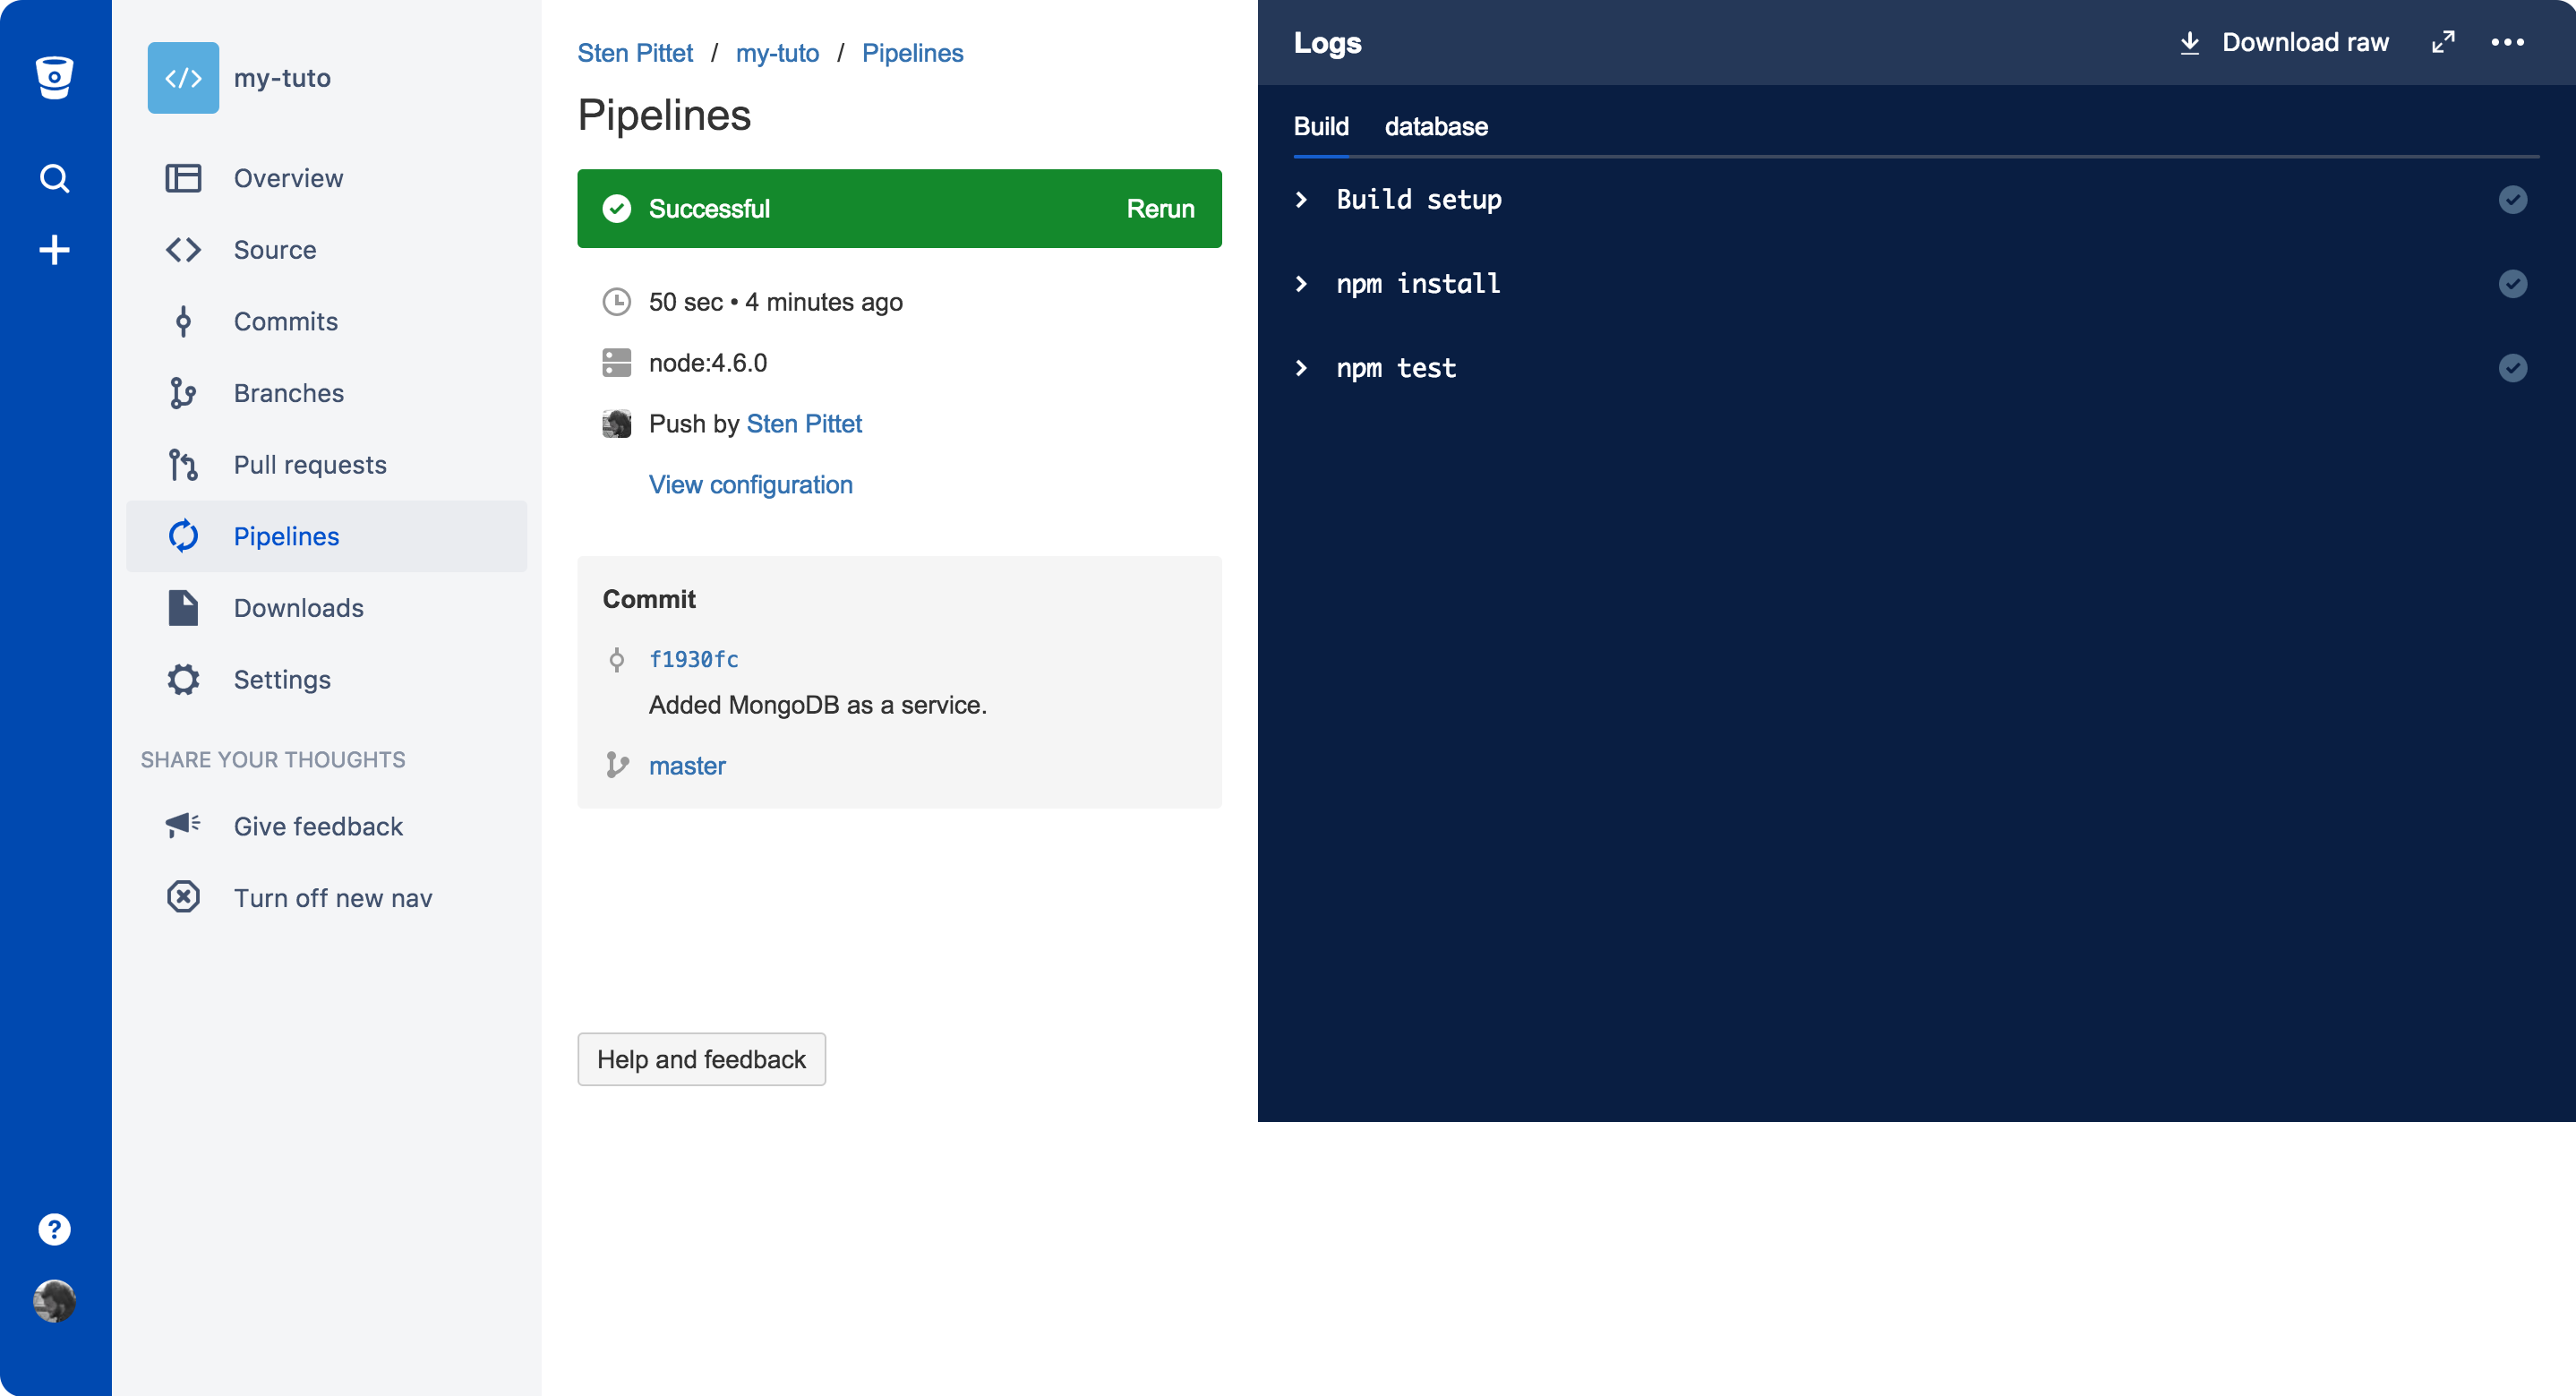
image: mongoGo to your Pipelines section after committing the file to see the pipeline in progress. It should normally complete successfully.
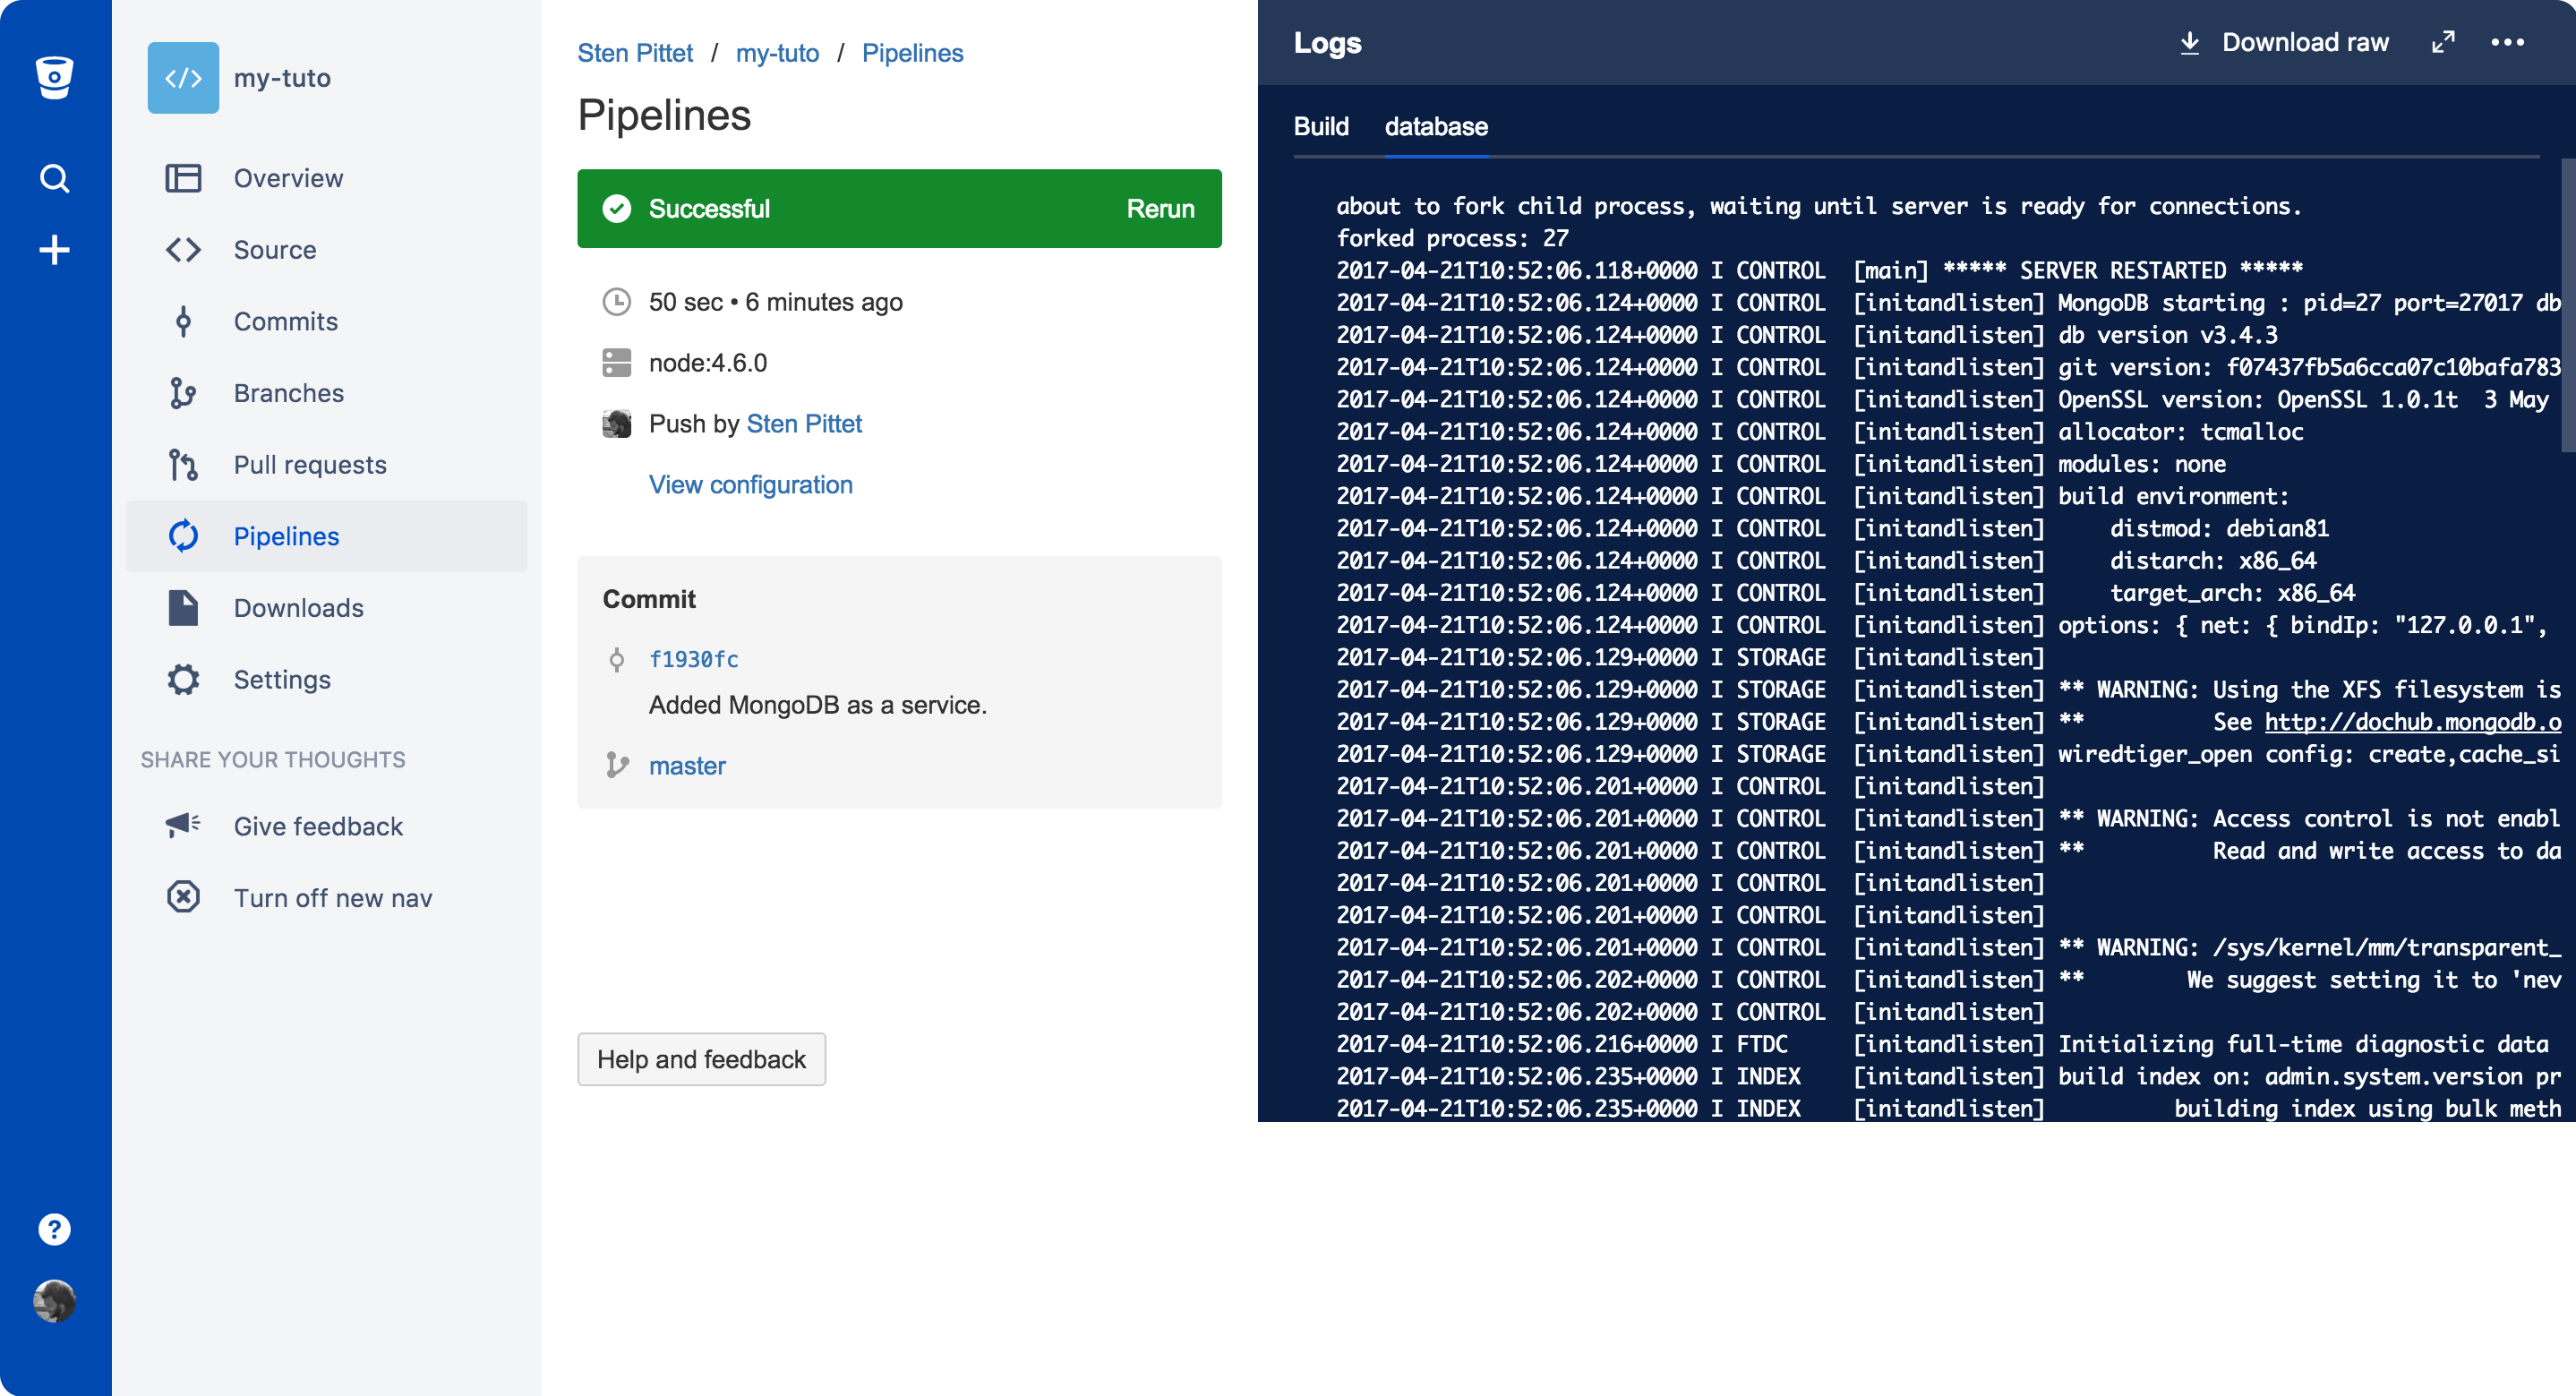
You can click on the database tab in the logs panel to see the logs of the MongoDB container.
That's it! You now know how to add services to your pipeline to run integration tests. Don't forget to read the documentation to learn more about how you can use these services.

Condividi l'articolo
Argomento successivo
Letture consigliate
Aggiungi ai preferiti queste risorse per ricevere informazioni sui tipi di team DevOps e aggiornamenti continui su DevOps in Atlassian.

Community DevOps
Percorso di apprendimento DevOps