
Articles
Tutorials
Interactive Guides
Learn Continuous Deployment with Bitbucket Pipelines

Sten Pittet
Contributing Writer
We'll see in this guide how you can implement a continuous deployment pipeline with Bitbucket Pipelines
Time
30 minutes
Audience
You are new to continuous deployment and/or Bitbucket Pipelines
In software development, you often have to do hard tradeoffs when developing an application. If you want to go faster, the general belief is that you will have to trade on the quality of your releases. But there's a development practice that can allow you to save time while releasing faster, and that is continuous deployment.
With continuous deployment, you remove the stress of deploying software by making it an automated process. Your development team doesn't have to stop anymore and switch context for a release – code is shipped to your customers as soon as a developer has finished their work.
We'll see in this guide how you can implement a continuous deployment pipeline with Bitbucket Pipelines.
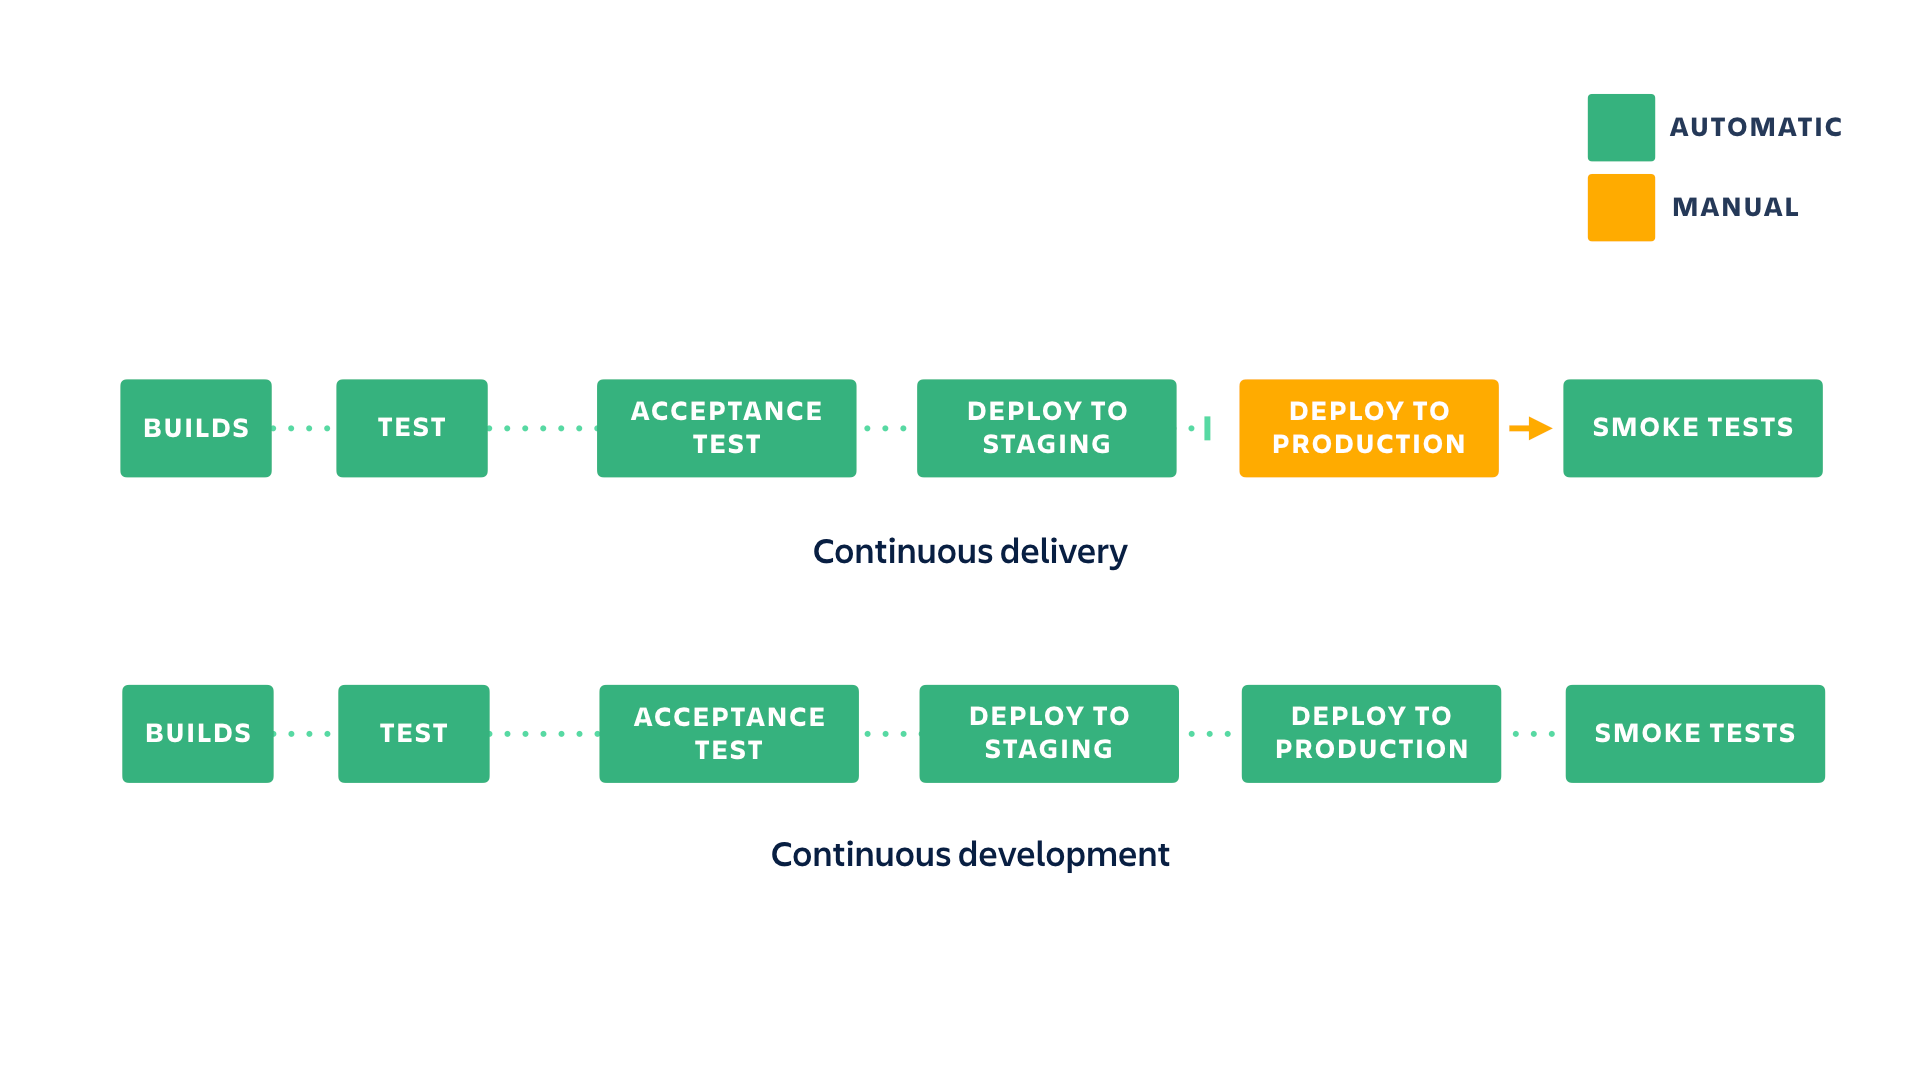
Continuous delivery vs. continuous deployment
Continuous delivery is the practice of making sure that your code is always ready to release even if you are not deploying every change to production. It is recommended to update your production as often as possible to make sure that you keep the scope of the changes small, but ultimately you're in control the rhythm of your releases.
In continuous deployment, new changes pushed to the repository are automatically deployed to production if they pass the tests. This puts more emphasis (read: pressure) on your testing culture, but it's a great way to accelerate the feedback loop with your customers.
Setting up a continuous deployment pipeline
In this example, we will extend the simple node.js app web built-in by adding a continuous deployment pipeline. Continuous deployment is a great way for teams to accelerate development. It removes the impediments related to the release approval process, and it allows developers to get feedback from customers as soon as they're done with their work. Issues are easier to identify and fix, and there's less context switching as there's no release time anymore.
Configuring a continuous deployment pipeline with Bitbucket Pipelines is very easy. We will see how to do it with a simple Hello World application that goes through a staging environment and acceptance tests before getting released automatically to production.
Step 1: Create a new Heroku app
On the continuous delivery tutorial, we pushed a branch with merges to the production Heroku app. We’re going to create another Heroku app to prevent conflicts when pushing in this tutorial. Run the following.
heroku create --remote production2
git push production2 main
Now, git remote -vv shows something like the following. Use staging, and production2 for the rest of this tutorial.
wmarusiak@C02F207NML7L cdtutorial % git remote -vv
origin git@bitbucket.org:pmmquickstartguides01/cdtutorial.git (fetch)
origin git@bitbucket.org:pmmquickstartguides01/cdtutorial.git (push)
production https://git.heroku.com/fierce-basin-45507.git (fetch)
production https://git.heroku.com/fierce-basin-45507.git (push)
production2 https://git.heroku.com/limitless-headland-92324.git (fetch)
production2 https://git.heroku.com/limitless-headland-92324.git (push)
staging https://git.heroku.com/thawing-river-12585.git (fetch)
staging https://git.heroku.com/thawing-river-12585.git (push)
Step 2: Set up the pipeline
Our workflow will be straightforward:
- Build the application.
- Run tests on the build.
- Deploy to staging.
- Run some acceptance tests on staging.
- Deploy to production.
You'll see that it's very easy to create the corresponding pipeline configuration. We'll start by adding our automatic deployment to the staging environment to make sure that it's happening properly on every push.
image: node:16

clone:
  depth: full

pipelines:
  branches:
    main:
      - step:
          name: deploy_to_staging
          script:
            - npm install
            - npm test
            - git push https://heroku:$HEROKU_API_KEY@git.heroku.com/thawing-river-12585.git main
Make sure to replace the Git push URL for main with the staging URL from git remote -vv.
You'll notice that we're using a full clone to make sure that Heroku doesn't reject our push. Then we're also using a branch-specific pipeline to make sure that we only deploy staging for changes pushed on main and not on other branches. You can push this configuration to Bitbucket to see it in action.
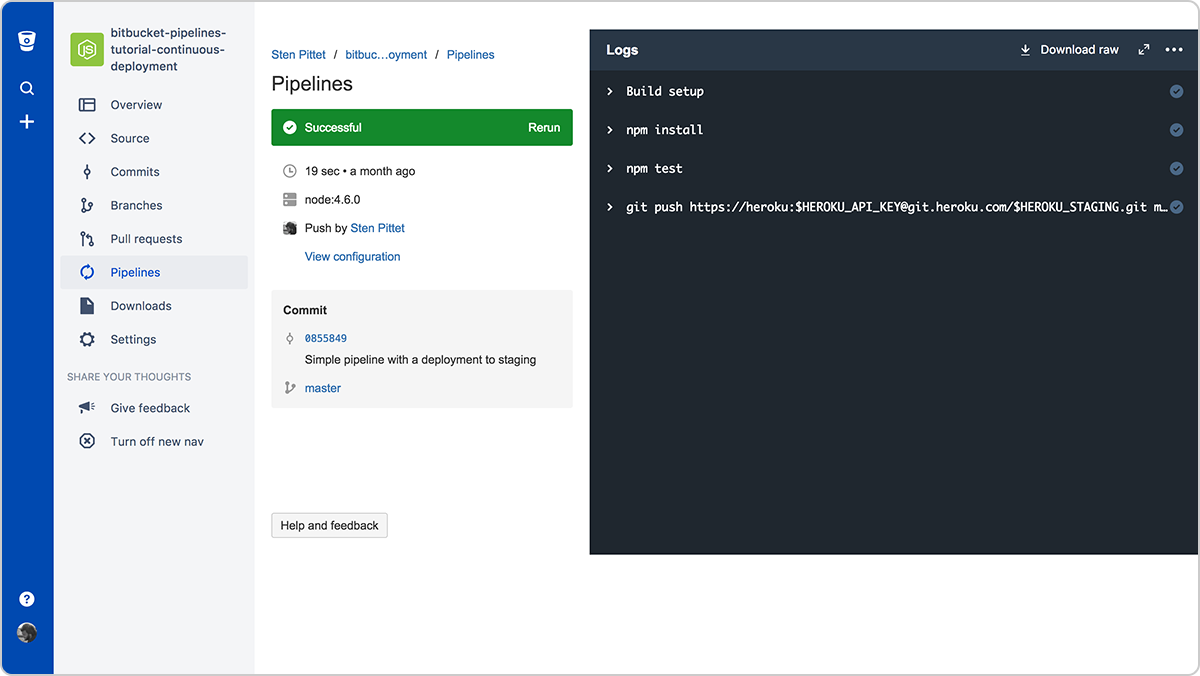
Automatic deployment to staging is completed
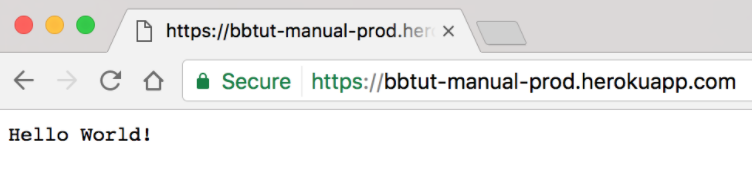
At this stage, we now have our Hello World application deployed on staging.
We can now move on to the next step and add our acceptance tests. Acceptance tests are here to make sure that our application behaves as expected in a production-like environment (staging). The goal is to remove uncertainties due to differences in configuration between the environment used to test the build and your production.
If you look at the code of our app, our test is doing something extremely simple – it's looking for the presence of the string "Hello World" in the page. In a real application we recommend having acceptance tests that go much further and verify that all the underlying services used by your application (database, cache, third party, etc.) are working properly.
To add an acceptance test complete the following steps.
mkdir acceptance-test
touch acceptance-test/test.js
Then edit acceptance-test/test.js and add the following code snippet.
var request = require('supertest');

// Running a test on our staging environment
describe('GET /', function() {
  it('displays "Hello World!" on staging', function(done) {
    var staging_url = 'https://' + process.env.HEROKU_STAGING + '.herokuapp.com'
    // The line below is the core test of our app.
    request(staging_url).get("/").expect("Hello World!", done);
  });
});
Update the package.json file to include --timeout 10000.
{
  "name": "cdtutorial",
  "version": "1.0.0",
  "description": "",
  "main": "server.js",
  "scripts": {
    "start": "node server.js",
    "test": "mocha --exit --timeout 10000"
  },
  "repository": {
    "type": "git",
    "url": "git+ssh://git@bitbucket.org/pmmquickstartguides01/cdtutorial.git"
  },
  "author": "",
  "license": "ISC",
  "bugs": {
    "url": "https://bitbucket.org/pmmquickstartguides01/cdtutorial/issues"
  },
  "homepage": "https://bitbucket.org/pmmquickstartguides01/cdtutorial#readme",
  "dependencies": {
    "express": "^4.17.3"
  },
  "devDependencies": {
    "mocha": "^9.2.2",
    "supertest": "^6.2.2"
  }
}
So let's add our test right after our deployment to staging.
image: node:16

clone:
  depth: full

pipelines:
  branches:
    main:
      - step:
          script:
            - npm install
            - npm test
            - git push https://heroku:$HEROKU_API_KEY@git.heroku.com/thawing-river-12585.git main
            - HEROKU_STAGING=thawing-river-12585 npm test acceptance-test
Make sure to replace the Git push URL for main with the staging URL from git remote -vv.
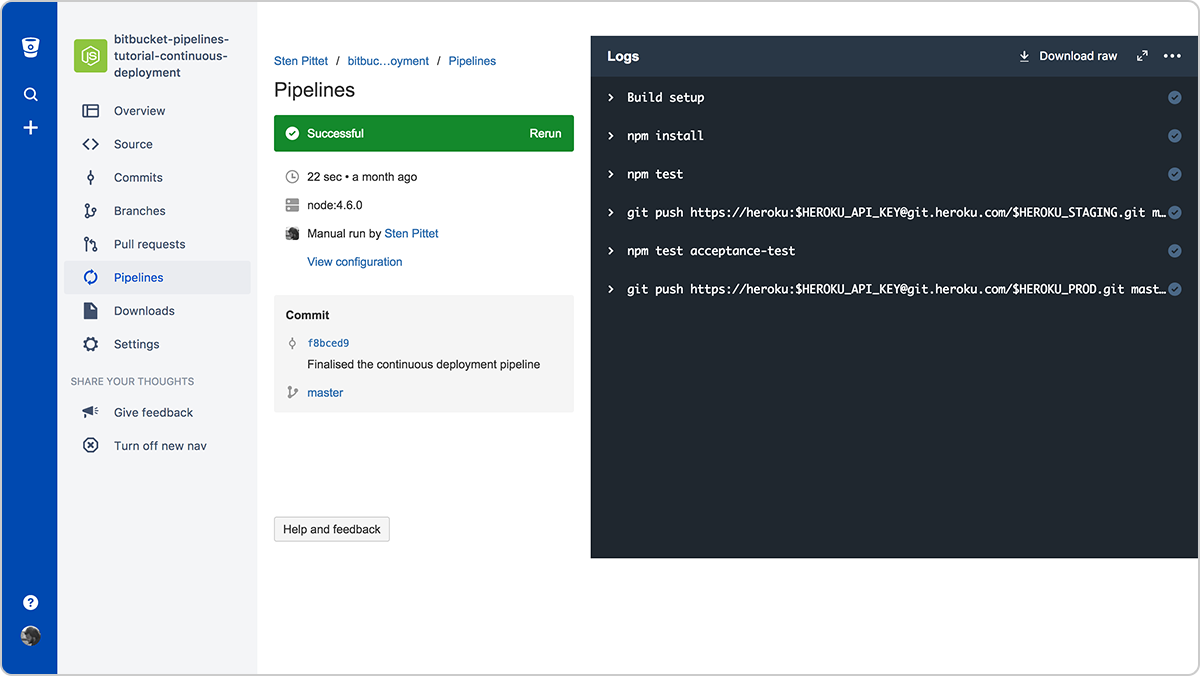
After pushing this new configuration to Bitbucket we can see our pipeline completing successfully.
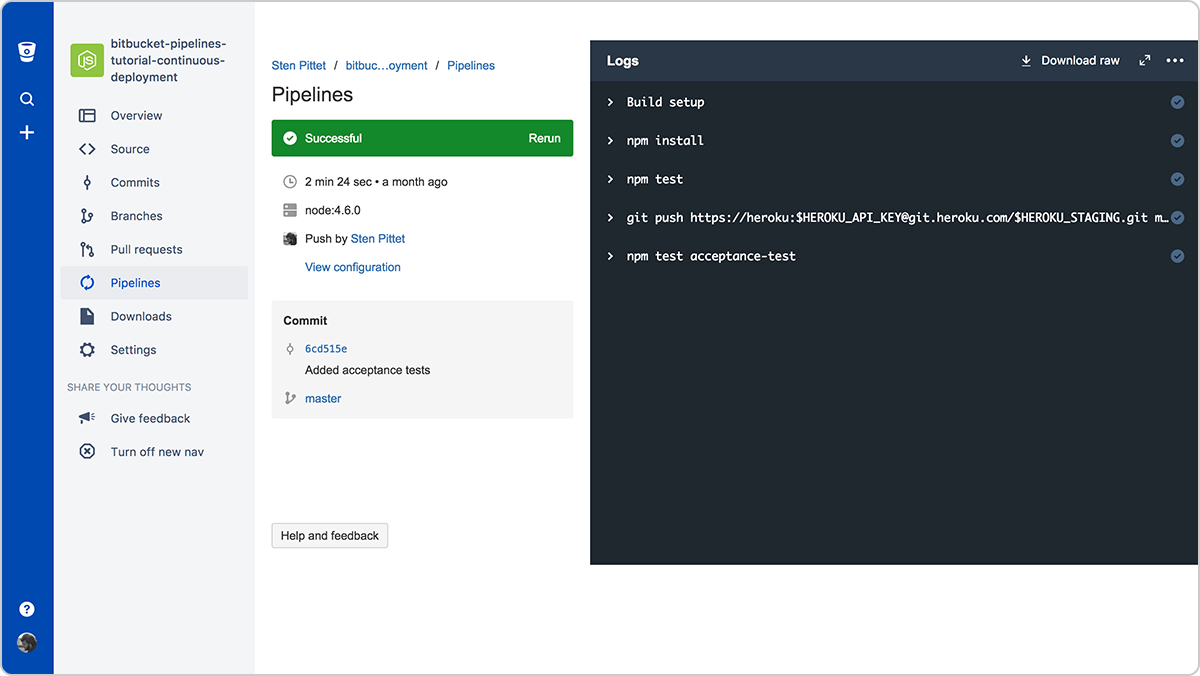
Bitbucket Pipelines now runs acceptance tests after deploying to staging
All that is left now is to add our production deployment at the end to complete our continuous deployment pipeline.
image: node:16

clone:
  depth: full

pipelines:
  branches:
    main:
      - step:
          script:
            - npm install
            - npm test
            - git push https://heroku:$HEROKU_API_KEY@git.heroku.com/thawing-river-12585.git main
            - HEROKU_STAGING=thawing-river-12585 npm test acceptance-test
            - git push https://heroku:$HEROKU_API_KEY@git.heroku.com/limitless-headland-92324.git main
Make sure to replace the git push url for main with the staging url from git remote -vv, and the git push url for production with the production2 url from git remote -vv.
A final push to Bitbucket will take our code changes through all the pipeline, building and testing the code then deploying to production after successfully verifying that staging works. In this case the homepage has been updated with a different message to make sure that it would get deployed all the way to production.
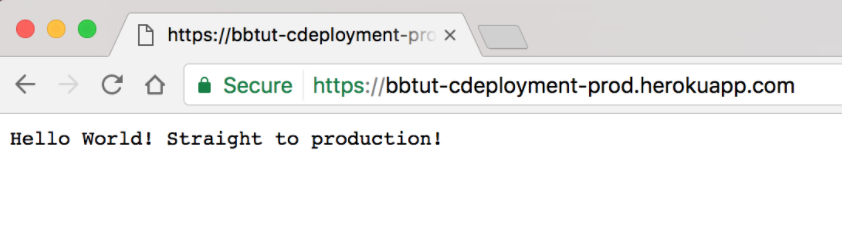
Our new message went to production as expected!
Checking that the code went through the pipeline
It is important to stress the importance of having a good test suite, as well as having real-time monitoring in place before you go ahead and implement continuous deployment for your own repositories. From now on changes will go straight to production as soon as they're pushed to the main branch so it's all the more important to make sure that your automated tests check the critical parts of your application. Additionally, you'll need monitoring tools to detect changes that affect negatively your production instances whether it's a full breakage or a degraded service.
You can find the final source in the Bitbucket Cloud repository linked below.

Share this article
Next Topic
Recommended reading
Bookmark these resources to learn about types of DevOps teams, or for ongoing updates about DevOps at Atlassian.
DevOps community
Simulation workshop