

Better code with Bitbucket: 4 starting steps
Now, let’s put some bits in your bucket.
Step 1: Put your code in Bitbucket
Repositories (affectionately referred to as ‘repos’ in the biz) are where code lives in Bitbucket. There are a few ways to get started depending on your needs:
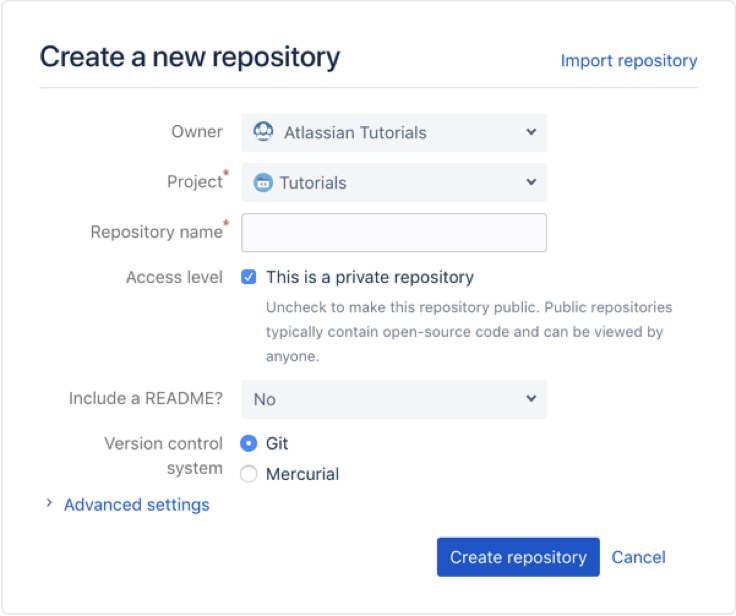
Create a new empty repository
- Click + in the global sidebar on the left, and under Create new select Repository.
- Give the repository a name. This is important! The name of a repository will be included in its URL.
- Set the Include a README? option to Yes, with a template.
- You can leave the rest to the defaults and click Create.
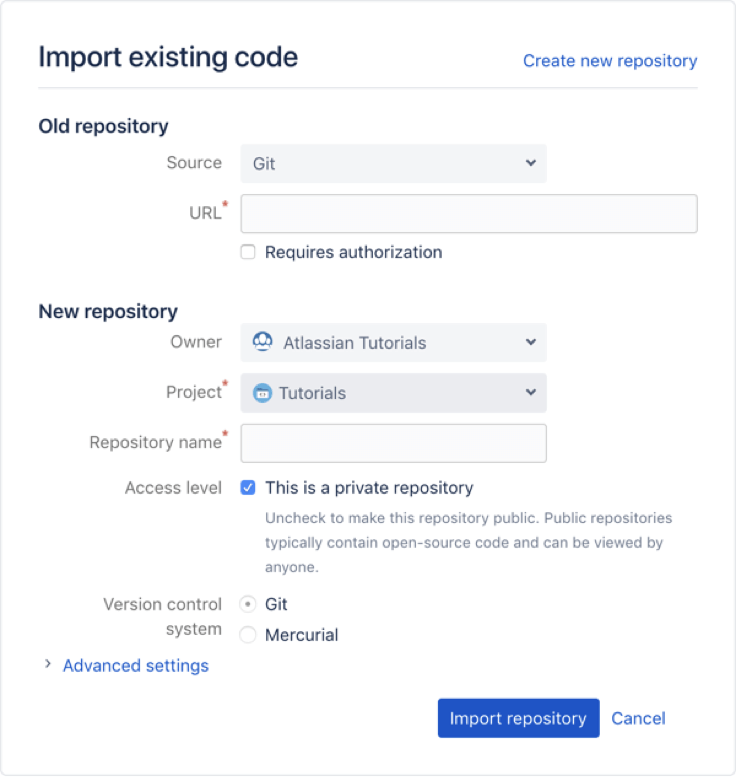
Import a repository from another Git provider
- Click + in the global sidebar on the left, and under Import select Repository.
-
Provide the URL where the repository can be accessed.
-
If your repository requires authorization, tick Requires authorization and provide credentials for access.
-
Give the repository a name. This is important! The name of a repository will be included in its URL.
-
You can leave the rest to the defaults and click Import repository.
Step 2: Set up locally, collaborate globally
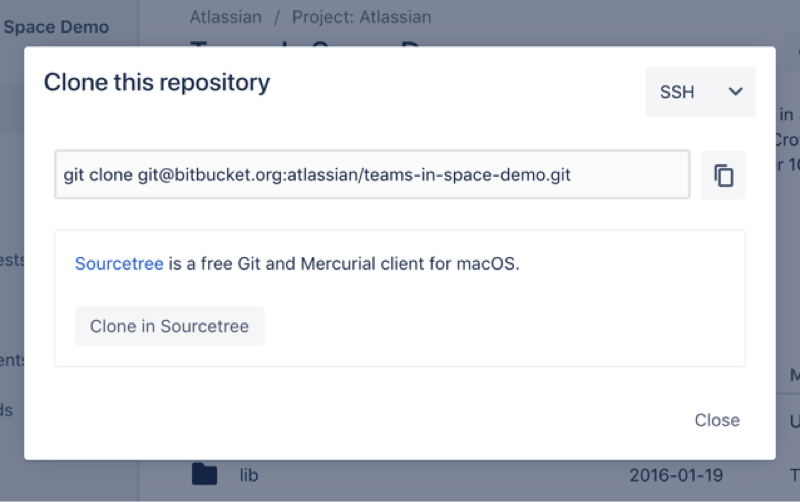
Clone a Bitbucket repository
- Click + in the global sidebar on the left, and under Get to work select Clone this repository.
- Select HTTPS from the menu in the upper-right (unless you’ve already set up your SSH keys).
- Copy the clone command.
From the CLI
- Change into the directory where you want to clone your repository.
cd
- Paste the command you copied from Bitbucket (would like something like this):
git clone https://username@bitbucket.org/teamsinspace/documentation-test.git
A new sub-directory appears on your local drive with the same name as the repository you cloned. If you cloned an empty repository there might not be anything in that local directory yet.
Make changes to a file in Bitbucket online
Wait, I don't have any files in Bitbucket...
Did you skip the optional step to add a README file to your Bitbucket repository? That’s okay! If the repository is still empty, go to the repository and create one now by clicking Create a README. Now you’ve got something to clone that’s not an empty repository.
Pull updates from Bitbucket
From the CLI
- Change into the directory where you want to clone your repository.
cd
- Paste the command you copied from Bitbucket (would like something like this):
git clone
Now you’ve downloaded any changes made to those files to your local system.
Step 3: Basic branching with Bitbucket
Branching allows each team member to work on a different things simultaneously without affecting the original codebase or each other’s work. When you’re ready to merge the changes, you’ll push your branch to Bitbucket so that it can be reviewed in a pull request.
There are a few ways to create branches, so pick the one that makes the most sense for your team’s needs.
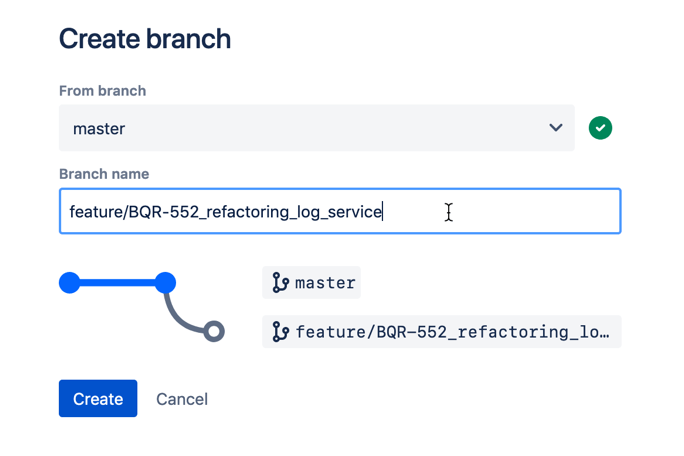
Create a branch
- From the repository, click + in the global sidebar and under Get to work, select Create a branch.
- From the popup that appears, select a Type (if using the Branching model), enter a Branch name and click Create.
From the CLI
- Once created, fetch and checkout the branch from your local system. Bitbucket will automatically show you the command needed, and it will look something like this:
git fetch && git checkout - Make your changes locally and then add, commit, and push your changes to the branch:
git add .git commit -m "adding a change from the feature branch"git push origin - Click the Source page of your repository. You should see both the main and the
From the CLI, within your local repository directory
- Create a branch using the Git branch command.
git branch - List the branches for this repository. You’ll see the default branch main, and the new branch you created.
git branch -
Check out the branch.
git checkout -
Push the new branch to Bitbucket.
git push --set-upstream origin
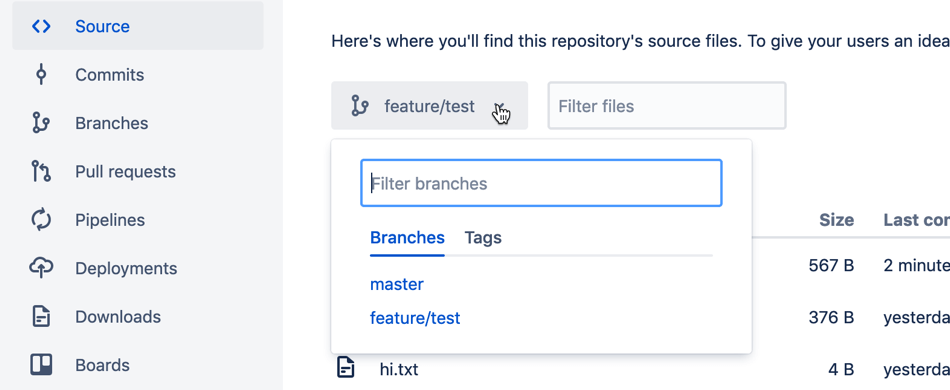
Now let’s go to Bitbucket to see our branch.
-
Go to your repository.
-
Click Branches.
This does require you have access to Jira Software Cloud, and have it integrated with Bitbucket. You’ll need administrator permissions to do this, but if you just want to play with the integration to see how it works, you can always sign up for your free trial of Jira Software Cloud.
Read Connect Bitbucket Cloud to Jira Software Cloud for instructions on integrating the two products once you have your Jira site set up.
Step 4: Review code changes with a pull request
Once your code changes have been pushed to Bitbucket, it’s time get those changes reviewed by a colleague. Pull requests are a simple and effective way to get your code reviewed and collaborate in a shared environment with your team.
Create a pull request
- From the open repository, click + in the global sidebar and select Create a pull request under Get to work.
- Fill out the rest of the pull request form:
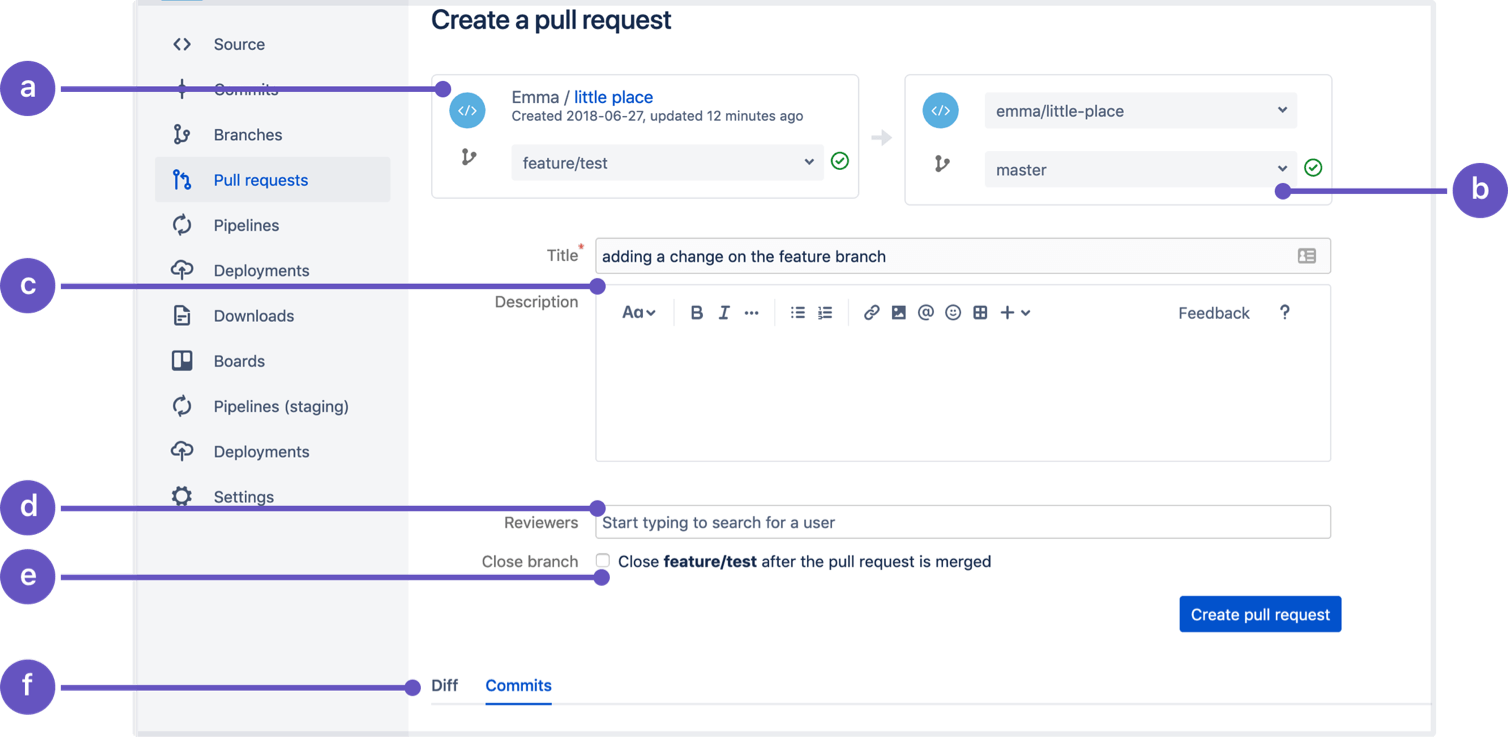
- Source: The repository and branch where you made the code changes that you want to merge.
- Destination: The repository and branch where you want to merge your changes into.
- Title and Description: You'll see both in email notifications and the title appears in the pull request list.
- Reviewers: Choose reviewers who will give effective feedback, and need to approve the changes.
- Close branch: Select if you want to automatically close the branch when the pull request is merged.
- Diff and Commits: Check these tabs to see the changes made (Diff), or included commits.
- Click Create pull request.
You can see this pull request from the Pull requests lists in the side navigation of your repository.
Review a pull request
As a reviewer, you'll get a notification that you have a pull request to review. You can also find open pull requests from the Pull requests tab on your Dashboard. There are a lot of ways to review code for quality assurance, but how your team does them is entirely up to you. Here are some ways to effectively communicate with your colleagues to ensure everyone understands what’s being changed, and approves a change to be merged.
View the diff(erence)
When you view a pull request, you'll see diffs (the changes) of all files changed in the pull request. Lines shaded in green were added, the ones in red were removed. You can also click the Commits tab at the top of a pull request to see which commits are included, which is helpful for reviewing big pull requests.
Leave feedback and ask questions in comments
In Bitbucket you can leave comments an entire pull request, a specific file, or a specific place within a file. This is handy when you want to provide context or specificity with your feedback. Comments can have images, links, rich text, and have a unique URL so you can share specific comments quickly.
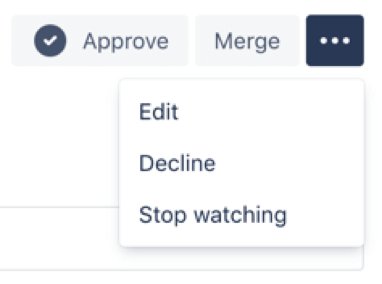
Approve, or Decline, a pull request
Once you’ve reviewed the code changes, you now need to tell the author of the pull request if this pull requests is ready to be merged. Clicking the Approve button sends a notification to the pull request author, and indicates you feel the changes can be safely merged. The opposite is true if you decline a pull request. Once you decline a pull request, it can’t be reopened. To merge the branch you will have to open a new pull request.
Take note that declining a pull request doesn’t feel good for the author, and should probably be reserved only for changes that are way off target, or for work that’s no longer needed. Remember to be kind in reviewing the work of others, and always seek first to understand before seeking to be understood.
Merge a pull request
After your code has been reviewed and approved in a pull request, click the Merge button to merge your branch into the main branch. The code changes from the source branch are now fully incorporated into the target branch.