
“When is my change going out?”
This is the million dollar question every engineer must answer. But the developer isn’t the only person that needs to be in the know. The team lead needs to understand when the team can move on to the next thing. The product manager needs to plan for the new features announcement. And the developer is eager to get feedback on the results of their work. In sum, it’s a team effort.
In a DevOps world, work is often merged to master multiple times a day, but it’s not always easy to know when changes ship. Developers have full control over deploying their changes to customers which makes it extra important that those changes are tracked. This way, IT and operations teams can pinpoint which changes went live in a particular release to effectively trace regressions during incident management.
The good news is that teams can automate much of this process using Jira or Jira Service Desk. Here are six actionable steps for better release management in the Jira platform.
1) Define changes with Jira issues
What constitutes a change? Is it a single commit? Or is it multiple commits? A typical, deliverable piece of work often consists of the latter.
One of the most popular ways of managing change is creating feature branches. When finished, they are merged to master via a Pull Request. The Pull Request is a better definition of a unit of change. However, there are often small but critical additional changes that must be added after the Pull Request has been merged. For example, the color of a UI element might need an update or the wording in a resource string could use some tweaking.
In that case, you might have multiple Pull Requests resulting in the same logical change.
Rather than trying to piece together piles of Pull Requests, you can group them into a single unit of change. This is where Jira issues come in. It’s where code, process and people meet.
Not only does the Jira issue track your work, but it also notifies interested parties of any updates. Anyone in your organization can “watch” a Jira issue to get notified of any comments, or when the status changes from In Progress to Done.
2) Set up your Jira release management workflow
Out of the box, a Jira workflow doesn’t include release management information. But since the Jira platform is completely flexible, you can add more statuses to track which issues are included in a specific release.
The default Jira workflow has these three statuses:
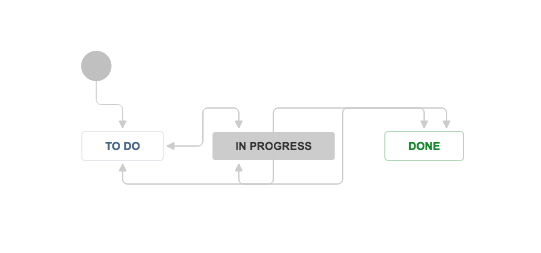
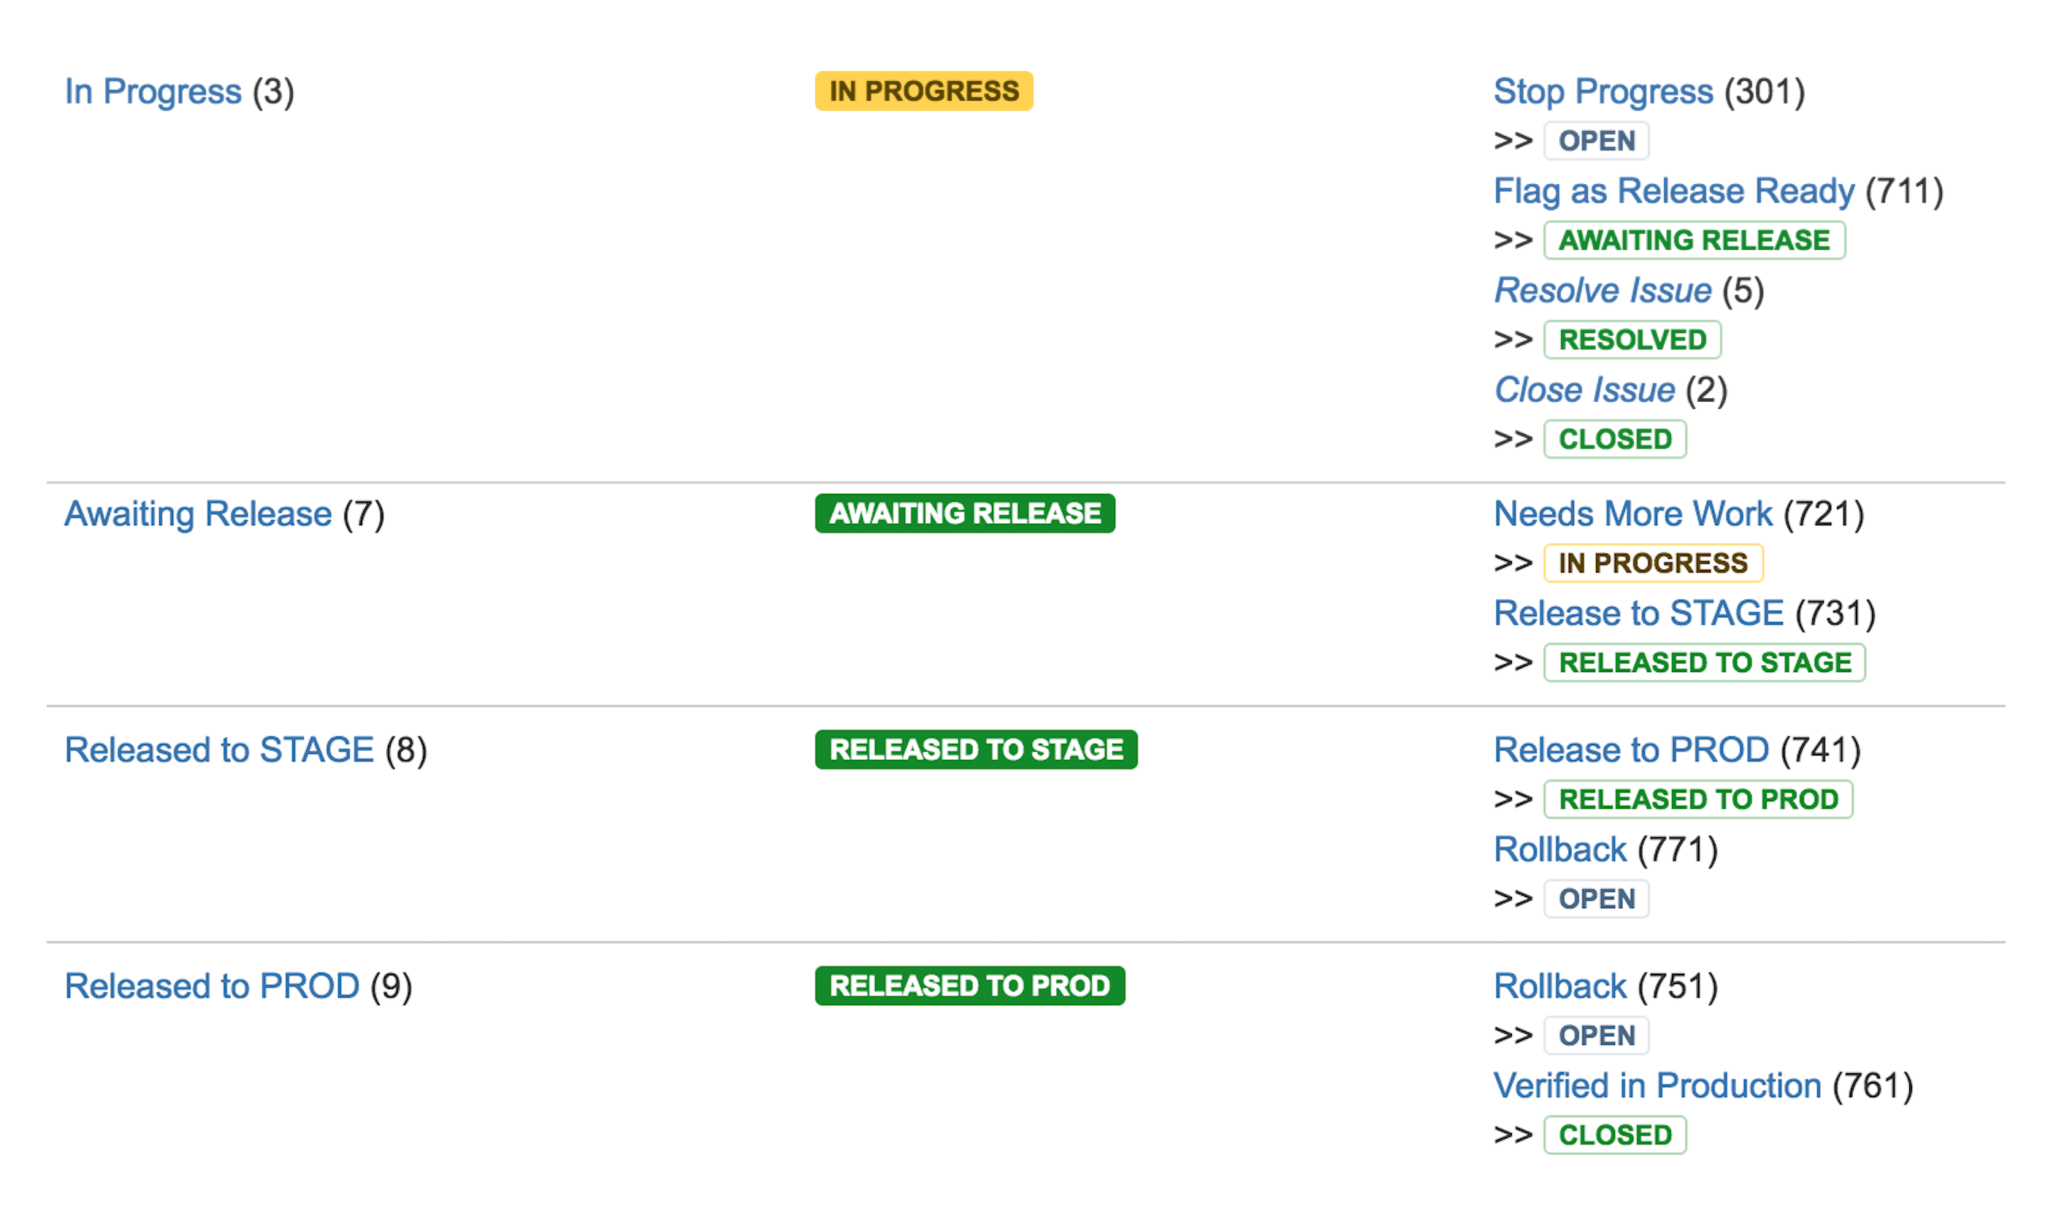
Now let’s add a few more statuses. In our case, instead of transitioning to Done after the In Progress state, we want them to transition like this:
- Awaiting Release: This means the work is complete and ready to ship.
- Released to Staging: This indicates that deployment to a testing environment is complete.
- Released to Production: Hooray! The change has reached customers.
Here’s an example of how we added transition steps and new statuses to the basic workflow. Read our documentation for more detailed instructions on configuring workflows.
3) Configure your agile boards
Once you have the new workflow, go into each project’s configuration to activate it for that project. If your developers are using boards, make sure to add the new workflow statuses to the board.
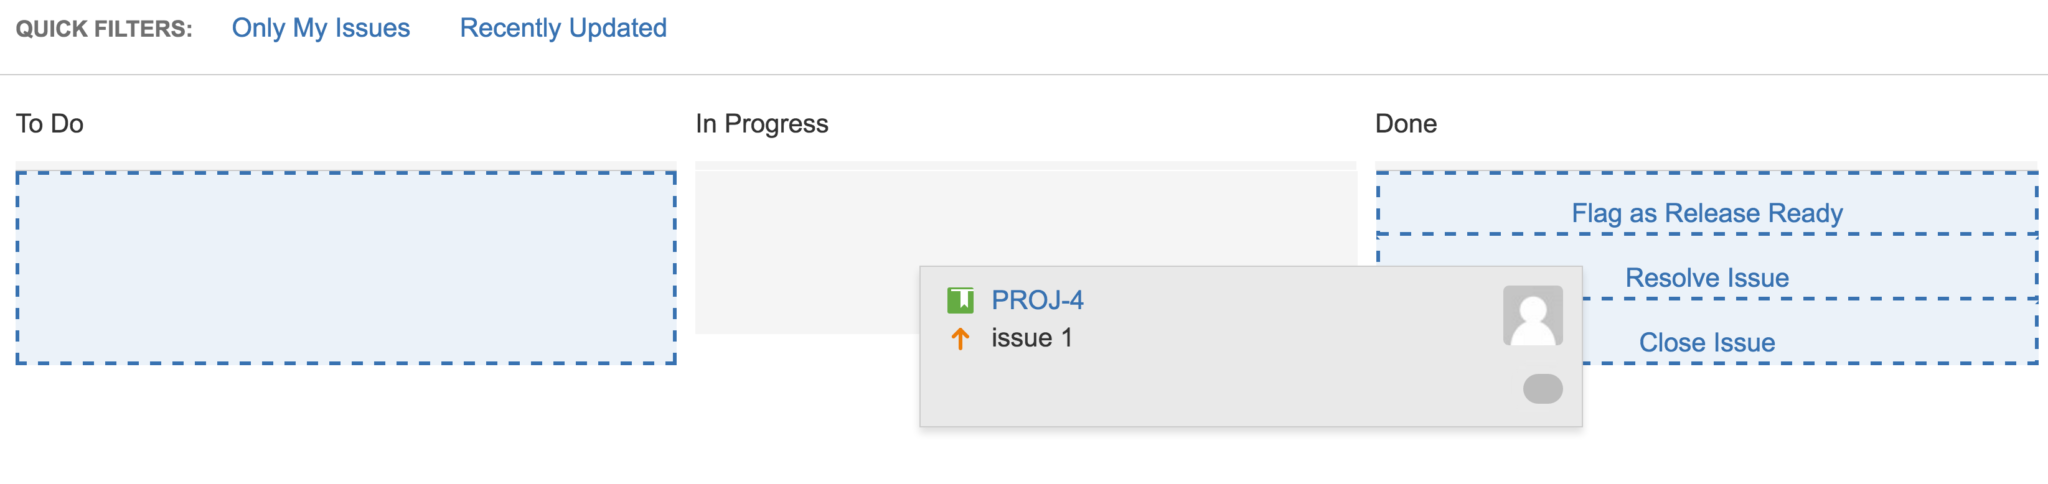
An easy way to do it: go into the board’s configuration screen and click on the Columns section. Once there, drag the status to the Done column:
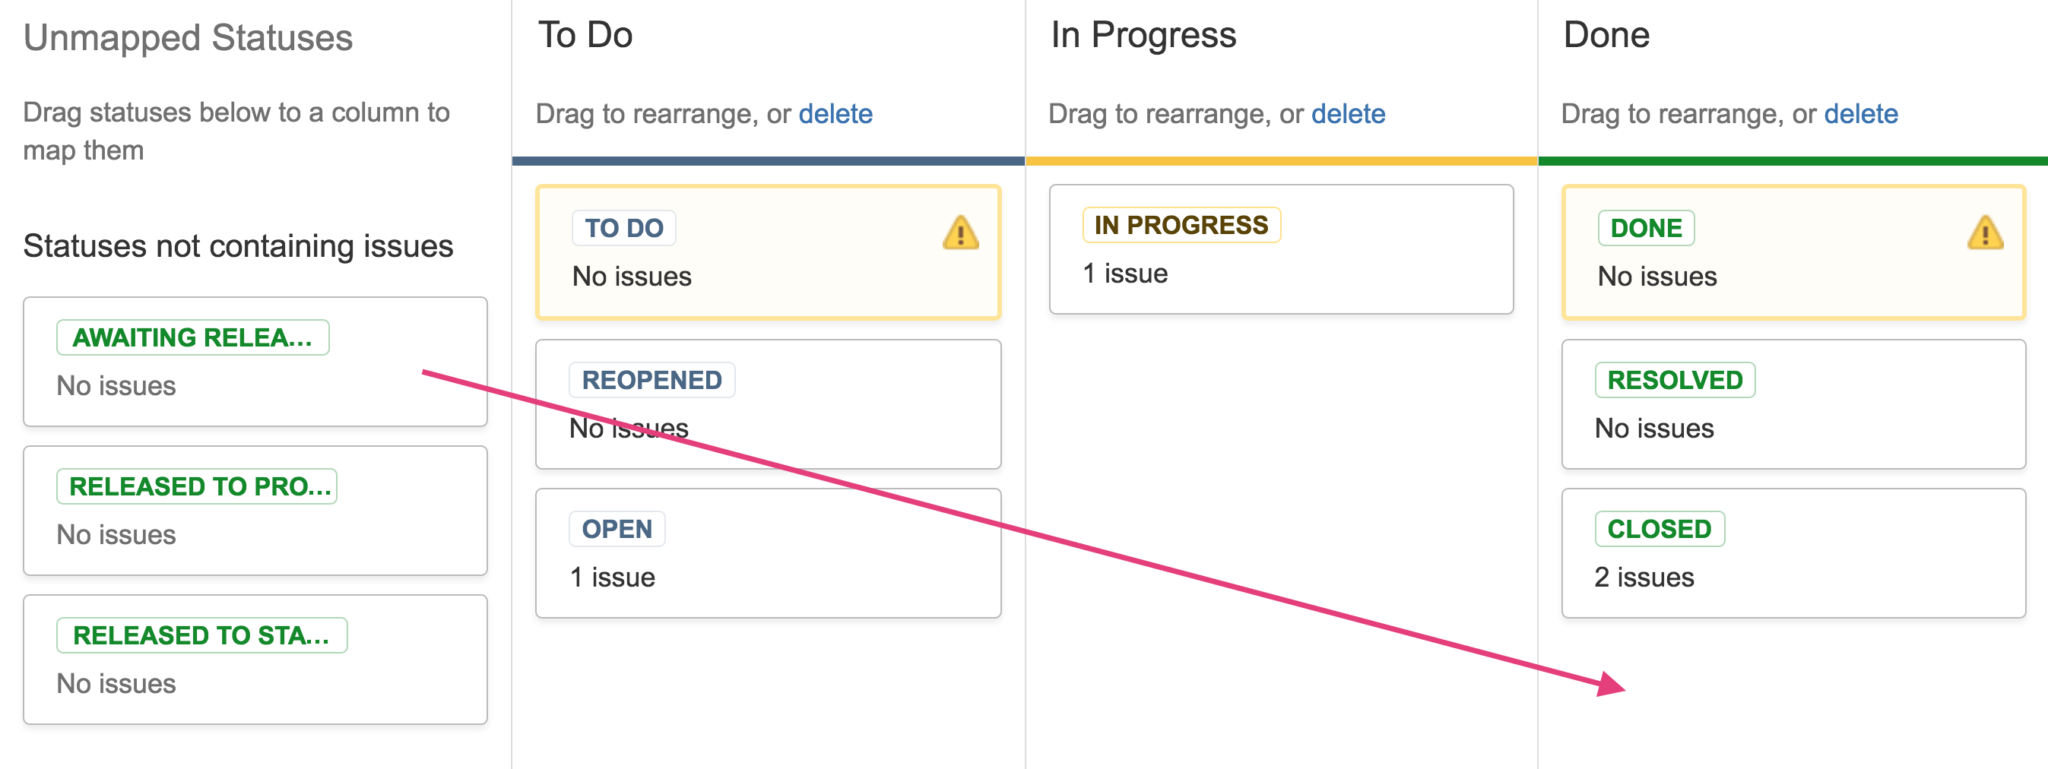
Now, when developers drag issues on the board from In Progress to Done, they’ll be prompted to select the correct status. In this case, they can signify if a change is release ready.
4) Map Jira issues to releases
Assuming releases are built from a git repository, we can use the commit history to accurately determine all the changes going into a release. However, we need to be able to map these commits to Jira issues, so we can tell which change belongs to which issue.
One way to achieve this is by prefixing commit messages with the issue key:
$ git commit -am 'PROJ-255: change publish button colour to blue'
This adds some overhead to the development process but referencing an issue key for each commit is good practice, as it provides context and traceability for changes. Alternatively, the issue branch can be named after the issue key, which makes it easy to match the key to the merge commit later.
5) Find all related changes for your next release
Now, for the most important part: here’s how you can track which changes go into a release. After building a release, tag the commit with a version number.
Here’s an example of a command you can add to your build script:
$ git tag -s -a 6.0.0-OD-2016.12.1-1106 && git push $remote 6.0.0-OD-2016.12.1-1106
We use git to retrieve all the commits between the previous release tag and the release that is being built. From the git history, parse out the issue keys from the commit messages:
$ git log 6.0.0-OD-2016.11.1-1091..6.0.0-OD-2016.12.1-1106 --pretty=oneline | perl -ne '{ /(\w+)-(\d+)/ && print "$1-$2\n" }' | sort | uniq
CONF-38645
CONF-40446
CONF-40973
CONF-41003
CONF-41014
CONF-41035
And voila! You now have a list of Jira issues that are going into the current release.
With a bit of further work this list can be transformed into a JQL query that can be passed to the Jira server:
issue in ('CONF-41003', 'CONF-40973', 'CONF-38645', 'CONF-40446', 'CONF-41014', 'CONF-41035') and status = 'AWAITING RELEASE'
Some of these commits may describe partial changes, so you may want to filter out all the issues that are not in the Awaiting Release state.
After getting the list, update all the issues going into the current release with the version. This can be done manually via Jira’s Bulk Update feature directly from the above search query, or ideally scripting this as part of the release build. The Python jira package is useful to interact with Jira’s REST API.
6) Release and notify stakeholders
You’re ready to deploy the release – now what? It’s time to deploy, update your Jira issue and notify stakeholders as a result. During deployment you’ll need the version and environment you are deploying to – then you’ll be able to transition all the issues to either of your release statuses: Released to Staging or Released to Production.
Once the deployment has completed successfully, search for the issues included in the release using this JQL search (you can do this in the build, or as part of a manual process):
fixVersion = '6.0.0-OD-2016.12.1-1106'
Using the Bulk Update feature or scripting the update via REST API, transition the matching issues to the Released to Staging or Released to Production, depending on the deployment that has just been completed.
When these issues are updated, the developers owning the issues and any other stakeholders watching the ticket will get a notification that the change has been delivered to the testing environment or to customers.
Have more questions about how to do DevOps with Jira? See what other DevOps practitioners have done on the Atlassian Community
The Jira platform is built to improve collaboration and communication between development and IT teams, an essential part of a successful DevOps environment. Want to learn more about how to do DevOps better? Check out our DevOps resource page. Or start a free trial of Jira today.
Did you find this post useful? Share it on your social network of choice so your fellow devs can learn about DevOps methods, too!